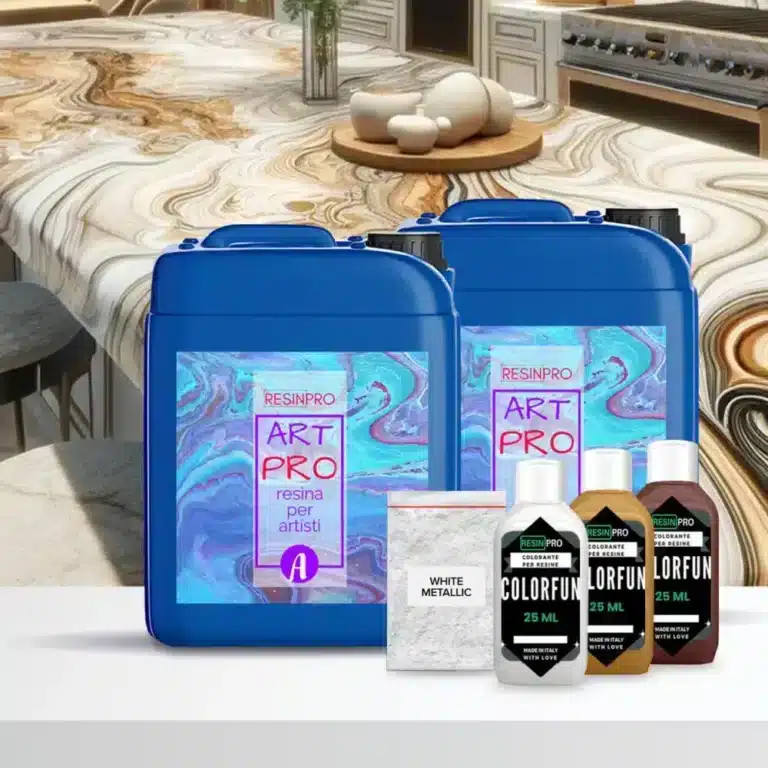
Amber Onyx Effect Kit with Epoxy resin: The 2.49 kg kit (1.66 + 0.83) covers 1 square meter (+ 10 g Sahara white pigment + 25 ml white dye + 25 ml brown dye + 25 ml OXIDE yellow dye) The 4.15 kg kit (2*1.66 + 0.83) covers 2 square meters (+ 2*10 g Sahara white pigment +2* 25 ml white dye +2* 25 ml brown dye +1*25 ml OXIDE yellow dye) The 8.33 kg kit covers 4 square meters (+ 4*10 g Sahara white pigment +4* 25 ml white dye +3* 25 ml brown dye+ 2*25 ml OXIDE yellow dye ) The 16.66kg kit covers 8 square meters (+8*10g Sahara white pigment +8*25ml white dye +4*25ml brown dye + 2 * 25 ml OXIDE Yellow dye) Kit Contents: 2.49 kg, 4.15 kg, 8.33 kg or 16.66 kg of Art Coat Epoxy "Art Pro" for a high quality base White Dye, Oxide Yellow Dye and Brown Dye from the "Colourful" Line for the perfect caramel stone shades - White Metallica Sahara pigment for that extra touch of sparkle Each kit includes dyes and pigment in sufficient quantity for the amount of resin required. Choose the Amber Onyx Effect Kit with Epoxy resin for an easy and elegant transformation of the worktop. Purchase your kit now and elevate your space with the warmth and beauty of caramel marble. Guide Instructions: Step N1: Primer Start by carefully measuring the amount needed to cover the surface based on the consumption of 150 g/m2, making sure to follow the proportions indicated to obtain a homogeneous mixture. Once the base has been prepared, proceed with adding the dye, choosing between white or black depending on your needs. The quantity of colourant to add to the mixture can be measured in a few drops (max 5% by volume). This step is crucial to achieve the desired colour and ensure uniformity of the application. Before applying the primer, it is essential that the surface intended for treatment is adequately prepared. Sand the surface with a coarse grit (40 or 60) before any operation. Make sure it's completely clean, using a soft cloth or brush to remove any pigment, dirt or debris. The surface must also be completely dry; residual humidity can compromise the adhesion of the primer and its effectiveness in sealing the surface. Once the surface is ready, apply the mixture evenly, using a suitable tool such as a brush, roller or spatula, depending on the size of the area to be treated and your personal preference. The key is to get a thin, even layer that can cover the entire area without leaving gaps or excessive product build-up.. After application, it is essential to allow the primer to dry completely before proceeding with further treatments or finishes on the surface. The recommended waiting time is 12 hours; this range may vary slightly depending on environmental conditions, such as humidity and temperature, but offers a good compromise to ensure the mixture has time to dry and adhere properly. During this period, avoid touching or stressing the treated surface to ensure optimal results. Don't worry if you notice any discrepancies on the surface, the next main pour will level everything perfectly. Step N2: application Start by applying masking tape around the perimeter of your countertop to contain the epoxy you're about to pour. This step is essential to ensure the resin stays where it is needed. After applying the resin, wait about 1.5 hours before gently removing the tape. To ensure coverage is even and complete, plan to use approximately 1.6kg of resin for every square meter of surface area. When you are ready to mix the resin, use a drill equipped with a paddle mixer for quick and even action (use at low speed), taking about 2 minutes for this operation. If you prefer to mix by hand, be prepared to take double the time. Don't forget to scrape the sides and bottom of the container halfway through the process with a stick to ensure all the material is mixed well. Next, separate the already mixed resin into different glasses and add the desired colours, mixing the different colours in the different glasses until you obtain an intense and uniform colour per single glass. To create a striking visual effect, pour the coloured resin in random layers into a larger bucket, being careful not to mix the colours together too much. After filling the bucket, spread the contents over the surface of the worktop, leaving a small amount of resin aside to finish the edges later. To remove trapped air bubbles, gently run a propane torch or heat gun over the surface. Once the adhesive tapes have been removed, approximately 1.5 hours after application, if there are any dry edges, moisten them slightly by wearing a protective glove to promote an even appearance. Use appropriate tools, such as spatulas or plastic scrapers, to spread and level the resin along the edges, making sure to cover the entire area well. After letting the resin cure for 24 hours, you can apply a clear top coat or PoliShield scratch-resistant paint to further protect the surface. Finally, for even more refined visual effects, spray 99.9% isopropyl alcohol onto the surface just before the resin begins to fully harden. This will create unique lacy textures. Remember that when you remove the tape, it is essential that the resin is partially hardened, neither too liquid nor completely solid, to avoid unwanted drips. Attention! Safety Guidelines for Using Isopropyl Alcohol (99.9%) Isopropyl alcohol (IPA) is a highly flammable substance. Improper use—especially near heat sources like torches or heat guns—can result in fire or explosion. To ensure safe use, follow these precautions: Primary Risks Highly flammable: IPA vapors can ignite from sparks, open flames, or hot surfaces. Forms explosive vapor-air mixtures, especially in enclosed or poorly ventilated spaces. Strictly Prohibited: Using gas torches or heat guns near areas treated with IPA. Spraying IPA near active heat sources. Storing IPA near flames, heaters, or hot tools. Recommended Safety Measures: 1. Ventilation: Always work in a well-ventilated area when using IPA. 2. Wait Time: After applying IPA, wait at least 5–10 minutes to allow complete evaporation before using any heat tools. 3. Safe Distance: Keep IPA containers at least 2 meters (6 feet) away from heat or flame sources. 4. Storage: Store IPA in a tightly sealed container, away from direct sunlight or high temperatures. 5. Fire Safety: Have a CO₂ or dry chemical fire extinguisher nearby when working with flammable substances and open flames. In Case of Fire: Do not use water to extinguish the fire. Use an appropriate extinguisher, cut off air supply if safe, and call emergency services if needed.
$140,49
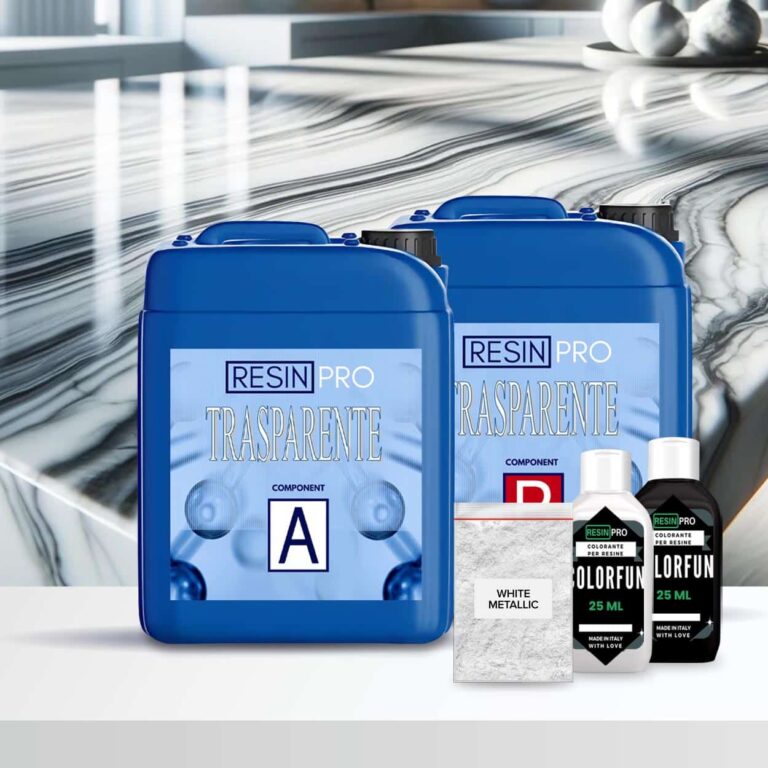
Top Cucina Kit Carrara Marble Effect with Epoxy Resin: The 2.4 kg kit (1.6 + 0.8) covers 1 square meter (+ 10 g white metallic pigment + 25 ml white dye +25 ml black dye) The 4 kg kit (2*1.6 + 0.8) covers 2 square meters (+ 2*10 g metallic pigment +2* 25 ml white dye + 2*25 ml black dye) The 8 kg kit covers 4 square meters (+ 4*10 g metallic pigment +4* 25 ml white dye+ 4*25 ml black dye) The 16 kg kit covers 8 square meters (+ 8*10 g white metallic pigment +8* 25 ml white dye 8*25 ml black dye) Kit Contents: 2.4kg, 4kg, 8kg or 16kg of "Art Pro" Epoxy Art Coat for a high quality base White dyeand Black of the "Colorfun" line for the perfect stone shades White Metallica Sahara pigment for that extra touch of sparkle Good to add: To enhance the appeal of the design:: Isopropanol 99.9% (additional option, not included in the price) To make the coating last longer: Polishield 100 Gloss (additional option, not included in the price). The coverage of a 0.5 kg kit is approximately 4 m2 Each kit includes dyes and pigment in sufficient quantity for the amount of resin required. HOW TO CREATE YOUR MARBLE EFFECT WITH EPOXY Guide Instructions: Step N1: Primer Start by carefully measuring the amount needed to cover the surface based on the consumption of 150 g/m2, making sure to follow the proportions indicated to obtain a homogeneous mixture. Once the base has been prepared, proceed with adding the dye, choosing between white or black depending on your needs. The quantity of colourant to add to the mixture can be measured in a few drops (max 5% by volume). This step is crucial to achieve the desired colour and ensure uniformity of the application. Before applying the primer, it is essential that the surface intended for treatment is adequately prepared. Sand the surface with a coarse grit (40 or 60) before any operation. Make sure it's completely clean, using a soft cloth or brush to remove any pigment, dirt or debris. The surface must also be completely dry; residual humidity can compromise the adhesion of the primer and its effectiveness in sealing the surface. Once the surface is ready, apply the mixture evenly, using a suitable tool such as a brush, roller or spatula, depending on the size of the area to be treated and your personal preference. The key is to get a thin, even layer that can cover the entire area without leaving gaps or excessive product buildup.. After application, it is essential to allow the primer to dry completely before proceeding with further treatments or finishes on the surface. The recommended waiting time is 12 hours; this range may vary slightly depending on environmental conditions, such as humidity and temperature, but offers a good compromise to ensure the mixture has time to dry and adhere properly. During this period, avoid touching or stressing the treated surface to ensure optimal results. Don't worry if you notice any discrepancies on the surface, the next main pour will level everything perfectly. Step N2: application Start by applying masking tape around the perimeter of your countertop to contain the epoxy you're about to pour. This step is essential to ensure the resin stays where it is needed. After applying the resin, wait about 1.5 hours before gently removing the tape. To ensure coverage is even and complete, plan to use approximately 1.6kg of resin for every square meter of surface area. When you are ready to mix the resin, use a drill equipped with a paddle mixer for quick and even action (use at low speed), taking about 2 minutes for this operation. If you prefer to mix by hand, be prepared to take double the time. Don't forget to scrape the sides and bottom of the container halfway through the process with a stick to ensure all the material is mixed well. Next, separate the already mixed resin into different glasses and add the desired colours, mixing the different colours in the different glasses until you obtain an intense and uniform colour per single glass. To create a striking visual effect, pour the coloured resin in random layers into a larger bucket, being careful not to mix the colours together too much. After filling the bucket, spread the contents over the surface of the worktop, leaving a small amount of resin aside to finish the edges later. To remove trapped air bubbles, gently run a propane torch or heat gun over the surface. Once the adhesive tapes have been removed, approximately 1.5 hours after application, if there are any dry edges, moisten them slightly by wearing a protective glove to promote an even appearance. Use appropriate tools, such as spatulas or plastic scrapers, to spread and level the resin along the edges, making sure to cover the entire area well. After letting the resin cure for 24 hours, you can apply a clear top coat or PoliShield scratch-resistant paint to further protect the surface. Finally, for even more refined visual effects, spray 99.9% isopropyl alcohol onto the surface just before the resin begins to fully harden. This will create unique lacy textures. Remember that when you remove the tape, it is essential that the resin is partially hardened, neither too liquid nor completely solid, to avoid unwanted drips. Attention! Safety Guidelines for Using Isopropyl Alcohol (99.9%) Isopropyl alcohol (IPA) is a highly flammable substance. Improper use—especially near heat sources like torches or heat guns—can result in fire or explosion. To ensure safe use, follow these precautions: Primary Risks Highly flammable: IPA vapors can ignite from sparks, open flames, or hot surfaces. Forms explosive vapor-air mixtures, especially in enclosed or poorly ventilated spaces. Strictly Prohibited: Using gas torches or heat guns near areas treated with IPA. Spraying IPA near active heat sources. Storing IPA near flames, heaters, or hot tools. Recommended Safety Measures: 1. Ventilation: Always work in a well-ventilated area when using IPA. 2. Wait Time: After applying IPA, wait at least 5–10 minutes to allow complete evaporation before using any heat tools. 3. Safe Distance: Keep IPA containers at least 2 meters (6 feet) away from heat or flame sources. 4. Storage: Store IPA in a tightly sealed container, away from direct sunlight or high temperatures. 5. Fire Safety: Have a CO₂ or dry chemical fire extinguisher nearby when working with flammable substances and open flames. In Case of Fire: Do not use water to extinguish the fire. Use an appropriate extinguisher, cut off air supply if safe, and call emergency services if needed.
$123,99
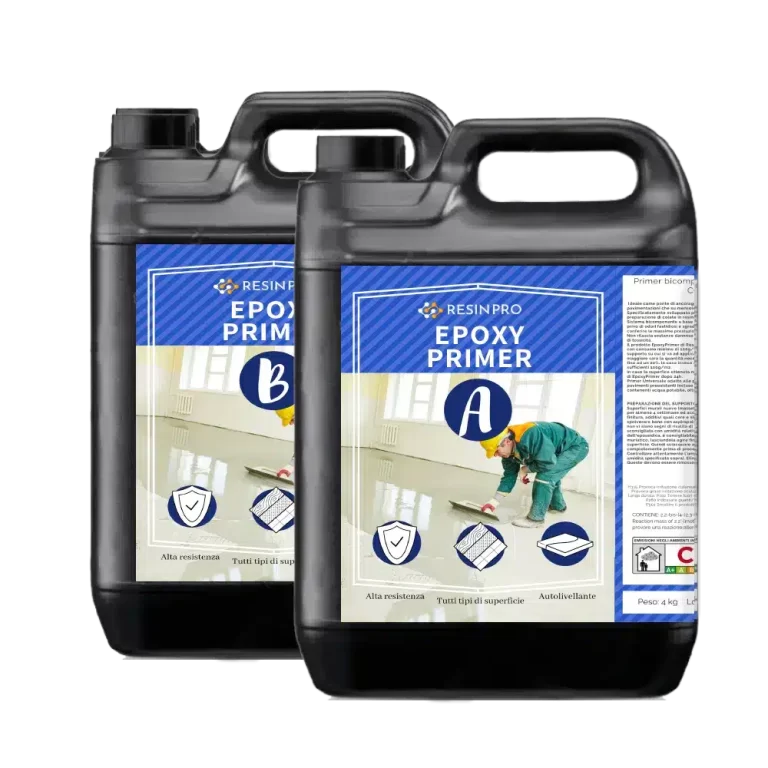
Great solution for making initial layer of your epoxy floor, which helps to increase the adhesion of your main layer! 💥About "EPOXYPRIMER" - Universal Water-Based Primer - For Stable & Durable Floors: Two-component system based on epoxy resins in water emulsion, and therefore free of annoying and unpleasant odors, additive with inorganic structurants suitable for giving maximum performance of resistance, durability and adhesion to the support. The product" EpoxyPrimer " by ResinPro can be applied with a roller, brush or spatula with a minimum consumption of 100g/m2 up to 300g/m2 , depending on the condition of the surface on which you are going to apply. The greater the porosity of the initial surface (concrete for example), the greater the quantity required and the dilution ratio can vary from 5% up to 20%. In the case of tiles or other poorly absorbent surfaces, 100g/m2 will be sufficient. If the surface obtained is not homogeneous, it is advisable to reapply a coat of " EpoxyPrimer". Mixing Ratio: 100:40 by weight Full curing time: 24/48h at room temperature
$212,95
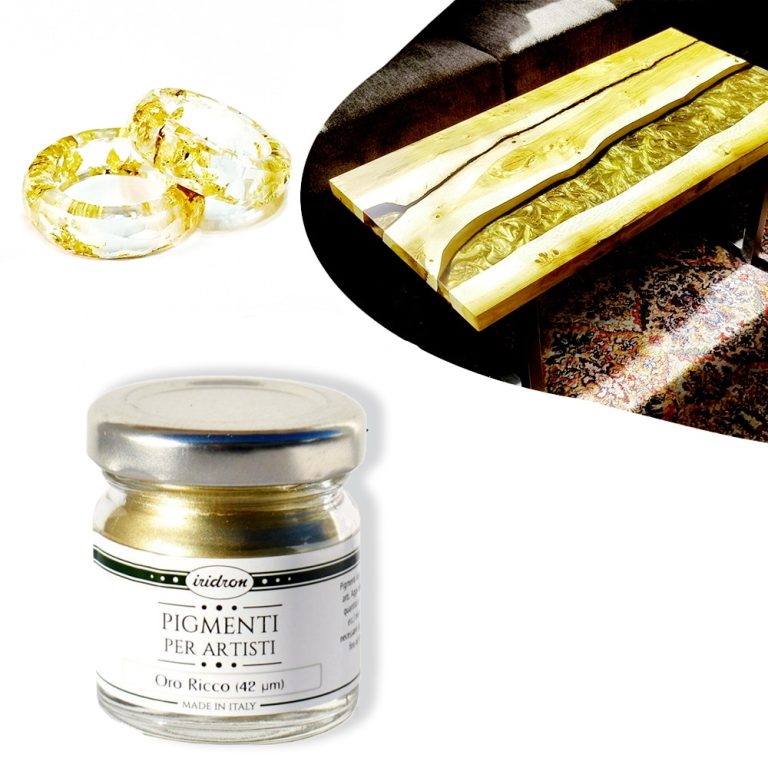
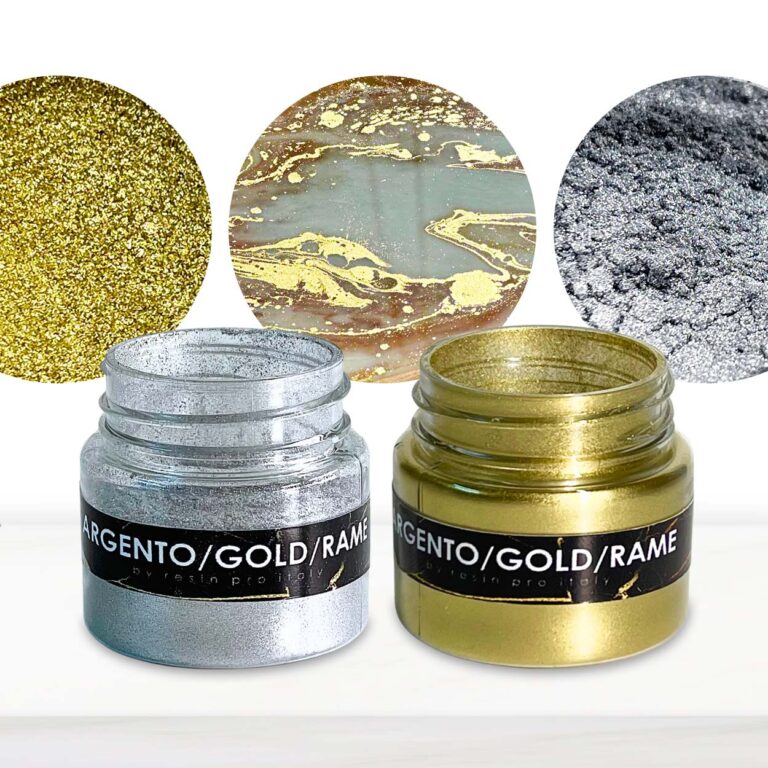
High-gloss metallic pigments with excellent covering power. Thanks to the wide range of shades, the pigments can be used in fine arts, in decoration, in restoration and in several industrial applications. THREE colours are available: aluminium, rich gold, copper. By simply adding them to resins, paints or varnishes, they are perfect for decoupage, decoration and anything related to DIY. Here is a video for those who want to start working with the Metallic Pigments Kit! https://www.youtube.com/watch?v=yW-n2AUfpBA&feature=youtu.be
$8,49
Durable and Non-Slip Grip Coating for Industrial Kitchens
Our grip coating for industrial kitchens is a long-lasting solution designed to provide a non-slip surface in high-traffic areas like industrial kitchens. This specialized paint ensures excellent adhesion on various surfaces such as concrete floors or tiles, offering effective protection against scratches, stains, and wear. With its unique formulation, this coating makes cleaning and maintenance easier, helping to uphold the required hygiene standards in food preparation environments. Ideal for environments where safety, hygiene, and durability are paramount.
Anti-Slip Coatings for Industrial Floors
Our anti-slip coatings for industrial floors are tailored solutions crafted to enhance safety in high-traffic areas prone to moisture. Formulated with abrasive particles or aggregates, these coatings create a rough surface resistant to slipping, making them perfect for industrial floors, warehouses, workshops, and production areas where safety is a top priority. Applying a layer of our non-slip paint not only reduces the risk of slip-related accidents but also safeguards the floor from chemicals, wear, and abrasion.
Safe and Durable Epoxy Resin for Food Contact Surfaces
Our epoxy resin for food contact surfaces is a secure and resilient coating ideal for safeguarding countertops, tables, and other surfaces in direct contact with food. Formulated to be non-toxic and free from harmful solvents, this resin ensures maximum safety for food preparation and consumption. Creating a smooth, waterproof, and easy-to-clean surface, our epoxy resin prevents the penetration of liquids and bacteria, maintaining a hygienic environment. Before application, always ensure the epoxy resin is certified for use on food contact surfaces.
Protective Coatings for Industrial Environments
Our protective coatings for industrial environments are specially formulated to shield surfaces in settings exposed to harsh conditions. Often based on specialized epoxy resins and silicone, these coatings offer resistance to corrosion, wear, rust, and aggressive chemicals. Applied to metal structures like tanks, pipelines, and more, our protective coatings help extend their lifespan and preserve structural integrity. Ideal for industries such as chemical, petrochemical, shipbuilding, and manufacturing, where long-term protection and resilience are critical.
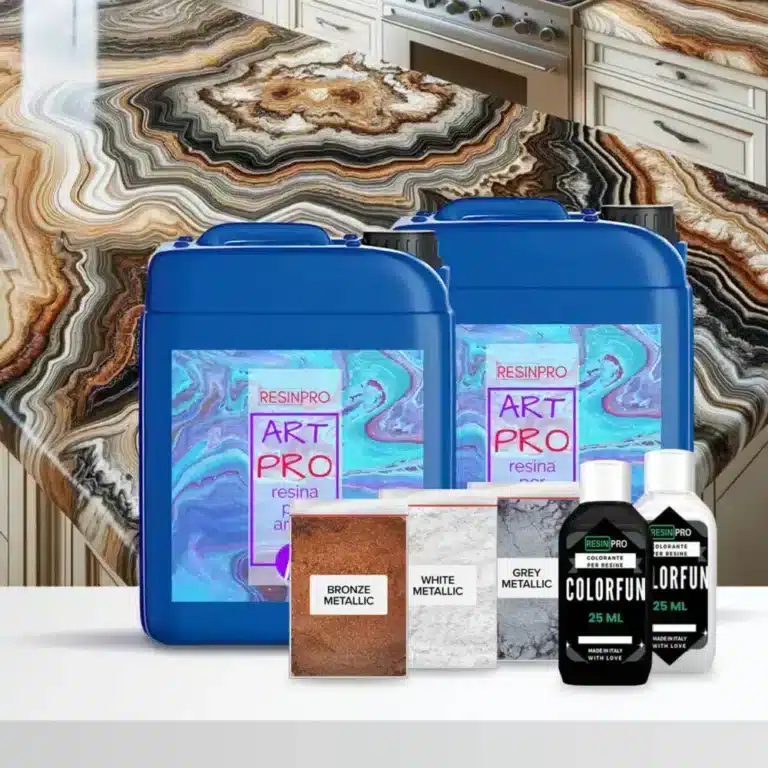
Kit Exotic white marble effect with Epoxy resin: The 2.49 kg kit (1.66 + 0.83) covers 1 square meter (+ 10 g white Sahara pigment + 10 g bronze Sahara pigment + 10 g dark gray Sahara pigment + 2*25 ml white dye + 1* 10 g colorfun black) The 4.15 kg kit (2*1.66 + 0.83) covers 2 square meters (+ 2*10 g white Sahara pigment + 2*10 g bronze Sahara pigment + 2*10 g dark gray Sahara pigment + 4 *25 ml white dye + 2* 10 g black colorfun) The 8.33 kg kit covers 4 square meters (+ 4*10 g white Sahara pigment + 4*10 g bronze Sahara pigment + 4*10 g dark gray Sahara pigment + 5*25 ml white dye + 2* 10 g colorfun black) The 16.66 kg kit covers 8 square meters (+ 6*10 g white Sahara pigment + 6*10 g bronze Sahara pigment + 6*10 g dark gray Sahara pigment + 8*25 ml white dye + 3* 10 g colorfun black) Kit Contents: 2.49 kg, 4.15 kg, 8.33 kg or 16.66 kg of Art Coat Epoxy "Art Pro" for a high quality base Black and White Dye from the "Colorfun" Line for the perfect stone shades Metallica Sahara white, bronze, gray pigment for that extra touch of sparkle Good to add: To enhance the appeal of the design: Isopropanol 99.9% To make the covering last longer: + polishield 100 GLOSS Each kit includes dyes and pigment in sufficient quantity for the amount of resin required. Guide Instructions: Step N1: Primer Start by carefully measuring the amount needed to cover the surface based on the consumption of 150 g/m2, making sure to follow the proportions indicated to obtain a homogeneous mixture. Once the base has been prepared, proceed with adding the dye, choosing between white or black depending on your needs. The quantity of colourant to add to the mixture can be measured in a few drops (max 5% by volume). This step is crucial to achieve the desired colour and ensure uniformity of the application. Before applying the primer, it is essential that the surface intended for treatment is adequately prepared. Sand the surface with a coarse grit (40 or 60) before any operation. Make sure it's completely clean, using a soft cloth or brush to remove any pigment, dirt or debris. The surface must also be completely dry; residual humidity can compromise the adhesion of the primer and its effectiveness in sealing the surface. Once the surface is ready, apply the mixture evenly, using a suitable tool such as a brush, roller or spatula, depending on the size of the area to be treated and your personal preference. The key is to get a thin, even layer that can cover the entire area without leaving gaps or excessive product buildup.. After application, it is essential to allow the primer to dry completely before proceeding with further treatments or finishes on the surface. The recommended waiting time is 12 hours; this range may vary slightly depending on environmental conditions, such as humidity and temperature, but offers a good compromise to ensure the mixture has time to dry and adhere properly. During this period, avoid touching or stressing the treated surface to ensure optimal results. Don't worry if you notice any discrepancies on the surface, the next main pour will level everything perfectly. Step N2: application Start by applying masking tape around the perimeter of your countertop to contain the epoxy you're about to pour. This step is essential to ensure the resin stays where it is needed. After applying the resin, wait about 1.5 hours before gently removing the tape. To ensure coverage is even and complete, plan to use approximately 1.6kg of resin for every square meter of surface area. When you are ready to mix the resin, use a drill equipped with a paddle mixer for quick and even action (use at low speed), taking about 2 minutes for this operation. If you prefer to mix by hand, be prepared to take double the time. Don't forget to scrape the sides and bottom of the container halfway through the process with a stick to ensure all the material is mixed well. Next, separate the already mixed resin into different glasses and add the desired colours, mixing the different colours in the different glasses until you obtain an intense and uniform colour per single glass. To create a striking visual effect, pour the coloured resin in random layers into a larger bucket, being careful not to mix the colours together too much. After filling the bucket, spread the contents over the surface of the worktop, leaving a small amount of resin aside to finish the edges later. To remove trapped air bubbles, gently run a propane torch or heat gun over the surface. Once the adhesive tapes have been removed, approximately 1.5 hours after application, if there are any dry edges, moisten them slightly by wearing a protective glove to promote an even appearance. Use appropriate tools, such as spatulas or plastic scrapers, to spread and level the resin along the edges, making sure to cover the entire area well. After letting the resin cure for 24 hours, you can apply a clear top coat or PoliShield scratch-resistant paint to further protect the surface. Finally, for even more refined visual effects, spray 99.9% isopropyl alcohol onto the surface just before the resin begins to fully harden. This will create unique lacy textures. Remember that when you remove the tape, it is essential that the resin is partially hardened, neither too liquid nor completely solid, to avoid unwanted drips. Attention! Safety Guidelines for Using Isopropyl Alcohol (99.9%) Isopropyl alcohol (IPA) is a highly flammable substance. Improper use—especially near heat sources like torches or heat guns—can result in fire or explosion. To ensure safe use, follow these precautions: Primary Risks Highly flammable: IPA vapors can ignite from sparks, open flames, or hot surfaces. Forms explosive vapor-air mixtures, especially in enclosed or poorly ventilated spaces. Strictly Prohibited: Using gas torches or heat guns near areas treated with IPA. Spraying IPA near active heat sources. Storing IPA near flames, heaters, or hot tools. Recommended Safety Measures: 1. Ventilation: Always work in a well-ventilated area when using IPA. 2. Wait Time: After applying IPA, wait at least 5–10 minutes to allow complete evaporation before using any heat tools. 3. Safe Distance: Keep IPA containers at least 2 meters (6 feet) away from heat or flame sources. 4. Storage: Store IPA in a tightly sealed container, away from direct sunlight or high temperatures. 5. Fire Safety: Have a CO₂ or dry chemical fire extinguisher nearby when working with flammable substances and open flames. In Case of Fire: Do not use water to extinguish the fire. Use an appropriate extinguisher, cut off air supply if safe, and call emergency services if needed.
$98,95
High gloss Pop up metallic pigment: a touch of luxury for your resin creations Being a very light pigment, it easily rises to the surface and leaves golden streaks allowing you to create a unique style. Ideal for: Resin Art technique, Pour Paint (Fluid Art), decoupage, decorations (paintings, furniture, boxes, trays, coasters) Do it Yourself or DIY
$6,95

About Wood Wax & Polish: Wood Wax & Polish is ideal for treating finished or unfinished wood. It is specifically designed to help preserve and prevent the wood from drying out and fading. With added conditioning oils, it actively feeds your wood while enhancing the natural beauty and depth of the grain. The Wood Wax contains natural beeswax and carnauba wax that offer a superior protective coating, and the formula is infused with orange oil for a pleasant aromatic finish. Wood Wax & Polish can be used on all wood surfaces, including finished and unfinished wood and is suitable for use on antiques and modern items alike. Designed to bring life back to old, faded and tired wooden surfaces, it should be used whenever the wood begins to look dry and faded, or at least once every six months. It is cream like in consistency and so is very easy to apply, we recommend the Wax & Polish for everyday polishing (for items you'd do monthly), and for items that are unfinished (i.e. are not treated with an oil, varnish or paint). Thats because it can soak into the wood, providing nourishment and accentuating the grain. The Beeswax Polish would be used for surfaces that you want to polish to a high shine, or for treating wood that is already finished. 💥Key features: • ⚙️ 【DRYING TIME】-20 minutes. • 🧪 【COVERAGE】-20m2 per litre. • 🌿【COATS】 -One coat. Two coats to bare wood. • 💧 【RE-COAT TIME】 -Once previous has dried • 👍【MAINTENANCE】 -When showing signs of 'drying'. • ✨【APPLICATION】 -Apply with a Lint Free Cloth. Wood Wax & Polish is Suitable For Wax & Polish can be used on all types of wood (oak, beech, maple etc) and on wood used in any environment. Interior Wood Hardwoods and Softwoods Kitchen Worktops & Utensils Furniture Doors and Windows Hardwood Floors Toys Turned Wood Untreated timber and bare wood Wood Wax & Polish Coverage and Shelf Life Coverage: 40m2 per litre Store in a cool dry place, away from direct sunlight. Store between 10°C and 25°C. Once opened, use within three years. [xyz-ips snippet="TRUSTPILOT-WIDGET"]
$16,49
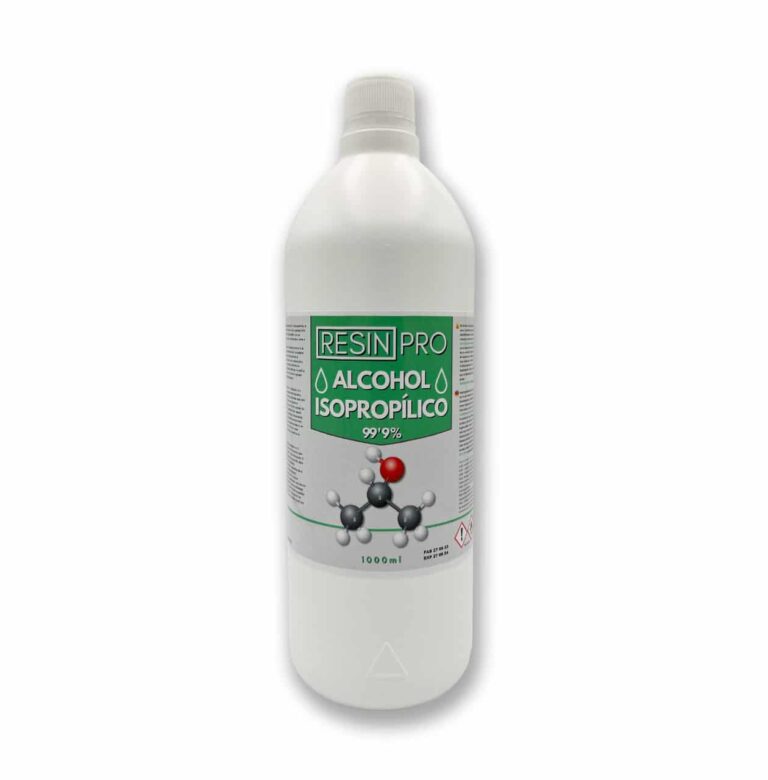
⚙️ In the world of resins: Used to remove surface bubbles from resin mixtures, if applied in drops on top of resin already mixed with mica pigments, it will create fantastic cells with very beautiful degradation and colour mixing. 💦 As a remedy for removing the formation of bubbles: By applying it to the inner surface of silicone moulds with a spray gun, you will remove bubbles on resin parts. 🎨 A multi-purpose product, ideal for: To remove bubbles from epoxy resin mixtures. To create the effect of craters and cells, it is applied to a mixture of epoxy resins with mica pigments. Solvent for coatings or for non-polar industrial processes. As a cleaning agent, it is highly recommended for cleaning electronic devices, LCD displays, DVDs… To remove stains from most fabrics, wood, cotton, etc... To remove oil-based paint residues for reuse. As a moisturiser in lithographic printing. A solvent for polishing varnish used in joinery. If you want to create beautiful effects on countertops, floors and surfaces, as well as easily remove bubbles in your resin products, then this is your product. Pure 99.9% Isopropyl Alcohol Resin Pro, also known as 2-propanol or isopropanol, is used as an electrical contact cleaner among many other applications. Trade Name: Medical ALCOHOL In the resin world, it is used to remove surface bubbles from mixtures, and when applied in drops over resin mixed with mica pigments, cells are formed. APPLICATION: For cleaning electronic components: Apply the product directly to the equipment, let it dry at room temperature or accelerate drying by applying compressed air, and finally reassemble the equipment. Do not use while the equipment is on. PRECAUTIONS: View the safety tab. Isopropyl alcohol in the vapor state is denser than air and is highly flammable, giving a very wide range of fuels. It should be kept away from sources of heat and fire. CHARACTERISTICS, PHYSICAL AND CHEMICAL PROPERTIES: Physical condition: Colourless liquid, very volatile Attention! Safety Guidelines for Using Isopropyl Alcohol (99.9%) Isopropyl alcohol (IPA) is a highly flammable substance. Improper use—especially near heat sources like torches or heat guns—can result in fire or explosion. To ensure safe use, follow these precautions: Primary Risks Highly flammable: IPA vapors can ignite from sparks, open flames, or hot surfaces. Forms explosive vapor-air mixtures, especially in enclosed or poorly ventilated spaces. Strictly Prohibited: Using gas torches or heat guns near areas treated with IPA. Spraying IPA near active heat sources. Storing IPA near flames, heaters, or hot tools. Recommended Safety Measures: 1. Ventilation: Always work in a well-ventilated area when using IPA. 2. Wait Time: After applying IPA, wait at least 5–10 minutes to allow complete evaporation before using any heat tools. 3. Safe Distance: Keep IPA containers at least 2 meters (6 feet) away from heat or flame sources. 4. Storage: Store IPA in a tightly sealed container, away from direct sunlight or high temperatures. 5. Fire Safety: Have a CO₂ or dry chemical fire extinguisher nearby when working with flammable substances and open flames. In Case of Fire: Do not use water to extinguish the fire. Use an appropriate extinguisher, cut off air supply if safe, and call emergency services if needed.
$14,08
 Free shipping on orders over €199,00
  Shipping Tracking!


 Google
 Facebook