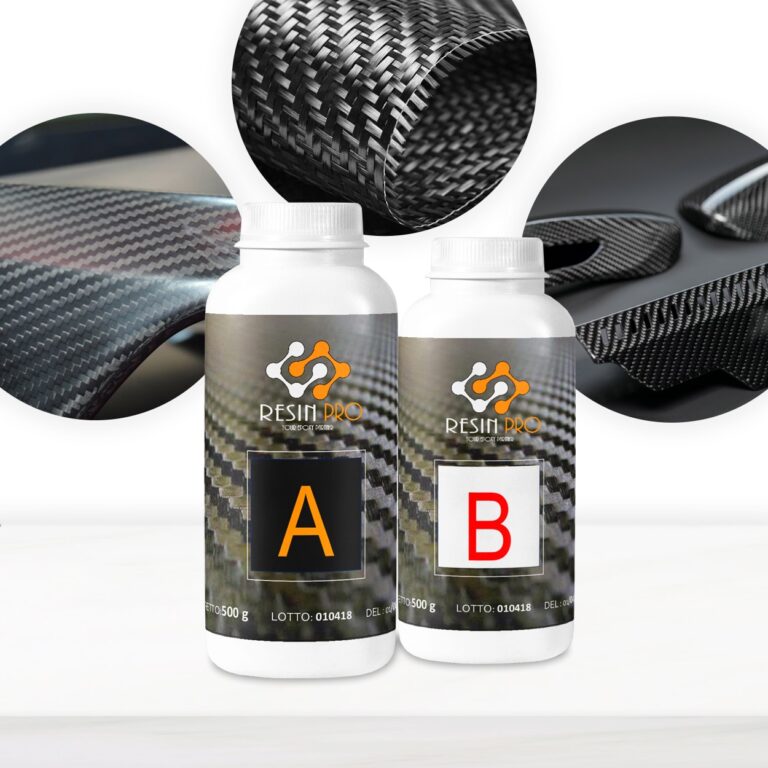
The Resin for Lamination with Carbon Fibre and Glass Fibre is a product formulated to ensure maximum mechanical strength and a perfect impregnation of the technical fabric. Its epoxy formulation allows an application at room temperature and guarantees a glossy and moisture resistant surface. Available quantities: 775 gr (500 gr of component A + 275 gr of component B). 1550 gr (1000 gr of component A + 550 gr of component B) 3.1 kg (2000 gr of component A + 1100 gr of component B)
$26,99
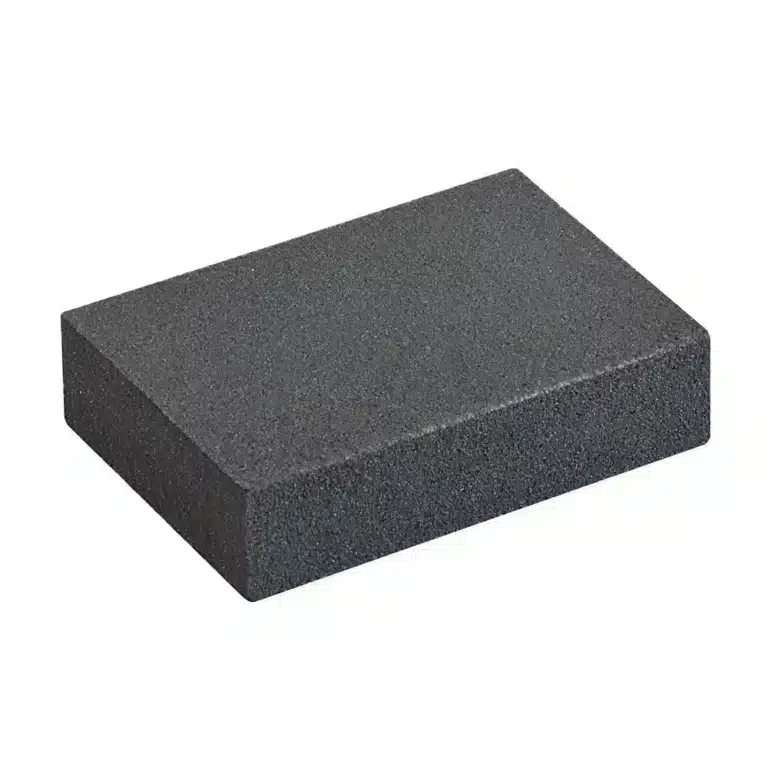
Can be used wet or dry for sanding almost any type of material, flat or contoured. 70 x 100 x 25mm. Bonded silicone carbide Bonded silicone carbide Use wet or dry For flat or contoured surfaces How to Use a Foam Sanding Block with Epoxy Resins Allow the Epoxy to Cure: Ensure that the epoxy resin has fully cured and hardened before sanding. This will prevent the resin from smearing or becoming uneven. Begin Sanding: Gently rub the foam sanding block over the epoxy surface in a back-and-forth or circular motion. Apply light, even pressure to avoid creating new scratches or uneven areas. Check Your Progress: Periodically wipe the surface with a clean, dry cloth to remove sanding dust and check the smoothness. This will help you gauge how much more sanding is needed. Clean the Surface: After achieving a smooth finish, clean the epoxy surface thoroughly to remove any remaining dust. This can be done with a damp cloth followed by a dry cloth to ensure no moisture remains. Inspect and Finish: Once the surface is clean and dry, inspect it to ensure it's free of imperfections. If needed, you can apply a new coat of resin or polish the surface for a glossy finish.
$2,51
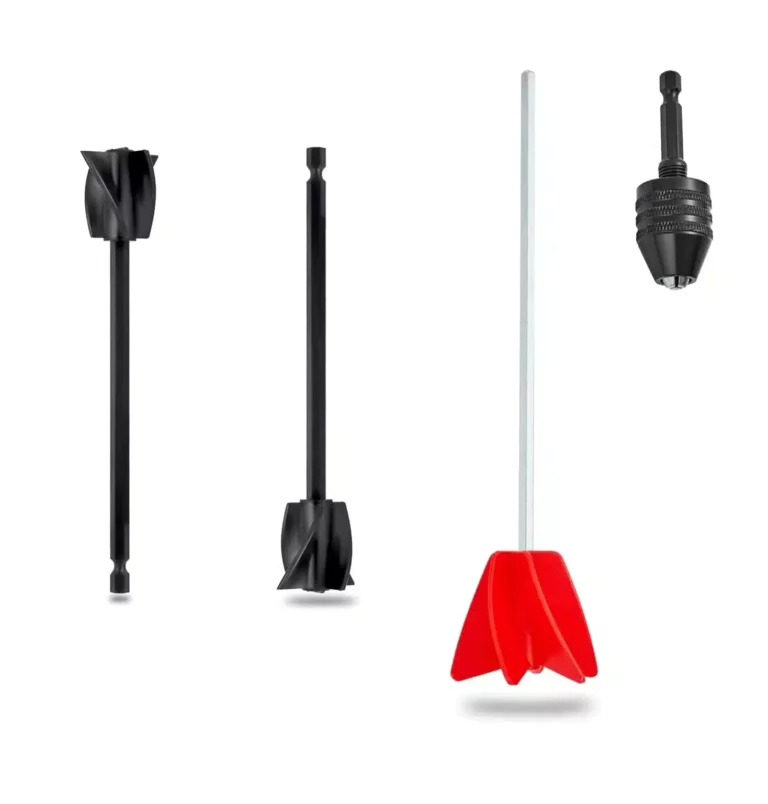
Ensures perfect mixing, avoiding bubble formation and saving time, our anti-bubble mixer is easy to use and reusable. The anti-bubble mixer for epoxy mixing is a high-quality tool that allows you to achieve perfect and uniform mixing of epoxy resins without the formation of bubbles. Thanks to its innovative technology, this blender guarantees professional results, reducing the time and effort required for mixing. In addition, the stirring blender is easy to use, clean and reusable, which makes it an environmentally friendly and economical choice for those working with epoxy resins.
$6,49

36 Wt. UV lamp for UV resin/gel Perfect for curing UV resin and speeding up the cure time. Provides a glossy and dry surface within seconds. Thanks to its internal refraction system, it irradiates from ALL DIRECTIONS, hardening the resin in a short time. You can just leave the mould inside the box, with no need to keep holding the UV lamp in your hand. Save your time! Cures UV resin / gel nail polish; Lifetime of 50.000 hours, professional and DIY use; 36 Wt. UV lamp reduces the cure time of the UV resin/gel by 50 % compared with standard devices. Equipped with 36 LED bulbs; Automatic sensors and pre-set timers. The UV lamp is provided with automatic sensors that enable the lamp to start functioning upon insertion of the item. The sensors automatically stop the device if you pull out your creation; The lamp works with all kinds of LED and UV gels, including restorative gels and Nail Art; Nominal input: 100-240V 50/Hz 1A; Nominal output DC 12V 1.5A; Sizes: 12 cm x 19 cm x 7.5 cm [4,72” x 7,48” x 2,95”]. USB powered (plug not included)
$18,95
How to Minimize Imperfections in Epoxy Resin
To minimize imperfections in epoxy resin, it is crucial to follow a set of key steps:
- Thoroughly blend the resin and hardener to prevent the formation of air bubbles.
- Work in a clean and well-ventilated area to reduce the presence of dust and particles in the mixture.
- Use a degreasing agent to eliminate oily or greasy residues that could lead to defects.
- Apply vacuum pressure to remove any air bubbles trapped during the curing process.
- Adhere closely to the manufacturer's guidelines, paying attention to the environmental temperature and humidity during application.
By adhering to these recommendations, you can achieve superior outcomes and minimize internal imperfections in epoxy resin.
How to Eliminate Air Bubbles in Epoxy Resin
Eliminating air bubbles in epoxy resin is a critical process that requires the following steps:
- Prior to pouring the resin, use a torch to eliminate surface bubbles in the liquid.
- During mixing, proceed slowly to prevent air entrapment.
- Utilize a warm brush to eliminate larger bubbles that may arise post-pouring.
- Consider employing specialized tools like a heat gun or a vacuum degassing chamber to effectively remove smaller bubbles.
- Cover the product with a lid to shield it from dust and contaminants while it cures.
Techniques for Preventing Streaks in Epoxy Resin
To prevent streaks in epoxy resin, employ the following techniques
Ensure thorough mixing of the resin and hardener for the recommended duration.
Avoid rapid mixing to prevent the introduction of air bubbles.
Use suitable mixing tools like a wooden stick or a silicone spatula.
Pour the resin evenly, taking care to prevent the formation of air bubbles.
Allow the resin to settle for a few minutes post-pouring to enable air bubbles to surface, then eliminate them using a gas torch or a syringe.
Minimizing Dust in Epoxy Resin
To minimize dust in epoxy resin, implement the following corrective measures:
Work in a clean, well-ventilated space to prevent contamination.
Employ clean and well-maintained tools during resin mixing and application.
Consider sieving the resin before use to eliminate impurities.
Ensure proper material storage and use it before the expiration date.
By following these precautions, you can achieve superior results and reduce the presence of dust particles in epoxy resin.
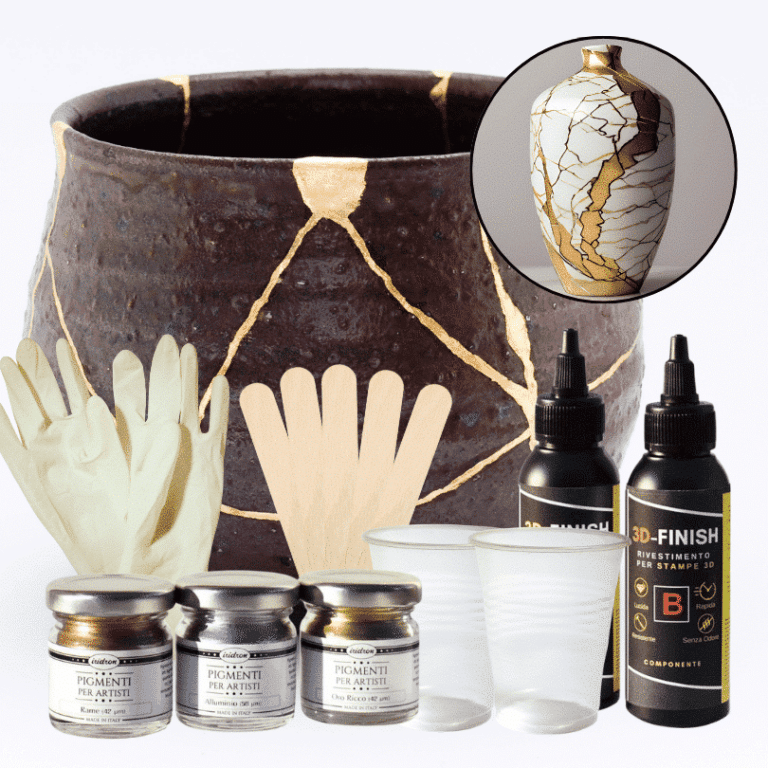
Kintsugi Repair Kit - Repair and Transform Your Ceramics with Elegance Celebrate imperfection with the ancient Japanese art Discover the traditional Japanese art of Kintsugi with our complete repair kit. Transform your broken ceramics into unique and fascinating works of art, highlighting imperfections with elegant gold, silver, or copper veins. Our kit is perfect for both beginners and experts, offering detailed instructions and everything you need to give new life and value to your most cherished items. 🌟 Specific epoxy resin (150g): slow catalysis to eliminate any bubbles or imperfections, allowing you to complete the work without rushing. 🎨 Dye of your choice (gold, copper, silver): customize your repair with a touch of elegance and refinement. ✨ Respect the tradition: follow the ancient art of Kintsugi and transform your ceramics into unique and precious treasures. The kit contains: 150g of resin for 3D decorations, 2 pairs of protective gloves, 2 mixing cups, and 5 spatulas for applying the resin, detailed instructions, everything you need in one kit. Give your ceramics a unique touch: repair them with style and make them even more beautiful. Buy the Kintsugi Repair Kit now and start creating your works of art today! Kintsugi Kit Instructions: Mix Resin: Measure 100A:50B by volume (or 100A:45B by weight) using a scale. Mix for 2 minutes, ensuring all surfaces are scraped. Add Colour: Mix your chosen metallic dye (gold, silver, or copper) into the resin to highlight the cracks. Prepare Surface: Ensure surfaces are clean, dry, and sanded. Apply Resin: Fill the cracks with the colored resin. Curing: Work in a temperature-controlled area, avoiding humidity. Safety: Wear protective gear.
$22,95
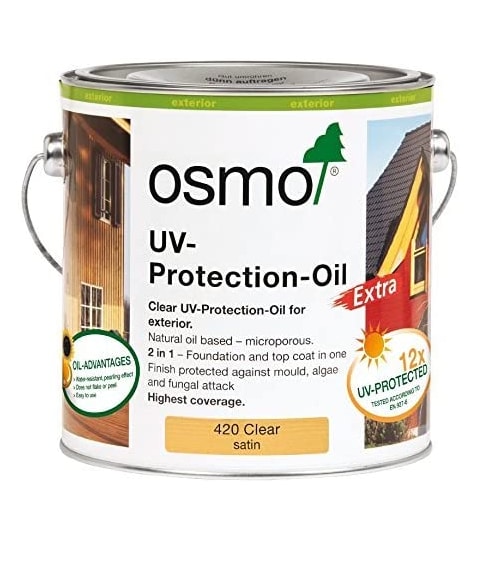
Perfectly protected against the sun – the first clear UV-protection for the outdoors! All resins / woods turn amber in colour over time, but UV-Protection-Oil has been developed to preserve epoxy's clear colour and slow down the yellowing process by (UV factor) 12 times compared to untreated epoxy. Ideal for River tables, epoxy furniture, exterior design pieces, windows, doors, claddings, fencings and other complex joinery. Natural oil-based and microporous finish, it does not crack, flake or peel. Water-resistant and dirt-resistant, it is moisture regulating and minimise the damaging. Description Natural oil-based clear satin wood finish for outdoor use. The microporous surface allows the wood to breathe and reduces swelling and shrinkage. Water-repellent, will not crack, peel or flake. As top coat on already treated coloured wood, Osmo UV-Protection-Oil Extra significantly extends the intervals between each restoration. When used as a single product, with a two-coat application it prevents greying on vertical surfaces with a 12 UV-protection factor compared to untreated wood. Osmo UV-Protection-Oil Extra features active ingredients to protect the coating against the action of mould, algae and fungi. No need to sand before application, easy and smooth. During coating, the finish is still workable. Recommended use Osmo UV-Protection-Oil Extra is perfect for all vertical wood surfaces for outdoor use: doors, windows, window shutters (dimensionally stable parts), parking places, resin coatings, balconies, fences, pergolas, and holiday cottages (dimensionally unstable parts). Also suitable for bamboo poles (e.g. in screens). Ingredients Based on natural plant oils (sunflower oil, soybean oil, thistle oil and linseed oil), desiccants and additives. Biocidal active ingredient: Propiconazole. Dearomatized turpentine (benzene-free). EU limit value for this product (cat. A/e): 400 g/l [0,02 lb/oz] VOC (2010). This product contains max. 400 g/l [0,02 lb/oz] VOC. Detailed declaration of ingredients available upon request. Storage Up to 5 years and longer if the can is stored in a dry place and hermetically sealed. If thickened by frost, store for 24-36 hours at room temperature before use. Surface preparation Wood surface must be clean, dry and frost-free (moisture content max. 20%). Osmo UV-Protection-Oil Extra is ready to use and should not be diluted. Stir well before use. If possible, please apply the first coat to all sides before installation. Particularly oily timbers need to weather off (for approximately 6 weeks) after installation. Thereby the wood will gain more absorbent power and the finish will penetrate optimally. A coloured base coat is recommended, e.g. Osmo One Coat Only, Natural Oil Woodstain or Country Colour. For renovations, clean all old microporous wood finishes thoroughly. Freshen up greyed wood with Osmo Wood Reviver Power-Gel before applying Osmo Clear Uv-Protection-Oil. Old paints and lacquers must be completely removed. As a general rule, wear a dust mask during sanding. Do not sand smooth surfaces thinner than P120. The final result may be influenced by several factors, including the natural features of the wood. Therefore, a trial application is always recommended, especially for unfamiliar timbers. If you wish to have additional protection against blue stains, decaying and insects, you should pre-treat the wood on all sides with Osmo WR Base Coat. Technical data Specific weight: 0.9-1.0 g/cm³ [0,03 lb/in³] Viscosity: >50s DIN EN ISO 2431/3 mm, viscous Odour: faint/mild, odourless after drying Flash point: >60 °C [140 F] acc. DIN EN ISO 2719 Documentation ⏩ TDS ⏩ SDS
$39,95
![]()
Stones & Binder Calculator Area sqm (L*W*1m): Thickness (cm)*: Calculate Stones: 0 kg Resin binder: 0 kg *Recommended minimum thickness for driveway: 2 cm; Other areas: 1.5 cm. Certified Non-Toxic Transparent Epoxy Binder This resin has been specifically formulated to ensure an impeccable result in various applications. Thanks to its high gloss and transparency, and low viscosity, it offers a flawless, clear, and bubble-free result for your colored pebbles or aggregates. It is also certified non-toxic for skin contact post-cure. High Resistance and Durability Excellent resistance for your permeable floor: this binder ensures outstanding mechanical performance once cured. It also cures very quickly, making the floor walkable and fully usable in just 24 hours. Guaranteed Yellowing Resistance The cycloaliphatic amine-based hardener, along with the use of UV filters, guarantees high resistance to yellowing. Key Features High transparency Excellent mechanical resistance Good chemical resistance and carbonation resistance High impregnation and structural reinforcement for permeable floors Long working time Glossy surface High UV resistance for long-lasting creations (low yellowing) High mechanical resistance for scratch protection Low viscosity that reduces air bubbles after curing and facilitates aggregate impregnation Odorless and solvent-free perfectly transparent and bubble-free thanks to the specific formula for natural stones and colored marbles Curing Time Complete curing is achieved in about 24 hours, but the product can be walked on after just 10 hours. Ideal Applications The ideal applications for "ultra-transparent" epoxy resin include colored or dark-colored pebbles and aggregates. Consider these indicative data for epoxy resin for colored aggregates: 1-2 mm - for 20-25 kg of aggregate, add 800g of epoxy resin 3-5 mm - for 20-25 kg of aggregate, add 600g of epoxy resin 6-10 mm - for 20-25 kg of aggregate, add 600g of epoxy resin 10-20 mm - for 20-25 kg of aggregate, add 400g of epoxy resin Main Technical Data (Click the "TDS" icon for the full technical data sheet) Pot-life (150g at 30°C): 1h20' Complete cure after 24h Film cure (1mm at 30°C): 6h Supplied in plastic cans Maximum casting thickness: 2 cm (7 kg at 20°C) Epoxy Resins Epoxy resins are thermosetting polymers derived from monomers containing the three-atom epoxy ring. They are widely used in the production of advanced composite materials, obtained by combining the resin with fibers.
$177,99
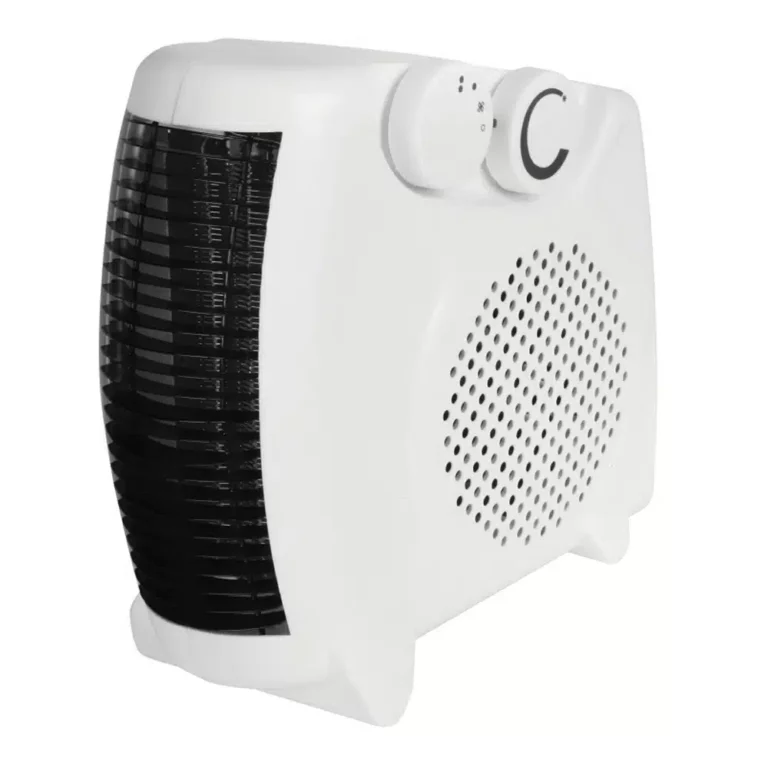
Versatile 2kW Electric Fan Heater Description: Durable and efficient 2kW electric fan heater, ideal for residential and light commercial use. Designed with a sturdy injection-molded case, this compact heater offers two heat settings with an adjustable ambient temperature selector. Built-in safety features include overheat protection, a thermal cut-out, and a thermal fuse for peace of mind. The illuminated power indicator ensures visibility in low-light environments. Can be positioned vertically or horizontally to fit your space and heating needs. Key Features: Dual Heat Settings: Choose your comfort level with adjustable heat settings. Enhanced Safety: Includes overheat protection, a thermal cut-out, and a thermal fuse for safe operation. Flexible Placement: Use vertically or horizontally to adapt to any room layout. Compact Design: Lightweight and portable, perfect for easy placement in any area. Power Indicator: Illuminated power light ensures visibility in dimly lit spaces. Technical Specifications: Cable Length: 3.94 feet (1.2m) Power: 2000W (2kW) Dimensions: 4.92” H x 10.04” W x 10.04” D (125 x 255 x 255mm) Weight: 2.87 lbs (1.3 kg)
$28,49
ResinPro: one supplier for all your needs
15 years of experience at your complete disposal, supplying resins and accessories for creativity, industry, DIY, flooring and marine applications.
At your home, directly from the manufacturer!
ResinPro is the direct manufacturer of our resin range for companies and hobbyists, guaranteeing the lowest prices on the market.
Learn more
The widest range of resins in the US!
We offer resins for every need, from artistic creations to marine and construction applications, far beyond the “limited” selection typically found in local DIY stores.
Expert technical support!
Our technicians provide free remote consulting to help you avoid mistakes and ensure you achieve the result you want — unlike “generic retailers” who sell 1,000 different products.
get a free consultation
RESIN PRO is a leader in resin production and distribution!
24-hour delivery: We ship across the US on the same day. Enjoy convenient home delivery with our appointment service—our courier will contact you in advance and deliver the package to your preferred location, or leave it at an alternative address of your choice.

Full support!
We provide continuous support from preparation to final application, including remote technical assistance, ensuring a smooth experience.
Talk with a specialist and place a phone order without registration and without credit cards!
 Free shipping on orders over €199,00
  Shipping Tracking!


 Google
 Facebook