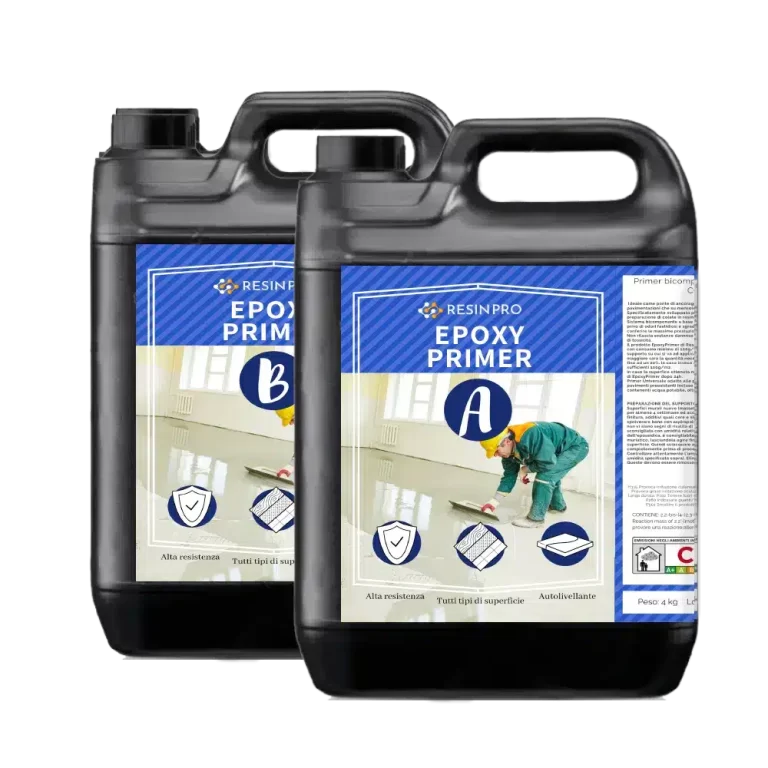
Great solution for making initial layer of your epoxy floor, which helps to increase the adhesion of your main layer! 💥About "EPOXYPRIMER" - Universal Water-Based Primer - For Stable & Durable Floors: Two-component system based on epoxy resins in water emulsion, and therefore free of annoying and unpleasant odors, additive with inorganic structurants suitable for giving maximum performance of resistance, durability and adhesion to the support. The product" EpoxyPrimer " by ResinPro can be applied with a roller, brush or spatula with a minimum consumption of 100g/m2 up to 300g/m2 , depending on the condition of the surface on which you are going to apply. The greater the porosity of the initial surface (concrete for example), the greater the quantity required and the dilution ratio can vary from 5% up to 20%. In the case of tiles or other poorly absorbent surfaces, 100g/m2 will be sufficient. If the surface obtained is not homogeneous, it is advisable to reapply a coat of " EpoxyPrimer". Mixing Ratio: 100:40 by weight Full curing time: 24/48h at room temperature
$212,95
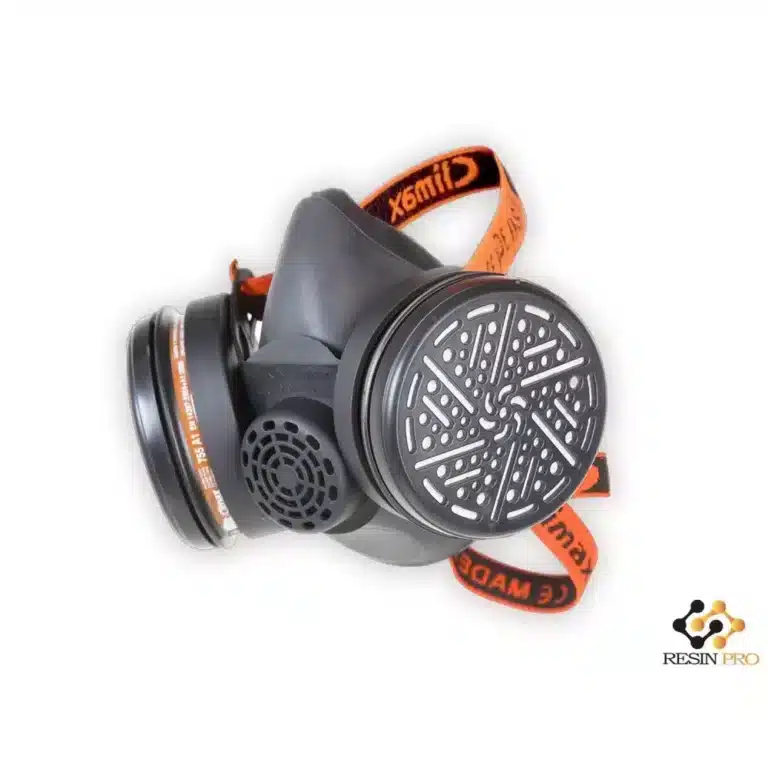
The mask with filter Climax for gas is designed to offer maximum protection against certain gases, vapours and particles such as dust, fog and fumes. It is the perfect companion for all those who work with epoxy, polyurethane or polyester resins. It is compatible with Climax filters model 755 and 756. The product consists of mask + 2 filters. Description and features: Covers the user's nose, mouth and/or beard and is produced with completely safe and lightweight materials. The body of the mask is made of flexible black rubber. Both the material and its shape and size allow a comfortable and airtight fit. The mask has a central hole in the exhalation valve, support valves and two additional holes on the sides to adjust the connectors for inhalation. Support valve: The mask is equipped with an exhalation valve that allows the air to be expelled easily. The mask is made of high density polyethylene (HDPE) This design ensures that the force exerted by the elastic straps of the mask is distributed evenly for a more comfortable fit. It has a rear band and a front band of high comfort and easy length adjustment system. The filter is cylindrical (diameter: 79 mm) with a black body made of high density polyethylene (HDPE). The filter is composed of two filter faces in white fabric. The discs are inserted inside the cover and bottom more easily absorbable type of activated carbon. - this needs rewording. Not sure what is meant by this. The connection of the filters to the mask is made by threading. Mask body: The mask body is manufactured from thermoplastic rubber. The design and material used allow an airtight fit preventing air leakage inward through the mask/face union. In the body of the mask must be housed the two connectors of the filter by screwing and interchangeable. Weight: 0.48 LB CE Certificate Standard: EN 140: 1999 Regulation (EU) 2016/425 Control Body: 0082
$53,99
Mini drill with helical tip, manual operation, effortless and durable. Suitable for the processing of resin, beeswax, wood, ivory, plastics and other soft materials. Perfect for precision machining that requires maximum delicacy. Includes different tip kits, easily interchangeable: 0.8 mm / 1.0 mm / 1.2 mm / 1.5 mm / 1.8 mm / 2.0 mm / 2.2 mm / 2.5 mm / 2.8 mm / 3.0 mm. Method of use: Unscrew the bottom and top of the drill, remove the additional parts and insert the tips. Choose a suitable nozzle for the diameter of the tip. Insert the tip into the nozzle and tighten the drill cover. For larger ends, use a nozzle with a large hole. The drill comes in a convenient metal box, which can then be used to store any object. Technique: mechanical-manual. It does not contain automatic devices. It is a mechanical hand tool. There are no descriptions available for this product.
$18,49
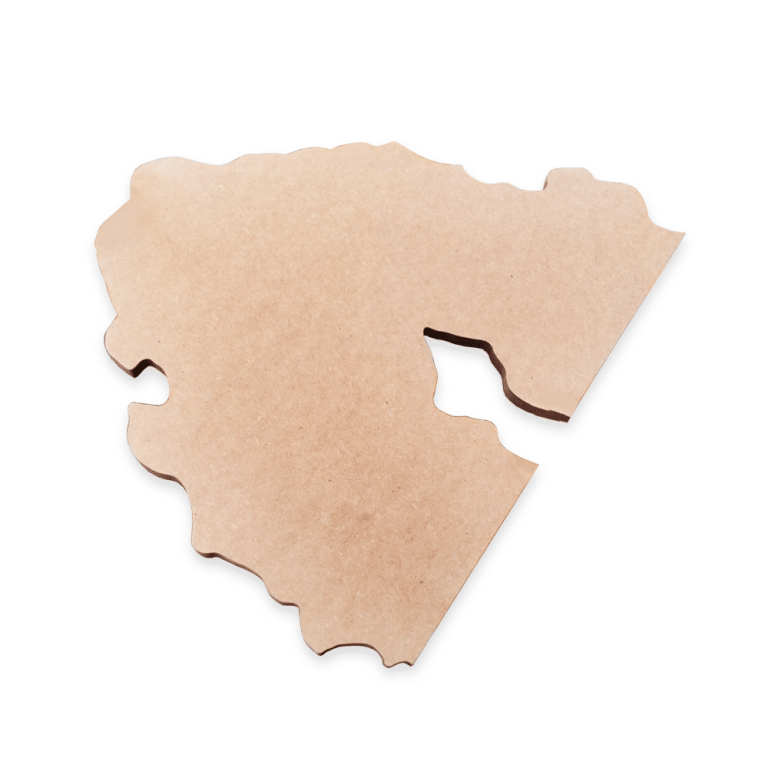
High-quality product – perfect for artists, craftsmen and beginners. Durable wooden base. For all painting techniques, even for those with double colour application. Excellent for home decoration, resin tables, paintings or other handicrafts. Used to make resin-based paints, ornaments and tables. Dimensions: 80x70 cm [31,49” x 27,55”] / 60x50 cm [23,62” x 19,68”] Thickness: 16 mm [0,62”] Weight: 2 kg [4,40 lb] https://youtu.be/lovp83sopB8
$30,95
Durable Parquet Grout Sealing Solution
Epoxy resins offer the perfect solution for sealing parquet grout in a durable and long-lasting manner. Once cured, these products create a waterproof surface that effectively shields the grout from moisture, dirt, and wear. Proper application of epoxy resin on parquet grout involves thorough surface cleaning and precise product mixing according to the manufacturer's guidelines. After applying the resin, ensure any excess is removed with a scraper for a flawless finish. This treatment is suitable for both indoor and outdoor settings.
How to Use Epoxy Resin for Parquet Grout
Follow these steps for using epoxy resin on parquet grout
- 1. Preparation: Ensure the grout lines are clean and free of dust or residues.
- 2. Mixing: Thoroughly mix the epoxy resin with the hardener following the manufacturer's instructions.
- 3. Application: Use a brush or spatula to evenly spread the resin over the grout lines.
- 4. Excess Removal: Remove excess resin with a scraper before it fully hardens.
- 5. Drying: Allow the resin to dry for the specified time.
- 6. Cleaning: Use a specific solvent to clean any resin residues.
- 7. Finishing: Polish the surface once dry for a uniform result.
Following these steps will result in perfectly sealed and protected parquet grout lines with epoxy resin.
Custom Parquet Grout Lines with Silicone Molds
Create custom grout lines for parquet flooring using silicone molds by following these steps:
Prepare the mold-making silicone by thoroughly mixing the components.
Pour the silicone around the parquet grout lines for even distribution.
Allow the silicone to dry for the required time.
Carefully remove the hardened silicone to reveal your custom mold.
Use the mold to fill the grout lines with colored resins for a unique and personalized effect on your parquet flooring.
By following these simple steps, you can creatively customize the grout lines of your parquet flooring.
Enhance Parquet Grout with Vibrant Pigments
Enhance the look of parquet grout with vibrant pigments based on iron oxides, titanium oxides, and manganese oxides. These pigments offer a wide range of long-lasting colors, perfect for customizing parquet grout uniquely. Before applying the pigments, ensure the grout is thoroughly cleaned and follow the manufacturer's instructions meticulously for optimal results.
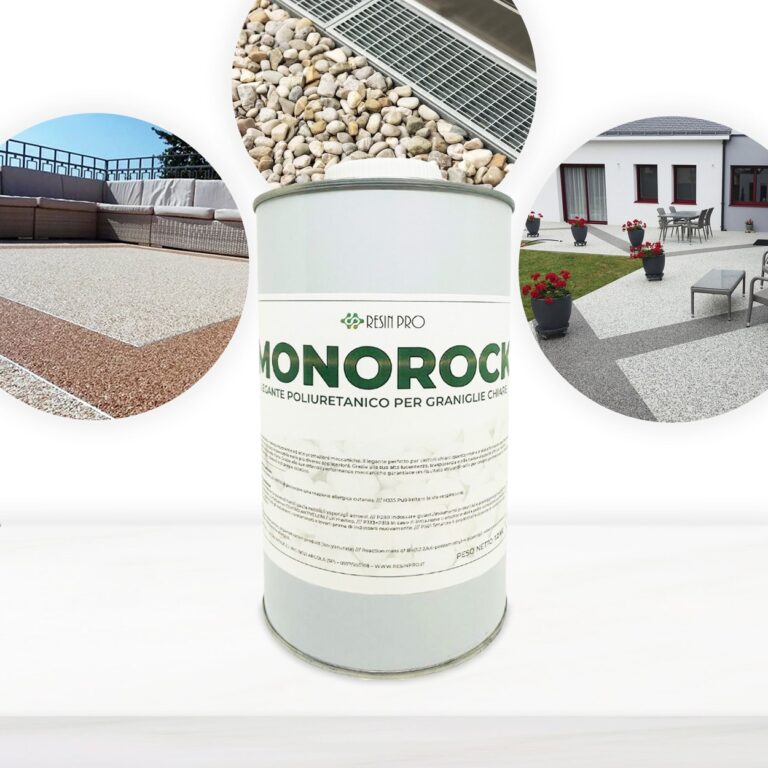
High-Performance Single-Component Polyurethane Resin The perfect binder for white or light-colored pebbles. This resin has been specifically formulated to ensure an impeccable result in various applications. Thanks to its high gloss and transparency, and low viscosity, it offers a flawless, clear, and bubble-free result. Ideal for use as a binder for white or light-colored pebbles. Due to its optimal mechanical performance, it ensures an extraordinary result for creating continuous permeable floors that are durable and aesthetically pleasing. Consumption for Aggregate/Pebble Binder Depending on the chosen grain size, consider these indicative data for polyurethane resin for white or light aggregates: 7-10 mm – for 20-25 kg of aggregate, add 500g of polyurethane resin; 4-6 mm – for 20-25 kg of aggregate, add 650g of polyurethane resin; 2-4 mm – for 20-25 kg of aggregate, add 800g of polyurethane resin; 1-2 mm – for 20-25 kg of aggregate, add 1.2 kg of polyurethane resin; Note: It is advisable to verify the necessary amount of binder before application, as an excess of binder can cause swelling and foaming. The correct amount of binder is just enough to wet the surface of the aggregate without dripping. If you have any doubts, contact our support! These consumption rates are calculated based on the standard sale format of aggregates/pebbles, approximately 20-25 kg per bag. Primer For greater adhesion security, use Transparent Epoxy Resin as a primer for your surfaces: in this application, consider 150-200 g/m² applied with a simple roller; to ensure optimal grip, sprinkle quartz sand to refusal immediately after application. Resistance Excellent mechanical performance, with pebbles perfectly bound together and extraordinary resistance to yellowing. Main Features High transparency Excellent mechanical resistance Good chemical resistance and carbonation resistance High impregnation and reinforcement of technical fabrics Long working time Glossy and self-leveling surface High UV resistance for long-lasting creations - no yellowing High mechanical resistance for scratch protection Low viscosity reduces the presence of air bubbles after curing and facilitates carbon fiber impregnation Odorless and solvent-free Perfectly transparent and bubble-free thanks to its specific formula. Curing Time Complete curing is achieved in about 24 hours. Surface Preparation Apply on solid, compact, dry substrates that are not subject to capillary rising damp, clean, and free of oils and greases. Treat surfaces by shot blasting or sanding followed by residue vacuuming. Alternatively, a cementitious underlay or epoxy screed is recommended. The use of a suitable primer is recommended (see specific application cycle sheets). Product Use Mix the product with colored or monochromatic mineral aggregates of any grain size, using manual (low-speed drill with helical mixer) or automatic (concrete mixer) mixing. For a finished product with maximum chemical and mechanical resistance, use aggregates that are clean of oils or greases and free of moisture. The ratio of aggregate to binder is highly dependent on the shape, size, and porosity of the aggregate; as a guideline: 40:1 for 4-6 mm aggregate; 20:1 for 2-4 mm aggregate; 16:1 for 1-2 mm aggregate. Technical Assistance, Product info: Contacts
$50,49
![]()
Stones & Binder Calculator Area sqm (L*W*1m): Thickness (cm)*: Calculate Stones: 0 kg Resin binder: 0 kg *Recommended minimum thickness for driveway: 2 cm; Other areas: 1.5 cm. Certified Non-Toxic Transparent Epoxy Binder This resin has been specifically formulated to ensure an impeccable result in various applications. Thanks to its high gloss and transparency, and low viscosity, it offers a flawless, clear, and bubble-free result for your colored pebbles or aggregates. It is also certified non-toxic for skin contact post-cure. High Resistance and Durability Excellent resistance for your permeable floor: this binder ensures outstanding mechanical performance once cured. It also cures very quickly, making the floor walkable and fully usable in just 24 hours. Guaranteed Yellowing Resistance The cycloaliphatic amine-based hardener, along with the use of UV filters, guarantees high resistance to yellowing. Key Features High transparency Excellent mechanical resistance Good chemical resistance and carbonation resistance High impregnation and structural reinforcement for permeable floors Long working time Glossy surface High UV resistance for long-lasting creations (low yellowing) High mechanical resistance for scratch protection Low viscosity that reduces air bubbles after curing and facilitates aggregate impregnation Odorless and solvent-free perfectly transparent and bubble-free thanks to the specific formula for natural stones and colored marbles Curing Time Complete curing is achieved in about 24 hours, but the product can be walked on after just 10 hours. Ideal Applications The ideal applications for "ultra-transparent" epoxy resin include colored or dark-colored pebbles and aggregates. Consider these indicative data for epoxy resin for colored aggregates: 1-2 mm - for 20-25 kg of aggregate, add 800g of epoxy resin 3-5 mm - for 20-25 kg of aggregate, add 600g of epoxy resin 6-10 mm - for 20-25 kg of aggregate, add 600g of epoxy resin 10-20 mm - for 20-25 kg of aggregate, add 400g of epoxy resin Main Technical Data (Click the "TDS" icon for the full technical data sheet) Pot-life (150g at 30°C): 1h20' Complete cure after 24h Film cure (1mm at 30°C): 6h Supplied in plastic cans Maximum casting thickness: 2 cm (7 kg at 20°C) Epoxy Resins Epoxy resins are thermosetting polymers derived from monomers containing the three-atom epoxy ring. They are widely used in the production of advanced composite materials, obtained by combining the resin with fibers.
$45,95
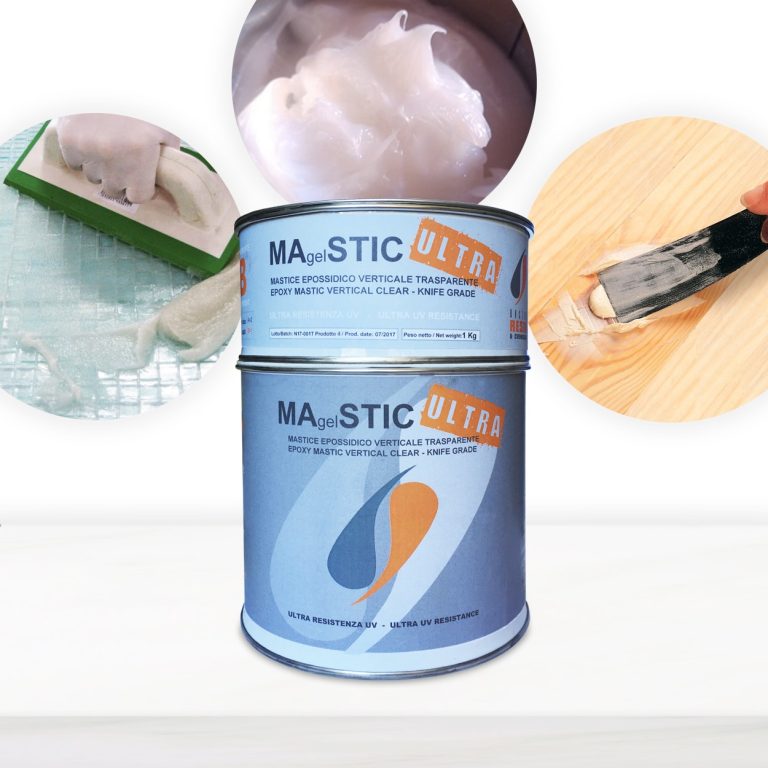
MAgelSTIC Epoxy Mastic Semi-transparent two-component with very high mechanical and adhesion properties weatherproof and with good UV resistance. Strongly recommended to bond and grout marble, granite, natural and artificial stones. Thanks to its high thixotropy and the near-zero shrinkage, the product excels both in vertical applications and in the correction of imperfections, even of medium / large dimensions. Two-component transparent epoxy mastic with very high mechanical and adhesion properties, unalterable to bad weather and with good UV resistance. Strongly recommended for bonding and grouting of marble, granite, natural and artificial stone. Thanks to its elevated thixotropy and a almost zero shrinkage, the product excels both in vertical applications and in the restoration of imperfections, even of medium / large size.
$62,95
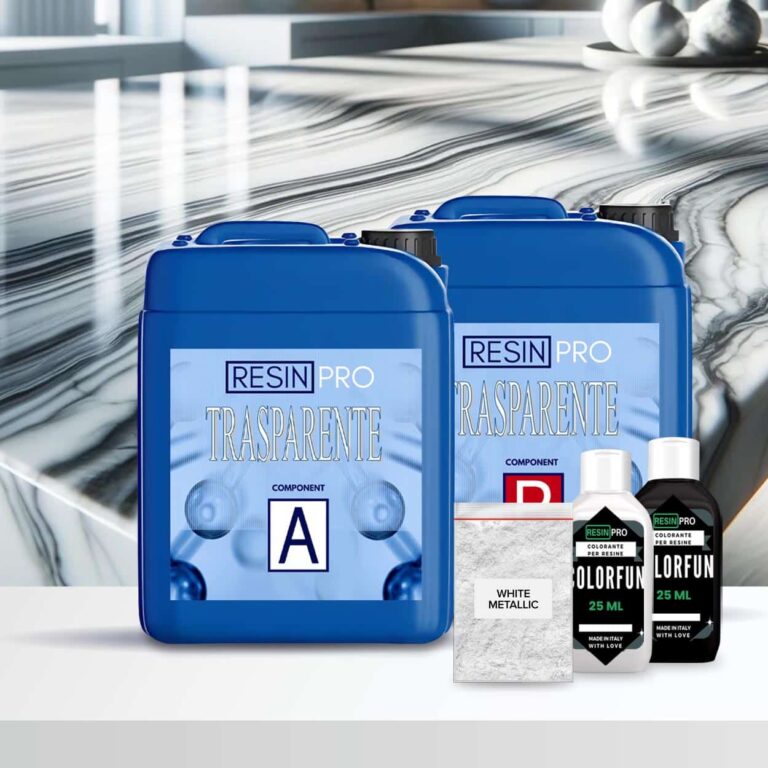
Top Cucina Kit Carrara Marble Effect with Epoxy Resin: The 2.4 kg kit (1.6 + 0.8) covers 1 square meter (+ 10 g white metallic pigment + 25 ml white dye +25 ml black dye) The 4 kg kit (2*1.6 + 0.8) covers 2 square meters (+ 2*10 g metallic pigment +2* 25 ml white dye + 2*25 ml black dye) The 8 kg kit covers 4 square meters (+ 4*10 g metallic pigment +4* 25 ml white dye+ 4*25 ml black dye) The 16 kg kit covers 8 square meters (+ 8*10 g white metallic pigment +8* 25 ml white dye 8*25 ml black dye) Kit Contents: 2.4kg, 4kg, 8kg or 16kg of "Art Pro" Epoxy Art Coat for a high quality base White dyeand Black of the "Colorfun" line for the perfect stone shades White Metallica Sahara pigment for that extra touch of sparkle Good to add: To enhance the appeal of the design:: Isopropanol 99.9% (additional option, not included in the price) To make the coating last longer: Polishield 100 Gloss (additional option, not included in the price). The coverage of a 0.5 kg kit is approximately 4 m2 Each kit includes dyes and pigment in sufficient quantity for the amount of resin required. HOW TO CREATE YOUR MARBLE EFFECT WITH EPOXY Guide Instructions: Step N1: Primer Start by carefully measuring the amount needed to cover the surface based on the consumption of 150 g/m2, making sure to follow the proportions indicated to obtain a homogeneous mixture. Once the base has been prepared, proceed with adding the dye, choosing between white or black depending on your needs. The quantity of colourant to add to the mixture can be measured in a few drops (max 5% by volume). This step is crucial to achieve the desired colour and ensure uniformity of the application. Before applying the primer, it is essential that the surface intended for treatment is adequately prepared. Sand the surface with a coarse grit (40 or 60) before any operation. Make sure it's completely clean, using a soft cloth or brush to remove any pigment, dirt or debris. The surface must also be completely dry; residual humidity can compromise the adhesion of the primer and its effectiveness in sealing the surface. Once the surface is ready, apply the mixture evenly, using a suitable tool such as a brush, roller or spatula, depending on the size of the area to be treated and your personal preference. The key is to get a thin, even layer that can cover the entire area without leaving gaps or excessive product buildup.. After application, it is essential to allow the primer to dry completely before proceeding with further treatments or finishes on the surface. The recommended waiting time is 12 hours; this range may vary slightly depending on environmental conditions, such as humidity and temperature, but offers a good compromise to ensure the mixture has time to dry and adhere properly. During this period, avoid touching or stressing the treated surface to ensure optimal results. Don't worry if you notice any discrepancies on the surface, the next main pour will level everything perfectly. Step N2: application Start by applying masking tape around the perimeter of your countertop to contain the epoxy you're about to pour. This step is essential to ensure the resin stays where it is needed. After applying the resin, wait about 1.5 hours before gently removing the tape. To ensure coverage is even and complete, plan to use approximately 1.6kg of resin for every square meter of surface area. When you are ready to mix the resin, use a drill equipped with a paddle mixer for quick and even action (use at low speed), taking about 2 minutes for this operation. If you prefer to mix by hand, be prepared to take double the time. Don't forget to scrape the sides and bottom of the container halfway through the process with a stick to ensure all the material is mixed well. Next, separate the already mixed resin into different glasses and add the desired colours, mixing the different colours in the different glasses until you obtain an intense and uniform colour per single glass. To create a striking visual effect, pour the coloured resin in random layers into a larger bucket, being careful not to mix the colours together too much. After filling the bucket, spread the contents over the surface of the worktop, leaving a small amount of resin aside to finish the edges later. To remove trapped air bubbles, gently run a propane torch or heat gun over the surface. Once the adhesive tapes have been removed, approximately 1.5 hours after application, if there are any dry edges, moisten them slightly by wearing a protective glove to promote an even appearance. Use appropriate tools, such as spatulas or plastic scrapers, to spread and level the resin along the edges, making sure to cover the entire area well. After letting the resin cure for 24 hours, you can apply a clear top coat or PoliShield scratch-resistant paint to further protect the surface. Finally, for even more refined visual effects, spray 99.9% isopropyl alcohol onto the surface just before the resin begins to fully harden. This will create unique lacy textures. Remember that when you remove the tape, it is essential that the resin is partially hardened, neither too liquid nor completely solid, to avoid unwanted drips. Attention! Safety Guidelines for Using Isopropyl Alcohol (99.9%) Isopropyl alcohol (IPA) is a highly flammable substance. Improper use—especially near heat sources like torches or heat guns—can result in fire or explosion. To ensure safe use, follow these precautions: Primary Risks Highly flammable: IPA vapors can ignite from sparks, open flames, or hot surfaces. Forms explosive vapor-air mixtures, especially in enclosed or poorly ventilated spaces. Strictly Prohibited: Using gas torches or heat guns near areas treated with IPA. Spraying IPA near active heat sources. Storing IPA near flames, heaters, or hot tools. Recommended Safety Measures: 1. Ventilation: Always work in a well-ventilated area when using IPA. 2. Wait Time: After applying IPA, wait at least 5–10 minutes to allow complete evaporation before using any heat tools. 3. Safe Distance: Keep IPA containers at least 2 meters (6 feet) away from heat or flame sources. 4. Storage: Store IPA in a tightly sealed container, away from direct sunlight or high temperatures. 5. Fire Safety: Have a CO₂ or dry chemical fire extinguisher nearby when working with flammable substances and open flames. In Case of Fire: Do not use water to extinguish the fire. Use an appropriate extinguisher, cut off air supply if safe, and call emergency services if needed.
$73,49
ResinPro: one supplier for all your needs
15 years of experience at your complete disposal, supplying resins and accessories for creativity, industry, DIY, flooring and marine applications.
At your home, directly from the manufacturer!
ResinPro is the direct manufacturer of our resin range for companies and hobbyists, guaranteeing the lowest prices on the market.
Learn more
The widest range of resins in the US!
We offer resins for every need, from artistic creations to marine and construction applications, far beyond the “limited” selection typically found in local DIY stores.
Expert technical support!
Our technicians provide free remote consulting to help you avoid mistakes and ensure you achieve the result you want — unlike “generic retailers” who sell 1,000 different products.
get a free consultation
RESIN PRO is a leader in resin production and distribution!
24-hour delivery: We ship across the US on the same day. Enjoy convenient home delivery with our appointment service—our courier will contact you in advance and deliver the package to your preferred location, or leave it at an alternative address of your choice.

Full support!
We provide continuous support from preparation to final application, including remote technical assistance, ensuring a smooth experience.
Talk with a specialist and place a phone order without registration and without credit cards!
 Free shipping on orders over €199,00