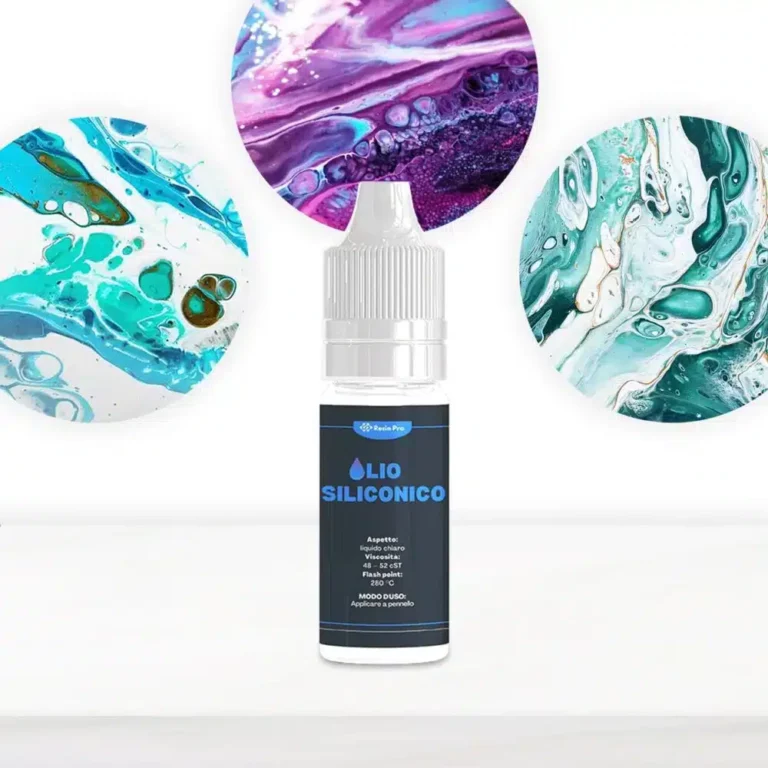
ResinPro silicone oil is composed of the highest quality elements and guarantees exceptional durability for your moulds! It is a product designed for artists who love to reproduce resin objects with silicone moulds and who want to protect their precious moulds from wear and tear. In fact, silicone moulds can often become damaged after a few uses: the silicone oil, regularly applied on the surfaces of silicone moulds, allows you to maintain the softness and anti-adhesive capacity of the moulds, resulting in them being unchanged and prolonged over time. Silicone oil also has many artistic applications: adding a few drops to a mass of coloured resin enable you to obtain special effects at the time of casting! In addition, silicone oil can also be used in pouring or fluid painting techniques with acrylic dyes to obtain the beautiful wet effect on your canvases ! ResinPro silicone oil is composed of the highest quality elements and guarantees exceptional durability for your moulds! It is a product designed for artists who love to reproduce resin objects with silicone moulds and who want to protect their precious moulds from wear and tear. In fact, silicone moulds can often become damaged after a few uses: the silicone oil, regularly applied on the surfaces of silicone moulds, allows you to maintain the softness and anti-adhesive capacity of the moulds, resulting in them being unchanged and prolonged over time. Silicone oil also has many artistic applications: adding a few drops to a mass of coloured resin enable you to obtain special effects at the time of casting! In addition, silicone oil can also be used in pouring or fluid painting techniques with acrylic dyes to obtain the beautiful wet effect on your canvases !
$7,49
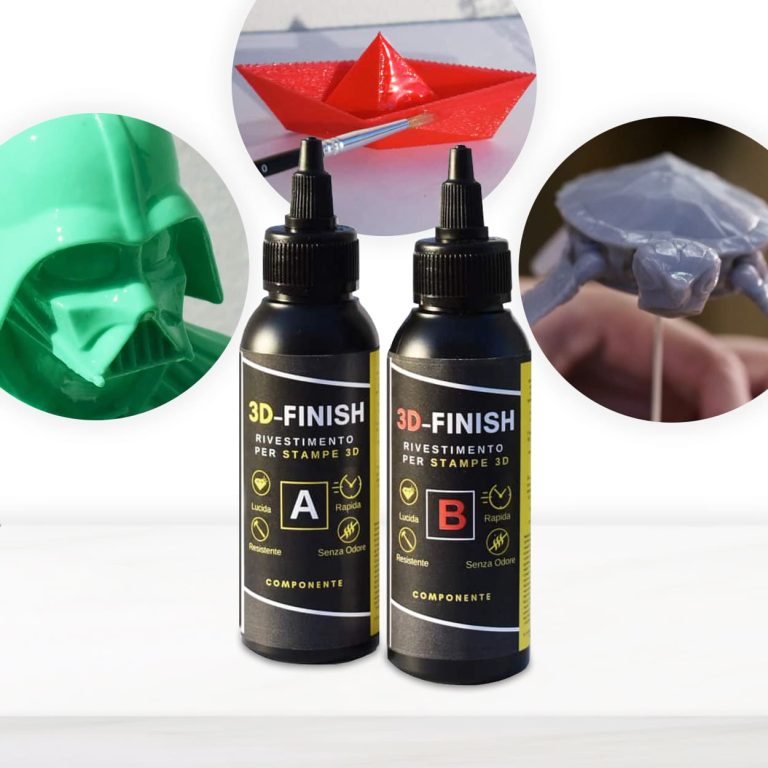
3D – FINISH “Fast” Post-print coating for polishing and finishing 3D prints. Applied on any kind print, it makes the treated surface glossy, smooth and impact-resistant. Specifically developed to be used in 3D applications, it does not drip or cover small details, faithfully respecting all the shapes of the printing. Eliminates unevenness between the different layers; Glossy; Strengthens the mechanical resistance of the printing; Can be polished and painted. If you want to paint your printing according to your tastes, 3D Finish “Fast” can be coloured with colouring pastes and metal powders. Excellent adhesion and reinforcement on PLA, LAYWOOD, ABS. Fast and effective, it is an easy-to-apply solution to create finished items through 3D printing more quickly, improving their aesthetic uniformity and their impact strength. Thanks to its high mechanical resistance, it is also perfect to be used as a bonding agent between printings or to repair damaged 3D artefacts. We recommend to store the product in a dark, cool and dry place away from direct sunlight. The tools must be washed with IPA (isopropyl alcohol).
$16,49
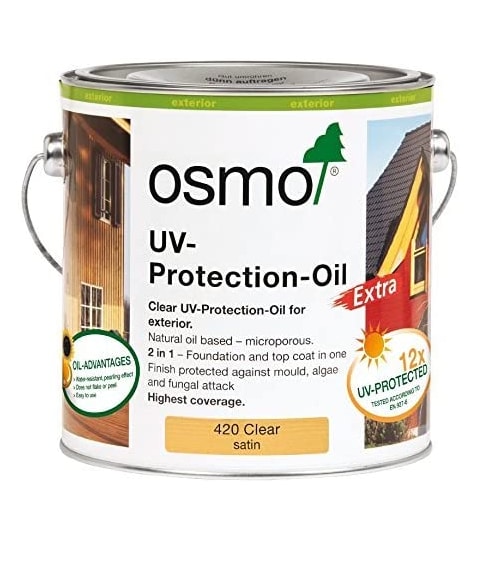
Perfectly protected against the sun – the first clear UV-protection for the outdoors! All resins / woods turn amber in colour over time, but UV-Protection-Oil has been developed to preserve epoxy's clear colour and slow down the yellowing process by (UV factor) 12 times compared to untreated epoxy. Ideal for River tables, epoxy furniture, exterior design pieces, windows, doors, claddings, fencings and other complex joinery. Natural oil-based and microporous finish, it does not crack, flake or peel. Water-resistant and dirt-resistant, it is moisture regulating and minimise the damaging. Description Natural oil-based clear satin wood finish for outdoor use. The microporous surface allows the wood to breathe and reduces swelling and shrinkage. Water-repellent, will not crack, peel or flake. As top coat on already treated coloured wood, Osmo UV-Protection-Oil Extra significantly extends the intervals between each restoration. When used as a single product, with a two-coat application it prevents greying on vertical surfaces with a 12 UV-protection factor compared to untreated wood. Osmo UV-Protection-Oil Extra features active ingredients to protect the coating against the action of mould, algae and fungi. No need to sand before application, easy and smooth. During coating, the finish is still workable. Recommended use Osmo UV-Protection-Oil Extra is perfect for all vertical wood surfaces for outdoor use: doors, windows, window shutters (dimensionally stable parts), parking places, resin coatings, balconies, fences, pergolas, and holiday cottages (dimensionally unstable parts). Also suitable for bamboo poles (e.g. in screens). Ingredients Based on natural plant oils (sunflower oil, soybean oil, thistle oil and linseed oil), desiccants and additives. Biocidal active ingredient: Propiconazole. Dearomatized turpentine (benzene-free). EU limit value for this product (cat. A/e): 400 g/l [0,02 lb/oz] VOC (2010). This product contains max. 400 g/l [0,02 lb/oz] VOC. Detailed declaration of ingredients available upon request. Storage Up to 5 years and longer if the can is stored in a dry place and hermetically sealed. If thickened by frost, store for 24-36 hours at room temperature before use. Surface preparation Wood surface must be clean, dry and frost-free (moisture content max. 20%). Osmo UV-Protection-Oil Extra is ready to use and should not be diluted. Stir well before use. If possible, please apply the first coat to all sides before installation. Particularly oily timbers need to weather off (for approximately 6 weeks) after installation. Thereby the wood will gain more absorbent power and the finish will penetrate optimally. A coloured base coat is recommended, e.g. Osmo One Coat Only, Natural Oil Woodstain or Country Colour. For renovations, clean all old microporous wood finishes thoroughly. Freshen up greyed wood with Osmo Wood Reviver Power-Gel before applying Osmo Clear Uv-Protection-Oil. Old paints and lacquers must be completely removed. As a general rule, wear a dust mask during sanding. Do not sand smooth surfaces thinner than P120. The final result may be influenced by several factors, including the natural features of the wood. Therefore, a trial application is always recommended, especially for unfamiliar timbers. If you wish to have additional protection against blue stains, decaying and insects, you should pre-treat the wood on all sides with Osmo WR Base Coat. Technical data Specific weight: 0.9-1.0 g/cm³ [0,03 lb/in³] Viscosity: >50s DIN EN ISO 2431/3 mm, viscous Odour: faint/mild, odourless after drying Flash point: >60 °C [140 F] acc. DIN EN ISO 2719 Documentation ⏩ TDS ⏩ SDS
$39,95

💥 BESTSELLER FOR COVERING: – Trays & Coasters; – Dooming and artistic applications on fabrics; – Other surfaces that need heat and scratch protection. 💥About “HEAT PRO” – Heat-resistant Anti-scratch Glossy Coating: HEAT PRO is a transparent, two-component polyurethane resin, ideal for protecting your projects. Its special elastic formulation allows it to absorb shocks and scratches, always remaining mirror-polished! It also resists up to 200°C and is ideal for surfaces that will come into contact with pots or other material at high temperature. It`s perfect to be applied as a final layer (1-3mm) and allows to cover surfaces. Catalysis at room temperature in a few hours and in 24h is completely ready for any use. The full curing time is 72h. 💥Key features: ⚙️ ULTRA TRANSPARENT PROTECTIVE COATING: -Heat Pro is ideal for creating a protective coating that withstands scratches temperatures up to 175°C (2 hours) and 200 C (15 minutes), keeping your creations in perfect condition. 🧪PROFESSIONAL QUALITY: -Made from high quality materials – Excellent transparency, No bubbles, Odourless, Self-leveling glossy surface 🌿 SAFE AND CERTIFIED: -All our resins are Certified Non-Toxic, Solvent-free, non-flammable, and totally safe. 💧 EASY TO USE: -The 100:75 mixing ratio makes this product very easy to use. Simply mix components RESIN A + HARDENER B in the ratio indicated above the package and let it harden without the need for further additives. 📞 FREE PROFESSIONAL ASSISTANCE SERVICE: -Since we are directly a manufacturer, we have access to a professional laboratory that will happily help you with any complex project. 🇬🇧 UK BASED TRUSTED COMPANY: -RESIN-PRO team collects and sends your order as fast as possible. We produce and realise epoxy resins since 2015. Just google our social media, where you will find thousands of projects made with our products around the world. Please pay attention to these product features before using it! Apply only on perfectly dry surfaces without traces of moisture. Not compatible with acrylic or liquid dyes: we strongly don`t recommend use this product with acrylic art-works! The product should be applied only on a transparent resin surfaces (without dyes). If you need to apply it on coloured resin or other materials (wood, concrete and stone and etc), create at least one 1mm layer of clear resin beforehand. Wait 24-48h and apply Heat Pro. It is very important to have the correct room temperature, above 20°C for all processing steps. Heat Pro must have a temperature above 20°C, so if you are not sure if the temperature is right, warm the cans slightly by keeping them in a warm place for at least a couple of hours. The product is ideal for application on small surfaces, not exceeding 0.25 square metres. Use a heat source carefully to eliminate bubbles: be careful to pass the torch or hairdryer only briefly (max. 2 seconds) over each area to avoid damage to the finish. The hardened Heat Pro coating will have a softer texture than classical resins: this specific texture will guarantee maximum performance! For the same reason, the coating cannot be sanded and polished. The hardened Heat Pro coating becomes resistant to hot objects and scratches only 72-96 hours after application! You can store objects covered with Heat Pro in a “stack” only through paper or cloth. In no case should such products be stacked on top of each other without this protection - the coating may stick to another object tightly!
$21,49
**Damaged Bookshelf Repair**
If your wooden bookshelf has scratches, cracks, or dents, using a specific filler designed for damaged bookshelves is the ideal solution. Follow these steps for optimal results:
- Start by thoroughly cleaning the damaged surface to remove dust and residues.
- Prepare the filler following the manufacturer's instructions and apply it to the damaged area using a spatula.
- Ensure the filler is smoothed well and allow it to dry completely.
- Once dry, gently sand the surface to level it with the rest of the bookshelf.
- For a flawless finish, paint or treat the repaired area.
By using a specialized bookshelf filler, you can effectively and discreetly repair damages while maintaining the furniture's aesthetics.
**RESINPRO Furniture Restoration**
Repairing resin furniture requires precision and care. Follow these steps for optimal results
- Begin by thoroughly cleaning the damaged area to remove any residues and dirt.
- Select a transparent resin suitable for the furniture type and damage size.
- Mix the resin with the catalyst following the manufacturer's instructions attentively.
- Apply the resin to the damaged area, ensuring a level surface, using a brush or dropper.
- Allow the resin to dry completely, following the recommended drying times.
- Optionally, polish the repaired area for a uniform and glossy finish.
Following these steps diligently will help you effectively and permanently repair your resin furniture.
**DIY Furniture Restoration Guide**
Engaging in DIY restoration allows you to revive furniture or objects through your efforts. Follow these steps for successful restoration:
Assess the object's condition, identifying damages, scratches, or missing parts.
Clean the object thoroughly, removing old coatings or residues with appropriate products.
Use resins or silicones to repair damages, such as cracks or holes.
Prepare the surface by sanding and smoothing for the application of new coatings.
Apply protective coatings, paints, oils, or waxes to safeguard and rejuvenate the object.
By meticulously following these steps, you can achieve gratifying results in your DIY restoration projects.
**Repairing Wood with Epoxy Resin**
Repairing wood with epoxy resin involves essential steps for a successful outcome:
- 1. Preparation: Clean and dry the damaged wood surface thoroughly.
- 2. Resin Application: Mix equal parts of resin and hardener, applying the mixture to the damaged area with a spatula.
- 3. Curing: Allow the resin to cure for the specified time indicated on the product.
- 4. Sanding: Once fully cured, sand down the resin to achieve a smooth surface.
- 5. Finishing: Apply a protective coating or paint, if required, to finalize the repair.
Following these steps will enable you to effectively and durably repair wood using epoxy resin.
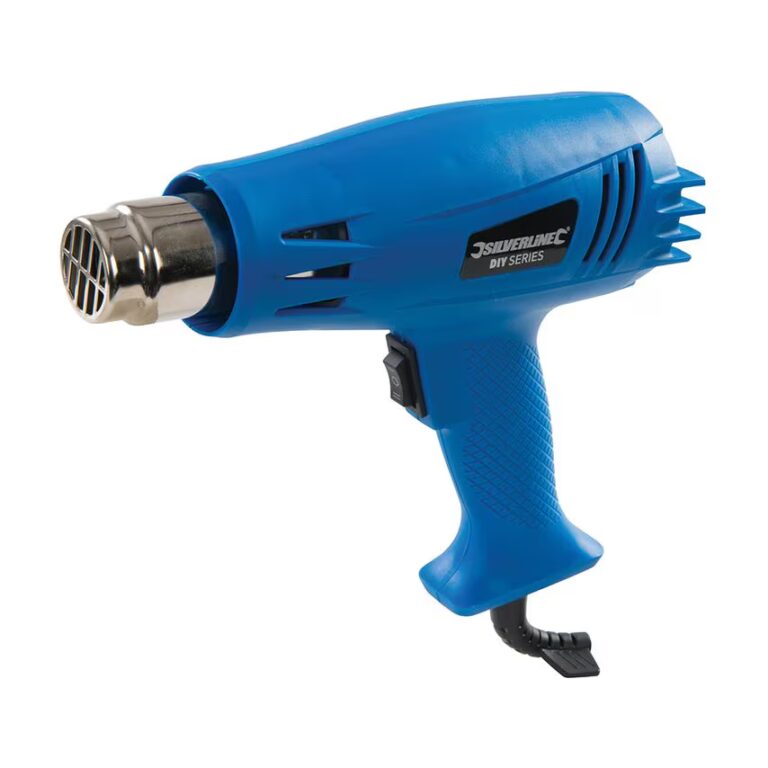
The 1500W Heat Gun is an essential tool for epoxy resin projects, designed to effectively remove bubbles and ensure a smooth finish. Its powerful heat output quickly eliminates imperfections, but care should be taken to avoid overheating the surface, which can cause damage or discoloration. Heat gun with two heat settings and maximum air temperature of 500°C. For drying or stripping paint, shaping plastic and heat-shrink tubing or defrosting frozen water pipes. Lightweight for easy handling. Includes reduction nozzle.
$39,95
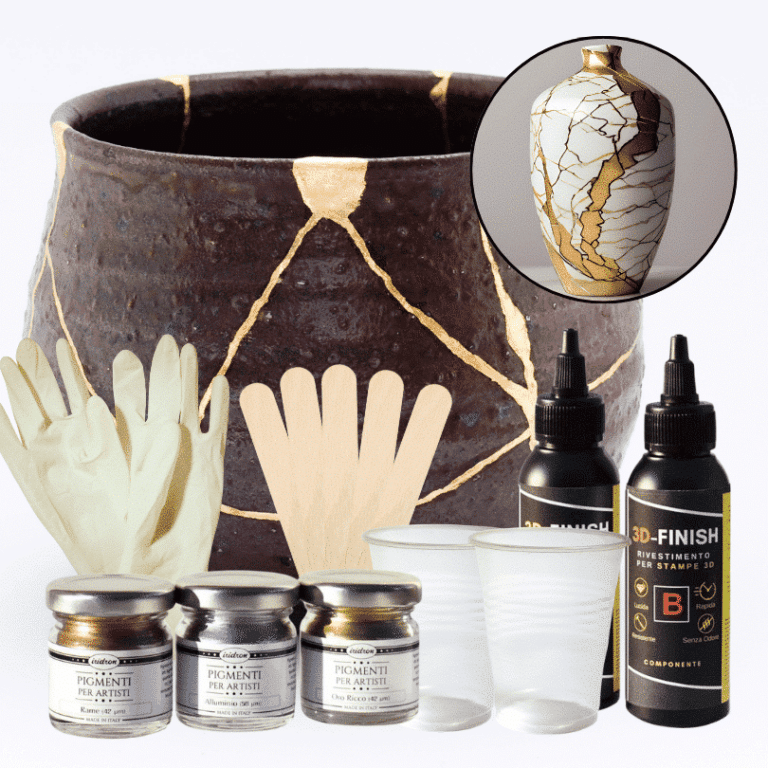
Kintsugi Repair Kit - Repair and Transform Your Ceramics with Elegance Celebrate imperfection with the ancient Japanese art Discover the traditional Japanese art of Kintsugi with our complete repair kit. Transform your broken ceramics into unique and fascinating works of art, highlighting imperfections with elegant gold, silver, or copper veins. Our kit is perfect for both beginners and experts, offering detailed instructions and everything you need to give new life and value to your most cherished items. 🌟 Specific epoxy resin (150g): slow catalysis to eliminate any bubbles or imperfections, allowing you to complete the work without rushing. 🎨 Dye of your choice (gold, copper, silver): customize your repair with a touch of elegance and refinement. ✨ Respect the tradition: follow the ancient art of Kintsugi and transform your ceramics into unique and precious treasures. The kit contains: 150g of resin for 3D decorations, 2 pairs of protective gloves, 2 mixing cups, and 5 spatulas for applying the resin, detailed instructions, everything you need in one kit. Give your ceramics a unique touch: repair them with style and make them even more beautiful. Buy the Kintsugi Repair Kit now and start creating your works of art today! Kintsugi Kit Instructions: Mix Resin: Measure 100A:50B by volume (or 100A:45B by weight) using a scale. Mix for 2 minutes, ensuring all surfaces are scraped. Add Colour: Mix your chosen metallic dye (gold, silver, or copper) into the resin to highlight the cracks. Prepare Surface: Ensure surfaces are clean, dry, and sanded. Apply Resin: Fill the cracks with the colored resin. Curing: Work in a temperature-controlled area, avoiding humidity. Safety: Wear protective gear.
$22,95
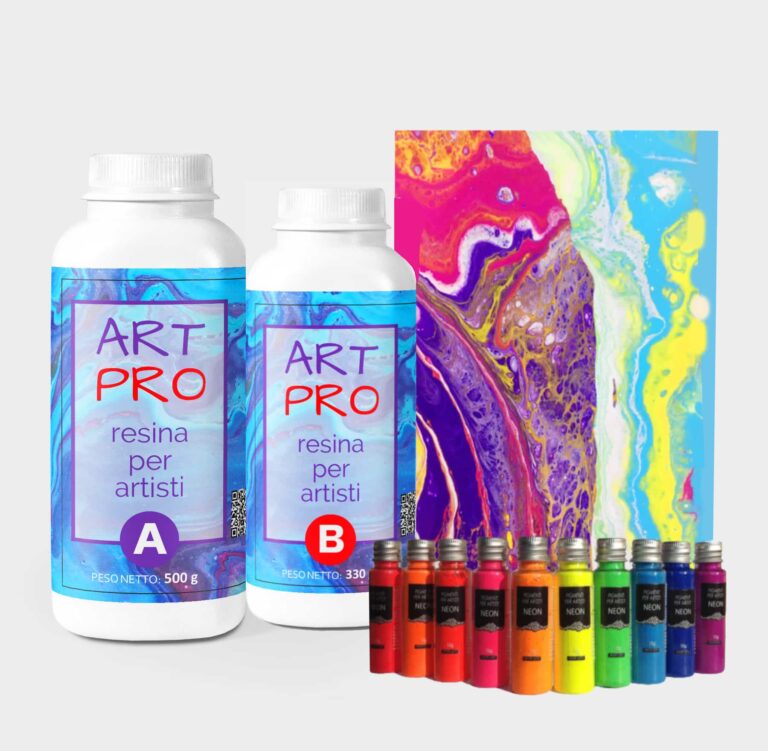
"RAPHAEL" KIT for Pour Paint & Resin Art Create your unique painting with the "RAPHAEL" kit. Experience the countless mixtures and design the perfect artwork! The "RAPHAEL" KIT includes: TRANSPARENT RESIN FOR ARTWORK AND DIY 1.66 KG [3,65 LB] NEON PIGMENTS SET RECTANGULAR FRAME CANVAS 30*30cm WOODEN SPATULA * 5pcs NITRILE GLOVES INSTRUCTION "TIPS HOW TO WORK WITH EPOXY" Transparent resin for artwork and DIY 1.66 KG [3,65 LB]. Transparent self-levelling UV-resistant epoxy system, which creates a hard and glossy protective layer for casting up to 1 cm [0,39”]. ART PRO, the epoxy resin for the artistic sector: thanks to its special formula and its dense structure, it allows you to create paintings with the "pour paint" and liquid paint technique. It does not leak out from the working surface, slowly reaching the corners of the frame. ART PRO preserves your original design and prevents any possible modification due to the casting of the resin: because of its special formula, the layers of colours do not expand and do not mix (unless you deliberately intervene), faithfully keeping with your creative idea! The surface is perfectly smooth and moisture-resistant. Solvent-free and odourless epoxy resin. Applications: - artworks, creation of art objects (paintings, panels, etc.) with the "fluid-art" (pour paint) technique (pouring up to 1 cm [0,39”]); - coating of surfaces, objects and furniture to add depth and brilliance to the colour; - create a 3D effect on prints, photos and images in general; - fixation of fillers (decorative elements, glass, stone, quartz, etc.) - creation of a perfectly transparent protective layer on your projects. The "ART-PRO" formula is specifically developed for coating in artistic applications. Compatible with colouring agents, powder pigments, alcohol-based and oil-based dyes, aerosol paints. Warning: the product is moisture sensitive, do not use on wet surfaces or with water-based dyes (e.g. Acrylics) Technical data: Usage ratio 100:66 (in weight) Pot Life (150 gr at 30°C) [0,33 lb at 86 F]: 1h20 ', Film (1 mm at 30°C) [0,03” at 86 F]: 6:00'. Full catalysis after 24 hours. Neon Pigments Set. PIGMENTS WITH COLOURED BASE are perfect for decoupage, decoration and anything related to DIY. By simply adding them to resins, paints or varnishes, you can express your creativity with truly brilliant shades (neon effect!). WARNING: pigments do not glow in the dark, as they are not fluorescent.
$69,95
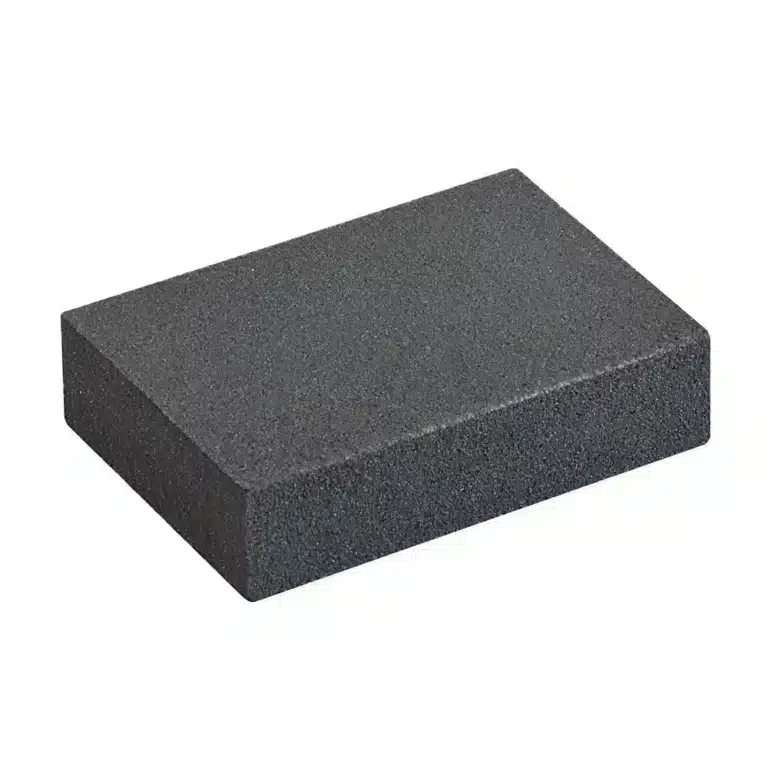
Can be used wet or dry for sanding almost any type of material, flat or contoured. 70 x 100 x 25mm. Bonded silicone carbide Bonded silicone carbide Use wet or dry For flat or contoured surfaces How to Use a Foam Sanding Block with Epoxy Resins Allow the Epoxy to Cure: Ensure that the epoxy resin has fully cured and hardened before sanding. This will prevent the resin from smearing or becoming uneven. Begin Sanding: Gently rub the foam sanding block over the epoxy surface in a back-and-forth or circular motion. Apply light, even pressure to avoid creating new scratches or uneven areas. Check Your Progress: Periodically wipe the surface with a clean, dry cloth to remove sanding dust and check the smoothness. This will help you gauge how much more sanding is needed. Clean the Surface: After achieving a smooth finish, clean the epoxy surface thoroughly to remove any remaining dust. This can be done with a damp cloth followed by a dry cloth to ensure no moisture remains. Inspect and Finish: Once the surface is clean and dry, inspect it to ensure it's free of imperfections. If needed, you can apply a new coat of resin or polish the surface for a glossy finish.
$2,51
 Free shipping on orders over €199,00