Molds for resin, chocolate, plaster and soap. It is very easy to use,very shiny and perfect to create beautiful jewelry or for decorations. Type of manual technique: jewelry making, cabochon, ice or chocolate Material: Silicone Silicone mold for craft use. Adato for reproductions of objects made of soap, plaster, resin, ice, ceramics, clay, wax and other casting materials suitable for DIY . DIY chocolates for sweet occasions. Many small chocolates in The Shape of cabochons to give or to offer to your guests. Ideal for decorating and completing your sweet corner. With the same you can also prepare ice cubes for a long drink, for jellies etc. Material-silicone Dishwasher safe Product-professional Attention! Remove the product from the mold no later than 12 hours after pouring the resin. Otherwise, there is a chance of local adhesion of the resin to the mold. Measurements of the object reproduced by the mold: D. 40MM SHORE HARDNESS OF THE MOLD: 20 Note: make sure the thicknesses are suitable for the purpose and material of use Copyright © Resin Pro Srl. The reproduction (total or partial) of the work by any means made and its making available to third parties, either free of charge or for a fee is prohibited.
$11,22
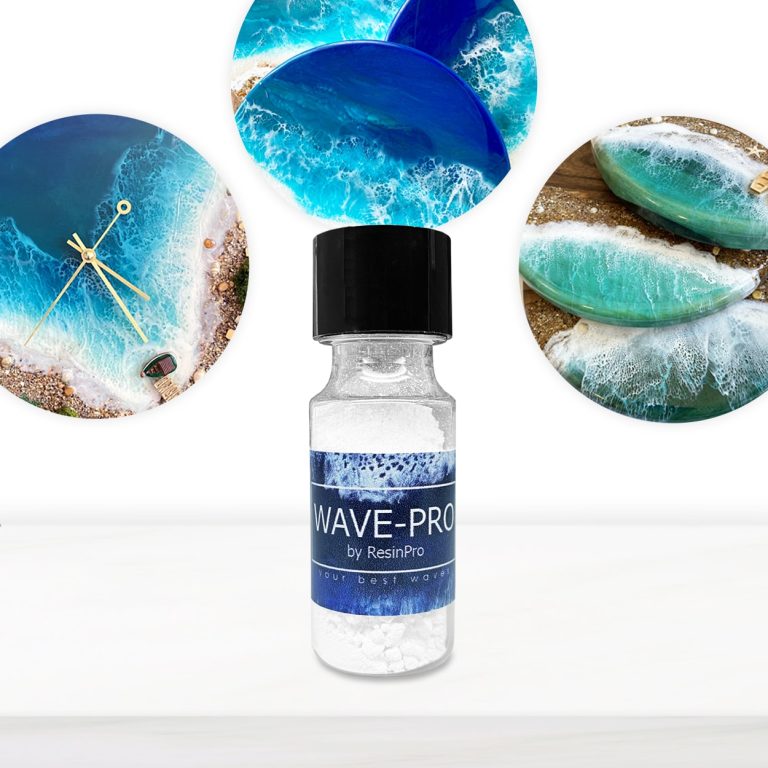
Create your personalized Sea Wave Effect! WAVE-PRO is a non-toxic powder that reacts with wet epoxy resins by repelling itself away, thereby stimulating movement in concentric outward circles and waves. Creates cells and waves in resin art Safe & user-friendly Odourless Non-toxic & non-flammable Zero-VOC formula with no harsh chemical ingredients, solvents or alcohol-based ink WAVE-PRO can be used along with our range of colours or metallic pigments. Please Note that WAVE-PRO was developed and tested with our proprietary artwork resins. Ideal for Ocean Resin Art How to use: How to work with Wave Pro - the ideal tool to create the natural sea waves effect! These instructions imply the presence of a "sea" background made of epoxy resin on your board / canvas (it can be done as acrylic paints, and just filled it with transparent resin on top, or you can make it entirely from coloured resin). The hardened "sea" background made of epoxy resin makes it possible to remove non-produced waves in case of failure. We mix the epoxy resin in the proportions indicated in the instructions (the volume depends on the scale of the work). In a cup, mix the resin and Wave Pro additive using the ratio: 3-4 teaspoons of resin and 1/2 teaspoon of Wave Pro). It is important to mix thoroughly and quickly so that the powder dissolves and turns from a pale white to a rich white. Let the mixture rest for 50-70 minutes, occasionally stirring it in a cup. Your main goal is to get a very thick mixture after the indicated time, since this is the perfect consistency for it to be blown with a blow dryer. Mix the newly obtained resin, and use it to make a transparent layer on top of your "sea" background (the key point is that without a liquid transparent layer, the wave effect will not work!). Pour a thin stream of white thick mixture onto this transparent epoxy layer and, holding the blow dryer at a 30 ° angle, blow the wave. Linger only at the beginning of the process, because the resin is thick, and the blow dryer needs to "soften" it, but as you see that the wave has gone, then immediately move along the entire wavelength without stopping. Go through the burner and wait for the resin to completely cure. Once cured, you will have your real sea :) We recommend to use the product with our TRANSPARENT EPOXY RESIN (low viscosity) https://resin-pro.co.uk/product/transparent-epoxy-resin-320-gr/ https://www.instagram.com/p/B0twAR1gDaE/?igshid=nvej64p9oa69
$4,84
Reliability: ARTSOAP, a renowned Italian brand, it is known for its quality and dedication to safety. Our moulds are manufactured in compliance with all European safety standards, to guarantee you a safe experience. Lunga Long life: ARTSOAP soap moulds are designed to last, thanks to their robust design and high quality material. You will be able to reuse the same mould many times, without losing the precision of the shape or the quality of your soaps💫 Not just for soaps! Despite being their primary destination, ARTSOAP moulds lend themselves to a number of other creative uses. In addition to the production of soaps, you can use them to create candles, chalks and resins. Your imagination is the only limit! Regain your inner balance with the Stampo Size:4.5x5cm Important: The price on the website is presented for one mold.
$6,95

💥 BESTSELLER FOR: -Wood-working: Coating, Countertops and Tables, Works of art; -Restoration or surface coating: Wood, Concrete, Ceramics, Canvas, Glass fiber); -DIY: Jewellery making, and Dynamic modelling. 💥About “iCrystal ” – Transparent Epoxy Resin: Our iCrystal Transparent Epoxy Resin is a premium quality, multipurpose resin that is a popular choice for customers looking to create stunning art pieces, jewellery, countertops, and DIY projects. The new formula is specifically designed to provide maximum transparency, allowing you to create unique and beautiful pieces that will last for a long time. It is easy to use and can be mixed with a variety of pigments to create an endless range of works. iCrystal Transparent Epoxy Resin is safe and non-toxic, making it a great option for artists who are environmentally conscious. It is odourless, VOC-free, making it comfortable to use indoors. Although our epoxy resin is safe to use, we recommend taking proper safety precautions when working with any type of resin. It is important to wear gloves and masks and work in a well-ventilated area to avoid any potential irritation or allergic reactions. This Epoxy Resin is self-levelling and has a high-gloss finish, providing a smooth and professional look to your creations. It is also extremely durable, providing a super solid and shiny surface after full curing time. iCrystal epoxy resin can be used on a variety of surfaces, including wood, stone, ceramics, and more. It is perfect for creating unique and stunning pieces that are sure to impress. We offer free shipping on this product, so you can start your project right away. Plus, with its long shelf life, you can store it for future projects. Choose iCrystal Transparent Epoxy Resin for a safe, high-quality, and versatile option for all your creative needs. 💥Key features: ⚙️ 【CRYSTAL CLEAR EPOXY RESIN】-The clear epoxy resin is suitable for both beginners and professionals. Start making jewellery, paintings, and any professional creation that involves the use of resin. 🧪 【HIGH QUALITY】 -Crystal clear, No bubbles, Odourless - because of unique formula for DIY, craft and artistic creations. Ideal for casting and embedding objects too. Compatible with silicone, wood, fabric, glass, paper or photographs. Fast completed curing time - 24 h, Demould time is only 10 hours. 💧 【EASY TO USE】-The 100:50 mixing ratio makes this product very easy to use. Being a two-component resin, simply mix RESIN A + HARDENER B in the ratio indicated above the package and let it harden without the need for further additives. Can be coloured as desired. 🌿 【SAFE AND CERTIFIED】 -All our resins are Certified Non-Toxic, Solvent-free, non-flammable, and totally safe. 📞 【FREE PROFESSIONAL ASSISTANCE SERVICE】-Since we are directly a manufacturer, we have access to a professional laboratory that will happily help you with any complex project. 🇬🇧 【UK BASED TRUSTED COMPANY】-RESIN-PRO team fulfils your order as fast as possible. We produce and realise epoxy resins since 2015. Just check our social media, where you will find thousands of projects made with our products around the world. 💥Suitable for: -Model making; -DIY and wood-working; -Coatings of furniture and surfaces; -Artistic creations (paintings, liquid art, petri dish); -Jewellery and fashion; -Glass Fiber Repair; -Outdoor Protective Coatings; -Boat construction; -Impregnation of technical fabrics (glass fiber, carbon fiber, etc); Check and tag our social media for inspiration! We are always happy to publish your art-work –
$10,67
Crafting for Special Occasions
Crafting for special occasions involves using epoxy resins and silicone to create personalized and decorative products. These materials enable the production of unique items like jewelry, frames, keychains, or decorations for special events. Transparent resins allow for the inclusion of dried flowers, glitter, or small objects inside the item, while silicones are perfect for making molds to replicate different shapes. This type of do-it-yourself (DIY) activity provides the opportunity to customize gifts or decorations for birthdays, anniversaries, weddings, or other special events in a unique and original way.
Custom Jewelry Making
Custom jewelry making is a craft that allows for the creation of unique, tailor-made pieces. It begins with selecting materials such as precious metals like gold and silver, gemstones, pearls, and other decorative elements. Through techniques like casting, handcrafting, and setting, the jeweler brings the desired design to life. This customization results in unique jewelry pieces that reflect the client's style and personality, making them exclusive and valuable items.
Crafting Unique Furniture Pieces
Crafting unique furniture pieces involves using innovative materials and creative techniques. Epoxy resins and silicone are commonly used to craft personalized and original items, allowing for the creation of unique shapes and colors suitable for any interior design style. Epoxy resin coatings offer durability and long-lasting qualities, making them ideal for furniture and home accessories. Through DIY projects, one can experiment with different combinations and designs, creating objects that stand out for their originality and beauty.
Making Special DIY Gifts
Crafting special DIY gifts is a personal and unique way to surprise loved ones. By utilizing materials like epoxy resins and silicone, one can create jewelry, keychains, frames, and more. Transparent resins enable the embedding of objects inside, resulting in personalized and one-of-a-kind pieces. Silicones are excellent for creating flexible and detailed molds. With creativity and craftsmanship, one can make unique and meaningful gifts that will be cherished by the recipients. Customize your DIY gifts to make every occasion special and memorable.
Designing Unique Event Decorations
Unique event decorations can be crafted using high-quality epoxy resins and silicones. These versatile materials allow for the creation of custom decorative elements such as centerpieces, candle holders, vases, and more. Epoxy resins offer transparency and durability, while silicones provide flexibility for intricate molds. With a blend of creativity and craftsmanship, personalized and original decorations can be made for weddings, birthdays, or corporate parties. Experiment with colors, shapes, and textures to create one-of-a-kind decorations that will elevate your event and make it truly special.
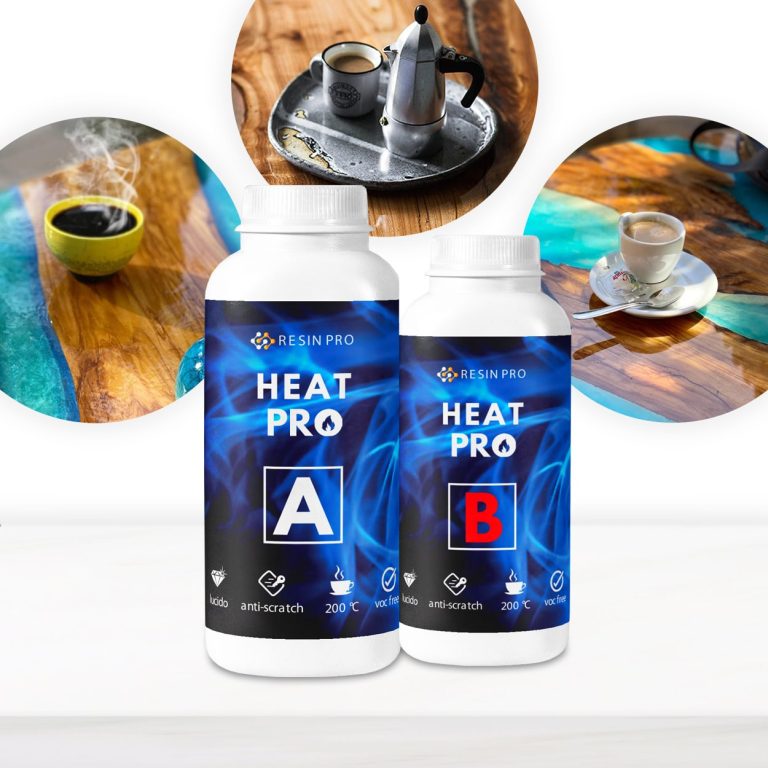
💥 BESTSELLER FOR COVERING: – Trays & Coasters; – Dooming and artistic applications on fabrics; – Other surfaces that need heat and scratch protection. 💥About “HEAT PRO” – Heat-resistant Anti-scratch Glossy Coating: HEAT PRO is a transparent, two-component polyurethane resin, ideal for protecting your projects. Its special elastic formulation allows it to absorb shocks and scratches, always remaining mirror-polished! It also resists up to 200°C and is ideal for surfaces that will come into contact with pots or other material at high temperature. It`s perfect to be applied as a final layer (1-3mm) and allows to cover surfaces. Catalysis at room temperature in a few hours and in 24h is completely ready for any use. The full curing time is 72h. 💥Key features: ⚙️ ULTRA TRANSPARENT PROTECTIVE COATING: -Heat Pro is ideal for creating a protective coating that withstands scratches temperatures up to 175°C (2 hours) and 200 C (15 minutes), keeping your creations in perfect condition. 🧪PROFESSIONAL QUALITY: -Made from high quality materials – Excellent transparency, No bubbles, Odourless, Self-leveling glossy surface 🌿 SAFE AND CERTIFIED: -All our resins are Certified Non-Toxic, Solvent-free, non-flammable, and totally safe. 💧 EASY TO USE: -The 100:75 mixing ratio makes this product very easy to use. Simply mix components RESIN A + HARDENER B in the ratio indicated above the package and let it harden without the need for further additives. 📞 FREE PROFESSIONAL ASSISTANCE SERVICE: -Since we are directly a manufacturer, we have access to a professional laboratory that will happily help you with any complex project. 🇬🇧 UK BASED TRUSTED COMPANY: -RESIN-PRO team collects and sends your order as fast as possible. We produce and realise epoxy resins since 2015. Just google our social media, where you will find thousands of projects made with our products around the world. Please pay attention to these product features before using it! Apply only on perfectly dry surfaces without traces of moisture. Not compatible with acrylic or liquid dyes: we strongly don`t recommend use this product with acrylic art-works! The product should be applied only on a transparent resin surfaces (without dyes). If you need to apply it on coloured resin or other materials (wood, concrete and stone and etc), create at least one 1mm layer of clear resin beforehand. Wait 24-48h and apply Heat Pro. It is very important to have the correct room temperature, above 20°C for all processing steps. Heat Pro must have a temperature above 20°C, so if you are not sure if the temperature is right, warm the cans slightly by keeping them in a warm place for at least a couple of hours. The product is ideal for application on small surfaces, not exceeding 0.25 square metres. Use a heat source carefully to eliminate bubbles: be careful to pass the torch or hairdryer only briefly (max. 2 seconds) over each area to avoid damage to the finish. The hardened Heat Pro coating will have a softer texture than classical resins: this specific texture will guarantee maximum performance! For the same reason, the coating cannot be sanded and polished. The hardened Heat Pro coating becomes resistant to hot objects and scratches only 72-96 hours after application! You can store objects covered with Heat Pro in a “stack” only through paper or cloth. In no case should such products be stacked on top of each other without this protection - the coating may stick to another object tightly!
$21,49
Intense and brilliant color, ideal for Transparent Epoxy Resins. Mix small quantities to get a translucent effect. The high coverage of the “Colorful Original” range allows to obtain a full and bright color. The high concentration provides an opaque color with a few drops.
Usable to color the products of the RESIN PRO range.
💥 Ideal for epoxy creations and resin tables thanks to its features:
✔️ Intense colors
✔️ Easy to mix
✔️ Intense colors
✔️ High concentration
✔️ Easy to get a translucent effect
✔️ 5 stars on Trustpilot
🌿Cruelty Free, Vegan Friendly🐹
$16,00
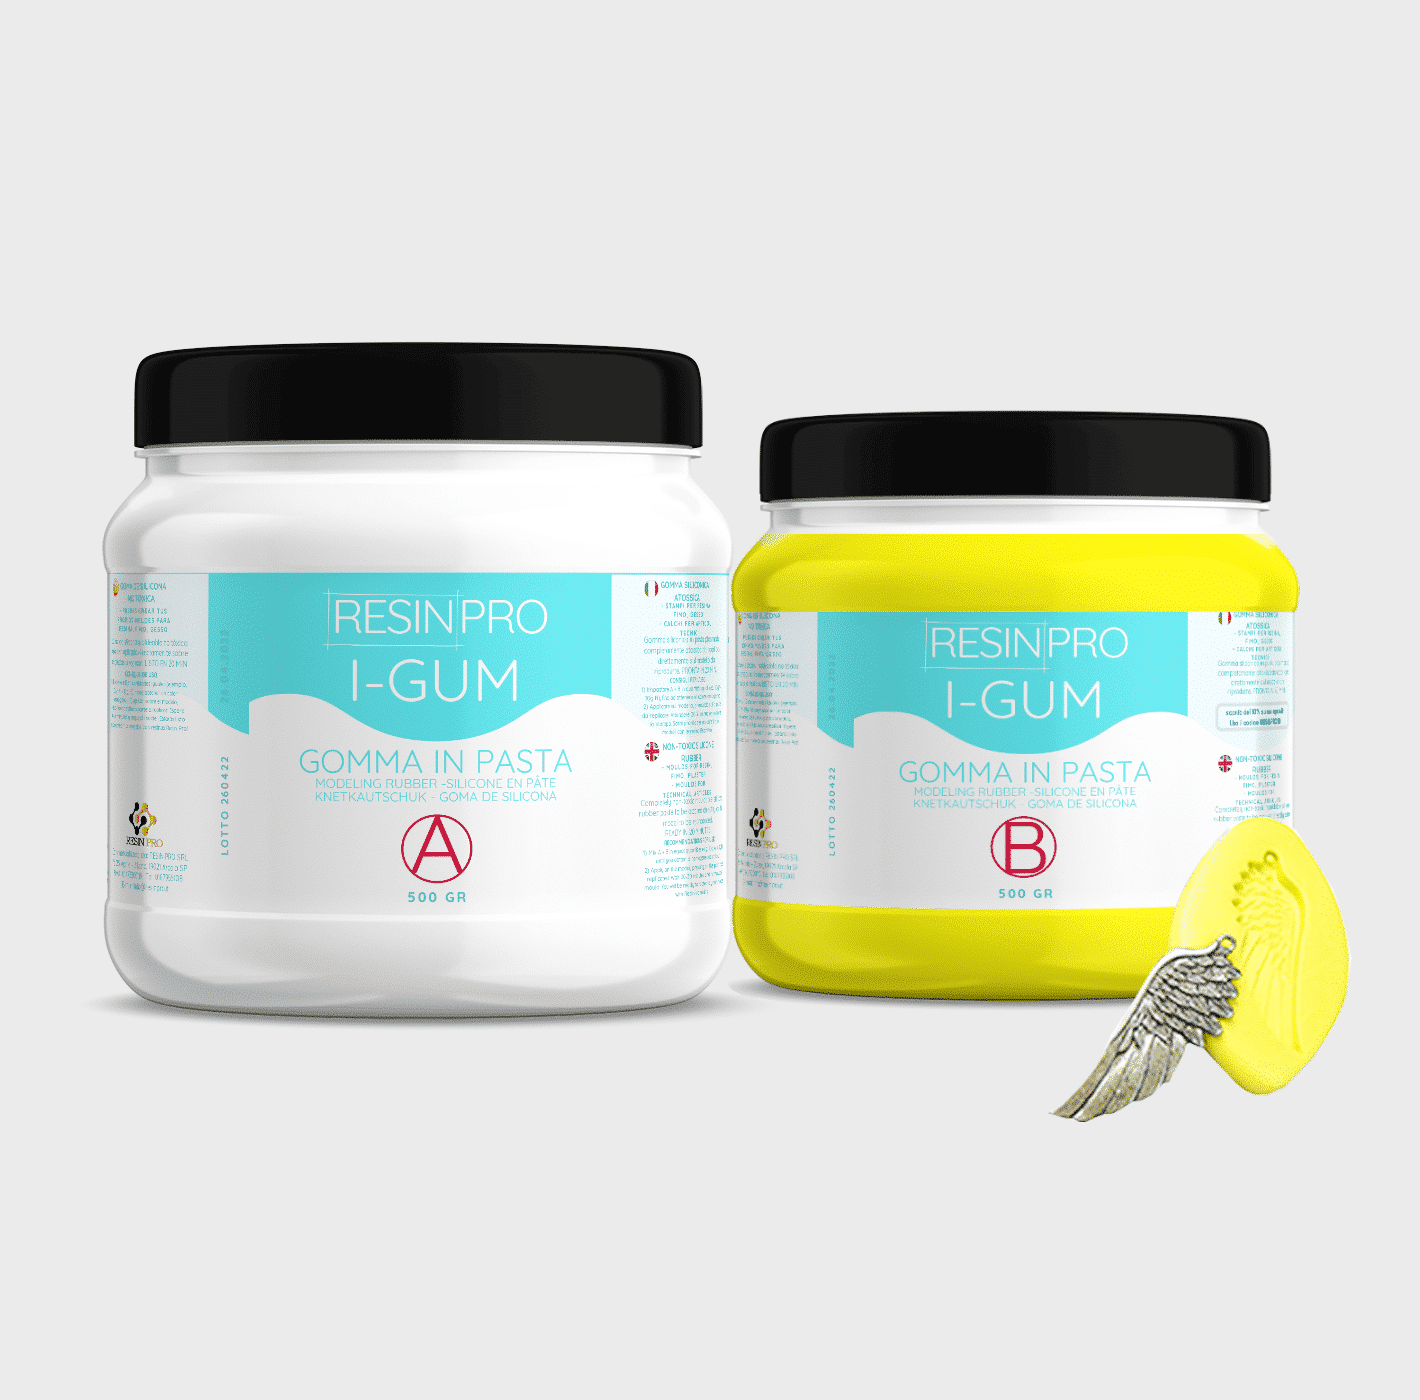
• "I-GUM" - Non-Toxic Silicone Rubber - Paste Form
Pasty silicone rubber "I-GUM" is a two–component product for creating moulds and forms for pouring with epoxy resin.
• Superior formula proven by years of experience:
✔️ Easy to use -> 1:1 mix ratio
✔️ Non-toxic -> You can work without gloves
✔️ Without smell
✔️ Long working time -> 20 minutes
✔️ European quality -> Directly from Italy
✔️ Ideal for creating moulds and frames for working with resin, polyurethanes, wax, cement and other materials
✔️ 🌿Cruelty Free, Vegan Friendly🐹
$22,00

Images
On sale
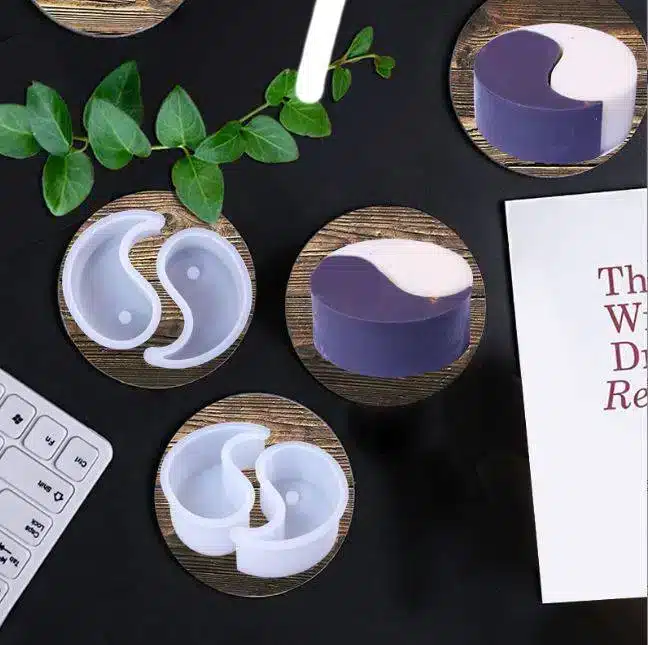
“Pure Mold” – Translucent Liquid Silicone Rubber for Mould Making, 1:1 Mix Ratio
Available, ready for shipping
Order now to receive your product between Wednesday, April 29 and Wednesday, May 6.
Shipping $16
Choose your kit:
Quantity
"Pure Mold" - Translucent Liquid Silicone Rubber for Mould Making, 1:1 Mix Ratio quantity
The kit: 1 KG (500 GR of A + 500 GR of B)
$52,95 Original price was: $52,95.$44,95Current price is: $44,95.-15%
💰 You save
$8.00
TRANSLUCENT AND FAST CASTING LIQUID SILICONE RUBBER FOR MOULDS
🧪【INNOVATIVE FORMULA】Create your moulds using PURE MOLD silicone rubber! Compatible with many materials including resins, plaster and cement. Its transparency will allow you to observe through the mould and its high mechanical characteristics make it a product suitable for both professional and hobby use.
💎【IMPECCABLE QUALITY】Guarantees the creation of resistant and detailed moulds that will last over time and will be reusable several times!
🌿【SAFE AND CERTIFIED】 100% Made in Italy, guaranteed by a Certificate of Non-toxicity and solvent-free and odorless, this rubber is configured as a safe and easy to use product!
⚙️【EASY TO USE】 Mixing ratio 1: 1; Hardness: 13 Shore; Catalysis in about 6-8 hours. The poly additive formula makes it more resistant than other silicones, allowing the creation of higher quality molds.
+ Easy mixing ratio 1:1
+ Less mould shrinkage over time
+ 30% longer service life
+ Fast (6-8H)
+ Translucent
+ Resistant
Good for:
epoxy resins,
polyester,
polyurethanes and acrylics,
cements and plasters.+ Liquid
🌿Cruelty Free, Vegan Friendly🐹
$44,00
 Free shipping on orders over €199,00