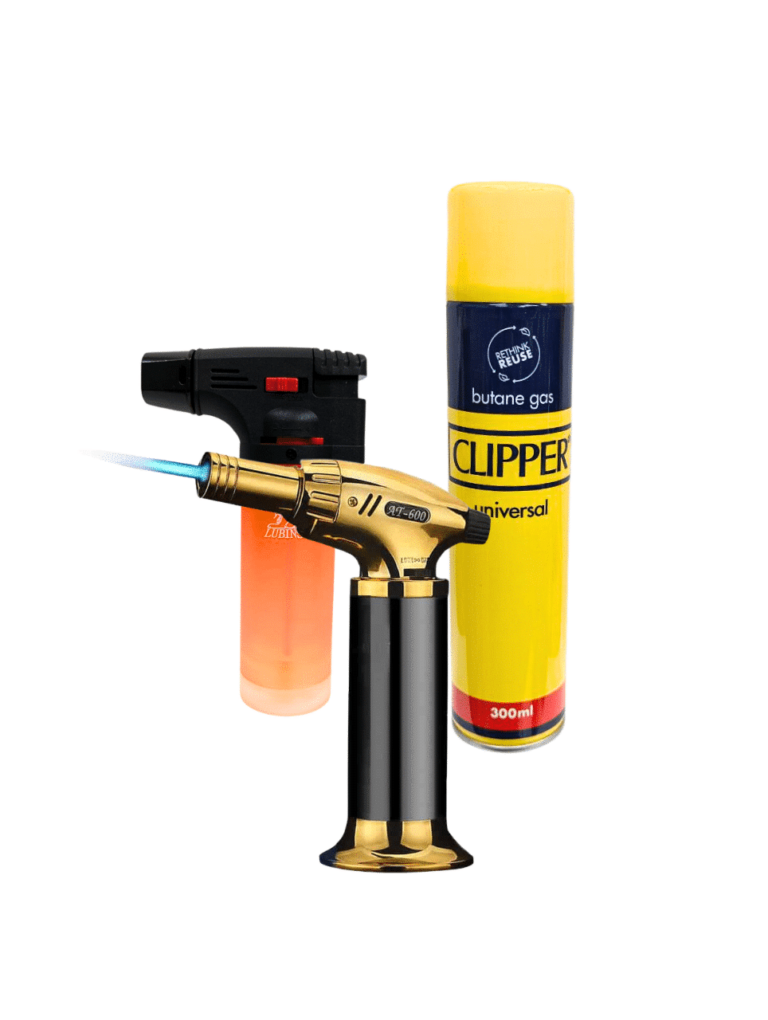
Manual gas heat gun with adjustable flame and safety lock. An excellent tool to neutralize the bubbles which form during the pouring of resin. WARNING! Avoid keeping the flame too close to the resin and do not direct it always on the same spot (move the gun over the entire surface). If the resin excessively overheats, a film may form on the surface. The gun must be loaded manually with the gas included in the kit. How to use: Remove the cap from the container, and insert it into the hole below the gun. Press and hold down for about 20-30 sec to fill the gun. During this process, it is normal for part of the gas to escape.
$5,95
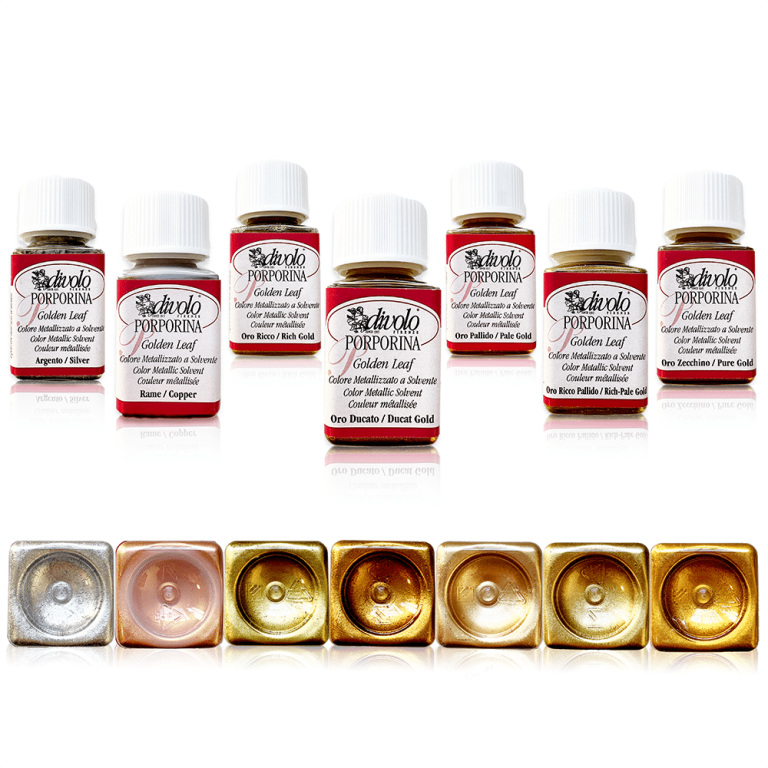
Golden Leaf is a particular paint based on metallic purples, dispersed in a solution of petroleum resin and white spirit. Once spread, the product forms a highly effective metallized film. The product can be used for finishes in the field of decoration and hobby, it is resistant and very stable when used on substrates intended for internal use. To apply this paint, just put the desired amount on a brush with which you will slowly massage the work surface. Drying time: 24 h The Golden Leaf series is available in 7 shades of different colors: Oro Ricco, Oro Pallido, Oro Ricco Pallido, Oro Zecchino, Oro Ducato, Rame, Silver.
$10,23

About Wood Wax & Polish: Wood Wax & Polish is ideal for treating finished or unfinished wood. It is specifically designed to help preserve and prevent the wood from drying out and fading. With added conditioning oils, it actively feeds your wood while enhancing the natural beauty and depth of the grain. The Wood Wax contains natural beeswax and carnauba wax that offer a superior protective coating, and the formula is infused with orange oil for a pleasant aromatic finish. Wood Wax & Polish can be used on all wood surfaces, including finished and unfinished wood and is suitable for use on antiques and modern items alike. Designed to bring life back to old, faded and tired wooden surfaces, it should be used whenever the wood begins to look dry and faded, or at least once every six months. It is cream like in consistency and so is very easy to apply, we recommend the Wax & Polish for everyday polishing (for items you'd do monthly), and for items that are unfinished (i.e. are not treated with an oil, varnish or paint). Thats because it can soak into the wood, providing nourishment and accentuating the grain. The Beeswax Polish would be used for surfaces that you want to polish to a high shine, or for treating wood that is already finished. 💥Key features: • ⚙️ 【DRYING TIME】-20 minutes. • 🧪 【COVERAGE】-20m2 per litre. • 🌿【COATS】 -One coat. Two coats to bare wood. • 💧 【RE-COAT TIME】 -Once previous has dried • 👍【MAINTENANCE】 -When showing signs of 'drying'. • ✨【APPLICATION】 -Apply with a Lint Free Cloth. Wood Wax & Polish is Suitable For Wax & Polish can be used on all types of wood (oak, beech, maple etc) and on wood used in any environment. Interior Wood Hardwoods and Softwoods Kitchen Worktops & Utensils Furniture Doors and Windows Hardwood Floors Toys Turned Wood Untreated timber and bare wood Wood Wax & Polish Coverage and Shelf Life Coverage: 40m2 per litre Store in a cool dry place, away from direct sunlight. Store between 10°C and 25°C. Once opened, use within three years. [xyz-ips snippet="TRUSTPILOT-WIDGET"]
$16,49
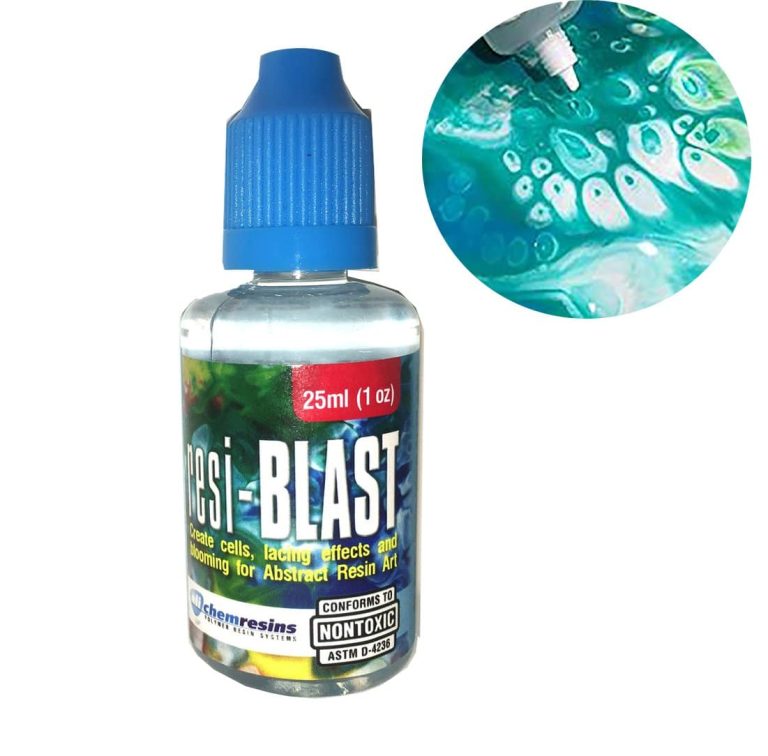
RESI-Blast 25 ml [0,85 oz] to create cell effects and decoration. One-component liquid to be added in drops over the resin when still liquid and coloured in layers to get an incredible effect! RESI-Blast is non-toxic and solvent-free. The product creates a surface dispersion of the resin, resulting in beautiful automatically generated cell structures (check the pictures!) This liquid reacts with epoxy resin, polyester and polyurethane (still liquid), and polymer resins stimulating movement and "blooming " in concentric outward circles. Add RESI-blast directly into the pigmented resin before pouring it over the surface or let it drip off over the surface immediately after the layering the pigmented resin. Innovative materials in the service of your imagination! Resin, Rubbers, Pigments, FIMO and much more in your home with a simple click!
$29,49
To convert rust into a stable surface, follow these steps
- Remove the rust using wire brushes or sandpaper.
- Apply a rust converter containing epoxy resins or tannins.
- Wait for the recommended reaction time specified by the manufacturer.
- Ensure the surface is completely dry.
- Apply a rust-resistant primer with epoxy resin base.
- Cover it with a protective coating made of silicone or resins for long-term stability and durability.
By meticulously adhering to these steps, you can transform rust into a stable surface shielded from future deterioration.
Epoxy Resin
Epoxy resin is a thermosetting material extensively utilized for crafting protective coatings and durable, smooth surfaces. Comprising epoxy resin and hardener, this chemical blend triggers an exothermic reaction that bestows the resin with distinctive qualities. Epoxy resins are prized for their resistance to corrosion, chemical agents, and heat, along with their ability to bond with various materials. Widely popular in DIY and construction sectors, epoxy resins find applications in floorings, coatings, repairs, and artistic projects. They are available in various formulations to cater to diverse application requirements.
Protecting Metal from Rust with Epoxy Resin
Shielding metal from rust with epoxy resin is an effective method to safeguard metallic materials from oxidation. Here's how to proceed:
- 1. Surface Preparation: Thoroughly clean and degrease the metal to ensure epoxy resin adhesion.
- 2. Resin Application: Apply a thin, uniform epoxy resin layer on the metal surface, ensuring complete coverage for protection.
- 3. Drying: Allow the resin to dry completely for the manufacturer-specified time to harden and create a rust-resistant barrier.
- 4. Optional Second Layer: Apply a second coat of epoxy resin if needed for enhanced protection.
By diligently following these steps, you can effectively shield metal from rust using epoxy resin.
Techniques to Convert Rust into a Stable Surface
Various effective techniques exist in the DIY and restoration sector to convert rust into a stable surface. Here are common methods used for this purpose:
Use rust converters containing acids or tannins.
Apply anti-rust primers to halt the corrosive process.
Treat with epoxy resin-based products to establish a protective barrier.
Apply protective coatings like epoxy resins or silicone to prevent future rust formation.
By employing these techniques, it is possible to convert rust into a stable surface and safeguard the material effectively against corrosion.
Tutorial on Using Epoxy Resin Against Corrosion
Epoxy resin serves as an outstanding anti-rust coating to protect metal surfaces from corrosion. Here's how to effectively utilize it:
- 1. Preparation: Thoroughly clean and dry the metal surface.
- 2. Mixing: Follow the manufacturer's instructions to properly mix the epoxy resin and hardener.
- 3. Application: Apply the mixture evenly on the surface using a brush or roller.
- 4. Drying: Allow it to dry completely following the recommended curing times.
- 5. Finishing: Apply a second coat if necessary for added protection.
- 6. Inspection: Regularly check the coating's condition and reapply as needed.
By adhering to these steps, epoxy resin can be a potent solution against the corrosion of metal surfaces.
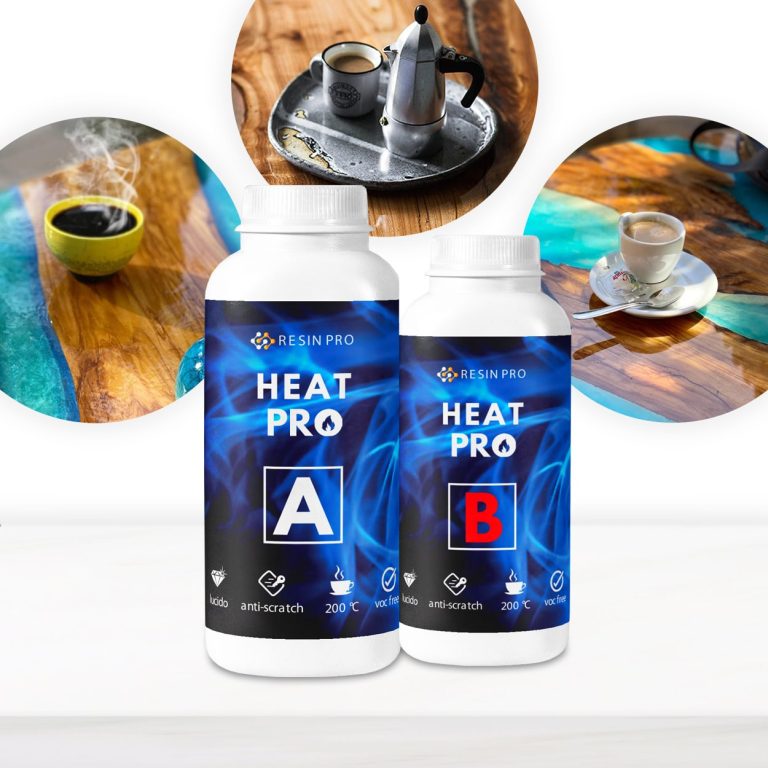
💥 BESTSELLER FOR COVERING: – Trays & Coasters; – Dooming and artistic applications on fabrics; – Other surfaces that need heat and scratch protection. 💥About “HEAT PRO” – Heat-resistant Anti-scratch Glossy Coating: HEAT PRO is a transparent, two-component polyurethane resin, ideal for protecting your projects. Its special elastic formulation allows it to absorb shocks and scratches, always remaining mirror-polished! It also resists up to 200°C and is ideal for surfaces that will come into contact with pots or other material at high temperature. It`s perfect to be applied as a final layer (1-3mm) and allows to cover surfaces. Catalysis at room temperature in a few hours and in 24h is completely ready for any use. The full curing time is 72h. 💥Key features: ⚙️ ULTRA TRANSPARENT PROTECTIVE COATING: -Heat Pro is ideal for creating a protective coating that withstands scratches temperatures up to 175°C (2 hours) and 200 C (15 minutes), keeping your creations in perfect condition. 🧪PROFESSIONAL QUALITY: -Made from high quality materials – Excellent transparency, No bubbles, Odourless, Self-leveling glossy surface 🌿 SAFE AND CERTIFIED: -All our resins are Certified Non-Toxic, Solvent-free, non-flammable, and totally safe. 💧 EASY TO USE: -The 100:75 mixing ratio makes this product very easy to use. Simply mix components RESIN A + HARDENER B in the ratio indicated above the package and let it harden without the need for further additives. 📞 FREE PROFESSIONAL ASSISTANCE SERVICE: -Since we are directly a manufacturer, we have access to a professional laboratory that will happily help you with any complex project. 🇬🇧 UK BASED TRUSTED COMPANY: -RESIN-PRO team collects and sends your order as fast as possible. We produce and realise epoxy resins since 2015. Just google our social media, where you will find thousands of projects made with our products around the world. Please pay attention to these product features before using it! Apply only on perfectly dry surfaces without traces of moisture. Not compatible with acrylic or liquid dyes: we strongly don`t recommend use this product with acrylic art-works! The product should be applied only on a transparent resin surfaces (without dyes). If you need to apply it on coloured resin or other materials (wood, concrete and stone and etc), create at least one 1mm layer of clear resin beforehand. Wait 24-48h and apply Heat Pro. It is very important to have the correct room temperature, above 20°C for all processing steps. Heat Pro must have a temperature above 20°C, so if you are not sure if the temperature is right, warm the cans slightly by keeping them in a warm place for at least a couple of hours. The product is ideal for application on small surfaces, not exceeding 0.25 square metres. Use a heat source carefully to eliminate bubbles: be careful to pass the torch or hairdryer only briefly (max. 2 seconds) over each area to avoid damage to the finish. The hardened Heat Pro coating will have a softer texture than classical resins: this specific texture will guarantee maximum performance! For the same reason, the coating cannot be sanded and polished. The hardened Heat Pro coating becomes resistant to hot objects and scratches only 72-96 hours after application! You can store objects covered with Heat Pro in a “stack” only through paper or cloth. In no case should such products be stacked on top of each other without this protection - the coating may stick to another object tightly!
$21,49
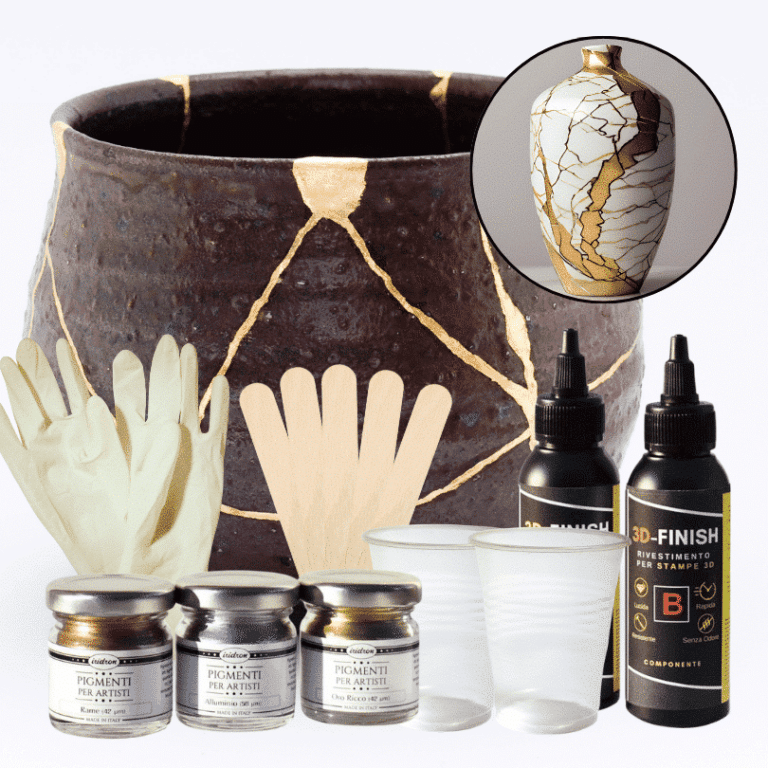
Kintsugi Repair Kit - Repair and Transform Your Ceramics with Elegance Celebrate imperfection with the ancient Japanese art Discover the traditional Japanese art of Kintsugi with our complete repair kit. Transform your broken ceramics into unique and fascinating works of art, highlighting imperfections with elegant gold, silver, or copper veins. Our kit is perfect for both beginners and experts, offering detailed instructions and everything you need to give new life and value to your most cherished items. 🌟 Specific epoxy resin (150g): slow catalysis to eliminate any bubbles or imperfections, allowing you to complete the work without rushing. 🎨 Dye of your choice (gold, copper, silver): customize your repair with a touch of elegance and refinement. ✨ Respect the tradition: follow the ancient art of Kintsugi and transform your ceramics into unique and precious treasures. The kit contains: 150g of resin for 3D decorations, 2 pairs of protective gloves, 2 mixing cups, and 5 spatulas for applying the resin, detailed instructions, everything you need in one kit. Give your ceramics a unique touch: repair them with style and make them even more beautiful. Buy the Kintsugi Repair Kit now and start creating your works of art today! Kintsugi Kit Instructions: Mix Resin: Measure 100A:50B by volume (or 100A:45B by weight) using a scale. Mix for 2 minutes, ensuring all surfaces are scraped. Add Colour: Mix your chosen metallic dye (gold, silver, or copper) into the resin to highlight the cracks. Prepare Surface: Ensure surfaces are clean, dry, and sanded. Apply Resin: Fill the cracks with the colored resin. Curing: Work in a temperature-controlled area, avoiding humidity. Safety: Wear protective gear.
$22,95
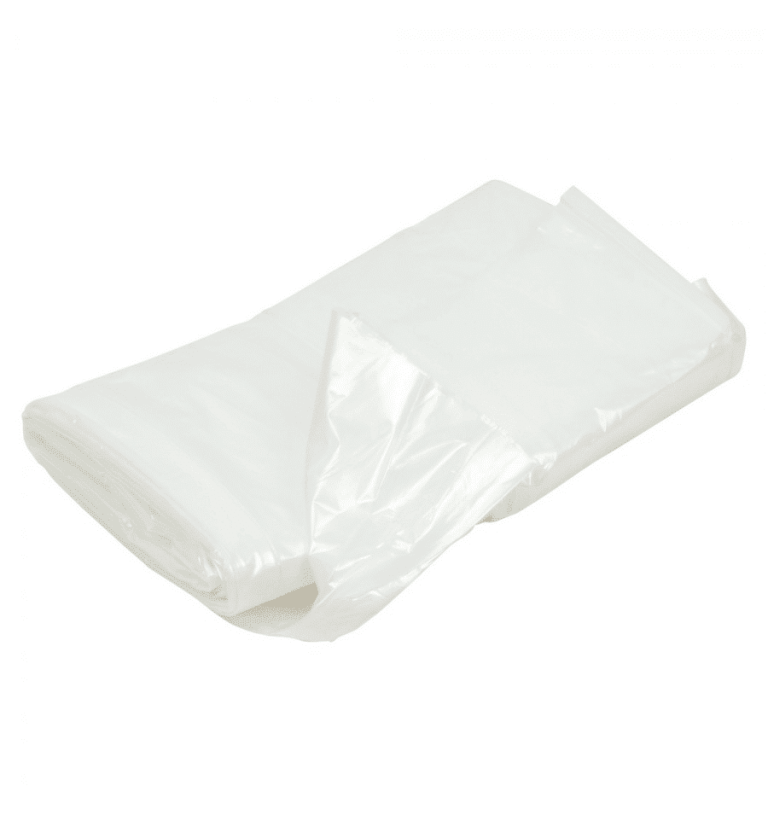
The 4X4 sheet is most commonly used to protect worktops and floors when working with Epoxy Resin! These very light but resistant sheets can be applied both on work tables (where artistic castings are made) and on floors when casting large size and in addition can be reused!
$4,07
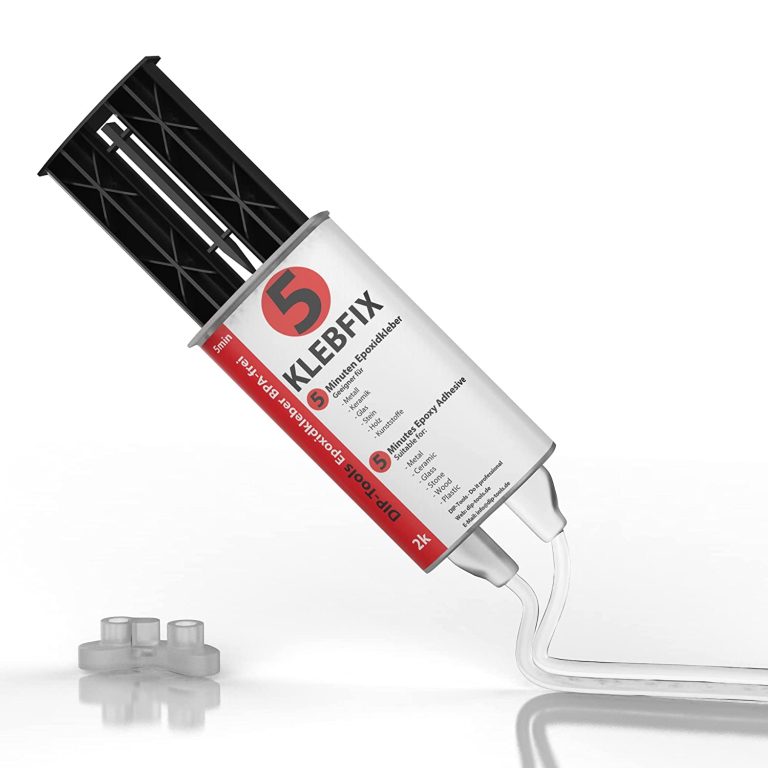
Advantages of Two-component Epoxy Resin Adhesive Extreme strength and resistance to thermal and mechanical influences Resistant to most aggressive substances and oils Available solvent free and BPA free It hardens even under water Compatible with a wide range of additives such as dyes and accelerators Expedited Potlife Application – BestPractice At room temperature (15-30 C The mixing ratio of the two components of 1: 1 is maintained automatically. Do not apply below 5 C outdoor temperature. The higher the ambient temperature, the more effectively the material polymerizes. This means that resistance increases at higher temperatures. It is recommended to have a cloth ready for cleaning. In addition, care must be taken that the work surface is protected and can be cleaned directly if necessary. The surface should be slightly roughened, because only then is the epoxy adhesive guaranteed to bond well with the material. To do this, you can sand or file the surface. To spread the sticker, a piece of cardboard or plastic is useful. After use, clean the tube so that the lid does not stick, and then close it tightly. The thickness of the adhesive should be thin enough (0.1-0.2 mm), but if necessary it can be thicker. The parts to be glued must be clean and free of oil and grease. Apply the adhesive on one side and join and press the parts to be glued. The potlife is about 5 minutes, good endurance is achieved after about 10-12 minutes, and total endurance after about 24 hours. Pot life is limited in time and describes the maximum working time of the uncured adhesive. Once the pot life has passed, the adhesive not yet applied must not be further processed, but must be disposed of! Until the manual force is reached, the binding must be additionally fixed, for example, with the help of a vice, adhesive tape or clamp. In the case of heat-assisted polymerisation, the temperature resistance of the joined parts must be guaranteed. In addition, the heating and cooling times of the parts to be joined must be respected. This time must be added to the curing time of the adhesive. Tension can occur in the glued joint during heating and cooling. With materials such as PP, PE, PTFE or silicone, the parts need to be pretreated with our primer. The need for a primer depends on the surface tension. If this is high enough it can be tested with water droplets on the surface. If the drops adhere well to the surface, a good bond is most likely. If the drops slip away, a primer is probably needed. Mixing There are several ways to mix the two components: - Mixing by hand - Use of a static mixing nozzle - Use of a dynamic mixing nozzle Hand mixing is sufficient in most cases. For this purpose, a toothpick or similar is used and the two components are mixed until a cloudy mass is formed. Make sure that no bubbles remain. When using a static mixing nozzle, the mixing of both components takes place inside the mixing nozzle so that the mixing is ideal. The first 2g should be discarded, given they are not yet mixed 1:1. However, the mixing nozzle can only be used until the adhesive in the mixing nozzle has dried. After that, you will need a new nozzle. W With a dynamic mixing nozzle, the speed of the mixer can be controlled electronically. This allows you to control the mixing intensity very precisely. However, this is intended for special industrial applications and is not necessary for everyday use. Harden The adhesive is chemically cured. This gives the advantage that gluing the surface is also possible, where adhesives that harden with moisture take a very long time. The bond is high strength and densely flexible. Thus, permanent resistance can be guaranteed in the event of shocks and vibrations. The use of the polymerised adhesive is also possible at high temperatures (up to about 120C), for a short time (30 min) up to 200C The polymerised adhesive has good resistance to physical (e.g. sunlight) or chemical (moisture, detergents, chemicals, etc.) influences. The great advantage of two-component epoxy adhesive is the fact that it hardens even under water and is robust. In addition, it is mouldable, so it can be inserted into any recess to fit. Technical data Epoxy Resin Hardener Base (amine mixture) Viscosity High Viscosity Transparent Color Density 1.1 g / ml Gap filling capacity 3mm Temperature resistance -40 up to +120 C Pot Life 5 min Hand resistance 10-12 min Final endurance 24 hours Shore hardness 60 Tensile shear strength 10 N / mm2 Module E 620 N / mm2
$32,95
 Free shipping on orders over €199,00