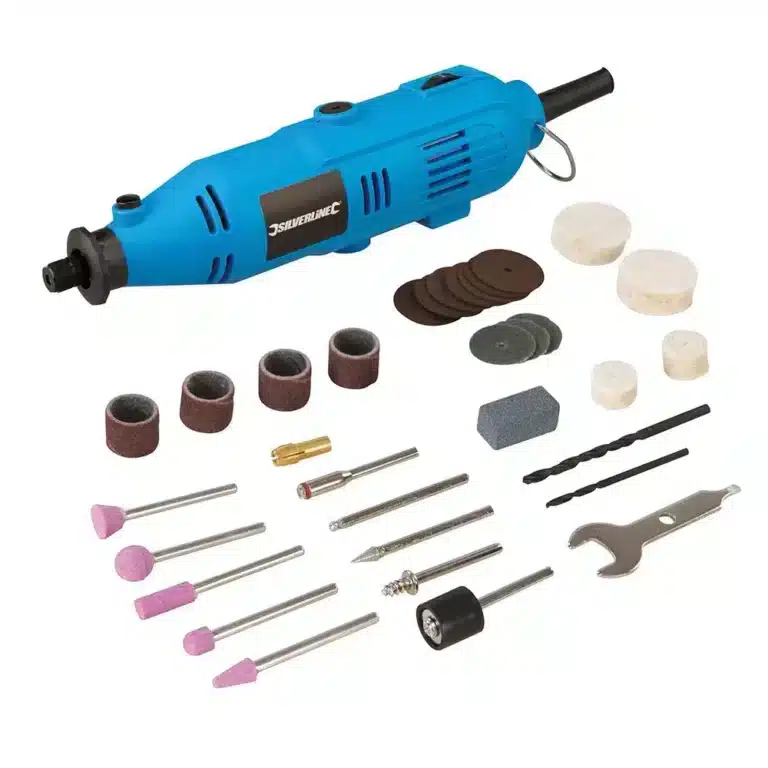
Multi-Function Rotary Tool Description: Versatile rotary tool designed for precise cutting, grinding, polishing, and carving. Features variable speed control (8,000-33,000 RPM) for optimal performance and a spindle lock for easy accessory changes. Includes two collets for mandrel sizes of 3/32" (2.4mm) and 1/8" (3.2mm). Comes with a convenient suspension loop and a comprehensive 43-piece accessory kit. Perfect for DIY enthusiasts and detailed craftwork. Key Features: Adjustable Speed & Spindle Lock: Allows you to tackle various projects with ease and switch accessories quickly. Comprehensive Accessories Kit: Includes sanding drums/discs, grinding stones, diamond bits, polishing wheels, and more. Precision Collets: Compatible with 3/32" (2.4mm) and 1/8" (3.2mm) mandrels. No-Load Speed Range: 8,000-33,000 RPM. Cable Length: 5.7 feet (1.75 meters). Compact & Portable: Comes with a durable blow-molded case for easy storage and transport. What’s in the Box: 1 x 135W Multi-Function Rotary Tool 1 x Drill Bit 3mm (Approx. 1/8") 1 x Drill Bit 2mm (Approx. 5/64") 1 x Ball Diamond Bit 1 x Coned Diamond Bit 1 x Disc Mandrel 1 x Felt Mandrel 1 x Steel Brush 1 x Nylon Brush 10 x Grinding Stones (Various Tips) 3 x Sanding Discs 8 x Cutting Discs 2 x Polishing Wheels (1" and 0.5") 1 x Drum Mandrel 4 x Sanding Drums 2 x Collets (3/32" and 1/8") 1 x Spanner 1 x Blow-Molded Case 1 x Instruction Manual Technical Specifications: Cable Length: 5.7 feet Power: 135W No-Load Speed: 8,000-33,000 RPM
$48,95
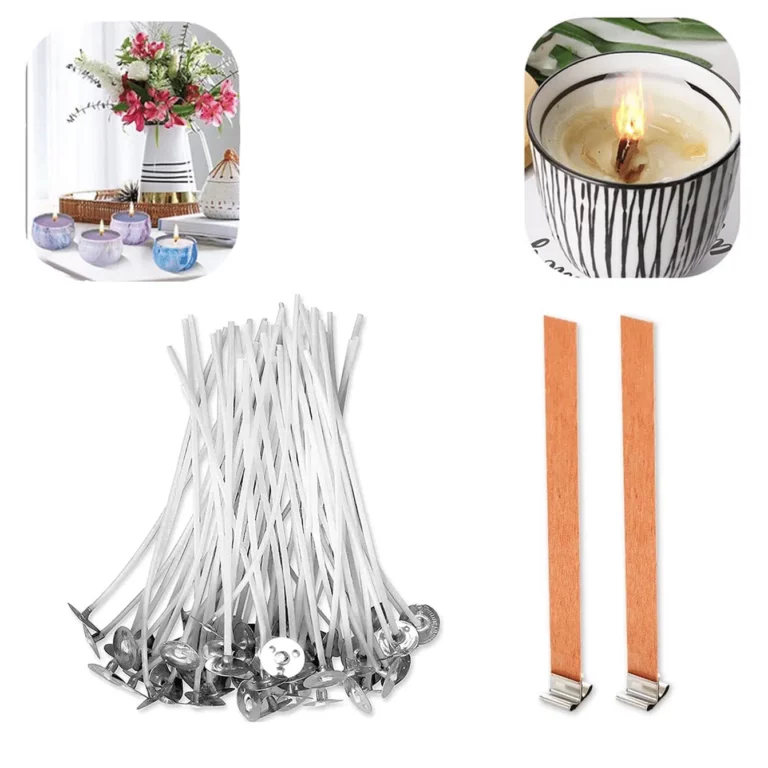
✅ Waxed cotton wicks: They are versatile and suitable for candles of all sizes, compatible with paraffin, soy, beeswax and natural wax. ✅ Wooden wicks: Ideal for creating a soothing sound when burning, for use in combination with soy or beeswax. ✅ Easy placement: Glue on the bottom to easily fix the wick in the container or mould. ✅ Minimal smoke: Designed to reduce smoke during burning. ✅ Ideal length: Available in different lengths (55-130 mm) to meet all creative needs. Choose from our waxed cotton or wooden wicks to personalise your homemade candles! Discover our LITELINE range of candle wicks, part of the CandlePro line designed for DIY candle makers and artisans in the industry. From classic waxed cotton wicks, perfect for their versatility, to charming wooden wicks that add a touch of nature and soothing sounds to your candle, we have what you need! How to use: Place the wick in the container or shape you have chosen for your candle. Thanks to the glue at the bottom of the wick, it will stay in place after being secured, providing a perfect candle. Our LITELINE range is compatible with all types of wax: paraffin, soy, bee or other natural wax blends. Cotton Wicks: waxed cotton wicks with metal backing and glue on the bottom, suitable for candles of all sizes. Wooden Wicks*: Easy to place as they support themselves. When they burn, they make a sound similar to the sound of wood in the fireplace, creating a unique atmosphere. Virtually no smoke: Our wicks are designed to minimise smoke during burning. Ideal length, our wicks range from 55 to 130 mm in length Suitable for all waxes: Our wicks are compatible with paraffin, soy, beeswax and many others. Don't wait! Discover the LITELINE range and spark your creativity! Attention: Wooden wicks should be used in pairs, not individually, when used for soy or beeswax. Also, you should always immerse them in liquid wax for 30 seconds before using them for candles to keep them burning properly.
$4,51
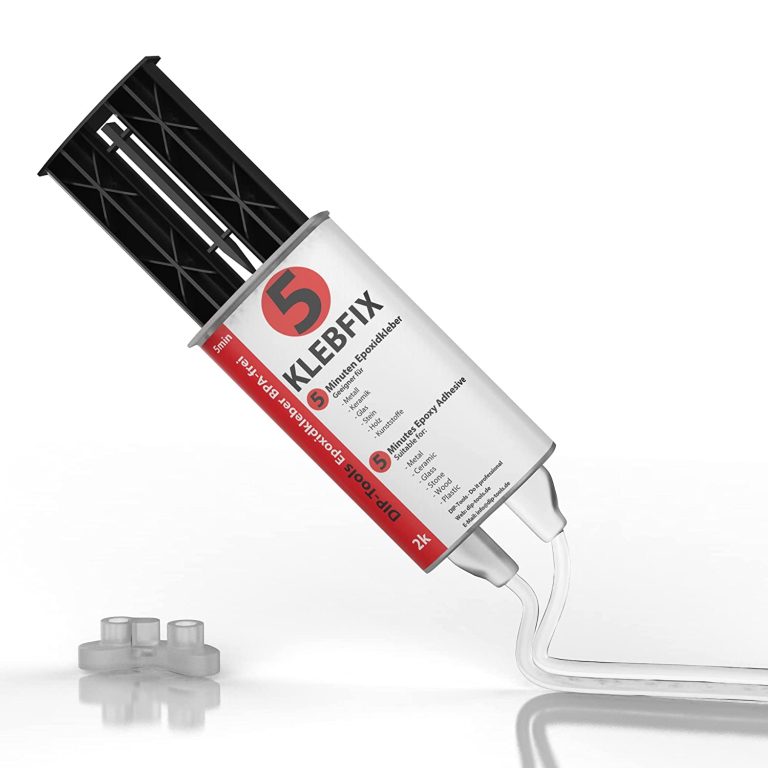
Advantages of Two-component Epoxy Resin Adhesive Extreme strength and resistance to thermal and mechanical influences Resistant to most aggressive substances and oils Available solvent free and BPA free It hardens even under water Compatible with a wide range of additives such as dyes and accelerators Expedited Potlife Application – BestPractice At room temperature (15-30 C The mixing ratio of the two components of 1: 1 is maintained automatically. Do not apply below 5 C outdoor temperature. The higher the ambient temperature, the more effectively the material polymerizes. This means that resistance increases at higher temperatures. It is recommended to have a cloth ready for cleaning. In addition, care must be taken that the work surface is protected and can be cleaned directly if necessary. The surface should be slightly roughened, because only then is the epoxy adhesive guaranteed to bond well with the material. To do this, you can sand or file the surface. To spread the sticker, a piece of cardboard or plastic is useful. After use, clean the tube so that the lid does not stick, and then close it tightly. The thickness of the adhesive should be thin enough (0.1-0.2 mm), but if necessary it can be thicker. The parts to be glued must be clean and free of oil and grease. Apply the adhesive on one side and join and press the parts to be glued. The potlife is about 5 minutes, good endurance is achieved after about 10-12 minutes, and total endurance after about 24 hours. Pot life is limited in time and describes the maximum working time of the uncured adhesive. Once the pot life has passed, the adhesive not yet applied must not be further processed, but must be disposed of! Until the manual force is reached, the binding must be additionally fixed, for example, with the help of a vice, adhesive tape or clamp. In the case of heat-assisted polymerisation, the temperature resistance of the joined parts must be guaranteed. In addition, the heating and cooling times of the parts to be joined must be respected. This time must be added to the curing time of the adhesive. Tension can occur in the glued joint during heating and cooling. With materials such as PP, PE, PTFE or silicone, the parts need to be pretreated with our primer. The need for a primer depends on the surface tension. If this is high enough it can be tested with water droplets on the surface. If the drops adhere well to the surface, a good bond is most likely. If the drops slip away, a primer is probably needed. Mixing There are several ways to mix the two components: - Mixing by hand - Use of a static mixing nozzle - Use of a dynamic mixing nozzle Hand mixing is sufficient in most cases. For this purpose, a toothpick or similar is used and the two components are mixed until a cloudy mass is formed. Make sure that no bubbles remain. When using a static mixing nozzle, the mixing of both components takes place inside the mixing nozzle so that the mixing is ideal. The first 2g should be discarded, given they are not yet mixed 1:1. However, the mixing nozzle can only be used until the adhesive in the mixing nozzle has dried. After that, you will need a new nozzle. W With a dynamic mixing nozzle, the speed of the mixer can be controlled electronically. This allows you to control the mixing intensity very precisely. However, this is intended for special industrial applications and is not necessary for everyday use. Harden The adhesive is chemically cured. This gives the advantage that gluing the surface is also possible, where adhesives that harden with moisture take a very long time. The bond is high strength and densely flexible. Thus, permanent resistance can be guaranteed in the event of shocks and vibrations. The use of the polymerised adhesive is also possible at high temperatures (up to about 120C), for a short time (30 min) up to 200C The polymerised adhesive has good resistance to physical (e.g. sunlight) or chemical (moisture, detergents, chemicals, etc.) influences. The great advantage of two-component epoxy adhesive is the fact that it hardens even under water and is robust. In addition, it is mouldable, so it can be inserted into any recess to fit. Technical data Epoxy Resin Hardener Base (amine mixture) Viscosity High Viscosity Transparent Color Density 1.1 g / ml Gap filling capacity 3mm Temperature resistance -40 up to +120 C Pot Life 5 min Hand resistance 10-12 min Final endurance 24 hours Shore hardness 60 Tensile shear strength 10 N / mm2 Module E 620 N / mm2
$32,95
High quality transparent EVA glue sticks. Excellent adhesion to many substrates including wood, fabric, most plastics, ceramics and light gauge metals. Bonding time approximately 35 seconds. Compatible with Silverline Glue Guns (583333, 868815 & 100036). High quality transparent glue sticks For ceramics, glass, light gauge metals, wood, plastic, fabric & card Bonding time approximately 35 seconds
$6,95
Microcement Compatibility and Application on Metal Surfaces
Microcement is fully compatible with metal surfaces when specific procedures are followed to ensure a strong and durable bond. Here are some essential points to consider:
- Surface Preparation: Before applying microcement, it is crucial to thoroughly clean the metal surface to eliminate grease, dirt, and rust. Ensure the surface is smooth and free from any contaminants that could impact adhesion.
- Primer: Enhancing adhesion is recommended by applying a specific primer designed for metal surfaces before the microcement application. This preparatory layer establishes a solid base, reducing the risk of temperature and humidity fluctuations.
- Microcement Application: Once the surface is prepared and the primer is applied, follow the manufacturer's instructions for the microcement application. Ensure even material spreading and adhere to drying times between coats.
- Sealing: After completing the microcement application, it is advised to seal the surface with a specific sealant to protect the coating and increase resistance to wear, stains, and moisture.
By diligently following these guidelines and using appropriate products, aesthetically pleasing and long-lasting results can be achieved when applying microcement on metal surfaces.
Microcement on Stainless Steel Surfaces
Microcement can be applied on stainless steel surfaces with specific precautions and steps. Here's what you need to know:
- Surface Preparation: Thoroughly clean the stainless steel surface before applying microcement to remove any dirt, grease, or residue that could compromise adhesion.
- Primer Application: Applying a specific primer for metal surfaces is advisable to enhance the adhesion of the microcement. This preparatory layer creates a suitable base for the subsequent microcement layer.
- Microcement Application: Once the primer is dry, proceed with the microcement application following standard procedures. Respect drying times between coats and carefully sand the surface for a uniform and resistant result.
- Finishing and Protection: After applying microcement, protect the surface with a specific sealant or protective coating to preserve its appearance and ensure long-term durability.
By following these steps and using suitable materials and products, high-quality aesthetic and functional results can be achieved even on stainless steel surfaces with microcement application.
Preparing a Metal Surface for Microcement Application
To prepare a metal surface for microcement application, follow these important steps for optimal and long-lasting results:
- Surface Cleaning: Remove any dirt, grease, oil, or rust from the metal surface using specific degreasers or degreasing detergents.
- Sanding: Sand the metal surface with coarse sandpaper to eliminate imperfections, rust, or old coatings, improving microcement adhesion.
- Primer Application: Apply a specific primer for metals on the prepared surface to enhance microcement adhesion and prevent rust formation.
- Surface Leveling: Use metal fillers or mortars to level any irregularities or holes on the metal surface, ensuring it is smooth and uniform before microcement application.
- Microcement Application: Follow the manufacturer's instructions carefully to prepare and apply microcement on the metal surface. Respect drying times and apply the correct number of coats for a durable and quality result.
By following these steps with care and precision, you can adequately prepare a metal surface for microcement application, ensuring an aesthetic and durable result over time.
Specific Types of Microcement for Metal Surfaces
There are specific types of microcement designed for application on metal surfaces, composed of resin, cement polymers, and other additives. To achieve optimal results on steel, aluminum, or other metals, it is crucial to use microcement formulated to adhere and withstand the specific characteristics of these surfaces. Here are some details to consider:
- Adhesion: Microcement for metals must ensure excellent adhesion to prevent surface cracks or breakage.
- Corrosion Resistance: Microcement should protect metal from corrosion and oxidation, ensuring extended durability.
- Flexibility: Microcement should be flexible enough to adapt to the expansions and contractions of metals without cracking.
- Finish: Different finishes are available for microcement on metal surfaces, such as matte, glossy, or satin, depending on aesthetic preferences.
Carefully follow the manufacturer's instructions for microcement application on metal surfaces to guarantee a durable and high-quality finish.
Intense and brilliant color, ideal for Transparent Epoxy Resins. Mix small quantities to get a translucent effect. The high coverage of the “Colorful Original” range allows to obtain a full and bright color. The high concentration provides an opaque color with a few drops.
Usable to color the products of the RESIN PRO range.
💥 Ideal for epoxy creations and resin tables thanks to its features:
✔️ Intense colors
✔️ Easy to mix
✔️ Intense colors
✔️ High concentration
✔️ Easy to get a translucent effect
✔️ 5 stars on Trustpilot
🌿Cruelty Free, Vegan Friendly🐹
$16,00
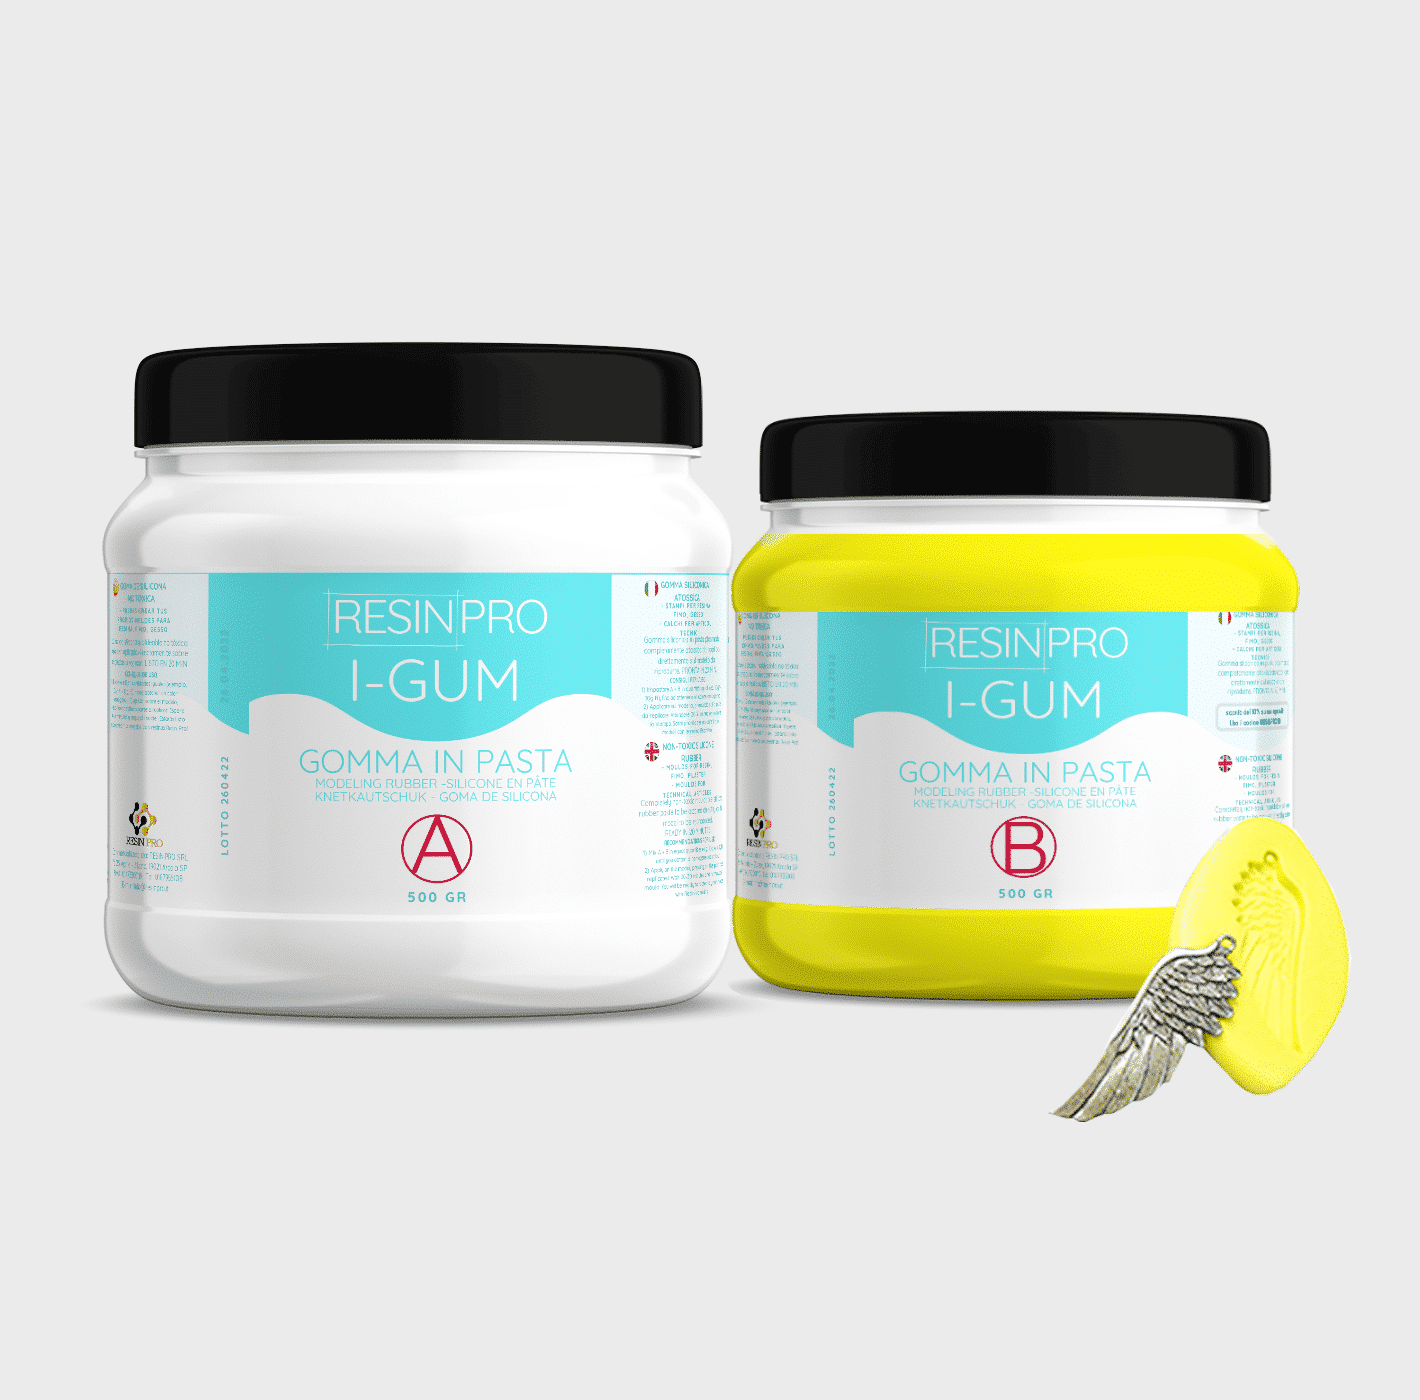
• "I-GUM" - Non-Toxic Silicone Rubber - Paste Form
Pasty silicone rubber "I-GUM" is a two–component product for creating moulds and forms for pouring with epoxy resin.
• Superior formula proven by years of experience:
✔️ Easy to use -> 1:1 mix ratio
✔️ Non-toxic -> You can work without gloves
✔️ Without smell
✔️ Long working time -> 20 minutes
✔️ European quality -> Directly from Italy
✔️ Ideal for creating moulds and frames for working with resin, polyurethanes, wax, cement and other materials
✔️ 🌿Cruelty Free, Vegan Friendly🐹
$22,00

Images
On sale
“Pure Mold” – Translucent Liquid Silicone Rubber for Mould Making, 1:1 Mix Ratio
Available, ready for shipping
Order now to receive your product between Wednesday, April 29 and Wednesday, May 6.
Shipping $16
Choose your kit:
Quantity
"Pure Mold" - Translucent Liquid Silicone Rubber for Mould Making, 1:1 Mix Ratio quantity
The kit: 1 KG (500 GR of A + 500 GR of B)
$52,95 Original price was: $52,95.$44,95Current price is: $44,95.-15%
💰 You save
$8.00
TRANSLUCENT AND FAST CASTING LIQUID SILICONE RUBBER FOR MOULDS
🧪【INNOVATIVE FORMULA】Create your moulds using PURE MOLD silicone rubber! Compatible with many materials including resins, plaster and cement. Its transparency will allow you to observe through the mould and its high mechanical characteristics make it a product suitable for both professional and hobby use.
💎【IMPECCABLE QUALITY】Guarantees the creation of resistant and detailed moulds that will last over time and will be reusable several times!
🌿【SAFE AND CERTIFIED】 100% Made in Italy, guaranteed by a Certificate of Non-toxicity and solvent-free and odorless, this rubber is configured as a safe and easy to use product!
⚙️【EASY TO USE】 Mixing ratio 1: 1; Hardness: 13 Shore; Catalysis in about 6-8 hours. The poly additive formula makes it more resistant than other silicones, allowing the creation of higher quality molds.
+ Easy mixing ratio 1:1
+ Less mould shrinkage over time
+ 30% longer service life
+ Fast (6-8H)
+ Translucent
+ Resistant
Good for:
epoxy resins,
polyester,
polyurethanes and acrylics,
cements and plasters.+ Liquid
🌿Cruelty Free, Vegan Friendly🐹
$44,00
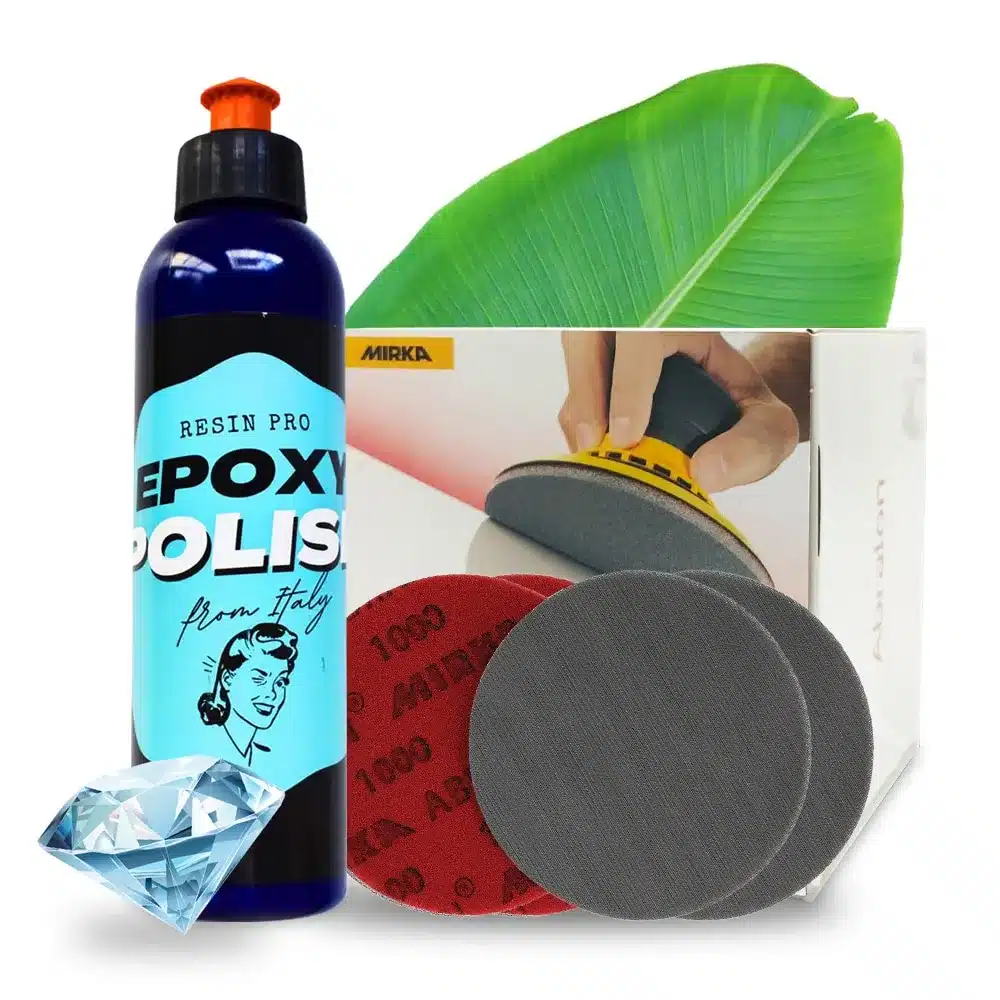
Great way to add some glossy finish to your epoxy project!
Was made especially for resin world.
Resin Pro offers the possibility to achieve a perfect polishing by using different types of abrasive pastes.
It can be used by hand or with an orbital polisher to make your resin creations shiny.
$36,00
ResinPro: one supplier for all your needs
15 years of experience at your complete disposal, supplying resins and accessories for creativity, industry, DIY, flooring and marine applications.
At your home, directly from the manufacturer!
ResinPro is the direct manufacturer of our resin range for companies and hobbyists, guaranteeing the lowest prices on the market.
Learn more
The widest range of resins in the US!
We offer resins for every need, from artistic creations to marine and construction applications, far beyond the “limited” selection typically found in local DIY stores.
Expert technical support!
Our technicians provide free remote consulting to help you avoid mistakes and ensure you achieve the result you want — unlike “generic retailers” who sell 1,000 different products.
get a free consultation
RESIN PRO is a leader in resin production and distribution!
24-hour delivery: We ship across the US on the same day. Enjoy convenient home delivery with our appointment service—our courier will contact you in advance and deliver the package to your preferred location, or leave it at an alternative address of your choice.

Full support!
We provide continuous support from preparation to final application, including remote technical assistance, ensuring a smooth experience.
Talk with a specialist and place a phone order without registration and without credit cards!
 Free shipping on orders over €199,00