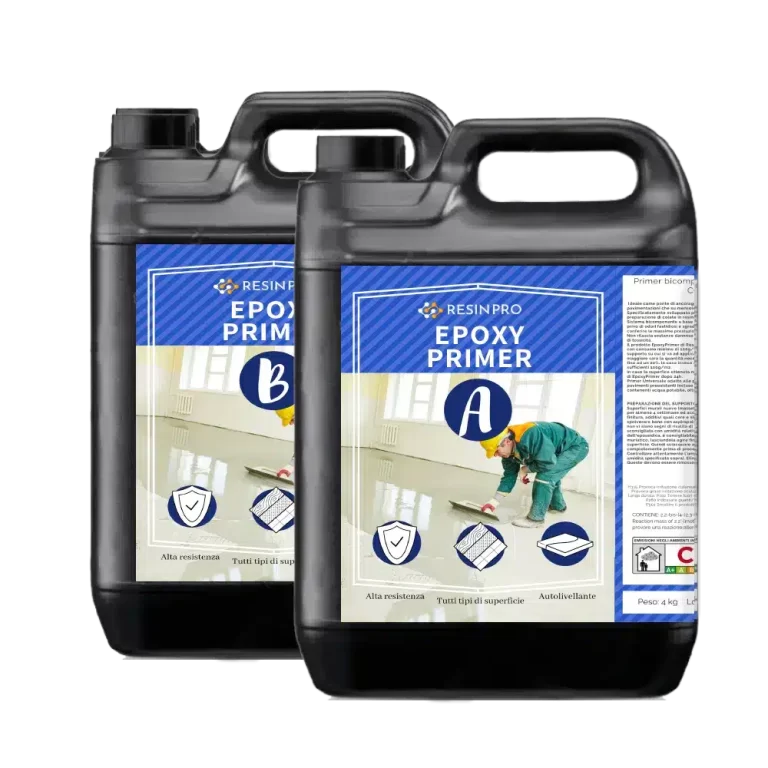
Great solution for making initial layer of your epoxy floor, which helps to increase the adhesion of your main layer! 💥About "EPOXYPRIMER" - Universal Water-Based Primer - For Stable & Durable Floors: Two-component system based on epoxy resins in water emulsion, and therefore free of annoying and unpleasant odors, additive with inorganic structurants suitable for giving maximum performance of resistance, durability and adhesion to the support. The product" EpoxyPrimer " by ResinPro can be applied with a roller, brush or spatula with a minimum consumption of 100g/m2 up to 300g/m2 , depending on the condition of the surface on which you are going to apply. The greater the porosity of the initial surface (concrete for example), the greater the quantity required and the dilution ratio can vary from 5% up to 20%. In the case of tiles or other poorly absorbent surfaces, 100g/m2 will be sufficient. If the surface obtained is not homogeneous, it is advisable to reapply a coat of " EpoxyPrimer". Mixing Ratio: 100:40 by weight Full curing time: 24/48h at room temperature
$212,95
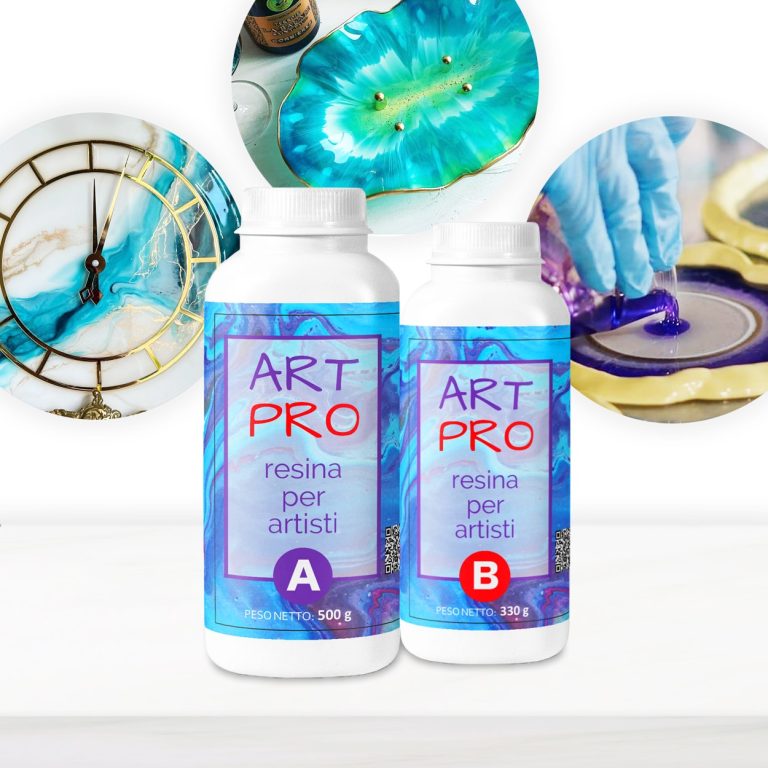
💥 BESTSELLER FOR: – Resin Artworks on surfaces, panels: Ocean Art, Marble Effect, Geode Art and etc; – Coasters and Trays with colour effects (layer thickness up to 1 cm [0,39”]); – Coating of surfaces - Floors, Canvases, Furniture, Etc; – 3D effect on prints, photos and images in general; – Fixation of decorative objects (decorative elements, glass, stone, quartz pieces, etc.); – Creation of a perfectly transparent protective layer on your projects. 💥About “ART PRO ” – Ultra Clear Medium Viscosity Epoxy Resin for Artists: First class quality epoxy resin for the artistic sector: thanks to its special dense formula, it allows you to create Resin Art works. It does not leak out from the working surface, slowly reaching the corners of the frame. ART PRO preserves your original design and prevents any possible modification due to the thickness of the resin: because of its special formula, the layers of colours do not expand and do not mix (unless you deliberately intervene), faithfully keeping with your creative idea! Additional features: Long working time; + Odourless; + Excellent mechanical strength; + High impregnation and reinforcement of technical fabrics. The product can be coloured with any epoxy dye (both in paste and powder) in a percentage ranging from 0.1% to 2.0%). It can also be thickened by the use of aggregates such as powders and fumed silica. 💥Key features: ⚙️ ULTRA TRANSPARENT EPOXY RESIN: -The crystal clear epoxy resin is suitable for both beginners and professionals. Start making Resin Art works, coasters, trays and any other DIY – creation that involves the use of medium viscosity resin. 🧪PROFESSIONAL QUALITY: -Made from high quality materials – Excellent transparency, Glossy surface, Odourless – because of unique formula for DIY, craft and artistic creations. Compatible with silicone, wood, fabric, glass and paper. 🌿 SAFE AND CERTIFIED: -All our resins are Certified Non-Toxic, Solvent-free, non-flammable, and totally safe. 💧 EASY TO USE: -The 3:2 mixing ratio makes this product very easy to use. Being a two-component resin, simply mix RESIN A + HARDENER B in the ratio indicated above the package and let it harden without the need for further additives. Can be coloured as desired. 📞 FREE PROFESSIONAL ASSISTANCE SERVICE: -Since we are directly a manufacturer, we have access to a professional laboratory that will happily help you with any complex project. 🇬🇧 UK BASED TRUSTED COMPANY: -RESIN-PRO team collects and sends your order as fast as possible. We produce and realise epoxy resins since 2015. Just google our social media, where you will find thousands of projects made with our products around the world. The "ART-PRO" formula is specifically developed for coating in artistic applications. Compatible with colouring agents, powder pigments, alcohol-based and oil-based dyes, aerosol paints. The migration laboratory test on cured resin samples ensures that the final product does not release any harmful substances, if applied following the instructions. Warning: the product is moisture sensitive, do not use on wet surfaces or with water-based dyes (e.g. Acrylics) ____________________________________________________________________ if you have not enough experience, we insistly suggest to make a small test before working with large project.
$28,49

💥 BESTSELLER FOR: –Resin-art: Geode-art, Ocean-art, Coasters, Trays, Fluid art (pour paint) and Art objects; –Surface coating: Coating + very good for vertical applications by brush or roller; –Restoration : Covering objects and furniture to add depth and brilliance to the colour. The surface is perfectly smooth and moisture-resistant. Solvent-free and odourless epoxy resin. 💥About ULTRA-HIGH VISCOSITY epoxy resin for artists "ART PRO DELUXE": The epoxy resin for the artistic sector: thanks to its special formula and its dense structure, it allows you to create paintings with the "pour paint" and liquid paint technique. It does not leak out from the working surface, slowly reaching the corners of the frame. Great choice for ocean-art; coasters and trays! ART PRO DELUXE preserves your original design and prevents any possible modification due to the casting of the resin: because of its special thick formula, the layers of colours do not expand and do not mix (unless you deliberately intervene), faithfully keeping with your creative idea! Additional features: Crystal Clear; + Odourless; + Excellent mechanical strength; + High impregnation and reinforcement of technical fabrics. The product can be coloured with any epoxy dye (both in paste and powder) in a percentage no more than 5% from the mix weight. It can also be thickened by the use of aggregates such as powders and fumed silica. DEAR ARTISTS! This type of epoxy has higher viscosity than you may expect! Please, read this note - 1. If you have no a lot of experience or you prefer to work with more liquid resin, please, check this Resin 👉🏽 ART PRO 2. If you prefer to do art-works in more viscosity resin, please, choose ART PRO DELUXE. But if it`s your first experience, we suggest to design your project before pouring, because, in this case you have short working-time (15-20 min). Due to its exceptionally high viscosity, our Deluxe epoxy resin is ideally suited for delicate casting projects, including ocean art, pour-art, and other creations that demand a resin with superior viscosity. When undertaking basic castings of 1-1.5cm, special care is needed to address bubble formation. We recommend a multi-layer approach for such castings, employing a heat gun after each application. For these projects, we suggest considering our lower viscosity resins - "Transparente" and "Art-Pro" - as the optimal solutions. Transparent self-levelling UV-resistant epoxy system, which creates a hard and glossy protective layer for casting up to 1 cm [0,39”] (ex. coasters, trays, art objects). The surface is perfectly smooth and moisture-resistant. Solvent-free and odourless epoxy resin. 💥Key features: ⚙️ 【RESIN ART EPOXY】 ART PRO DELUXE EPOXY RESIN is a ultra-high viscosity and high resistance product. The best choice for Resin-art, making Coasters, Trays, Ocean and Geode-art and casting surfaces. The particular formulation makes it a resistant product suitable for both the surface finishes of paintings, tables or even artistic floors. 🧪 【PROFESSIONAL QUALITY】Art Pro Deluxe Resin, unlike traditional "multipurpose" resins, has a special formulation and viscosity, which allows to obtain an impeccably transparent and glossy surface in any condition. Easily polished. The added UV Anti-Yellowing Filters helps save transparency over time. The low density allows prevent the incorporation of air bubbles making it perfectly suitable for river tables and countertops. Compatible with silicone and wood, fabric, glass, paper or photographs. Complete catalysis ~ 24-48 hours, but it will be ready for "unmoulding" after about 12 hours. 🌿 【SAFE AND CERTIFIED】 All our resins are Certified Non-Toxic, Solvent-free, non-flammable, and totally safe. 💧 【EASY TO USE】 The 100:70 mixing ratio (by weight) makes this product very easy to use. Being a two-component resin, simply mix RESIN A + HARDENER B in the ratio indicated above the package and let it harden without the need for further additives. Can be coloured as desired. 📞 【FREE PROFESSIONAL ASSISTANCE SERVICE】 Since we are directly a manufacturer, we have access to a professional laboratory that will happily help you with any complex project. 🇬🇧 【UK BASED TRUSTED COMPANY】 – RESIN-PRO team collect and send your order as fast as possible. We produce and realise epoxy resins since 2015. Just google our social media, where you find thousands of projects made with our products around the world. ____________________________________________________________________ 💥 Applications: - artworks, creation of art objects (paintings, panels, etc.) with the "fluid-art" (pour paint) technique (pouring up to 1 cm [0,39”]); - vertical applications by brush or roller - coating of surfaces, objects and furniture to add depth and brilliance to the colour; - create a 3D effect on prints, photos and images in general; - creation of a perfectly transparent protective layer on your projects. The "ART-PRO DELUXE" formula is specifically developed for coating in artistic applications. Compatible with colouring agents, powder pigments, alcohol-based and oil-based dyes, aerosol paints. Warning: the product is moisture sensitive, do not use on wet surfaces or with water-based dyes (e.g. Acrylics) ____________________________________________________________________ Epoxy resin is a complicated technical product, but if you follow the basic rules, you will get wonderful results! If you need any assistance, just call us - 07596 850968 or email us –
[email protected] With best regards, RESIN PRO TEAM😊 Check and tag our social media for inspiration! We are always happy to publish your art-work – [CP_CALCULATED_FIELDS id="1"]
$48,49
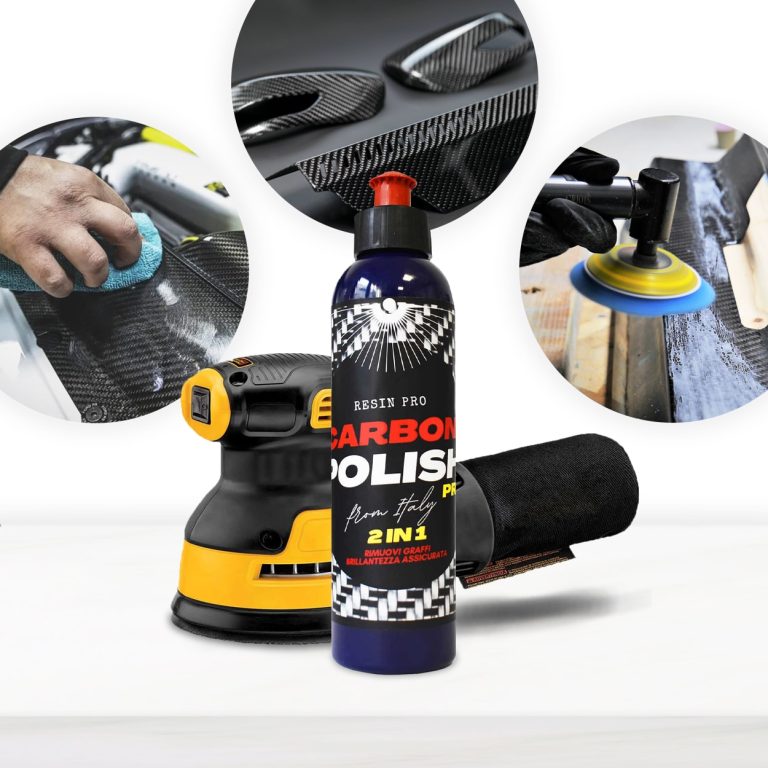
Carbon Polish Black (250ml) is the defined product for polishing your carbon, dark or black surfaces. The aesthetic and economic value of the carbon product is high, and for this reason it is essential to treat the surface with specific and dedicated products, which enhance the beauty of the “carbon look”. It is important to avoid “generic" products that can spoil the work done, with insufficient gloss or even worse, fail to remove scratches. EASY TO APPLY AND REMOVE MISCIBLE WITH WATER ODOURLESS DOES NOT WHITEN PLASTIC PARTS DOES NOT CONTAIN SILICONES VERY LOW ENVIRONMENTAL IMPACT The carbon polishing paste Carbon Polish Pro Black has been developed in a black colour precisely to ensure a brilliant finish and without white dots, typical of generic abrasive pastes. It can therefore be used for all dark surfaces (especially resin). Carbon Polish Pro Black is the specific paste for carbon; black colour prevents residues from remaining visible on surfaces after polishing. Thanks to the NAP (Nano Abrasive Particles) it is a 2 in 1 product; in fact it quickly removes scratches and defects from the surface and gives at the same time a deep shine like only a polish can do. In addition, its Synthetic Polymers allow you to correct and fill all the imperfections on the surfaces of Resin and carbon fiber artifacts. Eliminate scratches, defects and mirror shine with a single product! Carbon Polish Pro Black carbon polishing paste can be used both on the painted carbon and directly on the epoxy resin that covers the carbon fibers. Unlike commercial Polishes, Carbon Polish Pro Black is 100% Made in Italy, born from over 50 years of tradition in polishing. It allows both the hobbyist and the professions to obtain performing results quickly and easily. Here are the simple steps to polish or eliminate blemishes from your carbon fibre surfaces: If you need to use glass paper to remove the deepest scratches, you can do so without hesitation. The polishing paste will then be able to remove the sanding marks and make the surface smooth and shiny. Here's how:- The polishing paste Carbon Polish Black can be used by hand with extreme simplicity, with the help of a microfiber cloth or a foam pad. Or it can be used with electric tools, such as a drill and flexible, equipped with a special shepherd and foam pad (8000-12000 rpm) or with a polisher (1000-2000 rpm both rotary and ro orbital) with foam pad or wool (also synthetic). The use of tools of this kind will speed up the maintenance and ensure optimal results in even faster times. How to prepare the surface to be polished? Here are the tricks to make the most of NAP (Nano Abrasive Particles) technology:- Removals defects and scratches from sanding Depending on the depth of the scratch/defect, start with abrasive papers grit 800-1000 (for deep scratches) or simply 3000-4000 (for light scratches), always tend the surface wetted with water (this will help to make the result homogeneous) Apply the polishing paste for carbon fiber on the surface and spread it with circular and more or less energetic movements depending on the defect you want to remove. Or by directly attaching the buffer of the polisher / hose. We recommend one / two drops of carbon polishing paste every 3-4 cm. You can apply it several times thanks to synthetic polymers, without risking consuming the carbon, until the result is perfect. Clean up simply with water and a clean cloth. Put on your sunglasses and enjoy the dazzling result! Surface renewal: The product is also suitable as a fast and effective tool to renew your precious carbon surfaces, which wear out with normal use or exposure to atmospheric agents. In this case, the process is even easier: it is sufficient to apply the paste on the surface (well cleaned) and roll it out with circular movements, or by directly applying the buffer of the polisher / flexible. We recommend one / two drops of carbon polishing paste every 2-3 cm. The carbon polishing paste Carbon Polish Pro Black has been developed in black colour precisely to ensure a brilliant finish and without white dots, typical of generic abrasive pastes, and can therefore be used for all dark surfaces (especially resin). The special formula is free of volatile silicones and is therefore not harmful to health; it can also be used in painting processes.
$21,49
How to Refresh Your Flooring
To refresh your flooring, consider using epoxy or polyurethane resins to create a durable and resilient coating. These resins are simple to apply and come in a wide range of colors and finishes suitable for different settings. Before applying the resin, ensure that the floor is clean, smooth, and free of cracks. Following the manufacturer's instructions for resin preparation, apply the coating evenly using a roller or spatula. Allow it to dry completely according to the recommended curing times. This method is perfect for those looking for a professional, long-lasting result suitable for both indoor and outdoor spaces.
Floor Renewal with Resin
For a floor renewal with resin, follow these steps for optimal results. Proper surface preparation is essential to ensure the floor is clean, dry, and free of residues. Proceed with the application of epoxy or polyurethane resin based on your requirements and floor type, meticulously following the manufacturer's instructions regarding dosages, drying times, and application methods. For enhanced durability and longevity, consider applying a suitable protective coating over the resin. This floor renewal process is ideal for creating a durable, easy-to-clean, and visually appealing surface.
DIY Floor Refresh
Refreshing your floor yourself can be a manageable project for those with some manual skills. Start by preparing the floor, removing old coatings, cleaning thoroughly, and leveling the surface. Consider options like laying new tiles or painting the existing floor with specific resins such as epoxy or polyurethane resins for a resilient and long-lasting floor covering. Before application, carefully follow the manufacturer's instructions and gather all necessary materials. With some effort and precision, your floor will look as good as new in no time.
Innovative Concepts for Flooring Refreshment
Transforming your floors can completely alter the look of a space. Explore these creative ideas:
Painting with specific floor paints in various colors and finishes
Applying self-leveling resins for a modern and glossy effect
Using self-adhesive tiles for a quick restyling
Covering with easy-to-install laminates or adhesive vinyl in numerous designs
Opting for pre-finished parquet for a warm, natural look
Choosing designer rugs for partial floor coverage, adding comfort and style
Creating a resin floor for a contemporary and durable effect
These solutions offer various options for creatively and uniquely refreshing your floors.
Flooring Resin Application Techniques
To achieve optimal results when applying resin to your floor, follow these recommended techniques:
- - Surface Preparation: Ensure a clean, smooth, and dust-free floor.
- - Primer Application: Apply a specific resin primer for better adhesion.
- - Resin Spreading: Pour and evenly distribute the resin with a roller or notched trowel.
- - Leveling: Use a suitable roller to eliminate air bubbles and ensure a uniform surface.
- - Drying Time: Respect the drying times indicated by the manufacturer before applying additional layers or the final coating.
By correctly following these techniques, you'll achieve a resistant and visually appealing floor with the applied resin.
Epoxy Resin for DIY Floor Projects
Epoxy resin for DIY floor projects is a versatile and durable solution for professionally coating surfaces. This self-leveling material is ideal for creating long-lasting, modern floors with a relatively simple application. Before starting, ensure the surface is clean, dry, and free of imperfections. Measure the epoxy resin precisely based on the area to be covered. Thoroughly mix Component A with Component B following the manufacturer's instructions. Apply the compound evenly on the floor, leveling it with a roller to avoid air bubbles. Let it dry completely according to the recommended curing times. Once dry, the floor will be shiny, durable, and easy to clean.
Applying Resin on Flooring
Applying resin to a floor requires attention and precision to achieve optimal results. Here are the recommended steps:
- - Surface Preparation: Ensure the floor is clean, smooth, and free of dust, dirt, or grease.
- - Primer Application: Apply a specific resin primer to promote adhesion to the floor.
- - Resin Spreading: Pour and evenly distribute the resin on the area to be treated.
- - Leveling: Use a suitable roller to eliminate any air bubbles and ensure a homogeneous surface.
- - Drying Time: Respect the drying times indicated by the manufacturer before applying subsequent layers or the final coating.
By correctly following these techniques, you will achieve a resistant and visually appealing floor with the applied resin.
Epoxy Resin for DIY Floor Restoration
Epoxy resin is an excellent solution for restoring floors due to its resistance and durability over time. To start the restoration process, thorough surface preparation is essential. Remove any old coatings and ensure the floor is clean and smooth. Proceed with the application of epoxy resin, pouring and evenly leveling it on the surface. Once hardened, the resin will form a protective layer resistant to stains, wear, and chemicals. It is essential to carefully follow the manufacturer's instructions during application to ensure an optimal outcome. Epoxy resin floor restoration is an excellent solution for those seeking a durable and easy-to-maintain floor.
Renovating Bathroom Flooring with Resin
Renewing the bathroom floor with resin is an excellent solution to achieve a modern and durable aesthetic. Epoxy or polyurethane resins offer water and chemical resistance. Before applying the resin, ensure the floor is clean, dry, and crack-free. For optimal results, follow these steps:
- - Surface Preparation: Sand the floor and remove residue from old coatings.
- - Primer Application: Apply a specific resin primer to enhance adhesion.
- - Resin Spreading: Pour and evenly distribute the resin on the floor.
- - Optional Decoration: Add pigments or decorative inserts before the resin solidifies.
- - Sealing: Apply a transparent protective coating for long-lasting durability.
Following these steps correctly will provide your bathroom floor with a new look, making it resistant and easy to maintain.
Bathroom Floor Renewal with Resin
Renewing the bathroom floor with resin is an excellent choice for achieving a modern and durable aesthetic. Resin flooring is a versatile material offering benefits such as easy maintenance, waterproofing, and wear resistance. When renewing the bathroom floor with resin, it is essential to carefully follow these steps:
- - Surface Preparation: Ensure the floor is clean, dry, and free of cracks or imperfections.
- - Resin Application: Spread the material evenly on the floor using a roller or spatula.
- - Drying Time: Allow the resin to dry following the manufacturer's specified drying times.
- - Optional Finish: Apply a transparent protective layer for enhanced durability over time.
With resin flooring, you can completely transform the look of your bathroom, creating a modern and functional environment.
Ideas for Bathroom Floor Renewal
When renewing bathroom floors, consider these creative and practical ideas:
- - Resin Tiles: A modern and durable solution available in various colors and finishes.
- - Wood or Marble Effect Tiles: For an elegant and natural look without the maintenance issues of natural materials.
- - PVC or Vinyl Floors: Affordable, easy to install, and available in a wide range of designs.
- - Microcement or Cement Resin: Perfect for an industrial and minimalist look but requires professional application.
- - Rubber Flooring: Great for a safer, non-slip bathroom, ideal for families with children.
- - Water-Resistant Laminate Flooring: A practical and cost-effective choice available in various textures and colors.
Before making a choice, consider your budget, desired style, and practicality within the bathroom setting.
DIY Bathroom Floor Renewal
Renewing the bathroom floor as a DIY project can be rewarding. Start by evaluating the current state of the floor and decide if removing the existing coating is necessary. You can then choose from various coating options like ceramic tiles, vinyl, or laminate. Before installation, ensure the surface is adequately prepared, leveling any unevenness and ensuring it is clean and dry. Follow the manufacturer's instructions carefully for applying resin or silicone to fix tiles or the chosen coating. Finally, seal the joints with a specific bathroom sealant for a water-resistant and durable finish over time.
Renewing Balcony Flooring
To renew your balcony floor, consider applying epoxy or polyurethane resins. These coatings are weather-resistant, providing effective protection to the floor. Before application, ensure the floor is clean and free of cracks or holes. You can also use silicone to seal any cracks for increased durability over time. For a simpler and quicker option, you may evaluate applying a self-adhesive PVC coating, easy to install and available in various aesthetic finishes. Alternatively, a DIY approach could be cost-effective, such as using wooden tiles or composite materials. Always follow the manufacturer's instructions for optimal results.
Balcony Floor Renewal with Resin
Renewing the balcony floor with resin is an excellent solution for achieving a durable and resistant surface. Before starting, ensure the balcony is clean and free of cracks or irregularities. Follow these steps:
- - Surface Preparation: Remove old coatings and clean the floor thoroughly.
- - Application of Primer: Apply a specific resin primer for optimal adhesion.
- - Resin Spreading: Spread the resin with a roller or a spatula, ensuring uniform coverage.
- - Drying: Let the resin dry following the manufacturer's instructions.
- - Additional Protective Layer: Apply a final protective coat for increased resistance and durability.
Resin for outdoor flooring is available in various colors and finishes, ensuring a customized and quality aesthetic result.
DIY Balcony Flooring Restoration
Restoring the balcony floor as a DIY project can be gratifying and relatively simple to accomplish. Before starting, ensure you have the necessary tools and materials like epoxy resins or specific waterproof silicones for outdoor use. Here are the essential steps to follow:
- - Cleaning: Remove old tiles or damaged coatings and ensure the surface is clean and smooth.
- - Repairs: Fill any cracks or holes with weather-resistant grout.
- - Waterproofing: Apply a layer of waterproof resin or silicone to protect the floor from rain and moisture.
- - Coating: Choose the appropriate coating for your needs, such as ceramic or composite wood tiles.
By closely following these steps and using the proper materials, you can effectively and durably renew your balcony floor.
Applying Epoxy Resin on Balcony Flooring
Epoxy resin can be used to coat a balcony floor in a durable and long-lasting manner. Here's how to proceed:
- - Surface Preparation: Ensure the balcony is clean, dry, and free of dirt or dust.
- - Repair: Fill any cracks or holes with exterior putty.
- - Resin Application: Mix the resin and hardener thoroughly following the manufacturer's instructions.
- - Pouring Resin: Pour the resin evenly on the balcony area.
- - Distributing Resin: Spread the resin with a roller to avoid accumulations and ensure uniform coverage.
- - Drying and Finishing: Let the resin dry for the manufacturer's specified time. If necessary, apply a transparent protective layer for increased durability and weather resistance.
By following these instructions carefully, you can achieve a balcony coated with epoxy resin that is both aesthetically pleasing and functional.
Renewing Kitchen Flooring with Resin
To renew kitchen flooring, consider using epoxy or polyurethane resins. These materials offer a resistant, easy-to-clean surface available in various aesthetic finishes. Before applying the resin, it's crucial to prepare the floor by sanding and thoroughly cleaning it. Proceed with the primer application followed by pouring the resin, which self-levels to create a uniform surface. Once dry, the resin will give the floor a modern and long-lasting appearance. For a simpler option, you can opt for self-adhesive vinyl or laminate floors, easy to install and available in various designs. Rubber coatings can also be a practical and comfortable choice for the kitchen.
Epoxy Resin for Kitchen Flooring
Epoxy resin is an ideal choice for coating kitchen floors due to its resistance to wear, stains, and heat. Epoxy creates a smooth and durable surface that is easy to clean and maintain. Before application, ensure the floor is clean, smooth, and crack-free. Follow the manufacturer's instructions carefully to prepare and apply the epoxy resin correctly. It is essential to work in a well-ventilated environment and use appropriate protective clothing and tools. Once dry, the epoxy resin will transform the kitchen floor, giving it a modern and glossy finish.
DIY Kitchen Flooring Restoration
Restoring the kitchen floor as a DIY project can be rewarding. Evaluate the current state of the floor and decide if the existing coating needs to be removed. You can choose from various coating options such as tiles in ceramic, vinyl, or laminate. Before installation, ensure the surface is adequately prepared, leveling any unevenness and ensuring it is clean and dry. Follow the manufacturer's instructions for applying resin or the chosen coating. Finally, seal the seams with a specific kitchen sealant for a water-resistant and durable finish over time.
Renewing Marble Flooring
To refresh your marble flooring, consider following these steps:
- - Cleaning: Start by removing dirt and dust with a neutral detergent and warm water. Avoid using acidic products that could damage the marble.
- - Polishing: If the floor has scratches or prominent marks, consider professional polishing to restore its surface.
- - Sealing: Apply a sealant to protect the marble from stains and future damage. Ensure you use a product suitable for the type of marble.
By carefully following these steps, you can refresh your marble floor and maintain it in excellent condition over time.
DIY Marble Floor Restoration
Restoring a marble floor as a DIY project can be challenging but rewarding when done correctly. Here are some steps to follow:
- - Cleaning: Remove dirt and stains with a marble-specific cleaner.
- - Polishing: Use fine-grit sandpaper to smooth out any superficial scratches.
- - Polishing: Apply a marble polishing compound with a felt disc to restore its natural shine.
- - Sealing: Protect the marble by applying a sealant to prevent damage from liquids and atmospheric agents.
Remember to follow the product instructions carefully and test each step in a small inconspicuous area. For severely damaged floors, consider seeking help from a specialized restoration professional.
Resin Application on Marble Flooring
Applying epoxy resin on marble is a process that allows you to protect and enhance the surface effectively. Epoxy resin can provide protection and a glossy appearance to the marble surface.
![]()
Stones & Binder Calculator Area sqm (L*W*1m): Thickness (cm)*: Calculate Stones: 0 kg Resin binder: 0 kg *Recommended minimum thickness for driveway: 2 cm; Other areas: 1.5 cm. Certified Non-Toxic Transparent Epoxy Binder This resin has been specifically formulated to ensure an impeccable result in various applications. Thanks to its high gloss and transparency, and low viscosity, it offers a flawless, clear, and bubble-free result for your colored pebbles or aggregates. It is also certified non-toxic for skin contact post-cure. High Resistance and Durability Excellent resistance for your permeable floor: this binder ensures outstanding mechanical performance once cured. It also cures very quickly, making the floor walkable and fully usable in just 24 hours. Guaranteed Yellowing Resistance The cycloaliphatic amine-based hardener, along with the use of UV filters, guarantees high resistance to yellowing. Key Features High transparency Excellent mechanical resistance Good chemical resistance and carbonation resistance High impregnation and structural reinforcement for permeable floors Long working time Glossy surface High UV resistance for long-lasting creations (low yellowing) High mechanical resistance for scratch protection Low viscosity that reduces air bubbles after curing and facilitates aggregate impregnation Odorless and solvent-free perfectly transparent and bubble-free thanks to the specific formula for natural stones and colored marbles Curing Time Complete curing is achieved in about 24 hours, but the product can be walked on after just 10 hours. Ideal Applications The ideal applications for "ultra-transparent" epoxy resin include colored or dark-colored pebbles and aggregates. Consider these indicative data for epoxy resin for colored aggregates: 1-2 mm - for 20-25 kg of aggregate, add 800g of epoxy resin 3-5 mm - for 20-25 kg of aggregate, add 600g of epoxy resin 6-10 mm - for 20-25 kg of aggregate, add 600g of epoxy resin 10-20 mm - for 20-25 kg of aggregate, add 400g of epoxy resin Main Technical Data (Click the "TDS" icon for the full technical data sheet) Pot-life (150g at 30°C): 1h20' Complete cure after 24h Film cure (1mm at 30°C): 6h Supplied in plastic cans Maximum casting thickness: 2 cm (7 kg at 20°C) Epoxy Resins Epoxy resins are thermosetting polymers derived from monomers containing the three-atom epoxy ring. They are widely used in the production of advanced composite materials, obtained by combining the resin with fibers.
$45,95
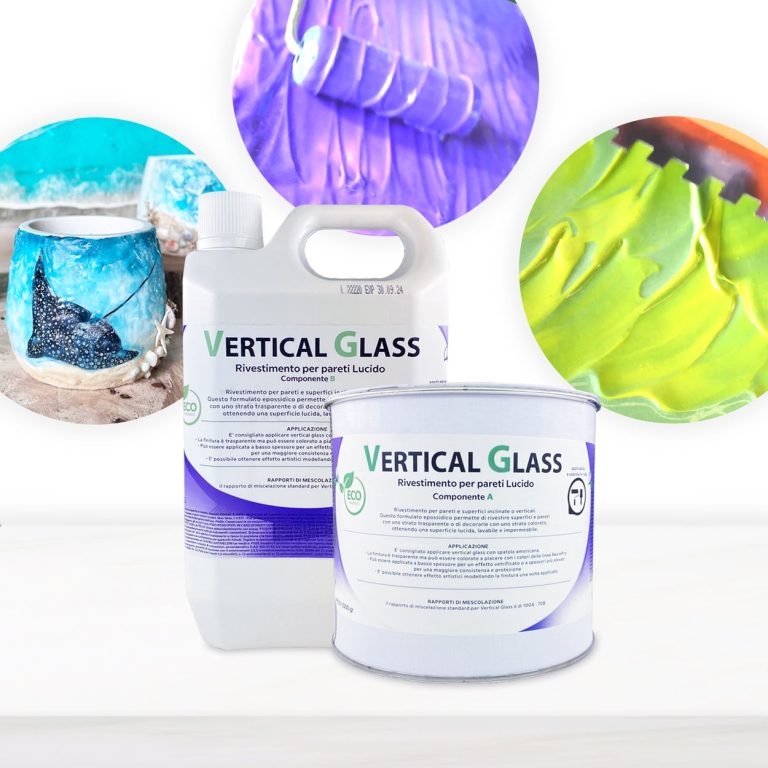
Coating for inclined or vertical walls and surfaces / This epoxy formulation allows you to coat surfaces and walls with a transparent layer or decorate them with a colored layer, resulting in a glossy, washable and waterproof surface. The Vertical Glass resin differs from normal resins allows creatives to create sharp shapes and designs on surfaces and canvases without the resin mixing unintentionally losing the original design! Transparent, UV-resistant epoxy system that creates a hard, glossy protective layer. Vertical Glass allows you to keep your initial design, faithfully respecting your creative idea! The surface will be perfectly smooth and resistant to moisture. Solvent-free and odorless epoxy resin. Applications: Floors and Walls (pre-existing) also vertical; Protection of material coatings and other artistic decorations; Coating, repair and decoration of shower trays and sanitary ware; Coating of surfaces, objects and furniture to give depth and brilliance to the color, even in Vertical! Features: For a smooth coating, it is applied with a spatula to the surface of any material: tile, concrete, wood, brick, etc. It has good hiding power, and completely covers the work surface in one application Creates a glossy, smooth and moisture-resistant layer To create a matte surface, it is easily sanded (48 hours after application, with a grain size of 1000-2000 P) Protects from moisture and gives a new life to surfaces It can be painted with dyes and pigments from our assortment Does not self-align: saves the drawing that you set for it 🙂 Please note that in the unpainted form, the material is not completely transparent, and there is a slight “milky” shade with almost imperceptible micro-particles, so we recommend painting it It is used for: Floor coverings, walls, furniture and other surfaces Protection of surfaces of materials Painting, repair and decoration of showers and bathrooms Creation of paintings, murals and other works of art
$109,49
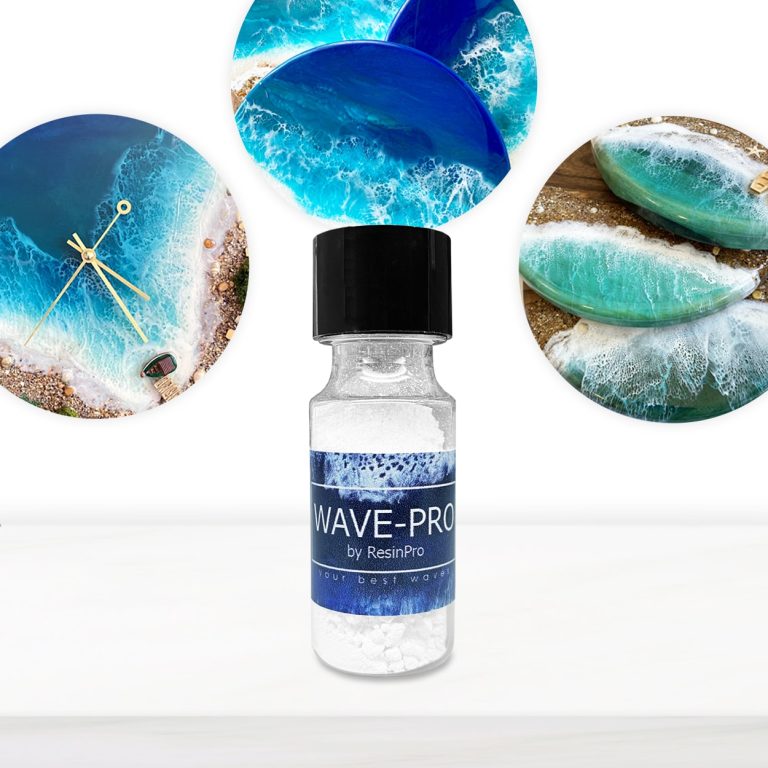
Create your personalized Sea Wave Effect! WAVE-PRO is a non-toxic powder that reacts with wet epoxy resins by repelling itself away, thereby stimulating movement in concentric outward circles and waves. Creates cells and waves in resin art Safe & user-friendly Odourless Non-toxic & non-flammable Zero-VOC formula with no harsh chemical ingredients, solvents or alcohol-based ink WAVE-PRO can be used along with our range of colours or metallic pigments. Please Note that WAVE-PRO was developed and tested with our proprietary artwork resins. Ideal for Ocean Resin Art How to use: How to work with Wave Pro - the ideal tool to create the natural sea waves effect! These instructions imply the presence of a "sea" background made of epoxy resin on your board / canvas (it can be done as acrylic paints, and just filled it with transparent resin on top, or you can make it entirely from coloured resin). The hardened "sea" background made of epoxy resin makes it possible to remove non-produced waves in case of failure. We mix the epoxy resin in the proportions indicated in the instructions (the volume depends on the scale of the work). In a cup, mix the resin and Wave Pro additive using the ratio: 3-4 teaspoons of resin and 1/2 teaspoon of Wave Pro). It is important to mix thoroughly and quickly so that the powder dissolves and turns from a pale white to a rich white. Let the mixture rest for 50-70 minutes, occasionally stirring it in a cup. Your main goal is to get a very thick mixture after the indicated time, since this is the perfect consistency for it to be blown with a blow dryer. Mix the newly obtained resin, and use it to make a transparent layer on top of your "sea" background (the key point is that without a liquid transparent layer, the wave effect will not work!). Pour a thin stream of white thick mixture onto this transparent epoxy layer and, holding the blow dryer at a 30 ° angle, blow the wave. Linger only at the beginning of the process, because the resin is thick, and the blow dryer needs to "soften" it, but as you see that the wave has gone, then immediately move along the entire wavelength without stopping. Go through the burner and wait for the resin to completely cure. Once cured, you will have your real sea :) We recommend to use the product with our TRANSPARENT EPOXY RESIN (low viscosity) https://resin-pro.co.uk/product/transparent-epoxy-resin-320-gr/ https://www.instagram.com/p/B0twAR1gDaE/?igshid=nvej64p9oa69
$4,84
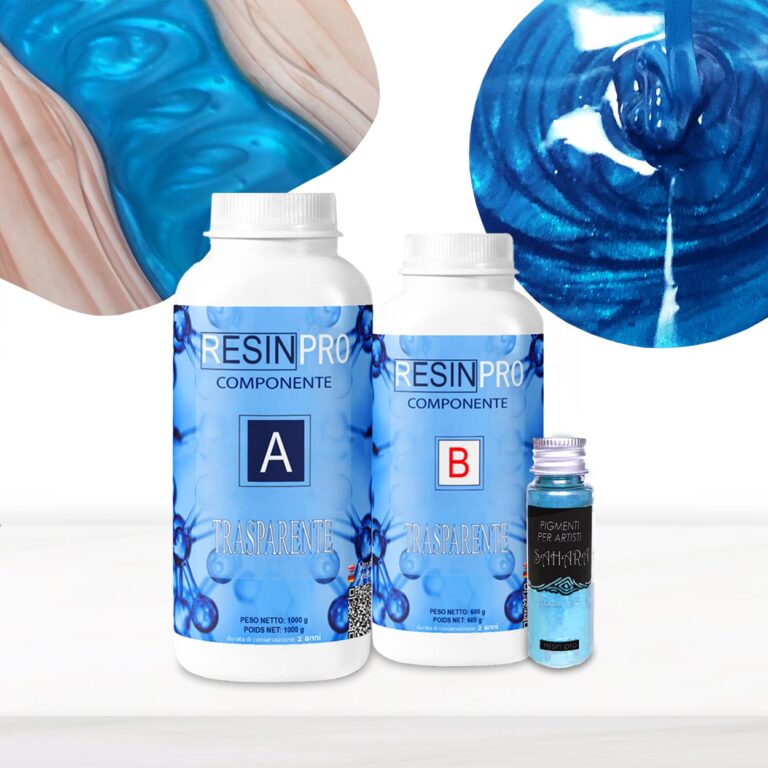
💥 Bestseller for: –Wood-working: Coating, Countertops and Tables, Lamps and Works of art; –Restoration and surface coating: Wood, Concrete, Ceramics, Canvas, Glass fiber, Floors; –DIY: Coasters, Penny-floors, Jewellery making, Dynamic modelling and Artistic creations; –Industrial: Boat care and maintenance; Impregnation of technical fabrics (fiberglass, carbon fiber, etc). 💥About “TRANSPARENT” – Ultra Clear Multipurpose Epoxy Resin: Our Non-Toxic Transparent Epoxy Resin is a high-quality, multipurpose resin that has become a top choice for thousands of customers around the world. It is perfect for creating stunning art pieces, tables jewellery, countertops, DIY projects, and woodworking. This resin is formulated to be safe and non-toxic, making it a great option for artists who are conscious of their environmental impact. It is odourless and VOC-free, making it safe to use indoors. While our Non-Toxic Transparent Epoxy Resin is safe to use, we do advise taking proper safety precautions when working with any type of resin. We recommend using gloves and masks or working in a well-ventilated area to avoid any potential irritation or allergic reactions. Non-Toxic Transparent Epoxy Resin is self-levelling and has a high-gloss finish. It is easy to use and can be mixed with a variety of pigments to create a wide range of colours. One of the best features of our Non-Toxic Transparent Epoxy Resin is its ability to create a super solid and shiny surface after full curing time. It can be used on a variety of surfaces, including wood, stone, ceramics, and more. It is perfect for creating unique and stunning pieces that are sure to impress. Plus, with its long shelf life, you can store it for future projects. Choose our Non-Toxic Transparent Epoxy Resin for a safe, high-quality, multipurpose option for all your creative needs. 💥Key features: ⚙️ ULTRA TRANSPARENT EPOXY RESIN: -The crystal clear epoxy resin is suitable for both beginners and professionals. Start making jewellery, tables, and any other DIY – creation that involves the use of resin. 🧪 PROFESSIONAL QUALITY: -Made from high quality materials – Excellent transparency, No bubbles, Odourless – because of unique formula for DIY, craft and artistic creations. Ideal for casting and embedding objects too. Compatible with silicone, wood, fabric, glass and paper. 🌿 SAFE AND CERTIFIED: -All our resins are Certified Non-Toxic, Solvent-free, non-flammable, and totally safe. 💧 EASY TO USE: -The 100:60 mixing ratio makes this product very easy to use. Being a two-component resin, simply mix RESIN A + HARDENER B in the ratio indicated above the package and let it harden without the need for further additives. Can be coloured as desired. 📞 FREE PROFESSIONAL ASSISTANCE SERVICE: -Since we are directly a manufacturer, we have access to a professional laboratory that will happily help you with any complex project. 🇬🇧 UK BASED TRUSTED COMPANY: -RESIN-PRO team fulfils your order as fast as possible. We produce and realise epoxy resins since 2015. Just check our social media, where you will find thousands of projects made with our products around the world. 💥Suitable for: –Wood-working: Coating, Countertops and Tables, Lamps and Works of art; –Restoration or surface coating: Wood, Concrete, Ceramics, Canvas, Glass fiber, Floors; –DIY: Coasters, Penny-floors, Jewellery making, Dynamic modelling and Artistic creations; –Industrial: Boat care and maintenance; Impregnation of technical fabrics (fiberglass, carbon fiber, etc). + Heat and chemical resistance (Up to 70C); + Long working time; + Odourless; + Excellent mechanical strength; Get inspired by creative works [pinterest_carousel gallery_id="776800704417739265"]
$28,49
 Free shipping on orders over €199,00
  Shipping Tracking!


 Google
 Facebook




