Resin Pro offers the possibility to achieve a perfect polishing by using different types of abrasive pastes. It can be used by hand or with an orbital polisher to make your resin creations shiny. Ebonite Abralon Sanding Pads Cosmetically appealing, consistent scratch pattern provides excellent traction. Combines the benefits of abrasive cloth and non-woven products. Opening in the fabric allows water to flow freely around the abrasive. Solid surface and foam backing provide even surface pressure. Last 5+ times longer than sandpaper. Use wet or dry (residual material can be removed by high pressure air). Now it's possible to get the most aggressive surface texture without that "cheese grater" look. Abralon sanding pads use silicon carbide particles that are precision sifted to a consistent grain size, then bonded evenly to a six-inch round fabric face for the most even scratch pattern available. WARNINGS: During processing, use protective masks, gloves, and other protective clothing. In case of contact with eyes, immediately rinse with cold water for 15 minutes and immediately consult a doctor. The kits may include by variations: EpoxyPolish Polishing cream – 250 ml [8,79 oz] - 1pc Ebonite Abralon Sanding Pads: - Ebonite Abralon Sanding Pad 150mm 360 grit - 1pc - Ebonite Abralon Sanding Pad 150mm 500 grit - 1pc - Ebonite Abralon Sanding Pad 150mm 1000 grit - 1pc - Ebonite Abralon Sanding Pad 150mm 2000 grit - 1pc - Ebonite Abralon Sanding Pad 150mm 3000 grit - 1pc - Ebonite Abralon Sanding Pad 150mm 4000 grit - 1pc EpoxyPolish Polishing cream How to Use: Step 1: Thoroughly clean the surface with a cloth. Step 2: Now you can polish by hand or with an orbital polisher. We recommend using the lowest possible speed to get the best result. Start Polishing with 360-500 grit. Note: Sand the entire surface evenly with circular movements and light pressure. Moisten the pad or the surface with water from time to time. Step 3: Now use the 1000 grit sandpaper. Note: Moisten the sandpaper or the surface with water from time to time. Step 4: Afterwards, use 2000 grit sandpaper. Note: Moisten the sandpaper or the surface with water from time to time. Lastly, use 4000 grit sandpaper to finish sanding. Step 5: Remove the sandpaper from the polishing disc and attach a soft sponge to it. Rinse the surface or wipe it with a damp cloth to remove any residual grain of the sanding. Step 6: Apply EpoxyPolish Polishing cream on the damp sponge. Use by hand or with an orbital polisher, using a large circular motion and exerting slight pressure. Step 7: Clean the surface with plenty of water to remove all the remaining residues. Step 8: Enjoy the result!!!
$21,49
"I-GUM" - Non-Toxic Silicone Rubber - Paste Form Completely non-toxic silicone rubber in paste to be directly applied onto the model you want to replicate. Prior to using, it should be mixed with its catalyst paste (in equal parts, 1: 1) until you have a homogeneous mixture. Due to its non-stick performance on all surfaces, you don’t need to wash the tools after use and it is not necessary to apply other release agents to the model. In addition to copying the shape of small products, this silicone is ideal for creating the moulds of coasters, trays and other similar decorations: the sides are made of silicone, and the base is made of plexiglass or films.
$26,99
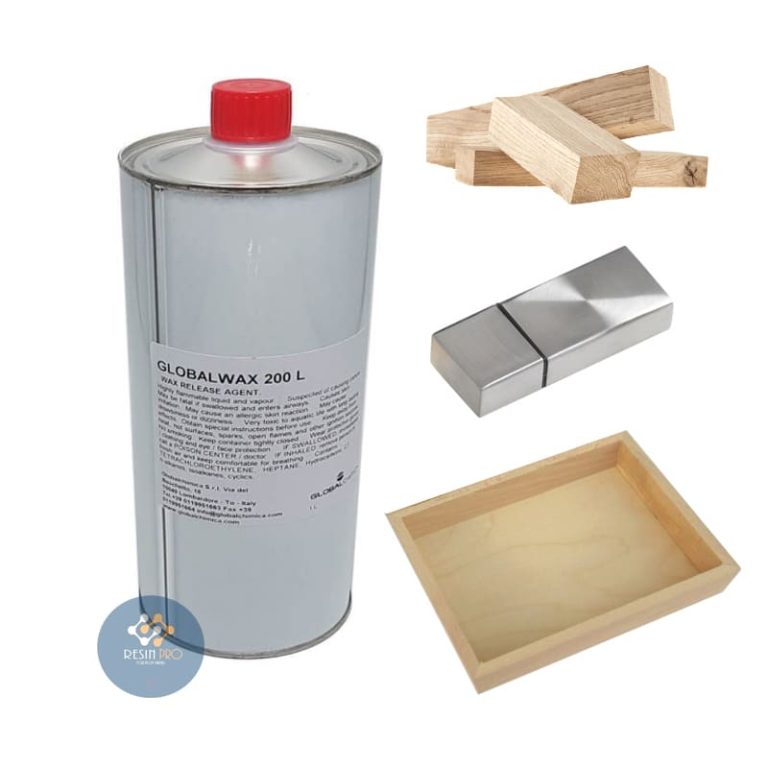
Global Distacc A Distacc Release Wax (Liquid) for Epoxy, Polyurethane and Acrylic Resins. The GlobalA A 2 200 L Liquid is a wax-based product for application with a pen or spray gun Resistant up to + 180 C The Global -a A distacc release agent (Liquid) creates a wax film on the mould surface and model, with a strong anti-adhesion action and high temperature resistance (up to + 180 C It is particularly recommended in the preparation of moulds and formwork in which to cast resin. You can apply it on wood, metal, plastic and even cardboard, making the surface perfectly anti-adherent in which to pour resin or other compounds in just a few minutes. IT IS NOT RECOMMENDED TO USE LIGHTERS, HEAT GUNS OR DEVICES THAT INCREASE THE TEMPERATURE (FOR EXAMPLE WHEN YOU WANT TO REMOVE BUBBLES FROM THE RESIN OR ACCELERATE THE CATALYSIS TIME). Application-brush or spray gun Colour – - white It is a liquid wax release agent packed in 1 liter packs. It is a very effective detachment agent that can be applied by brush or gun. It dries quickly in 2-3 minutes and keeps all the details of the mould. This product belongs to the second category; work only with protective equipment during use. The second category of products - Air freshener, candles, pressed wood, mothballs, non-stick frying pans, plastic bottles. May have carcinogenic properties. CAUSES SKIN IRRITATION. THIS MAY CAUSE AN ALLERGIC SKIN REACTION. THIS MAY CAUSE DROWSINESS OR DIZZINESS. VERY TOXIC TO AQUATIC ORGANISMS WITH LONG-LASTING EFFECTS. HIGH PRESSURE BOTTLE: IT MAY EXPLODE WHEN HEATED. KEEP AWAY FROM HEAT SOURCES, HOT SURFACES, SPARKS, OPEN FLAMES OR OTHER SOURCES OF IGNITION. DON'T SMOKE. DO NOT PIERCE OR BURN EVEN AFTER USE. PROTECT FROM SUNLIGHT. DO NOT EXPOSE TO TEMPERATURES ABOVE 50°C/122°F DO NOT VAPORIZE OVER AN OPEN FLAME OR A SOURCE OF STRONG EXPOSURE TO THE EYES/FACE. DO NOT SPRAY IN THE ENVIRONMENT. contains: TETRACHLOROETHYLENE, heptane, HYDROCARBONS, C7, N-ALKANES, ISOALKANES CYCLIC.
$22,95
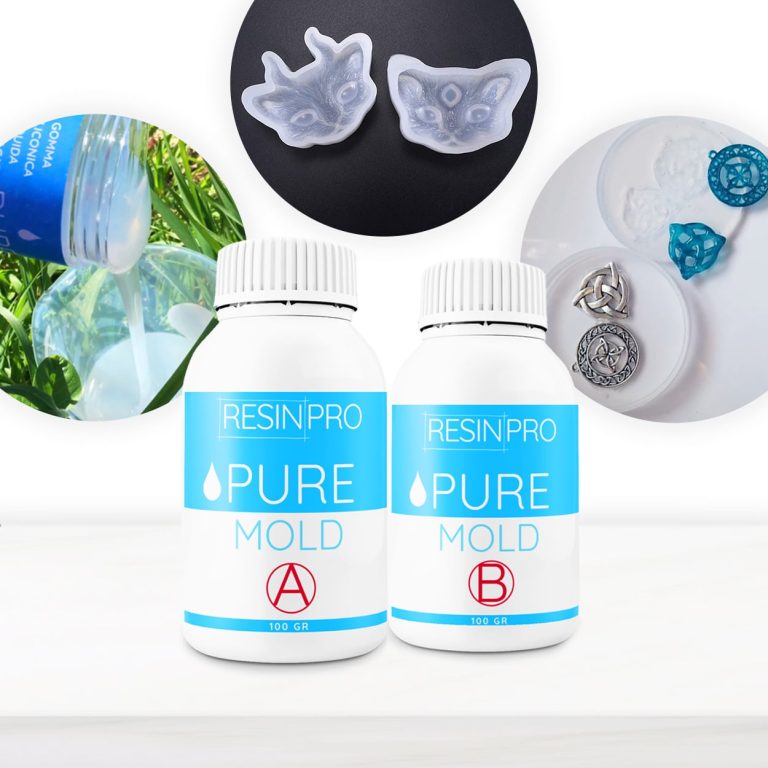
"PURE MOLD": TRANSLUCENT AND FAST LIQUID SILICONE RUBBER FOR THE CREATION OF MOULDS COMPATIBLE WITH RESIN. 500 GR [1,10 LB] - A + B (250 GR + 250 GR) [0,55 LB + 0,55 LB] or 1000 GR [2,20 LB] - A + B (500 GR + 500 GR) [1,10 LB + 1,10 LB] Very easy to use silicone for creating detailed moulds of any size! Description. Liquid medium-hard condensation pourable silicone rubber (13 shore A). PURE MOLD is a two-component addition silicone rubber that vulcanizes at room temperature. Due to its remarkable fluidity, it is ideal even for the duplication of models with undercut areas. The main qualities of the product make it particularly suitable for the use of: epoxy resins, polyester, polyurethanes and acrylics, cements and plasters. + Liquid + Fast (6-8H) + Translucent + Resistant. It possesses high mechanical characteristics, and it is suited for the preparation of casts with considerable undercuts: reproduction of bronze statues (artistic foundries), serial reproduction of complex objects in resin (polyester, polyurethane and epoxy), in plaster, natural and synthetic wax, concrete (e.g. statues, decorative garden items, decorative candles, prototypes, decorative ceramics, rosettes, frames, faux wood decorations, etc.). Casts for technical products. AREAS OF APPLICATION Thanks to its considerable accuracy in reproduction, its high dimensional stability and its mechanical resistance, PURE MOLD silicone rubber is especially good for model and mould making. Its great fluidity and its high dimensional stability make it ideal for decorative pottery, ceramic and jewellery serigraphy and concrete moulding. Silicone rubber is compatible with the majority of Epoxy, Polyurethane and Acrylic resins, and with plaster and cement. Demould time: 4H Technical Features: * Colour Part A: Translucent * Colour Part B: Translucent * Mix ratio 1: 1 * Pre-catalyst mixing viscosity 4500 +/- 500 cP * Mixing time at 23°C (73°F) 1 ' * Working time at 23°C (73°F) 40 '- 50' * Demould time at 23°C (73°F) 180 ’ * Shore A hardness after 24 hours 13 +/- 2 ShA * Ultimate tensile strength 3.0 +/- 0.2 N/mm² * Elongation at break 450 +/- 20% * Tear resistance (Die B) 14 +/- N/mm. * Tear resistance (Die C) 9 +/- N/1mm Note: Do not use above 30°C [86 F]. For more safety information, please carefully read the Safety Data Sheet of all ingredients. WARNINGS: During processing, use protective masks, gloves, and other protective clothing. In case of contact with eyes, immediately rinse with cold water for 15 minutes and immediately consult a doctor. Download Non toxicity Certificate
$32,49
Model Preparation
Before embarking on creating the mold for the epoxy fillet, it is essential to prepare the model for use. It is recommended to select an object with a smooth surface and distinct details. Alternatively, you can craft a custom model using materials such as clay or plasticine. Once the model is chosen or created, ensure it is clean and free of any dust.
Mold Making
For crafting the mold for the epoxy fillet, it is recommended to utilize a flexible and durable silicone mold material. Apply the silicone to the model, ensuring comprehensive coverage of all details. Allow the silicone to dry for the duration specified by the manufacturer. Once solidified, gently detach the mold from the model.
Resin Casting
With the fillet mold in place, you can proceed with casting the epoxy resin. RESINPRO offers premium-quality epoxy resins ideal for this purpose. Carefully pour the resin into the mold, taking care to prevent the formation of air bubbles. Allow the resin to cure for the specified time as per the manufacturer's instructions.
Fillet Removal and Finishing
Upon complete curing of the resin, delicately extract the fillet from the mold. If needed, refine the edges and smoothen the surface for a flawless finish. RESINPRO provides a comprehensive range of tools and materials necessary for perfecting resin artifacts.
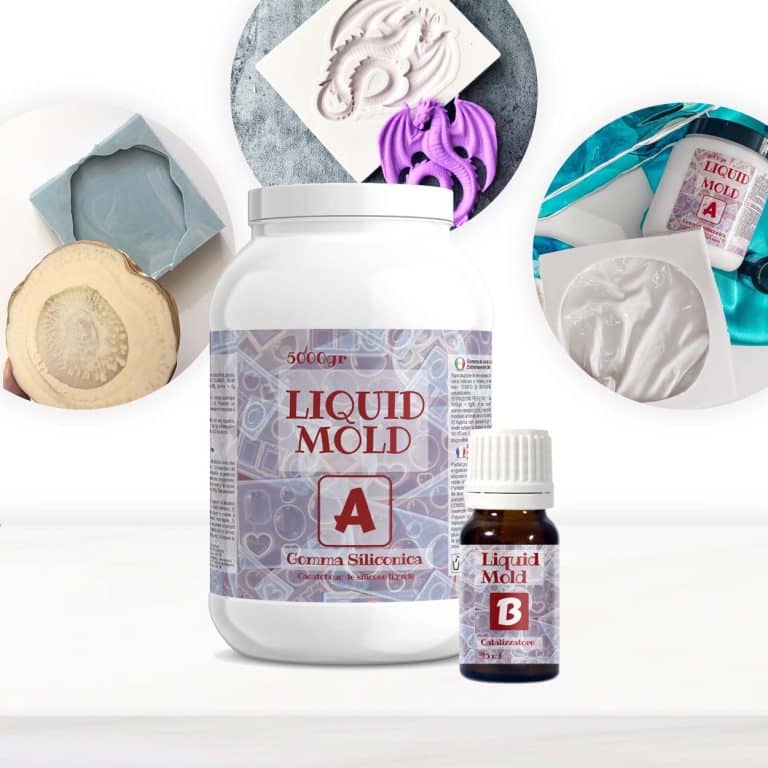
CASTING LIQUID SILICONE RUBBER – for mold-making. Two-component A + B. Liquid silicone rubber for mold-making; able to penetrate everywhere and to reproduce every small detail. It is suitable for making molds for small objects, even with very fine details and noticeable undercuts. Liquid Silicone Rubber for Making Highly Detailed Molds. Compatible with Resin, Soap and Polymer Pastes. Ideal for multiple reproductions of models and complex shapes and jewelry of any kind. White Color – Mixing Ratio: 100: 2 by weight (for 20 Shore type), 100:3 by weight (for 15 Shore type). Complete cure in 12 hours. Liquid medium-hard condensation pourable silicone rubber. It possesses high mechanical characteristics, and it is suited for the preparation of molds with fine details: reproduction of bronze statues (artistic foundries), serial reproduction of complex objects in resin (polyester, polyurethane and epoxy), in plaster, natural and synthetic wax, concrete (e.g., statues, decorative garden items, decorative candles, prototypes, decorative ceramics, rosettes, frames, faux wood decorations, etc.). Castings for technical products. Technical Features: + Mix ratio: 100: 2 by weight (for 20 Shore type), 100:3 by weight (for 15 Shore type), + Pot Life – 60-80 min; + Pouring time – 60-80 min; + Demold time – 12 hours; + Hardness – 20 + -3 Shore A + Color – white, semi-gloss.
$19,49
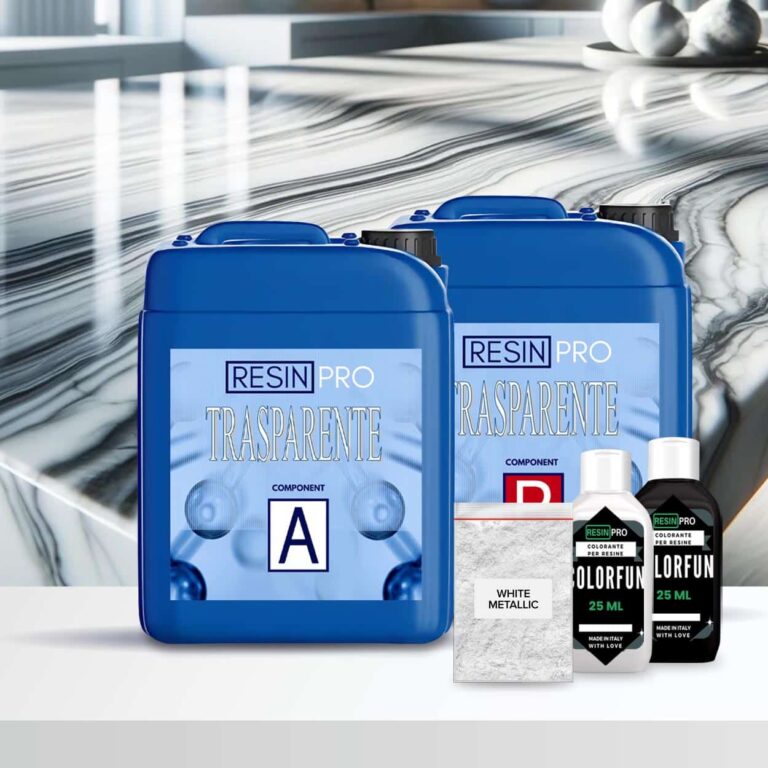
Top Cucina Kit Carrara Marble Effect with Epoxy Resin: The 2.4 kg kit (1.6 + 0.8) covers 1 square meter (+ 10 g white metallic pigment + 25 ml white dye +25 ml black dye) The 4 kg kit (2*1.6 + 0.8) covers 2 square meters (+ 2*10 g metallic pigment +2* 25 ml white dye + 2*25 ml black dye) The 8 kg kit covers 4 square meters (+ 4*10 g metallic pigment +4* 25 ml white dye+ 4*25 ml black dye) The 16 kg kit covers 8 square meters (+ 8*10 g white metallic pigment +8* 25 ml white dye 8*25 ml black dye) Kit Contents: 2.4kg, 4kg, 8kg or 16kg of "Art Pro" Epoxy Art Coat for a high quality base White dyeand Black of the "Colorfun" line for the perfect stone shades White Metallica Sahara pigment for that extra touch of sparkle Good to add: To enhance the appeal of the design:: Isopropanol 99.9% (additional option, not included in the price) To make the coating last longer: Polishield 100 Gloss (additional option, not included in the price). The coverage of a 0.5 kg kit is approximately 4 m2 Each kit includes dyes and pigment in sufficient quantity for the amount of resin required. HOW TO CREATE YOUR MARBLE EFFECT WITH EPOXY Guide Instructions: Step N1: Primer Start by carefully measuring the amount needed to cover the surface based on the consumption of 150 g/m2, making sure to follow the proportions indicated to obtain a homogeneous mixture. Once the base has been prepared, proceed with adding the dye, choosing between white or black depending on your needs. The quantity of colourant to add to the mixture can be measured in a few drops (max 5% by volume). This step is crucial to achieve the desired colour and ensure uniformity of the application. Before applying the primer, it is essential that the surface intended for treatment is adequately prepared. Sand the surface with a coarse grit (40 or 60) before any operation. Make sure it's completely clean, using a soft cloth or brush to remove any pigment, dirt or debris. The surface must also be completely dry; residual humidity can compromise the adhesion of the primer and its effectiveness in sealing the surface. Once the surface is ready, apply the mixture evenly, using a suitable tool such as a brush, roller or spatula, depending on the size of the area to be treated and your personal preference. The key is to get a thin, even layer that can cover the entire area without leaving gaps or excessive product buildup.. After application, it is essential to allow the primer to dry completely before proceeding with further treatments or finishes on the surface. The recommended waiting time is 12 hours; this range may vary slightly depending on environmental conditions, such as humidity and temperature, but offers a good compromise to ensure the mixture has time to dry and adhere properly. During this period, avoid touching or stressing the treated surface to ensure optimal results. Don't worry if you notice any discrepancies on the surface, the next main pour will level everything perfectly. Step N2: application Start by applying masking tape around the perimeter of your countertop to contain the epoxy you're about to pour. This step is essential to ensure the resin stays where it is needed. After applying the resin, wait about 1.5 hours before gently removing the tape. To ensure coverage is even and complete, plan to use approximately 1.6kg of resin for every square meter of surface area. When you are ready to mix the resin, use a drill equipped with a paddle mixer for quick and even action (use at low speed), taking about 2 minutes for this operation. If you prefer to mix by hand, be prepared to take double the time. Don't forget to scrape the sides and bottom of the container halfway through the process with a stick to ensure all the material is mixed well. Next, separate the already mixed resin into different glasses and add the desired colours, mixing the different colours in the different glasses until you obtain an intense and uniform colour per single glass. To create a striking visual effect, pour the coloured resin in random layers into a larger bucket, being careful not to mix the colours together too much. After filling the bucket, spread the contents over the surface of the worktop, leaving a small amount of resin aside to finish the edges later. To remove trapped air bubbles, gently run a propane torch or heat gun over the surface. Once the adhesive tapes have been removed, approximately 1.5 hours after application, if there are any dry edges, moisten them slightly by wearing a protective glove to promote an even appearance. Use appropriate tools, such as spatulas or plastic scrapers, to spread and level the resin along the edges, making sure to cover the entire area well. After letting the resin cure for 24 hours, you can apply a clear top coat or PoliShield scratch-resistant paint to further protect the surface. Finally, for even more refined visual effects, spray 99.9% isopropyl alcohol onto the surface just before the resin begins to fully harden. This will create unique lacy textures. Remember that when you remove the tape, it is essential that the resin is partially hardened, neither too liquid nor completely solid, to avoid unwanted drips. Attention! Safety Guidelines for Using Isopropyl Alcohol (99.9%) Isopropyl alcohol (IPA) is a highly flammable substance. Improper use—especially near heat sources like torches or heat guns—can result in fire or explosion. To ensure safe use, follow these precautions: Primary Risks Highly flammable: IPA vapors can ignite from sparks, open flames, or hot surfaces. Forms explosive vapor-air mixtures, especially in enclosed or poorly ventilated spaces. Strictly Prohibited: Using gas torches or heat guns near areas treated with IPA. Spraying IPA near active heat sources. Storing IPA near flames, heaters, or hot tools. Recommended Safety Measures: 1. Ventilation: Always work in a well-ventilated area when using IPA. 2. Wait Time: After applying IPA, wait at least 5–10 minutes to allow complete evaporation before using any heat tools. 3. Safe Distance: Keep IPA containers at least 2 meters (6 feet) away from heat or flame sources. 4. Storage: Store IPA in a tightly sealed container, away from direct sunlight or high temperatures. 5. Fire Safety: Have a CO₂ or dry chemical fire extinguisher nearby when working with flammable substances and open flames. In Case of Fire: Do not use water to extinguish the fire. Use an appropriate extinguisher, cut off air supply if safe, and call emergency services if needed.
$371,95
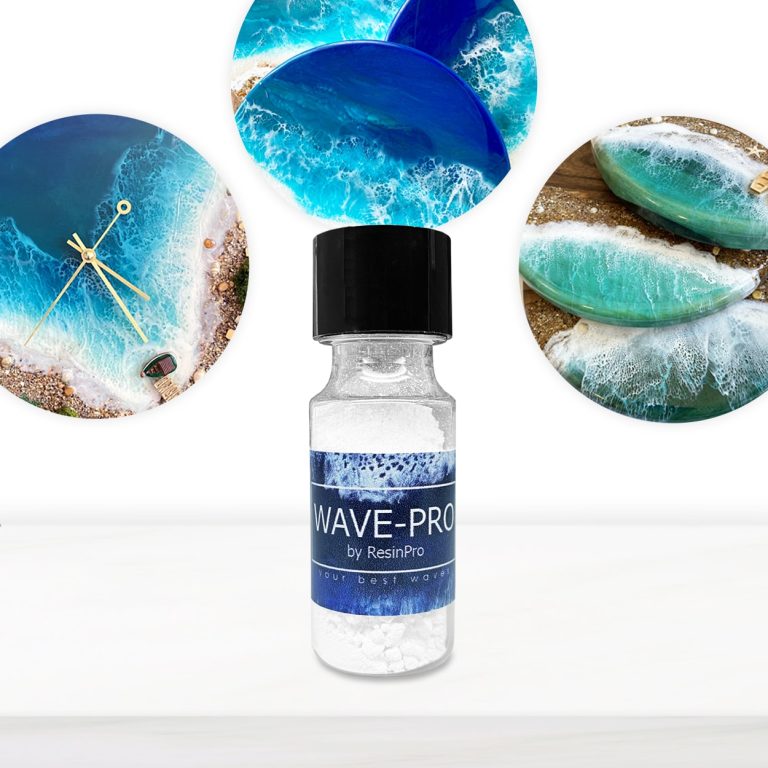
Create your personalized Sea Wave Effect! WAVE-PRO is a non-toxic powder that reacts with wet epoxy resins by repelling itself away, thereby stimulating movement in concentric outward circles and waves. Creates cells and waves in resin art Safe & user-friendly Odourless Non-toxic & non-flammable Zero-VOC formula with no harsh chemical ingredients, solvents or alcohol-based ink WAVE-PRO can be used along with our range of colours or metallic pigments. Please Note that WAVE-PRO was developed and tested with our proprietary artwork resins. Ideal for Ocean Resin Art How to use: How to work with Wave Pro - the ideal tool to create the natural sea waves effect! These instructions imply the presence of a "sea" background made of epoxy resin on your board / canvas (it can be done as acrylic paints, and just filled it with transparent resin on top, or you can make it entirely from coloured resin). The hardened "sea" background made of epoxy resin makes it possible to remove non-produced waves in case of failure. We mix the epoxy resin in the proportions indicated in the instructions (the volume depends on the scale of the work). In a cup, mix the resin and Wave Pro additive using the ratio: 3-4 teaspoons of resin and 1/2 teaspoon of Wave Pro). It is important to mix thoroughly and quickly so that the powder dissolves and turns from a pale white to a rich white. Let the mixture rest for 50-70 minutes, occasionally stirring it in a cup. Your main goal is to get a very thick mixture after the indicated time, since this is the perfect consistency for it to be blown with a blow dryer. Mix the newly obtained resin, and use it to make a transparent layer on top of your "sea" background (the key point is that without a liquid transparent layer, the wave effect will not work!). Pour a thin stream of white thick mixture onto this transparent epoxy layer and, holding the blow dryer at a 30 ° angle, blow the wave. Linger only at the beginning of the process, because the resin is thick, and the blow dryer needs to "soften" it, but as you see that the wave has gone, then immediately move along the entire wavelength without stopping. Go through the burner and wait for the resin to completely cure. Once cured, you will have your real sea :) We recommend to use the product with our TRANSPARENT EPOXY RESIN (low viscosity) https://resin-pro.co.uk/product/transparent-epoxy-resin-320-gr/ https://www.instagram.com/p/B0twAR1gDaE/?igshid=nvej64p9oa69
$4,84
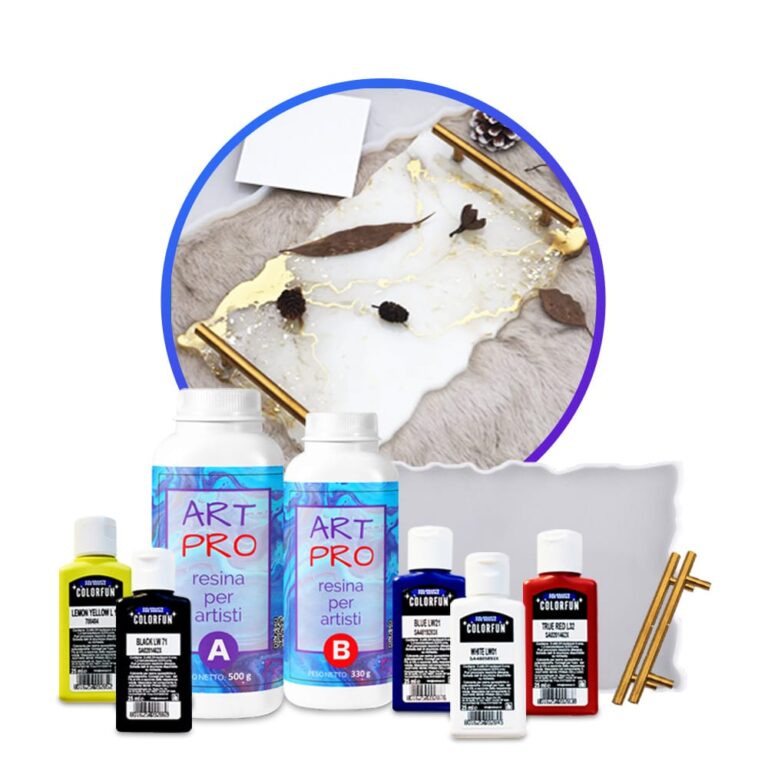
Creative Kit: Create your own resin tray! KIT INSTRUCTIONS This kit contains: 1.66 kg of epoxy resin Silicone mould "tray" + handles 5 dense dyes Spread out the plastic tarpaulin to protect the work surface. Make sure that the silicone mould is clean and all materials are at hand. Do not forget to wear disposable gloves and follow the safety instructions. Mix the epoxy resin according to the mixing ratio Art Pro 100: 66 – by weight) – 180 g A and 119 g B-for a filling thickness of 5 mm. Carefully weigh and mix both components for 3 minutes, making sure that all sides and bottom of the mixing container are included for effective mixing. Let the mixture stand for 2-3 minutes. Divide the resulting resin into separate containers for each colour you are going to use. Add resin-specific dyes to each container to get the desired shades. Mix thoroughly. Put the colours in one large container without mixing them, allowing them to stack on top of each other. Pour this mixture in layers into a mould for a dynamic abstract effect. In addition, you can pour each colour into different places of the mould according to your design concept. After 24 hours, you can remove the resin tray. After another 12-24 hours (the resin reaches full strength), you can make your tray workable by using the screws included in the kit to attach the tray handles. Drill the holes in the tray, then secure the handles with screws. Geodetic effect- To get the geode effect when casting, use the layering technique. Divide the mixed resin into separate containers for each colour you are going to use + one part with transparent resin and one white. Start by pouring clear resin into the center of the mould. Then alternate layers of white and transparent resin with coloured resin, allowing them to spread naturally. Finish by adding the last layer of transparent resin for a beautiful 3D effect. Let it harden to reveal a stunning geodesic-inspired design. Other ideas: Ocean Art Resin Tray: Capture the beauty of the ocean using different shades of blue and white resin, adding a few shells or a small starfish for an authentic nautical feel. Real Pressed Flowers: Add real dried flowers or leaves to the resin to create a natural and timeless look. Gold leaf Accents: Use a gold or metal sheet to add a touch of luxury to your tray.
$78,49
ResinPro: one supplier for all your needs
15 years of experience at your complete disposal, supplying resins and accessories for creativity, industry, DIY, flooring and marine applications.
At your home, directly from the manufacturer!
ResinPro is the direct manufacturer of our resin range for companies and hobbyists, guaranteeing the lowest prices on the market.
Learn more
The widest range of resins in the US!
We offer resins for every need, from artistic creations to marine and construction applications, far beyond the “limited” selection typically found in local DIY stores.
Expert technical support!
Our technicians provide free remote consulting to help you avoid mistakes and ensure you achieve the result you want — unlike “generic retailers” who sell 1,000 different products.
get a free consultation
RESIN PRO is a leader in resin production and distribution!
24-hour delivery: We ship across the US on the same day. Enjoy convenient home delivery with our appointment service—our courier will contact you in advance and deliver the package to your preferred location, or leave it at an alternative address of your choice.

Full support!
We provide continuous support from preparation to final application, including remote technical assistance, ensuring a smooth experience.
Talk with a specialist and place a phone order without registration and without credit cards!
 Free shipping on orders over €199,00
  Shipping Tracking!


 Google
 Facebook