💥 BESTSELLER FOR: –Resin-art: Geode-art, Ocean-art, Coasters, Trays, Fluid art (pour paint) and Art objects; –Surface coating: Coating + very good for vertical applications by brush or roller; –Restoration : Covering objects and furniture to add depth and brilliance to the colour. The surface is perfectly smooth and moisture-resistant. Solvent-free and odourless epoxy resin. 💥About ULTRA-HIGH VISCOSITY epoxy resin for artists "ART PRO DELUXE": The epoxy resin for the artistic sector: thanks to its special formula and its dense structure, it allows you to create paintings with the "pour paint" and liquid paint technique. It does not leak out from the working surface, slowly reaching the corners of the frame. Great choice for ocean-art; coasters and trays! ART PRO DELUXE preserves your original design and prevents any possible modification due to the casting of the resin: because of its special thick formula, the layers of colours do not expand and do not mix (unless you deliberately intervene), faithfully keeping with your creative idea! Additional features: Crystal Clear; + Odourless; + Excellent mechanical strength; + High impregnation and reinforcement of technical fabrics. The product can be coloured with any epoxy dye (both in paste and powder) in a percentage no more than 5% from the mix weight. It can also be thickened by the use of aggregates such as powders and fumed silica. DEAR ARTISTS! This type of epoxy has higher viscosity than you may expect! Please, read this note - 1. If you have no a lot of experience or you prefer to work with more liquid resin, please, check this Resin 👉🏽 ART PRO 2. If you prefer to do art-works in more viscosity resin, please, choose ART PRO DELUXE. But if it`s your first experience, we suggest to design your project before pouring, because, in this case you have short working-time (15-20 min). Due to its exceptionally high viscosity, our Deluxe epoxy resin is ideally suited for delicate casting projects, including ocean art, pour-art, and other creations that demand a resin with superior viscosity. When undertaking basic castings of 1-1.5cm, special care is needed to address bubble formation. We recommend a multi-layer approach for such castings, employing a heat gun after each application. For these projects, we suggest considering our lower viscosity resins - "Transparente" and "Art-Pro" - as the optimal solutions. Transparent self-levelling UV-resistant epoxy system, which creates a hard and glossy protective layer for casting up to 1 cm [0,39”] (ex. coasters, trays, art objects). The surface is perfectly smooth and moisture-resistant. Solvent-free and odourless epoxy resin. 💥Key features: ⚙️ 【RESIN ART EPOXY】 ART PRO DELUXE EPOXY RESIN is a ultra-high viscosity and high resistance product. The best choice for Resin-art, making Coasters, Trays, Ocean and Geode-art and casting surfaces. The particular formulation makes it a resistant product suitable for both the surface finishes of paintings, tables or even artistic floors. 🧪 【PROFESSIONAL QUALITY】Art Pro Deluxe Resin, unlike traditional "multipurpose" resins, has a special formulation and viscosity, which allows to obtain an impeccably transparent and glossy surface in any condition. Easily polished. The added UV Anti-Yellowing Filters helps save transparency over time. The low density allows prevent the incorporation of air bubbles making it perfectly suitable for river tables and countertops. Compatible with silicone and wood, fabric, glass, paper or photographs. Complete catalysis ~ 24-48 hours, but it will be ready for "unmoulding" after about 12 hours. 🌿 【SAFE AND CERTIFIED】 All our resins are Certified Non-Toxic, Solvent-free, non-flammable, and totally safe. 💧 【EASY TO USE】 The 100:70 mixing ratio (by weight) makes this product very easy to use. Being a two-component resin, simply mix RESIN A + HARDENER B in the ratio indicated above the package and let it harden without the need for further additives. Can be coloured as desired. 📞 【FREE PROFESSIONAL ASSISTANCE SERVICE】 Since we are directly a manufacturer, we have access to a professional laboratory that will happily help you with any complex project. 🇬🇧 【UK BASED TRUSTED COMPANY】 – RESIN-PRO team collect and send your order as fast as possible. We produce and realise epoxy resins since 2015. Just google our social media, where you find thousands of projects made with our products around the world. ____________________________________________________________________ 💥 Applications: - artworks, creation of art objects (paintings, panels, etc.) with the "fluid-art" (pour paint) technique (pouring up to 1 cm [0,39”]); - vertical applications by brush or roller - coating of surfaces, objects and furniture to add depth and brilliance to the colour; - create a 3D effect on prints, photos and images in general; - creation of a perfectly transparent protective layer on your projects. The "ART-PRO DELUXE" formula is specifically developed for coating in artistic applications. Compatible with colouring agents, powder pigments, alcohol-based and oil-based dyes, aerosol paints. Warning: the product is moisture sensitive, do not use on wet surfaces or with water-based dyes (e.g. Acrylics) ____________________________________________________________________ Epoxy resin is a complicated technical product, but if you follow the basic rules, you will get wonderful results! If you need any assistance, just call us - 07596 850968 or email us –
[email protected] With best regards, RESIN PRO TEAM😊 Check and tag our social media for inspiration! We are always happy to publish your art-work – [CP_CALCULATED_FIELDS id="1"]
$48,49
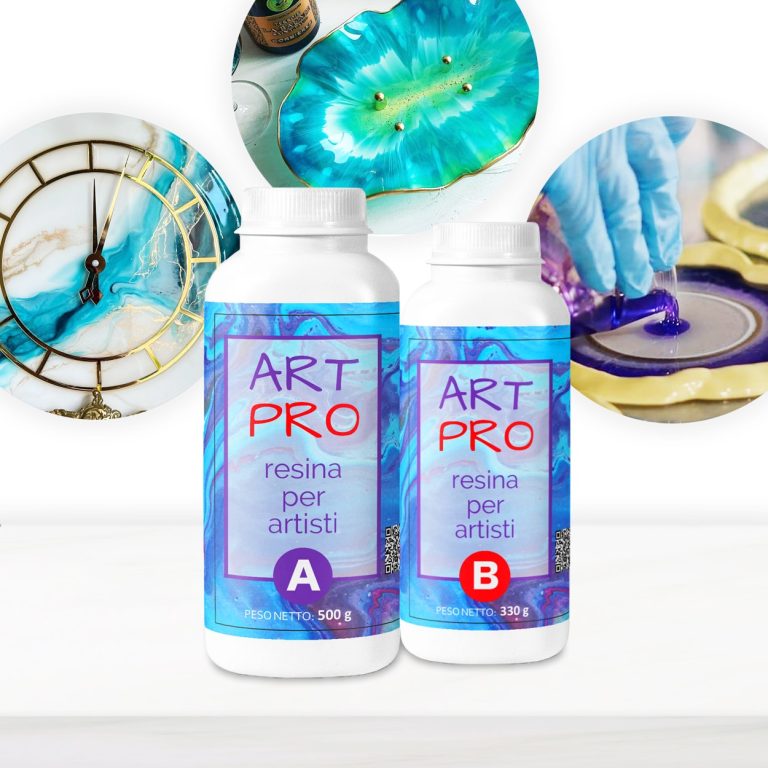
💥 BESTSELLER FOR: – Resin Artworks on surfaces, panels: Ocean Art, Marble Effect, Geode Art and etc; – Coasters and Trays with colour effects (layer thickness up to 1 cm [0,39”]); – Coating of surfaces - Floors, Canvases, Furniture, Etc; – 3D effect on prints, photos and images in general; – Fixation of decorative objects (decorative elements, glass, stone, quartz pieces, etc.); – Creation of a perfectly transparent protective layer on your projects. 💥About “ART PRO ” – Ultra Clear Medium Viscosity Epoxy Resin for Artists: First class quality epoxy resin for the artistic sector: thanks to its special dense formula, it allows you to create Resin Art works. It does not leak out from the working surface, slowly reaching the corners of the frame. ART PRO preserves your original design and prevents any possible modification due to the thickness of the resin: because of its special formula, the layers of colours do not expand and do not mix (unless you deliberately intervene), faithfully keeping with your creative idea! Additional features: Long working time; + Odourless; + Excellent mechanical strength; + High impregnation and reinforcement of technical fabrics. The product can be coloured with any epoxy dye (both in paste and powder) in a percentage ranging from 0.1% to 2.0%). It can also be thickened by the use of aggregates such as powders and fumed silica. 💥Key features: ⚙️ ULTRA TRANSPARENT EPOXY RESIN: -The crystal clear epoxy resin is suitable for both beginners and professionals. Start making Resin Art works, coasters, trays and any other DIY – creation that involves the use of medium viscosity resin. 🧪PROFESSIONAL QUALITY: -Made from high quality materials – Excellent transparency, Glossy surface, Odourless – because of unique formula for DIY, craft and artistic creations. Compatible with silicone, wood, fabric, glass and paper. 🌿 SAFE AND CERTIFIED: -All our resins are Certified Non-Toxic, Solvent-free, non-flammable, and totally safe. 💧 EASY TO USE: -The 3:2 mixing ratio makes this product very easy to use. Being a two-component resin, simply mix RESIN A + HARDENER B in the ratio indicated above the package and let it harden without the need for further additives. Can be coloured as desired. 📞 FREE PROFESSIONAL ASSISTANCE SERVICE: -Since we are directly a manufacturer, we have access to a professional laboratory that will happily help you with any complex project. 🇬🇧 UK BASED TRUSTED COMPANY: -RESIN-PRO team collects and sends your order as fast as possible. We produce and realise epoxy resins since 2015. Just google our social media, where you will find thousands of projects made with our products around the world. The "ART-PRO" formula is specifically developed for coating in artistic applications. Compatible with colouring agents, powder pigments, alcohol-based and oil-based dyes, aerosol paints. The migration laboratory test on cured resin samples ensures that the final product does not release any harmful substances, if applied following the instructions. Warning: the product is moisture sensitive, do not use on wet surfaces or with water-based dyes (e.g. Acrylics) ____________________________________________________________________ if you have not enough experience, we insistly suggest to make a small test before working with large project.
$28,49
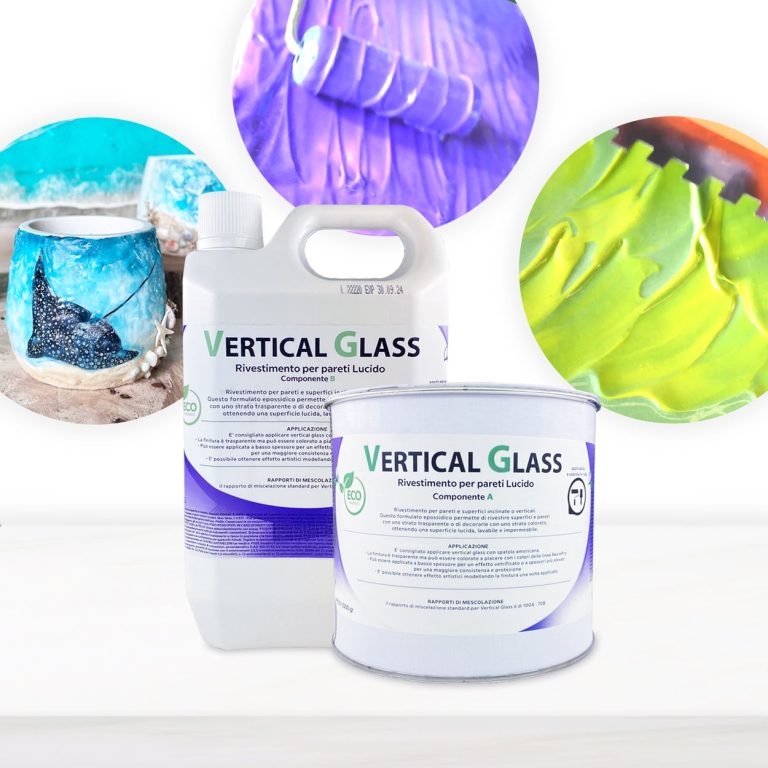
Coating for inclined or vertical walls and surfaces / This epoxy formulation allows you to coat surfaces and walls with a transparent layer or decorate them with a colored layer, resulting in a glossy, washable and waterproof surface. The Vertical Glass resin differs from normal resins allows creatives to create sharp shapes and designs on surfaces and canvases without the resin mixing unintentionally losing the original design! Transparent, UV-resistant epoxy system that creates a hard, glossy protective layer. Vertical Glass allows you to keep your initial design, faithfully respecting your creative idea! The surface will be perfectly smooth and resistant to moisture. Solvent-free and odorless epoxy resin. Applications: Floors and Walls (pre-existing) also vertical; Protection of material coatings and other artistic decorations; Coating, repair and decoration of shower trays and sanitary ware; Coating of surfaces, objects and furniture to give depth and brilliance to the color, even in Vertical! Features: For a smooth coating, it is applied with a spatula to the surface of any material: tile, concrete, wood, brick, etc. It has good hiding power, and completely covers the work surface in one application Creates a glossy, smooth and moisture-resistant layer To create a matte surface, it is easily sanded (48 hours after application, with a grain size of 1000-2000 P) Protects from moisture and gives a new life to surfaces It can be painted with dyes and pigments from our assortment Does not self-align: saves the drawing that you set for it 🙂 Please note that in the unpainted form, the material is not completely transparent, and there is a slight “milky” shade with almost imperceptible micro-particles, so we recommend painting it It is used for: Floor coverings, walls, furniture and other surfaces Protection of surfaces of materials Painting, repair and decoration of showers and bathrooms Creation of paintings, murals and other works of art
$109,49
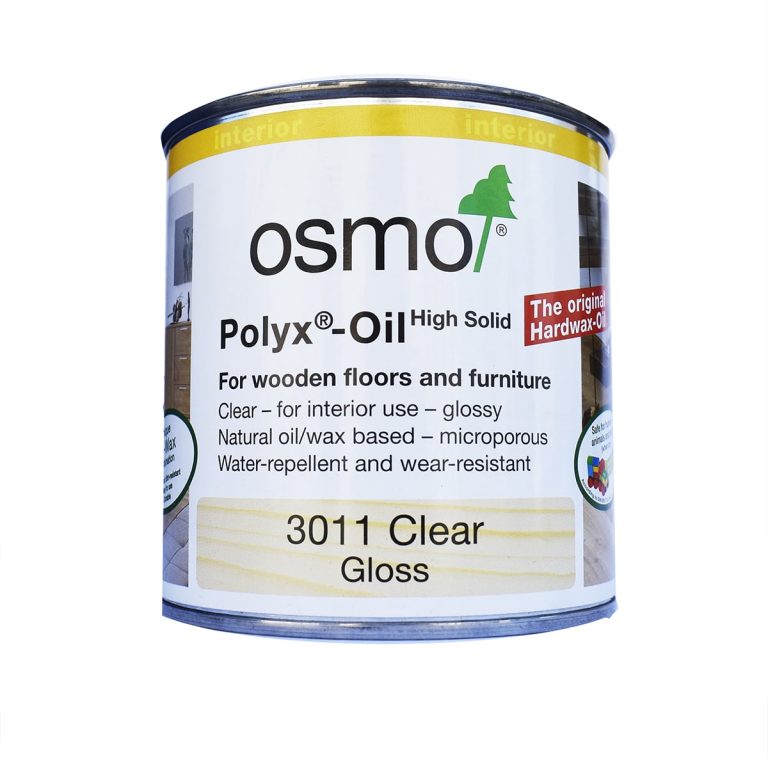
Osmo Hard-Oil-Wax is a general-purpose resin and wood finish derived from natural plant oils and waxes. Resistant to water, dirt, beer, wine, cola and saliva, Osmo Hard-Oil-Wax is microporous and molecularly bonds with the wood, thereby it does not crack, flake or peel. The new advanced formula of Osmo Hard-Oil-Wax has been specially elaborated in Germany to be the first Osmo Hard-Oil-Wax on the European market that can be easily applied with a brush or a roller, no buffing is necessary! It can be used for spot repair and/or restoration/renovation without the need to sand, therefore resin or wood will no longer need complete sanding and refinishing. Clear glossy wood/epoxy finish, which uniquely combines all the advantages of oils and waxes in one product. Osmo-Polyx - Oil Original gloss is resistant to water, dirt and abrasion, and it smoothens any wood surface. Suitable for wood and epoxy resin; microporous surface does not crack, flack or peel. Resistant to wine, beer, cola, coffee, tea, fruit juice, milk and water according to DIN 68861-1A- no water spots. When dry, finish is safe for people, animals and plants and it is also suitable for toys as per EN 71-3 (European norm) and is saliva resistant and sweat-resistant according to DIN 53160 (German industry standard). Recommended use: Osmo Polyx - Oil Original is perfect for the protection of all surfaces and wooden floors, such as solid wood, planks, strips, OSB and cork flooring, as well as furniture surfaces. Ingredients: Based on natural plant oils and paraffin, desiccants and hydrophobing agent. Dearomatized turpentine (benzene-free). EU limit value for this product (cat.A/i): 500 g/l [0,03 lb/oz] VOC (2010). This product contains max. 500 g/l [0,03 lb/oz] VOC. Detailed declaration of ingredients available upon request. Storage: up to 5 years and longer if the can is stored in a dry place and hermetically sealed. Surface preparation: wood and epoxy resin surface must be clean, dry and frost-free (moisture content max. 18%). Osmo Polyx Oil Original is ready to use and should not be diluted. Stir well before use. Clean old microporous stains thoroughly. Old paints and lacquers must be completely removed. As a general rule, wear a dust mask during sanding. Sand wood or epoxy surfaces carefully. Begin with coarse sandpaper – for final sanding use P.120-150, for broom or vacuum. The final result may be influenced by several factors, including the natural features of the wood. Therefore, a trial application is always recommended, especially for unfamiliar timbers. ADVANTAGES Extremely long-lasting and hardwearing Highly resistant to water and dirt Enhances the natural wood characteristics Resistant to common liquids such as water, juice, tea, cola and wine Saliva resistant and sweat-resistant, suitable for toys Microporous breathable finish which does not crack, peel or flake No need to sand for spot repairs or future applications TECHNICAL DATA Approx. coverage: 24 m²/L [7,63 ft²/oz] with one coat No. of coats: 2 coats Application temperature: +5°C to 35°C [41 F to 95 F] Drying time: 8-10 hrs. Sizes: 0.375 L [13,19 oz] Viscosity 95-240 mPas Specific weight: 0.88-0.95 g/cm3 [0,03 lb/in3] Methods of Applications: with Osmo Flat Brush, Floor brush, Oil Finish Applicator Fleece (Hand Pad Holder) or Microfibre Roller, thinly apply to the clean and dry surface along the grain and distribute well. Let it dry for approx. 8-10 hours under good ventilation. Once dry, quickly apply a second thin coat. When renovating or recoating an already oiled surface, one coat applied to the clean and dry surface is usually enough. WARNINGS: During processing, use protective masks, gloves, and other protective clothing. In case of contact with eyes, immediately rinse with cold water for 15 minutes and immediately consult a doctor.
$35,99
Floor Protection for Painting
When it comes to protecting your floor during painting, using paper or cardboard is a common and effective method. This helps prevent splatters and paint drips that could potentially damage the underlying surface. It's crucial to ensure that the protective material used is thick enough to prevent paint from seeping through. Alternatively, plastic sheets or specific protective materials can also be utilized to safeguard the floor during painting tasks. Prior to laying down any protective materials, always make sure that the surface is clean and dry to ensure optimal protection and prevent any damage to the flooring.
Protecting the Floor During Painting
To protect your floor during painting, it's recommended to follow some simple steps that can prevent damage and make cleanup easier. Here are some suggestions:
- Cover the floor with plastic sheets or protective paper to prevent paint from dripping and spreading.
- Use painter's tape to secure the protective materials along the floor edges and protect any exposed corners or areas.
- Place cardboard or plywood panels under furniture or heavy objects to shield them from paint splatters.
- Wear old clothes or aprons to avoid staining your clothing during the painting process.
- Ensure proper ventilation to reduce paint odor and promote drying. By adhering to these tips, you can effectively protect your floor during painting projects.
Covering the Floor Before Painting
Before starting to paint, covering the floor is a crucial step to protect it from paint splatters and simplify the final cleaning process. Here are some common methods to protect the floor during painting:
- - Protective Sheet: Lay down a plastic or fabric sheet on the floor to create a waterproof barrier.
- - Painter's Paper: Secure painter's paper sheets along the floor edges with painter's tape to protect adjacent areas.
- - Painter's Tape: Use painter's tape along baseboards or other vertical surfaces. Ensure complete floor coverage to prevent paint damage and simplify cleaning once the painting is finished.
Preparing the Floor for Painting
Properly preparing the floor before painting is essential for achieving optimal and long-lasting results. Follow these steps:
- 1. Cleaning: Remove dust, dirt, and residues from previous treatments using brushes, vacuum cleaners, or specific detergents.
- 2. Repairs: Fill cracks, holes, or irregularities with epoxy resin-based putties or mortars.
- 3. Sanding: Smooth the surface to remove old paint layers, even out any rough areas, and promote adhesion of the new coating.
- 4. Primer: Apply a specific primer for floors to enhance adhesion and coverage of the subsequent paint.
- 5. Painting: Use a paint that is resistant to foot traffic, chemicals, and wear. Apply it evenly with rollers or brushes. By carefully following these steps, you will achieve a well-prepared floor ready for a professional paint finish.
For a seamless painting process, it's advisable to lay down protective paper on the floor before starting. This can be thick cardboard or specific painter's paper designed to shield the floor from paint splatters and drips. This protective layer effectively prevents paint from reaching the floor, making the final cleaning process easier. Additionally, the paper absorbs any paint stains, preventing streaks on the floor. Be sure to securely tape the edges of the paper to prevent shifting during work. This practice is particularly useful for indoor painting projects to keep the floor clean and protected from damage and stains.
To achieve a smooth floor before painting, follow these key steps:
- 1. Cleaning: Remove dust, dirt, and residues from previous treatments with a stiff brush or sander.
- 2. Crack Filling: Apply filler to fill any cracks or holes in the floor.
- 3. Sanding: Smooth the floor with fine-grit sandpaper to even out the surface and remove any imperfections.
- 4. Primer Application: Apply a specific floor primer for optimal paint adhesion.
- 5. Painting: Apply at least two coats of floor paint, allowing drying time between coats. By diligently following these steps, you can achieve a smooth and uniform floor ready for a professional paint finish.
To protect the floor before painting, it's essential to take precautions to avoid damage and stains. Here are some useful tips:
Thoroughly clean the floor to remove dust, dirt, and residues.
Cover the floor with plastic sheets or painter's paper to shield it from paint.
Use tape to securely fix the protective materials along the floor edges.
Place cardboard or plywood panels under the working areas for extra protection.
If using ladders, ensure they are stable and have non-slip feet.
Wear protective clothing such as gloves and goggles to avoid contact with paint. By following these precautions, you can effectively protect the floor during the painting process.
To ensure a smooth wall painting process and protect the floor during work, follow these steps:
Prepare the floor by covering it with protective sheets or paper to prevent paint stains.
Ensure the floor is clean and dry before laying down the protective material.
Use painter's tape to protect baseboards or floor corners.
Place a sheet or cardboard between the wall and the floor to prevent smudges during painting.
Choose suitable paint for the smooth wall and apply it evenly with a brush or roller.
Allow the paint to dry completely before removing the protective materials from the floor. By following these recommendations, you can paint the smooth wall without damaging the surrounding floor.
Osmo Hard-Oil-Wax is a general-purpose resin and wood finish derived from natural plant oils and waxes. Resistant to water, dirt, beer, wine, cola and saliva, Osmo Hard-Oil-Wax is microporous and molecularly bonds with the wood, thereby it does not crack, flake or peel. The new advanced formula of Osmo Hard-Oil-Wax has been specially elaborated in Germany to be the first Osmo Hard-Oil-Wax on the European market that can be easily applied with a brush or a roller, no buffing is necessary! It can be used for spot repair and/or restoration/renovation without the need to sand, therefore resin or wood will no longer need complete sanding and refinishing. Clear glossy wood/epoxy finish, which uniquely combines all the advantages of oils and waxes in one product. Osmo-Polyx - Oil Original gloss is resistant to water, dirt and abrasion, and it smoothens any wood surface. Suitable for wood and epoxy resin; microporous surface does not crack, flack or peel. Resistant to wine, beer, cola, coffee, tea, fruit juice, milk and water according to DIN 68861-1A- no water spots. When dry, finish is safe for people, animals and plants and it is also suitable for toys as per EN 71-3 (European norm) and is saliva resistant and sweat-resistant according to DIN 53160 (German industry standard). Recommended use: Osmo Polyx - Oil Original is perfect for the protection of all surfaces and wooden floors, such as solid wood, planks, strips, OSB and cork flooring, as well as furniture surfaces. Ingredients: Based on natural plant oils and paraffin, desiccants and hydrophobing agent. Dearomatized turpentine (benzene-free). EU limit value for this product (cat.A/i): 500 g/l [0,03 lb/oz] VOC (2010). This product contains max. 500 g/l [0,03 lb/oz] VOC. Detailed declaration of ingredients available upon request. Storage: up to 5 years and longer if the can is stored in a dry place and hermetically sealed. Surface preparation: wood and epoxy resin surface must be clean, dry and frost-free (moisture content max. 18%). Osmo Polyx Oil Original is ready to use and should not be diluted. Stir well before use. Clean old microporous stains thoroughly. Old paints and lacquers must be completely removed. As a general rule, wear a dust mask during sanding. Sand wood or epoxy surfaces carefully. Begin with coarse sandpaper – for final sanding use P.120-150, for broom or vacuum. The final result may be influenced by several factors, including the natural features of the wood. Therefore, a trial application is always recommended, especially for unfamiliar timbers. ADVANTAGES Extremely long-lasting and hardwearing Highly resistant to water and dirt Enhances the natural wood characteristics Resistant to common liquids such as water, juice, tea, cola and wine Saliva resistant and sweat-resistant, suitable for toys Microporous breathable finish which does not crack, peel or flake No need to sand for spot repairs or future applications TECHNICAL DATA Approx. coverage: 24 m²/L [7,63 ft²/oz] with one coat No. of coats: 2 coats Application temperature: +5°C to 35°C [41 F to 95 F] Drying time: 8-10 hrs. Sizes: 0.375 L [13,19 oz] Viscosity 95-240 mPas Specific weight: 0.88-0.95 g/cm3 [0,03 lb/in3] Methods of Applications: with Osmo Flat Brush, Floor brush, Oil Finish Applicator Fleece (Hand Pad Holder) or Microfibre Roller, thinly apply to the clean and dry surface along the grain and distribute well. Let it dry for approx. 8-10 hours under good ventilation. Once dry, quickly apply a second thin coat. When renovating or recoating an already oiled surface, one coat applied to the clean and dry surface is usually enough. WARNINGS: During processing, use protective masks, gloves, and other protective clothing. In case of contact with eyes, immediately rinse with cold water for 15 minutes and immediately consult a doctor.
$35,99
Intense and brilliant color, ideal for Transparent Epoxy Resins. Mix small quantities to get a translucent effect. The high coverage of the “Colorful Original” range allows to obtain a full and bright color. The high concentration provides an opaque color with a few drops.
Usable to color the products of the RESIN PRO range.
💥 Ideal for epoxy creations and resin tables thanks to its features:
✔️ Intense colors
✔️ Easy to mix
✔️ Intense colors
✔️ High concentration
✔️ Easy to get a translucent effect
✔️ 5 stars on Trustpilot
🌿Cruelty Free, Vegan Friendly🐹
$16,00
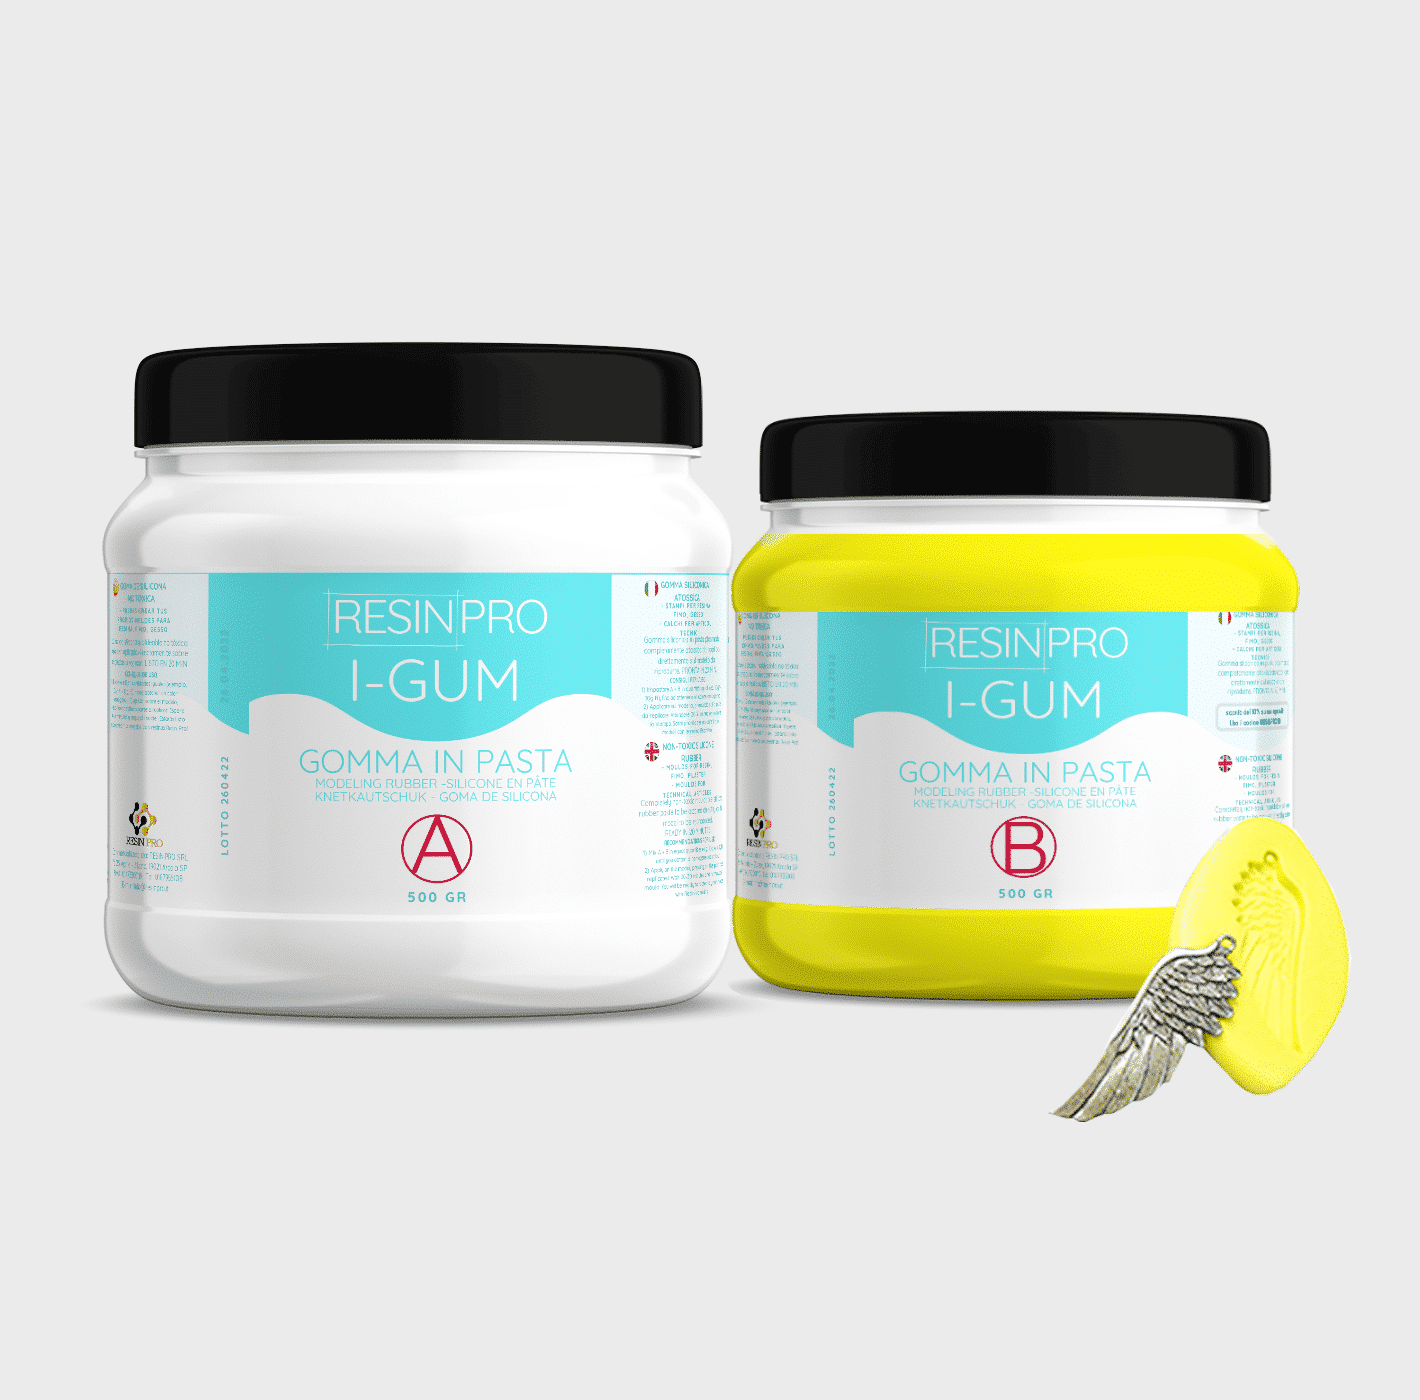
• "I-GUM" - Non-Toxic Silicone Rubber - Paste Form
Pasty silicone rubber "I-GUM" is a two–component product for creating moulds and forms for pouring with epoxy resin.
• Superior formula proven by years of experience:
✔️ Easy to use -> 1:1 mix ratio
✔️ Non-toxic -> You can work without gloves
✔️ Without smell
✔️ Long working time -> 20 minutes
✔️ European quality -> Directly from Italy
✔️ Ideal for creating moulds and frames for working with resin, polyurethanes, wax, cement and other materials
✔️ 🌿Cruelty Free, Vegan Friendly🐹
$22,00

Images
On sale
“Pure Mold” – Translucent Liquid Silicone Rubber for Mould Making, 1:1 Mix Ratio
Available, ready for shipping
Order now to receive your product between Wednesday, April 29 and Wednesday, May 6.
Shipping $16
Choose your kit:
Quantity
"Pure Mold" - Translucent Liquid Silicone Rubber for Mould Making, 1:1 Mix Ratio quantity
The kit: 1 KG (500 GR of A + 500 GR of B)
$52,95 Original price was: $52,95.$44,95Current price is: $44,95.-15%
💰 You save
$8.00
TRANSLUCENT AND FAST CASTING LIQUID SILICONE RUBBER FOR MOULDS
🧪【INNOVATIVE FORMULA】Create your moulds using PURE MOLD silicone rubber! Compatible with many materials including resins, plaster and cement. Its transparency will allow you to observe through the mould and its high mechanical characteristics make it a product suitable for both professional and hobby use.
💎【IMPECCABLE QUALITY】Guarantees the creation of resistant and detailed moulds that will last over time and will be reusable several times!
🌿【SAFE AND CERTIFIED】 100% Made in Italy, guaranteed by a Certificate of Non-toxicity and solvent-free and odorless, this rubber is configured as a safe and easy to use product!
⚙️【EASY TO USE】 Mixing ratio 1: 1; Hardness: 13 Shore; Catalysis in about 6-8 hours. The poly additive formula makes it more resistant than other silicones, allowing the creation of higher quality molds.
+ Easy mixing ratio 1:1
+ Less mould shrinkage over time
+ 30% longer service life
+ Fast (6-8H)
+ Translucent
+ Resistant
Good for:
epoxy resins,
polyester,
polyurethanes and acrylics,
cements and plasters.+ Liquid
🌿Cruelty Free, Vegan Friendly🐹
$44,00
 Free shipping on orders over €199,00