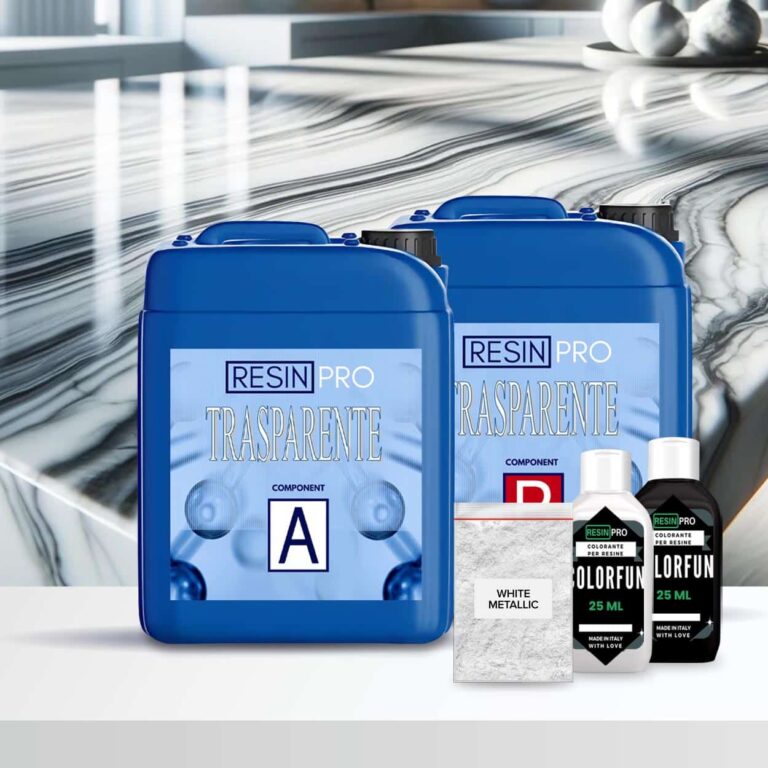
Top Cucina Kit Carrara Marble Effect with Epoxy Resin: The 2.4 kg kit (1.6 + 0.8) covers 1 square meter (+ 10 g white metallic pigment + 25 ml white dye +25 ml black dye) The 4 kg kit (2*1.6 + 0.8) covers 2 square meters (+ 2*10 g metallic pigment +2* 25 ml white dye + 2*25 ml black dye) The 8 kg kit covers 4 square meters (+ 4*10 g metallic pigment +4* 25 ml white dye+ 4*25 ml black dye) The 16 kg kit covers 8 square meters (+ 8*10 g white metallic pigment +8* 25 ml white dye 8*25 ml black dye) Kit Contents: 2.4kg, 4kg, 8kg or 16kg of "Art Pro" Epoxy Art Coat for a high quality base White dyeand Black of the "Colorfun" line for the perfect stone shades White Metallica Sahara pigment for that extra touch of sparkle Good to add: To enhance the appeal of the design:: Isopropanol 99.9% (additional option, not included in the price) To make the coating last longer: Polishield 100 Gloss (additional option, not included in the price). The coverage of a 0.5 kg kit is approximately 4 m2 Each kit includes dyes and pigment in sufficient quantity for the amount of resin required. HOW TO CREATE YOUR MARBLE EFFECT WITH EPOXY Guide Instructions: Step N1: Primer Start by carefully measuring the amount needed to cover the surface based on the consumption of 150 g/m2, making sure to follow the proportions indicated to obtain a homogeneous mixture. Once the base has been prepared, proceed with adding the dye, choosing between white or black depending on your needs. The quantity of colourant to add to the mixture can be measured in a few drops (max 5% by volume). This step is crucial to achieve the desired colour and ensure uniformity of the application. Before applying the primer, it is essential that the surface intended for treatment is adequately prepared. Sand the surface with a coarse grit (40 or 60) before any operation. Make sure it's completely clean, using a soft cloth or brush to remove any pigment, dirt or debris. The surface must also be completely dry; residual humidity can compromise the adhesion of the primer and its effectiveness in sealing the surface. Once the surface is ready, apply the mixture evenly, using a suitable tool such as a brush, roller or spatula, depending on the size of the area to be treated and your personal preference. The key is to get a thin, even layer that can cover the entire area without leaving gaps or excessive product buildup.. After application, it is essential to allow the primer to dry completely before proceeding with further treatments or finishes on the surface. The recommended waiting time is 12 hours; this range may vary slightly depending on environmental conditions, such as humidity and temperature, but offers a good compromise to ensure the mixture has time to dry and adhere properly. During this period, avoid touching or stressing the treated surface to ensure optimal results. Don't worry if you notice any discrepancies on the surface, the next main pour will level everything perfectly. Step N2: application Start by applying masking tape around the perimeter of your countertop to contain the epoxy you're about to pour. This step is essential to ensure the resin stays where it is needed. After applying the resin, wait about 1.5 hours before gently removing the tape. To ensure coverage is even and complete, plan to use approximately 1.6kg of resin for every square meter of surface area. When you are ready to mix the resin, use a drill equipped with a paddle mixer for quick and even action (use at low speed), taking about 2 minutes for this operation. If you prefer to mix by hand, be prepared to take double the time. Don't forget to scrape the sides and bottom of the container halfway through the process with a stick to ensure all the material is mixed well. Next, separate the already mixed resin into different glasses and add the desired colours, mixing the different colours in the different glasses until you obtain an intense and uniform colour per single glass. To create a striking visual effect, pour the coloured resin in random layers into a larger bucket, being careful not to mix the colours together too much. After filling the bucket, spread the contents over the surface of the worktop, leaving a small amount of resin aside to finish the edges later. To remove trapped air bubbles, gently run a propane torch or heat gun over the surface. Once the adhesive tapes have been removed, approximately 1.5 hours after application, if there are any dry edges, moisten them slightly by wearing a protective glove to promote an even appearance. Use appropriate tools, such as spatulas or plastic scrapers, to spread and level the resin along the edges, making sure to cover the entire area well. After letting the resin cure for 24 hours, you can apply a clear top coat or PoliShield scratch-resistant paint to further protect the surface. Finally, for even more refined visual effects, spray 99.9% isopropyl alcohol onto the surface just before the resin begins to fully harden. This will create unique lacy textures. Remember that when you remove the tape, it is essential that the resin is partially hardened, neither too liquid nor completely solid, to avoid unwanted drips. Attention! Safety Guidelines for Using Isopropyl Alcohol (99.9%) Isopropyl alcohol (IPA) is a highly flammable substance. Improper use—especially near heat sources like torches or heat guns—can result in fire or explosion. To ensure safe use, follow these precautions: Primary Risks Highly flammable: IPA vapors can ignite from sparks, open flames, or hot surfaces. Forms explosive vapor-air mixtures, especially in enclosed or poorly ventilated spaces. Strictly Prohibited: Using gas torches or heat guns near areas treated with IPA. Spraying IPA near active heat sources. Storing IPA near flames, heaters, or hot tools. Recommended Safety Measures: 1. Ventilation: Always work in a well-ventilated area when using IPA. 2. Wait Time: After applying IPA, wait at least 5–10 minutes to allow complete evaporation before using any heat tools. 3. Safe Distance: Keep IPA containers at least 2 meters (6 feet) away from heat or flame sources. 4. Storage: Store IPA in a tightly sealed container, away from direct sunlight or high temperatures. 5. Fire Safety: Have a CO₂ or dry chemical fire extinguisher nearby when working with flammable substances and open flames. In Case of Fire: Do not use water to extinguish the fire. Use an appropriate extinguisher, cut off air supply if safe, and call emergency services if needed.
$73,49
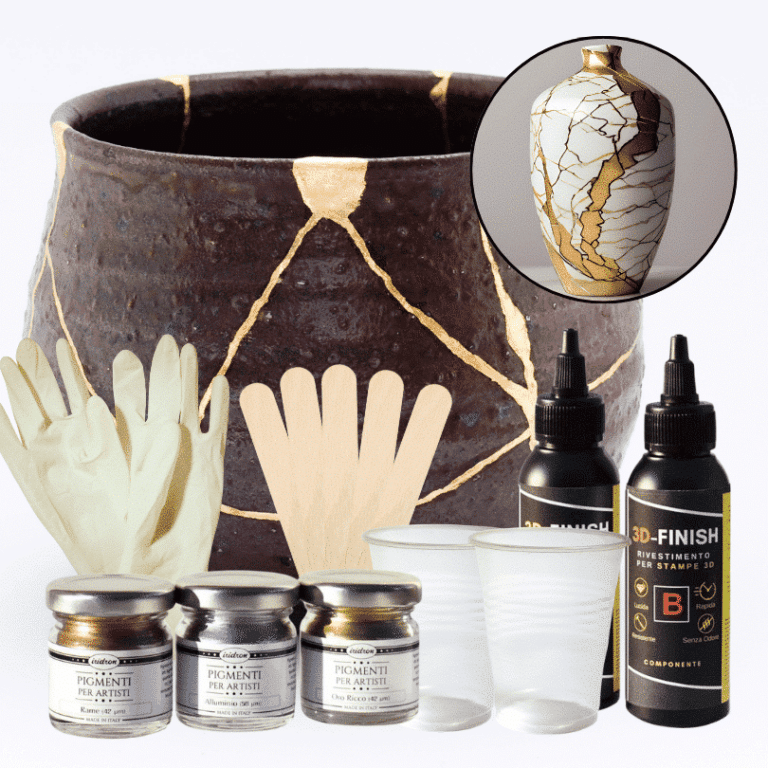
Kintsugi Repair Kit - Repair and Transform Your Ceramics with Elegance Celebrate imperfection with the ancient Japanese art Discover the traditional Japanese art of Kintsugi with our complete repair kit. Transform your broken ceramics into unique and fascinating works of art, highlighting imperfections with elegant gold, silver, or copper veins. Our kit is perfect for both beginners and experts, offering detailed instructions and everything you need to give new life and value to your most cherished items. 🌟 Specific epoxy resin (150g): slow catalysis to eliminate any bubbles or imperfections, allowing you to complete the work without rushing. 🎨 Dye of your choice (gold, copper, silver): customize your repair with a touch of elegance and refinement. ✨ Respect the tradition: follow the ancient art of Kintsugi and transform your ceramics into unique and precious treasures. The kit contains: 150g of resin for 3D decorations, 2 pairs of protective gloves, 2 mixing cups, and 5 spatulas for applying the resin, detailed instructions, everything you need in one kit. Give your ceramics a unique touch: repair them with style and make them even more beautiful. Buy the Kintsugi Repair Kit now and start creating your works of art today! Kintsugi Kit Instructions: Mix Resin: Measure 100A:50B by volume (or 100A:45B by weight) using a scale. Mix for 2 minutes, ensuring all surfaces are scraped. Add Colour: Mix your chosen metallic dye (gold, silver, or copper) into the resin to highlight the cracks. Prepare Surface: Ensure surfaces are clean, dry, and sanded. Apply Resin: Fill the cracks with the colored resin. Curing: Work in a temperature-controlled area, avoiding humidity. Safety: Wear protective gear.
$22,95
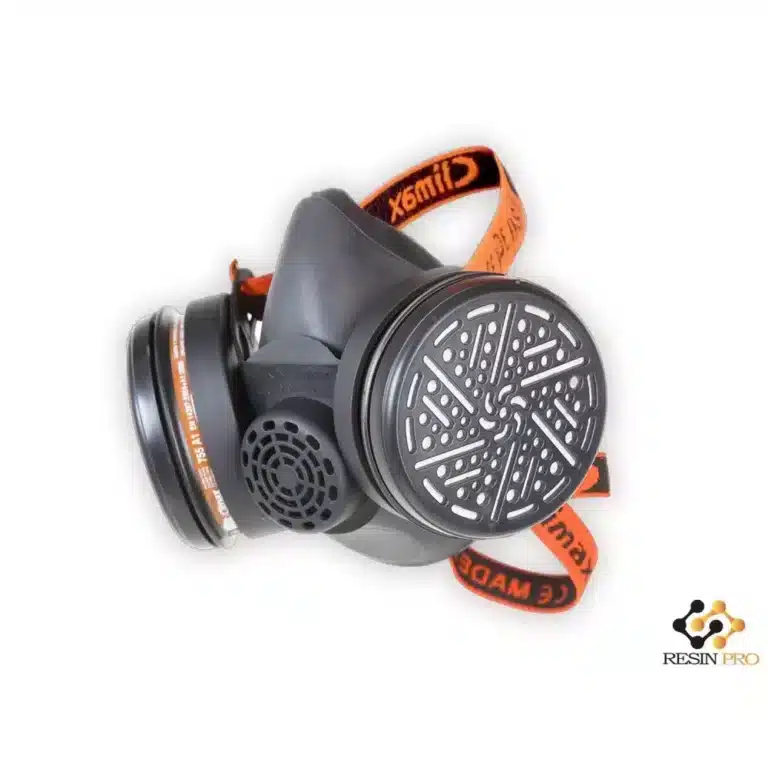
The mask with filter Climax for gas is designed to offer maximum protection against certain gases, vapours and particles such as dust, fog and fumes. It is the perfect companion for all those who work with epoxy, polyurethane or polyester resins. It is compatible with Climax filters model 755 and 756. The product consists of mask + 2 filters. Description and features: Covers the user's nose, mouth and/or beard and is produced with completely safe and lightweight materials. The body of the mask is made of flexible black rubber. Both the material and its shape and size allow a comfortable and airtight fit. The mask has a central hole in the exhalation valve, support valves and two additional holes on the sides to adjust the connectors for inhalation. Support valve: The mask is equipped with an exhalation valve that allows the air to be expelled easily. The mask is made of high density polyethylene (HDPE) This design ensures that the force exerted by the elastic straps of the mask is distributed evenly for a more comfortable fit. It has a rear band and a front band of high comfort and easy length adjustment system. The filter is cylindrical (diameter: 79 mm) with a black body made of high density polyethylene (HDPE). The filter is composed of two filter faces in white fabric. The discs are inserted inside the cover and bottom more easily absorbable type of activated carbon. - this needs rewording. Not sure what is meant by this. The connection of the filters to the mask is made by threading. Mask body: The mask body is manufactured from thermoplastic rubber. The design and material used allow an airtight fit preventing air leakage inward through the mask/face union. In the body of the mask must be housed the two connectors of the filter by screwing and interchangeable. Weight: 0.48 LB CE Certificate Standard: EN 140: 1999 Regulation (EU) 2016/425 Control Body: 0082
$53,99

💥 Bestseller for: –Prototyping:Polyurethane resin is frequently employed for rapid prototyping in industries such as automotive, medical, product design, and more. Its quick curing time and high casting precision make it ideal for efficiently producing test prototypes; –Modeling:Thanks to its high durability and the ability to replicate intricate details, polyurethane resin is used in art and design for creating models. This includes artistic sculptures, architectural prototypes, and decorative elements; –Small Batch Production:The "vacuum casting" technique with polyurethane resin enables cost-effective and rapid production of small batches of items with high detail. This is useful for manufacturing limited quantities of products with consistent characteristics; –Repair and Restoration:Polyurethane resin can be employed for the restoration and repair of various materials, including wood, stone, plastic, and metal. It is used to fill cracks, create missing components, or restore surfaces; –Manufacturing Seals and Components: Due to its chemical resistance and high wear resistance, polyurethane resin is widely used in the production of seals, including rubber seals, gaskets, and components for automobiles and industrial machinery; –Creative Projects:Artists and craftsmen use polyurethane resin for a wide range of creative projects, including art installations, decorative items, unique shapes, and even jewelry. 💥About “POLYFORM” POLYURETHANE CASTING RESIN: PolyForm, our cutting-edge polyurethane casting resin, is a high-performance solution designed for rapid prototyping in the modeling and automation industries. With a carefully formulated blend that boasts high fluidity and a remarkable Shore A hardness of 100, PolyForm empowers you to bring your creative visions to life with precision and efficiency. Key Features: Versatile Application: PolyForm is ideal for a wide range of applications, from creating detailed models to automating production processes. Its adaptability makes it a valuable asset in various industries. Rapid Prototyping: Craft prototypes with ease using silicone molds and PolyForm resin. These prototypes serve as crucial tools for pre-processing, strength testing, and dimensional analysis before moving on to mass production. Vacuum Casting Technique: Explore the "Vacuum casting" technique with PolyForm, enabling the production of small series of objects with identical mechanical, aesthetic, and dimensional properties to the final product. Quick Curing: Experience a fast pot life of 3 minutes and a maturation time of 30 minutes, allowing you to work efficiently and bring your ideas to life in a short span. Non-Toxic Certification: PolyForm is certified non-toxic for skin contact post-catalysis, ensuring the safety of handling the artifacts created with this resin. Technical Specifications: Viscosity: 70 mPa*s Weight Ratio A/B: 90/100 Color: Beige Usage Guidelines: Not suitable for coloring with dyes Do not use at temperatures below 8-10°C. Wear gloves and protective eyewear during mixing and application. Clean tools with epoxy or nitro thinner. Dispose of packaging following local regulations. PolyForm is your reliable partner for bringing innovation to your projects. Whether you're a hobbyist or a professional, PolyForm delivers exceptional results, providing the precision and reliability you need for your creative endeavors. Start creating with PolyForm today! [CP_CALCULATED_FIELDS id="1"] Download Non toxicity Certificate
$20,95
If you need to repair a damaged car air hose, follow these steps
- 1. Identify the damage: Inspect the hose to find where the air leak is.
- 2. Cut out the damaged section: Use a utility knife to remove the damaged part of the hose.
- 3. Prepare the hose for repair: Ensure both sides of the hose are clean and free of debris.
- 4. Apply a repair patch: Use a self-adhesive patch to cover the cut and securely repair the hose.
- 5. Test the repair: Start the engine and check if the repaired hose effectively holds air pressure.
By following these steps, you can successfully repair a damaged car air hose.
Epoxy Resin Applications
Epoxy resin is a thermosetting polymeric material known for its strength and versatility. It adheres well to different materials, making it popular in construction, craftsmanship, and industrial sectors. Once cured, epoxy resin creates a hard, durable, and waterproof surface ideal for coatings or repairs. It can also be pigmented for customized finishes. Carefully follow instructions during preparation and application for optimal results.
Repairing an Air Tube Leak in a Car
Fixing a leak in a car's air tube is crucial for maintaining vehicle performance. Follow these steps for effective repair:
- 1. Identify the leak: Carefully locate where the air tube is leaking.
- 2. Clean the damaged area: Ensure the area around the leak is free from dirt and grease.
- 3. Apply specific resin or silicone: Use resin or silicone for a strong adhesion to the damaged area.
- 4. Allow to dry: Follow recommended drying times.
- 5. Verify repair integrity: Check that the leak is successfully repaired with no further air leaks.
By diligently following these steps, you can effectively repair a car's air tube leak.
Epoxy Resin for Air Pipe Repairs
Epoxy resin is an excellent solution for fixing a damaged air pipe. Follow these steps for an effective repair:
Clean the damaged area thoroughly to remove dirt and grease.
Measure and mix epoxy resin per manufacturer's instructions.
Apply resin to the crack or hole, ensuring full coverage.
Allow to dry completely following curing times.
Check the repair for durability and effectiveness in restoring the air pipe's integrity.
This method ensures a lasting and efficient repair of the damaged air pipe.
Repairing an Air Tube with Epoxy Resin
Repairing an air tube with epoxy resin is effective and durable. Here's how to proceed:
- 1. Preparation: Ensure the tube is clean and dry.
- 2. Fault identification: Locate the exact air leak point.
- 3. Cutting and grinding: Remove damaged parts and grind the surrounding area for better adhesion.
- 4. Resin application: Mix and apply epoxy resin to cover the damaged area.
- 5. Curing: Allow the resin to dry and cure for the necessary time.
- 6. Testing: Verify the repair is successful.
Following these steps will help you efficiently and safely repair the air tube.
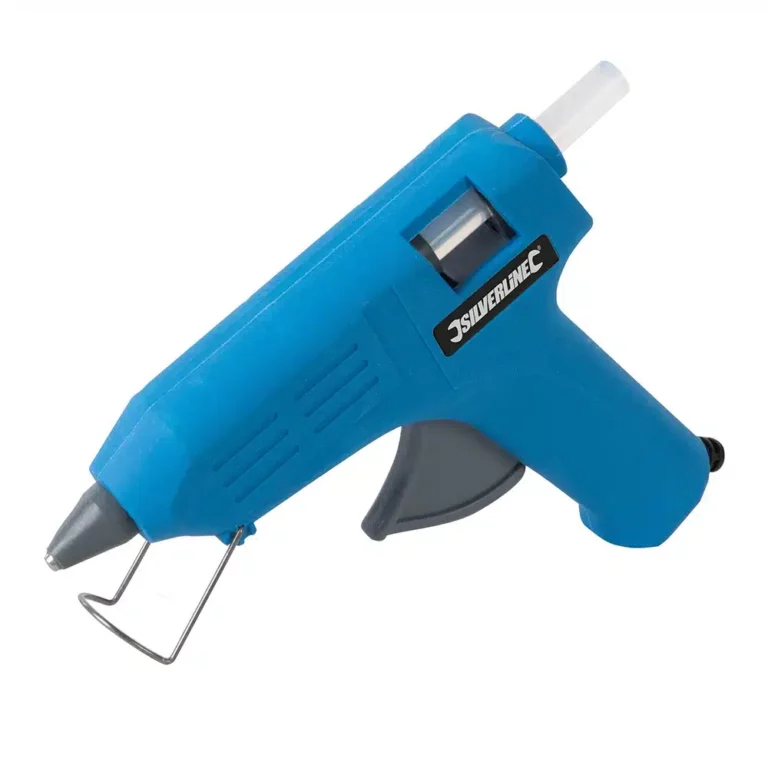
Hot melt glue gun suitable for light craft use with wood, metal, glass, fabric, plastic, ceramics and card. Smooth trigger action for optimum control and integral fold away stand. Includes 2 glue sticks. For use with ceramics, glass, light gauge metals, wood, plastic, fabric & card For light craft use Smooth trigger action Input 230V~50Hz Power 15(40)W Glue Sticks 0.44 x 3.94 "" What's in the Box 1 x Hobby Glue 2 x Glue sticks 1 x Manual
$17,95

💥 BESTSELLER FOR: -Wood-working: Coating, Countertops and Tables, Works of art; -Restoration or surface coating: Wood, Concrete, Ceramics, Canvas, Glass fiber); -DIY: Jewellery making, and Dynamic modelling. 💥About “iCrystal ” – Transparent Epoxy Resin: Our iCrystal Transparent Epoxy Resin is a premium quality, multipurpose resin that is a popular choice for customers looking to create stunning art pieces, jewellery, countertops, and DIY projects. The new formula is specifically designed to provide maximum transparency, allowing you to create unique and beautiful pieces that will last for a long time. It is easy to use and can be mixed with a variety of pigments to create an endless range of works. iCrystal Transparent Epoxy Resin is safe and non-toxic, making it a great option for artists who are environmentally conscious. It is odourless, VOC-free, making it comfortable to use indoors. Although our epoxy resin is safe to use, we recommend taking proper safety precautions when working with any type of resin. It is important to wear gloves and masks and work in a well-ventilated area to avoid any potential irritation or allergic reactions. This Epoxy Resin is self-levelling and has a high-gloss finish, providing a smooth and professional look to your creations. It is also extremely durable, providing a super solid and shiny surface after full curing time. iCrystal epoxy resin can be used on a variety of surfaces, including wood, stone, ceramics, and more. It is perfect for creating unique and stunning pieces that are sure to impress. We offer free shipping on this product, so you can start your project right away. Plus, with its long shelf life, you can store it for future projects. Choose iCrystal Transparent Epoxy Resin for a safe, high-quality, and versatile option for all your creative needs. 💥Key features: ⚙️ 【CRYSTAL CLEAR EPOXY RESIN】-The clear epoxy resin is suitable for both beginners and professionals. Start making jewellery, paintings, and any professional creation that involves the use of resin. 🧪 【HIGH QUALITY】 -Crystal clear, No bubbles, Odourless - because of unique formula for DIY, craft and artistic creations. Ideal for casting and embedding objects too. Compatible with silicone, wood, fabric, glass, paper or photographs. Fast completed curing time - 24 h, Demould time is only 10 hours. 💧 【EASY TO USE】-The 100:50 mixing ratio makes this product very easy to use. Being a two-component resin, simply mix RESIN A + HARDENER B in the ratio indicated above the package and let it harden without the need for further additives. Can be coloured as desired. 🌿 【SAFE AND CERTIFIED】 -All our resins are Certified Non-Toxic, Solvent-free, non-flammable, and totally safe. 📞 【FREE PROFESSIONAL ASSISTANCE SERVICE】-Since we are directly a manufacturer, we have access to a professional laboratory that will happily help you with any complex project. 🇬🇧 【UK BASED TRUSTED COMPANY】-RESIN-PRO team fulfils your order as fast as possible. We produce and realise epoxy resins since 2015. Just check our social media, where you will find thousands of projects made with our products around the world. 💥Suitable for: -Model making; -DIY and wood-working; -Coatings of furniture and surfaces; -Artistic creations (paintings, liquid art, petri dish); -Jewellery and fashion; -Glass Fiber Repair; -Outdoor Protective Coatings; -Boat construction; -Impregnation of technical fabrics (glass fiber, carbon fiber, etc); Check and tag our social media for inspiration! We are always happy to publish your art-work –
$10,12
Intense and brilliant color, ideal for Transparent Epoxy Resins. Mix small quantities to get a translucent effect. The high coverage of the “Colorful Original” range allows to obtain a full and bright color. The high concentration provides an opaque color with a few drops.
Usable to color the products of the RESIN PRO range.
💥 Ideal for epoxy creations and resin tables thanks to its features:
✔️ Intense colors
✔️ Easy to mix
✔️ Intense colors
✔️ High concentration
✔️ Easy to get a translucent effect
✔️ 5 stars on Trustpilot
🌿Cruelty Free, Vegan Friendly🐹
$16,00
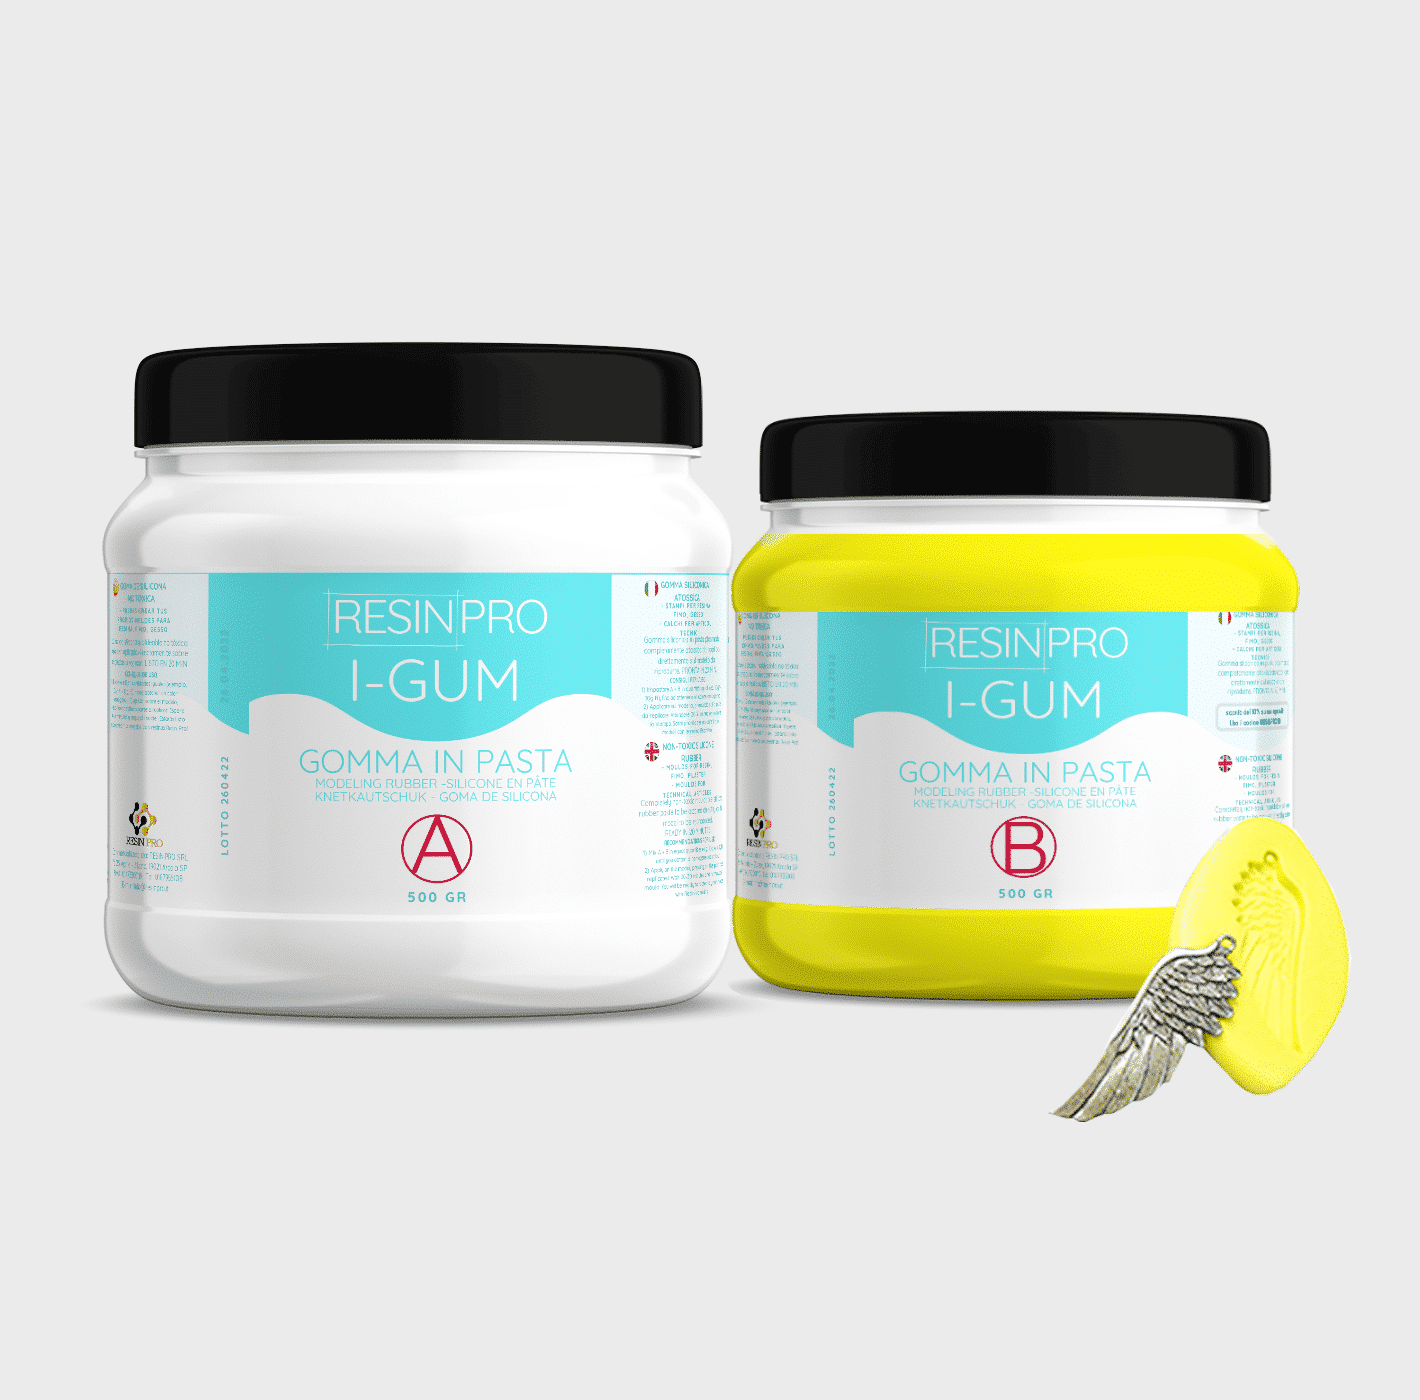
• "I-GUM" - Non-Toxic Silicone Rubber - Paste Form
Pasty silicone rubber "I-GUM" is a two–component product for creating moulds and forms for pouring with epoxy resin.
• Superior formula proven by years of experience:
✔️ Easy to use -> 1:1 mix ratio
✔️ Non-toxic -> You can work without gloves
✔️ Without smell
✔️ Long working time -> 20 minutes
✔️ European quality -> Directly from Italy
✔️ Ideal for creating moulds and frames for working with resin, polyurethanes, wax, cement and other materials
✔️ 🌿Cruelty Free, Vegan Friendly🐹
$22,00
 Free shipping on orders over €199,00
  Shipping Tracking!


 Google
 Facebook