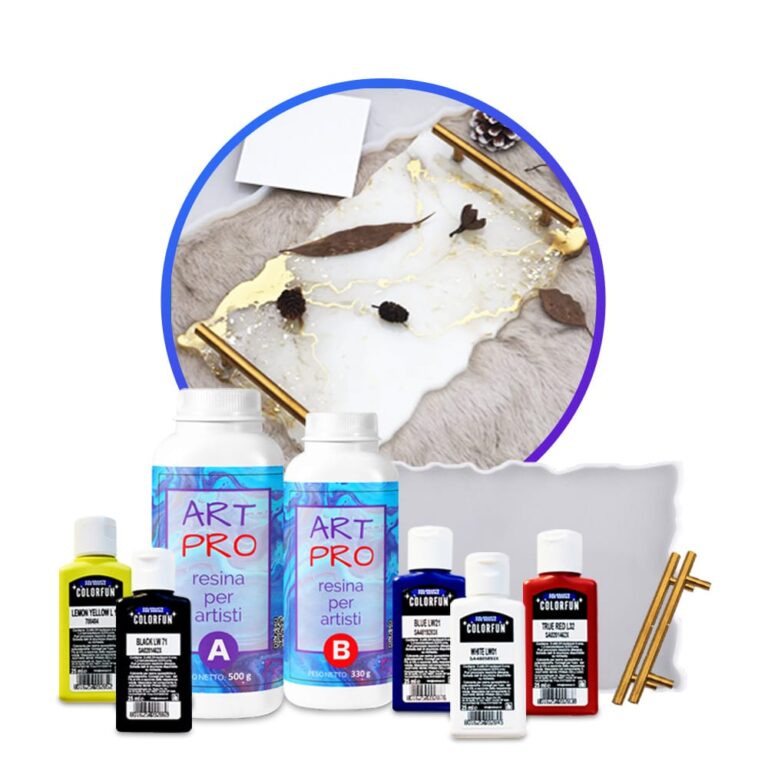
Creative Kit: Create your own resin tray! KIT INSTRUCTIONS This kit contains: 1.66 kg of epoxy resin Silicone mould "tray" + handles 5 dense dyes Spread out the plastic tarpaulin to protect the work surface. Make sure that the silicone mould is clean and all materials are at hand. Do not forget to wear disposable gloves and follow the safety instructions. Mix the epoxy resin according to the mixing ratio Art Pro 100: 66 – by weight) – 180 g A and 119 g B-for a filling thickness of 5 mm. Carefully weigh and mix both components for 3 minutes, making sure that all sides and bottom of the mixing container are included for effective mixing. Let the mixture stand for 2-3 minutes. Divide the resulting resin into separate containers for each colour you are going to use. Add resin-specific dyes to each container to get the desired shades. Mix thoroughly. Put the colours in one large container without mixing them, allowing them to stack on top of each other. Pour this mixture in layers into a mould for a dynamic abstract effect. In addition, you can pour each colour into different places of the mould according to your design concept. After 24 hours, you can remove the resin tray. After another 12-24 hours (the resin reaches full strength), you can make your tray workable by using the screws included in the kit to attach the tray handles. Drill the holes in the tray, then secure the handles with screws. Geodetic effect- To get the geode effect when casting, use the layering technique. Divide the mixed resin into separate containers for each colour you are going to use + one part with transparent resin and one white. Start by pouring clear resin into the center of the mould. Then alternate layers of white and transparent resin with coloured resin, allowing them to spread naturally. Finish by adding the last layer of transparent resin for a beautiful 3D effect. Let it harden to reveal a stunning geodesic-inspired design. Other ideas: Ocean Art Resin Tray: Capture the beauty of the ocean using different shades of blue and white resin, adding a few shells or a small starfish for an authentic nautical feel. Real Pressed Flowers: Add real dried flowers or leaves to the resin to create a natural and timeless look. Gold leaf Accents: Use a gold or metal sheet to add a touch of luxury to your tray.
$78,49
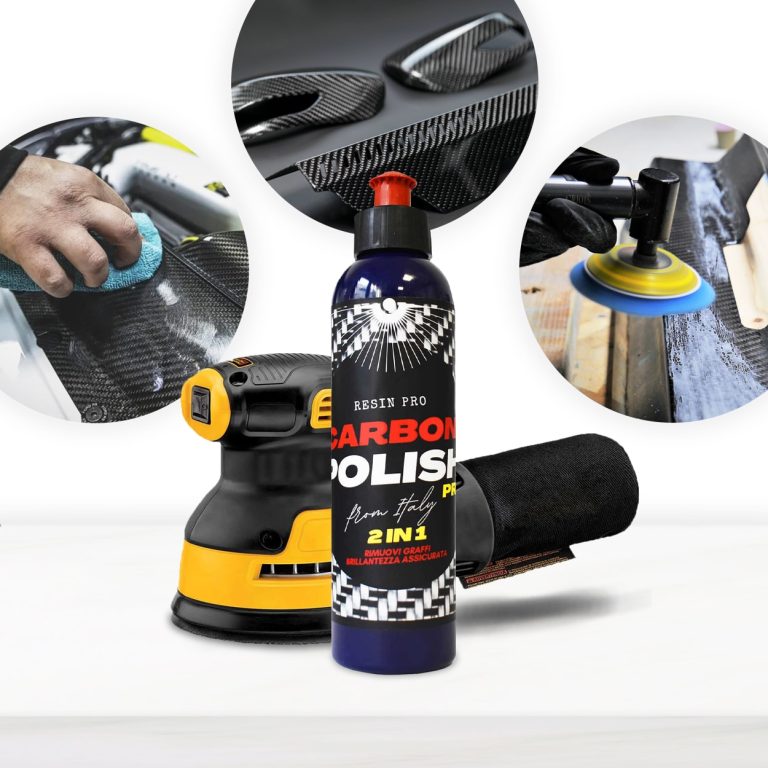
Carbon Polish Black (250ml) is the defined product for polishing your carbon, dark or black surfaces. The aesthetic and economic value of the carbon product is high, and for this reason it is essential to treat the surface with specific and dedicated products, which enhance the beauty of the “carbon look”. It is important to avoid “generic" products that can spoil the work done, with insufficient gloss or even worse, fail to remove scratches. EASY TO APPLY AND REMOVE MISCIBLE WITH WATER ODOURLESS DOES NOT WHITEN PLASTIC PARTS DOES NOT CONTAIN SILICONES VERY LOW ENVIRONMENTAL IMPACT The carbon polishing paste Carbon Polish Pro Black has been developed in a black colour precisely to ensure a brilliant finish and without white dots, typical of generic abrasive pastes. It can therefore be used for all dark surfaces (especially resin). Carbon Polish Pro Black is the specific paste for carbon; black colour prevents residues from remaining visible on surfaces after polishing. Thanks to the NAP (Nano Abrasive Particles) it is a 2 in 1 product; in fact it quickly removes scratches and defects from the surface and gives at the same time a deep shine like only a polish can do. In addition, its Synthetic Polymers allow you to correct and fill all the imperfections on the surfaces of Resin and carbon fiber artifacts. Eliminate scratches, defects and mirror shine with a single product! Carbon Polish Pro Black carbon polishing paste can be used both on the painted carbon and directly on the epoxy resin that covers the carbon fibers. Unlike commercial Polishes, Carbon Polish Pro Black is 100% Made in Italy, born from over 50 years of tradition in polishing. It allows both the hobbyist and the professions to obtain performing results quickly and easily. Here are the simple steps to polish or eliminate blemishes from your carbon fibre surfaces: If you need to use glass paper to remove the deepest scratches, you can do so without hesitation. The polishing paste will then be able to remove the sanding marks and make the surface smooth and shiny. Here's how:- The polishing paste Carbon Polish Black can be used by hand with extreme simplicity, with the help of a microfiber cloth or a foam pad. Or it can be used with electric tools, such as a drill and flexible, equipped with a special shepherd and foam pad (8000-12000 rpm) or with a polisher (1000-2000 rpm both rotary and ro orbital) with foam pad or wool (also synthetic). The use of tools of this kind will speed up the maintenance and ensure optimal results in even faster times. How to prepare the surface to be polished? Here are the tricks to make the most of NAP (Nano Abrasive Particles) technology:- Removals defects and scratches from sanding Depending on the depth of the scratch/defect, start with abrasive papers grit 800-1000 (for deep scratches) or simply 3000-4000 (for light scratches), always tend the surface wetted with water (this will help to make the result homogeneous) Apply the polishing paste for carbon fiber on the surface and spread it with circular and more or less energetic movements depending on the defect you want to remove. Or by directly attaching the buffer of the polisher / hose. We recommend one / two drops of carbon polishing paste every 3-4 cm. You can apply it several times thanks to synthetic polymers, without risking consuming the carbon, until the result is perfect. Clean up simply with water and a clean cloth. Put on your sunglasses and enjoy the dazzling result! Surface renewal: The product is also suitable as a fast and effective tool to renew your precious carbon surfaces, which wear out with normal use or exposure to atmospheric agents. In this case, the process is even easier: it is sufficient to apply the paste on the surface (well cleaned) and roll it out with circular movements, or by directly applying the buffer of the polisher / flexible. We recommend one / two drops of carbon polishing paste every 2-3 cm. The carbon polishing paste Carbon Polish Pro Black has been developed in black colour precisely to ensure a brilliant finish and without white dots, typical of generic abrasive pastes, and can therefore be used for all dark surfaces (especially resin). The special formula is free of volatile silicones and is therefore not harmful to health; it can also be used in painting processes.
$21,49
Animals & Plants silicone moulds Reusable silicone mold, perfect for casting with epoxy! You can put dried flowers, glitter and other decorative elements inside before pouring.Colored pigments will also help make your jewelry unique and unique. Create your collection! Specifications: Material: Silicone; Color: translucent; Designed for reusable use, easy to clean. Withstands temperatures from -40 ° C to + 210 ° C Caution: do not use aggressive solvents to clean the mould Attention! Remove the product from the mold no later than 12 hours after pouring the resin. Otherwise, there is a chance of local adhesion of the resin to the mold.
$9,68
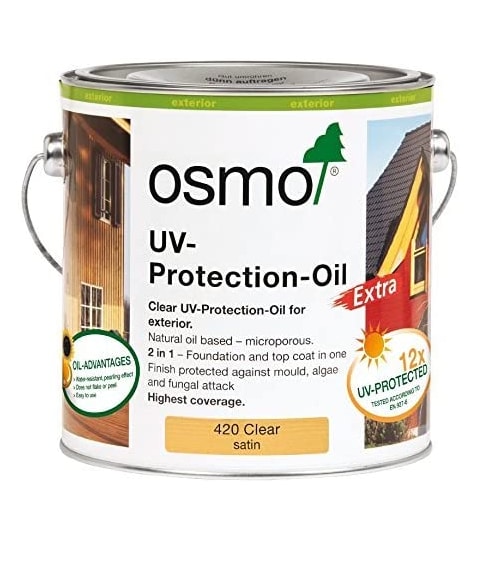
Perfectly protected against the sun – the first clear UV-protection for the outdoors! All resins / woods turn amber in colour over time, but UV-Protection-Oil has been developed to preserve epoxy's clear colour and slow down the yellowing process by (UV factor) 12 times compared to untreated epoxy. Ideal for River tables, epoxy furniture, exterior design pieces, windows, doors, claddings, fencings and other complex joinery. Natural oil-based and microporous finish, it does not crack, flake or peel. Water-resistant and dirt-resistant, it is moisture regulating and minimise the damaging. Description Natural oil-based clear satin wood finish for outdoor use. The microporous surface allows the wood to breathe and reduces swelling and shrinkage. Water-repellent, will not crack, peel or flake. As top coat on already treated coloured wood, Osmo UV-Protection-Oil Extra significantly extends the intervals between each restoration. When used as a single product, with a two-coat application it prevents greying on vertical surfaces with a 12 UV-protection factor compared to untreated wood. Osmo UV-Protection-Oil Extra features active ingredients to protect the coating against the action of mould, algae and fungi. No need to sand before application, easy and smooth. During coating, the finish is still workable. Recommended use Osmo UV-Protection-Oil Extra is perfect for all vertical wood surfaces for outdoor use: doors, windows, window shutters (dimensionally stable parts), parking places, resin coatings, balconies, fences, pergolas, and holiday cottages (dimensionally unstable parts). Also suitable for bamboo poles (e.g. in screens). Ingredients Based on natural plant oils (sunflower oil, soybean oil, thistle oil and linseed oil), desiccants and additives. Biocidal active ingredient: Propiconazole. Dearomatized turpentine (benzene-free). EU limit value for this product (cat. A/e): 400 g/l [0,02 lb/oz] VOC (2010). This product contains max. 400 g/l [0,02 lb/oz] VOC. Detailed declaration of ingredients available upon request. Storage Up to 5 years and longer if the can is stored in a dry place and hermetically sealed. If thickened by frost, store for 24-36 hours at room temperature before use. Surface preparation Wood surface must be clean, dry and frost-free (moisture content max. 20%). Osmo UV-Protection-Oil Extra is ready to use and should not be diluted. Stir well before use. If possible, please apply the first coat to all sides before installation. Particularly oily timbers need to weather off (for approximately 6 weeks) after installation. Thereby the wood will gain more absorbent power and the finish will penetrate optimally. A coloured base coat is recommended, e.g. Osmo One Coat Only, Natural Oil Woodstain or Country Colour. For renovations, clean all old microporous wood finishes thoroughly. Freshen up greyed wood with Osmo Wood Reviver Power-Gel before applying Osmo Clear Uv-Protection-Oil. Old paints and lacquers must be completely removed. As a general rule, wear a dust mask during sanding. Do not sand smooth surfaces thinner than P120. The final result may be influenced by several factors, including the natural features of the wood. Therefore, a trial application is always recommended, especially for unfamiliar timbers. If you wish to have additional protection against blue stains, decaying and insects, you should pre-treat the wood on all sides with Osmo WR Base Coat. Technical data Specific weight: 0.9-1.0 g/cm³ [0,03 lb/in³] Viscosity: >50s DIN EN ISO 2431/3 mm, viscous Odour: faint/mild, odourless after drying Flash point: >60 °C [140 F] acc. DIN EN ISO 2719 Documentation ⏩ TDS ⏩ SDS
$39,95
Specialized Epoxy Resin Cleaner
A specialized cleaner for epoxy resin is crucial for efficiently eliminating any residue or stains of resin. These products are formulated specifically to dissolve and remove epoxy resin without causing harm to the underlying surfaces. It is important to meticulously adhere to the manufacturer's instructions to ensure proper and safe usage. Typically, it is advised to apply the cleaner on the affected surface, allow it to work for the specified duration, and then wipe it off with a clean cloth. This type of cleaner is particularly beneficial for individuals engaged in DIY resin projects or for cleaning equipment and tools used with this material.
Best Solvents for Epoxy Resin
The most effective solvents for cleaning epoxy resin are alcohol-based, such as isopropyl alcohol or acetone. These solvents work well in eliminating epoxy resin residues from tools, surfaces, and other materials. It is crucial to use solvents in well-ventilated spaces and meticulously follow the manufacturer's guidelines to ensure safety during application. Additionally, wearing suitable personal protective equipment like gloves and a mask is advisable to prevent direct contact with the solvents. Always remember to dispose of used solvents properly in accordance with local regulations regarding hazardous waste.
How to Remove Epoxy Resin from Tools
To effectively remove epoxy resin from tools, follow these steps
Gently heat the resin with a hairdryer to soften it.
Use a scraper or spatula to delicately eliminate the softened resin.
If necessary, apply a specific solvent for epoxy resins on the surface.
Allow the solvent to work for a few minutes, then scrub with a cloth or abrasive sponge.
Repeat the process until the resin is completely removed from the tools.
Finally, wash the tools with water and soap to remove any remaining resin and solvent.
This method will assist you in safely and effectively cleaning tools from epoxy resin.
Epoxy Resin Cleaning Detergents
Detergents for cleaning epoxy resin should be gentle yet effective to prevent surface damage. It is recommended to use specialized products for cleaning epoxy resins while avoiding harsh solvents that could compromise the material's integrity. Water-based detergents are generally safe for cleaning epoxy resin surfaces as they do not contain corrosive agents. Before using any detergent, it is essential to conduct a compatibility test on a small inconspicuous area. Additionally, carefully follow the manufacturer's instructions to ensure efficient cleaning without causing harm to the epoxy resin.

💥 Bestseller for: –Prototyping:Polyurethane resin is frequently employed for rapid prototyping in industries such as automotive, medical, product design, and more. Its quick curing time and high casting precision make it ideal for efficiently producing test prototypes; –Modeling:Thanks to its high durability and the ability to replicate intricate details, polyurethane resin is used in art and design for creating models. This includes artistic sculptures, architectural prototypes, and decorative elements; –Small Batch Production:The "vacuum casting" technique with polyurethane resin enables cost-effective and rapid production of small batches of items with high detail. This is useful for manufacturing limited quantities of products with consistent characteristics; –Repair and Restoration:Polyurethane resin can be employed for the restoration and repair of various materials, including wood, stone, plastic, and metal. It is used to fill cracks, create missing components, or restore surfaces; –Manufacturing Seals and Components: Due to its chemical resistance and high wear resistance, polyurethane resin is widely used in the production of seals, including rubber seals, gaskets, and components for automobiles and industrial machinery; –Creative Projects:Artists and craftsmen use polyurethane resin for a wide range of creative projects, including art installations, decorative items, unique shapes, and even jewelry. 💥About “POLYFORM” POLYURETHANE CASTING RESIN: PolyForm, our cutting-edge polyurethane casting resin, is a high-performance solution designed for rapid prototyping in the modeling and automation industries. With a carefully formulated blend that boasts high fluidity and a remarkable Shore A hardness of 100, PolyForm empowers you to bring your creative visions to life with precision and efficiency. Key Features: Versatile Application: PolyForm is ideal for a wide range of applications, from creating detailed models to automating production processes. Its adaptability makes it a valuable asset in various industries. Rapid Prototyping: Craft prototypes with ease using silicone molds and PolyForm resin. These prototypes serve as crucial tools for pre-processing, strength testing, and dimensional analysis before moving on to mass production. Vacuum Casting Technique: Explore the "Vacuum casting" technique with PolyForm, enabling the production of small series of objects with identical mechanical, aesthetic, and dimensional properties to the final product. Quick Curing: Experience a fast pot life of 3 minutes and a maturation time of 30 minutes, allowing you to work efficiently and bring your ideas to life in a short span. Non-Toxic Certification: PolyForm is certified non-toxic for skin contact post-catalysis, ensuring the safety of handling the artifacts created with this resin. Technical Specifications: Viscosity: 70 mPa*s Weight Ratio A/B: 90/100 Color: Beige Usage Guidelines: Not suitable for coloring with dyes Do not use at temperatures below 8-10°C. Wear gloves and protective eyewear during mixing and application. Clean tools with epoxy or nitro thinner. Dispose of packaging following local regulations. PolyForm is your reliable partner for bringing innovation to your projects. Whether you're a hobbyist or a professional, PolyForm delivers exceptional results, providing the precision and reliability you need for your creative endeavors. Start creating with PolyForm today! [CP_CALCULATED_FIELDS id="1"] Download Non toxicity Certificate
$20,95
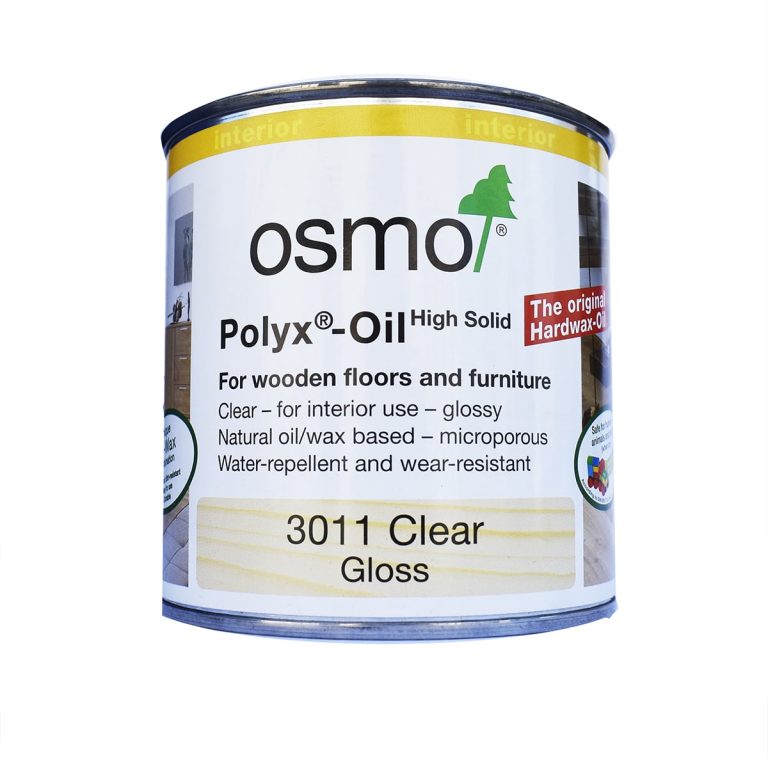
Osmo Hard-Oil-Wax is a general-purpose resin and wood finish derived from natural plant oils and waxes. Resistant to water, dirt, beer, wine, cola and saliva, Osmo Hard-Oil-Wax is microporous and molecularly bonds with the wood, thereby it does not crack, flake or peel. The new advanced formula of Osmo Hard-Oil-Wax has been specially elaborated in Germany to be the first Osmo Hard-Oil-Wax on the European market that can be easily applied with a brush or a roller, no buffing is necessary! It can be used for spot repair and/or restoration/renovation without the need to sand, therefore resin or wood will no longer need complete sanding and refinishing. Clear glossy wood/epoxy finish, which uniquely combines all the advantages of oils and waxes in one product. Osmo-Polyx - Oil Original gloss is resistant to water, dirt and abrasion, and it smoothens any wood surface. Suitable for wood and epoxy resin; microporous surface does not crack, flack or peel. Resistant to wine, beer, cola, coffee, tea, fruit juice, milk and water according to DIN 68861-1A- no water spots. When dry, finish is safe for people, animals and plants and it is also suitable for toys as per EN 71-3 (European norm) and is saliva resistant and sweat-resistant according to DIN 53160 (German industry standard). Recommended use: Osmo Polyx - Oil Original is perfect for the protection of all surfaces and wooden floors, such as solid wood, planks, strips, OSB and cork flooring, as well as furniture surfaces. Ingredients: Based on natural plant oils and paraffin, desiccants and hydrophobing agent. Dearomatized turpentine (benzene-free). EU limit value for this product (cat.A/i): 500 g/l [0,03 lb/oz] VOC (2010). This product contains max. 500 g/l [0,03 lb/oz] VOC. Detailed declaration of ingredients available upon request. Storage: up to 5 years and longer if the can is stored in a dry place and hermetically sealed. Surface preparation: wood and epoxy resin surface must be clean, dry and frost-free (moisture content max. 18%). Osmo Polyx Oil Original is ready to use and should not be diluted. Stir well before use. Clean old microporous stains thoroughly. Old paints and lacquers must be completely removed. As a general rule, wear a dust mask during sanding. Sand wood or epoxy surfaces carefully. Begin with coarse sandpaper – for final sanding use P.120-150, for broom or vacuum. The final result may be influenced by several factors, including the natural features of the wood. Therefore, a trial application is always recommended, especially for unfamiliar timbers. ADVANTAGES Extremely long-lasting and hardwearing Highly resistant to water and dirt Enhances the natural wood characteristics Resistant to common liquids such as water, juice, tea, cola and wine Saliva resistant and sweat-resistant, suitable for toys Microporous breathable finish which does not crack, peel or flake No need to sand for spot repairs or future applications TECHNICAL DATA Approx. coverage: 24 m²/L [7,63 ft²/oz] with one coat No. of coats: 2 coats Application temperature: +5°C to 35°C [41 F to 95 F] Drying time: 8-10 hrs. Sizes: 0.375 L [13,19 oz] Viscosity 95-240 mPas Specific weight: 0.88-0.95 g/cm3 [0,03 lb/in3] Methods of Applications: with Osmo Flat Brush, Floor brush, Oil Finish Applicator Fleece (Hand Pad Holder) or Microfibre Roller, thinly apply to the clean and dry surface along the grain and distribute well. Let it dry for approx. 8-10 hours under good ventilation. Once dry, quickly apply a second thin coat. When renovating or recoating an already oiled surface, one coat applied to the clean and dry surface is usually enough. WARNINGS: During processing, use protective masks, gloves, and other protective clothing. In case of contact with eyes, immediately rinse with cold water for 15 minutes and immediately consult a doctor.
$35,99
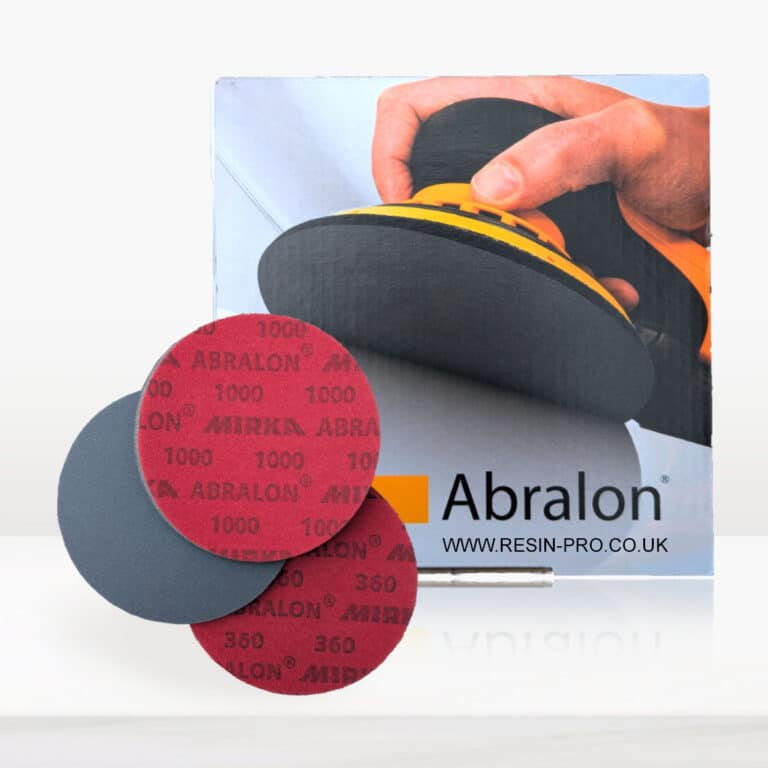
New line of polishing products SPECIFIC for plastic and resins industry. Ebonite Abralon Sanding Pads: - Ebonite Abralon Sanding Pad 150mm 360 grit - Ebonite Abralon Sanding Pad 150mm 500 grit - Ebonite Abralon Sanding Pad 150mm 1000 grit - Ebonite Abralon Sanding Pad 150mm 2000 grit - Ebonite Abralon Sanding Pad 150mm 3000 grit - Ebonite Abralon Sanding Pad 150mm 4000 grit Ebonite Abralon Sanding Pads Cosmetically appealing, consistent scratch pattern provides excellent traction. Combines the benefits of abrasive cloth and non-woven products. Opening in the fabric allows water to flow freely around the abrasive. Solid surface and foam backing provide even surface pressure. Last 5+ times longer than sandpaper. Use wet or dry (residual material can be removed by high pressure air). Now it's possible to get the most aggressive surface texture without that "cheese grater" look. Abralon sanding pads use silicon carbide particles that are precision sifted to a consistent grain size, then bonded evenly to a six-inch round fabric face for the most even scratch pattern available. WARNINGS: During processing, use protective masks, gloves, and other protective clothing. In case of contact with eyes, immediately rinse with cold water for 15 minutes and immediately consult a doctor. How to Use: Step 1: Thoroughly clean the surface with a cloth. Step 2: Now you can polish by hand or with an orbital polisher. We recommend using the lowest possible speed to get the best result. Start Polishing with 360-500 grit. Note: Sand the entire surface evenly with circular movements and light pressure. Moisten the pad or the surface with water from time to time. Step 3: Now use the 1000 grit sandpaper. Note: Moisten the sandpaper or the surface with water from time to time. Step 4: Afterwards, use 2000 grit sandpaper. Note: Moisten the sandpaper or the surface with water from time to time. Lastly, use 4000 grit sandpaper to finish sanding. Step 5: Remove the sandpaper from the polishing disc and attach a soft sponge to it. Rinse the surface or wipe it with a damp cloth to remove any residual grain of the sanding. Step 6: Apply EpoxyPolish Polishing cream on the damp sponge. Use by hand or with an orbital polisher, using a large circular motion and exerting slight pressure. Step 7: Clean the surface with plenty of water to remove all the remaining residues. Step 8: Enjoy the result!!!
$5,61
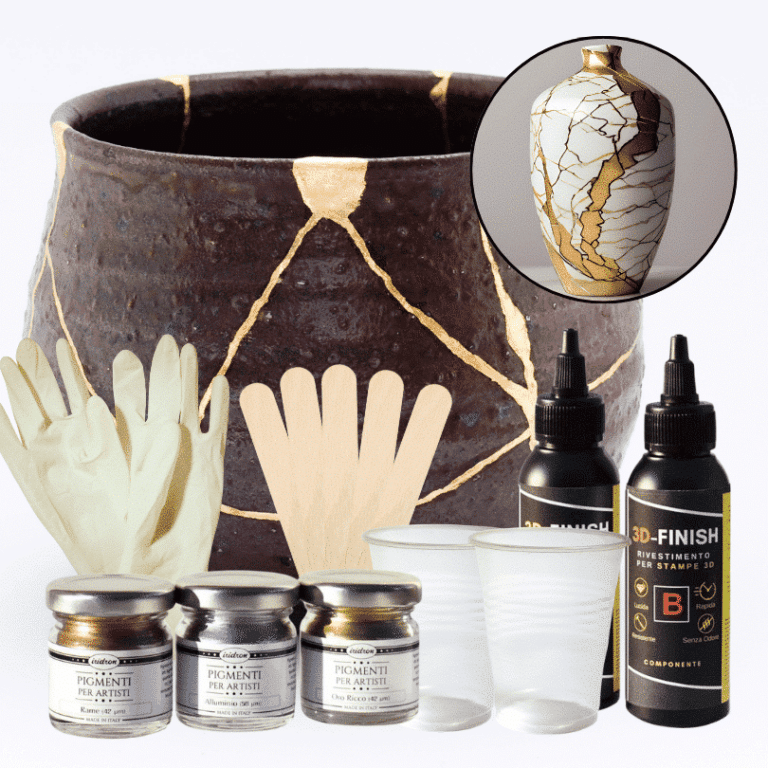
Kintsugi Repair Kit - Repair and Transform Your Ceramics with Elegance Celebrate imperfection with the ancient Japanese art Discover the traditional Japanese art of Kintsugi with our complete repair kit. Transform your broken ceramics into unique and fascinating works of art, highlighting imperfections with elegant gold, silver, or copper veins. Our kit is perfect for both beginners and experts, offering detailed instructions and everything you need to give new life and value to your most cherished items. 🌟 Specific epoxy resin (150g): slow catalysis to eliminate any bubbles or imperfections, allowing you to complete the work without rushing. 🎨 Dye of your choice (gold, copper, silver): customize your repair with a touch of elegance and refinement. ✨ Respect the tradition: follow the ancient art of Kintsugi and transform your ceramics into unique and precious treasures. The kit contains: 150g of resin for 3D decorations, 2 pairs of protective gloves, 2 mixing cups, and 5 spatulas for applying the resin, detailed instructions, everything you need in one kit. Give your ceramics a unique touch: repair them with style and make them even more beautiful. Buy the Kintsugi Repair Kit now and start creating your works of art today! Kintsugi Kit Instructions: Mix Resin: Measure 100A:50B by volume (or 100A:45B by weight) using a scale. Mix for 2 minutes, ensuring all surfaces are scraped. Add Colour: Mix your chosen metallic dye (gold, silver, or copper) into the resin to highlight the cracks. Prepare Surface: Ensure surfaces are clean, dry, and sanded. Apply Resin: Fill the cracks with the colored resin. Curing: Work in a temperature-controlled area, avoiding humidity. Safety: Wear protective gear.
$22,95
ResinPro: one supplier for all your needs
15 years of experience at your complete disposal, supplying resins and accessories for creativity, industry, DIY, flooring and marine applications.
At your home, directly from the manufacturer!
ResinPro is the direct manufacturer of our resin range for companies and hobbyists, guaranteeing the lowest prices on the market.
Learn more
The widest range of resins in the US!
We offer resins for every need, from artistic creations to marine and construction applications, far beyond the “limited” selection typically found in local DIY stores.
Expert technical support!
Our technicians provide free remote consulting to help you avoid mistakes and ensure you achieve the result you want — unlike “generic retailers” who sell 1,000 different products.
get a free consultation
RESIN PRO is a leader in resin production and distribution!
24-hour delivery: We ship across the US on the same day. Enjoy convenient home delivery with our appointment service—our courier will contact you in advance and deliver the package to your preferred location, or leave it at an alternative address of your choice.

Full support!
We provide continuous support from preparation to final application, including remote technical assistance, ensuring a smooth experience.
Talk with a specialist and place a phone order without registration and without credit cards!
 Free shipping on orders over €199,00
  Shipping Tracking!


 Google
 Facebook