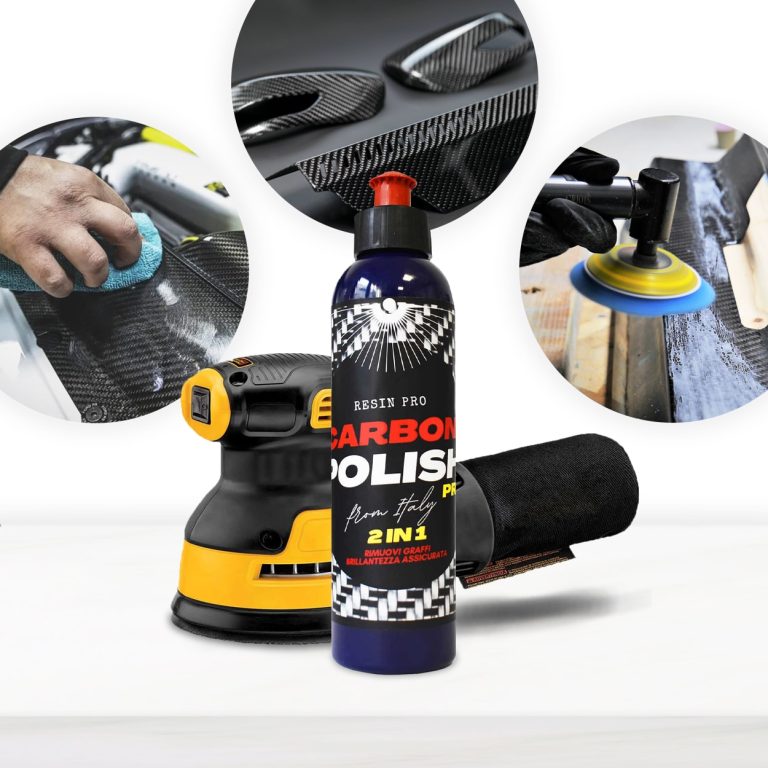
Carbon Polish Black (250ml) is the defined product for polishing your carbon, dark or black surfaces. The aesthetic and economic value of the carbon product is high, and for this reason it is essential to treat the surface with specific and dedicated products, which enhance the beauty of the “carbon look”. It is important to avoid “generic" products that can spoil the work done, with insufficient gloss or even worse, fail to remove scratches. EASY TO APPLY AND REMOVE MISCIBLE WITH WATER ODOURLESS DOES NOT WHITEN PLASTIC PARTS DOES NOT CONTAIN SILICONES VERY LOW ENVIRONMENTAL IMPACT The carbon polishing paste Carbon Polish Pro Black has been developed in a black colour precisely to ensure a brilliant finish and without white dots, typical of generic abrasive pastes. It can therefore be used for all dark surfaces (especially resin). Carbon Polish Pro Black is the specific paste for carbon; black colour prevents residues from remaining visible on surfaces after polishing. Thanks to the NAP (Nano Abrasive Particles) it is a 2 in 1 product; in fact it quickly removes scratches and defects from the surface and gives at the same time a deep shine like only a polish can do. In addition, its Synthetic Polymers allow you to correct and fill all the imperfections on the surfaces of Resin and carbon fiber artifacts. Eliminate scratches, defects and mirror shine with a single product! Carbon Polish Pro Black carbon polishing paste can be used both on the painted carbon and directly on the epoxy resin that covers the carbon fibers. Unlike commercial Polishes, Carbon Polish Pro Black is 100% Made in Italy, born from over 50 years of tradition in polishing. It allows both the hobbyist and the professions to obtain performing results quickly and easily. Here are the simple steps to polish or eliminate blemishes from your carbon fibre surfaces: If you need to use glass paper to remove the deepest scratches, you can do so without hesitation. The polishing paste will then be able to remove the sanding marks and make the surface smooth and shiny. Here's how:- The polishing paste Carbon Polish Black can be used by hand with extreme simplicity, with the help of a microfiber cloth or a foam pad. Or it can be used with electric tools, such as a drill and flexible, equipped with a special shepherd and foam pad (8000-12000 rpm) or with a polisher (1000-2000 rpm both rotary and ro orbital) with foam pad or wool (also synthetic). The use of tools of this kind will speed up the maintenance and ensure optimal results in even faster times. How to prepare the surface to be polished? Here are the tricks to make the most of NAP (Nano Abrasive Particles) technology:- Removals defects and scratches from sanding Depending on the depth of the scratch/defect, start with abrasive papers grit 800-1000 (for deep scratches) or simply 3000-4000 (for light scratches), always tend the surface wetted with water (this will help to make the result homogeneous) Apply the polishing paste for carbon fiber on the surface and spread it with circular and more or less energetic movements depending on the defect you want to remove. Or by directly attaching the buffer of the polisher / hose. We recommend one / two drops of carbon polishing paste every 3-4 cm. You can apply it several times thanks to synthetic polymers, without risking consuming the carbon, until the result is perfect. Clean up simply with water and a clean cloth. Put on your sunglasses and enjoy the dazzling result! Surface renewal: The product is also suitable as a fast and effective tool to renew your precious carbon surfaces, which wear out with normal use or exposure to atmospheric agents. In this case, the process is even easier: it is sufficient to apply the paste on the surface (well cleaned) and roll it out with circular movements, or by directly applying the buffer of the polisher / flexible. We recommend one / two drops of carbon polishing paste every 2-3 cm. The carbon polishing paste Carbon Polish Pro Black has been developed in black colour precisely to ensure a brilliant finish and without white dots, typical of generic abrasive pastes, and can therefore be used for all dark surfaces (especially resin). The special formula is free of volatile silicones and is therefore not harmful to health; it can also be used in painting processes.
$21,49

Resin Pro offers the possibility to achieve a perfect polishing by using different types of abrasive pastes. It can be used by hand or with an orbital polisher to make your resin creations shiny. Ebonite Abralon Sanding Pads Cosmetically appealing, consistent scratch pattern provides excellent traction. Combines the benefits of abrasive cloth and non-woven products. Opening in the fabric allows water to flow freely around the abrasive. Solid surface and foam backing provide even surface pressure. Last 5+ times longer than sandpaper. Use wet or dry (residual material can be removed by high pressure air). Now it's possible to get the most aggressive surface texture without that "cheese grater" look. Abralon sanding pads use silicon carbide particles that are precision sifted to a consistent grain size, then bonded evenly to a six-inch round fabric face for the most even scratch pattern available. WARNINGS: During processing, use protective masks, gloves, and other protective clothing. In case of contact with eyes, immediately rinse with cold water for 15 minutes and immediately consult a doctor. The kits may include by variations: EpoxyPolish Polishing cream – 250 ml [8,79 oz] - 1pc Ebonite Abralon Sanding Pads: - Ebonite Abralon Sanding Pad 150mm 360 grit - 1pc - Ebonite Abralon Sanding Pad 150mm 500 grit - 1pc - Ebonite Abralon Sanding Pad 150mm 1000 grit - 1pc - Ebonite Abralon Sanding Pad 150mm 2000 grit - 1pc - Ebonite Abralon Sanding Pad 150mm 3000 grit - 1pc - Ebonite Abralon Sanding Pad 150mm 4000 grit - 1pc EpoxyPolish Polishing cream How to Use: Step 1: Thoroughly clean the surface with a cloth. Step 2: Now you can polish by hand or with an orbital polisher. We recommend using the lowest possible speed to get the best result. Start Polishing with 360-500 grit. Note: Sand the entire surface evenly with circular movements and light pressure. Moisten the pad or the surface with water from time to time. Step 3: Now use the 1000 grit sandpaper. Note: Moisten the sandpaper or the surface with water from time to time. Step 4: Afterwards, use 2000 grit sandpaper. Note: Moisten the sandpaper or the surface with water from time to time. Lastly, use 4000 grit sandpaper to finish sanding. Step 5: Remove the sandpaper from the polishing disc and attach a soft sponge to it. Rinse the surface or wipe it with a damp cloth to remove any residual grain of the sanding. Step 6: Apply EpoxyPolish Polishing cream on the damp sponge. Use by hand or with an orbital polisher, using a large circular motion and exerting slight pressure. Step 7: Clean the surface with plenty of water to remove all the remaining residues. Step 8: Enjoy the result!!!
$21,49
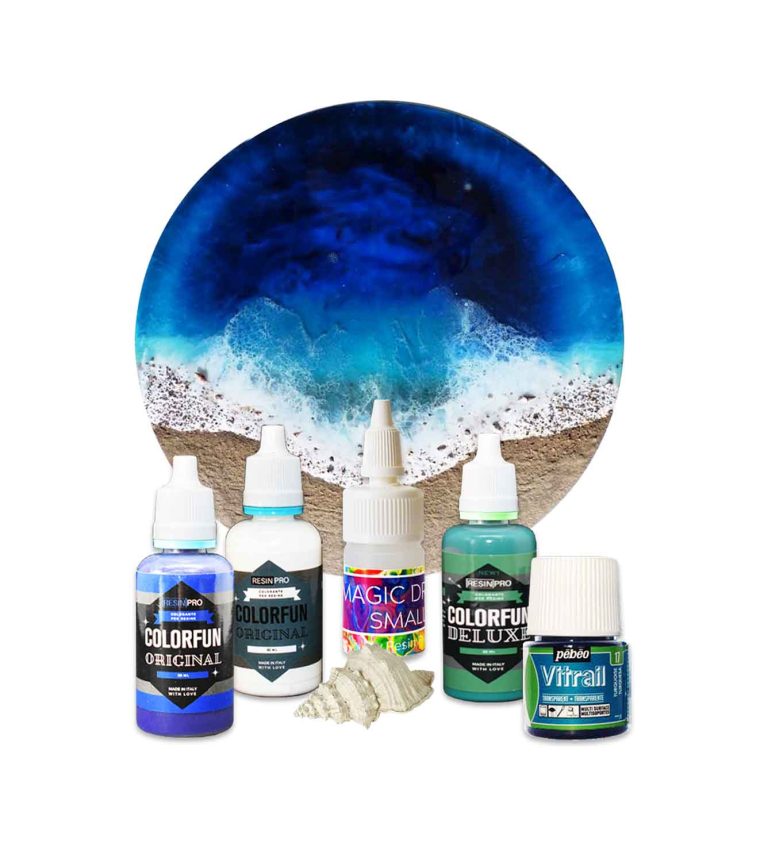
Create your personalized Sea Wave Effect! The ideal kit for creating cup coasters, geodes, “Ocean Art” style paintings and artistic coatings of all kinds, creating a natural sea wave effect. The “Ocean Art” KIT includes colours, pigments, additives and a non-toxic powder that reacts with wet epoxy resins by repelling itself away, thereby stimulating movement in concentric outward circles and waves. Creates cells and waves in resin art Safe & user-friendly Odourless Non-toxic & non-flammable Zero-VOC formula with no harsh chemical ingredients, solvents or alcohol-based ink Ideal for Ocean Resin Art The “Ocean Art” KIT includes: "Colorfun Deluxe" white colouring paste 30 ml "Colorfun Deluxe" Blue colouring paste 30 ml "Colorfun Deluxe" True Green colouring paste (Gradient green) 30 ml "Pebeo" Turquoise Semitransparent liquid pigment 45 ml "Magic Drops Small" liquid additive 15 ml How to use: Prepare about 300 gr [0,66 lb] of resin and, after mixing it well, divide it into 7 parts. Colour each part with the different pigments included in the kit (blue, opal green, white, turquoise, rich gold). Then use the “Pebeo” Turquoise pigment with two small glasses, and proceed as follows: pour a drop in the first glass and 2/3 in the second. In this way you will be able to perfectly recreate the sea-depth effect, giving an increasingly darker shade depending on the distance from the point where you will paint the coast. Then pour the darker resin in the farthest point from the "shore" (which you can create with a piece of wood or with sand) approaching the "coast" with increasingly transparent resin. In this way you will get a more gradual colouring that will give your creation the depth effect. Now apply the sand or wood, securing them with a layer of transparent resin. With the white pigment, draw thin lines in the shape of a wave which you will then “inflate” using a hairdryer or a straw. Then apply the golden pigment on the "sand" to give a final touch and shine. At this point, touch up your resin with “Magic Drops SMALL” by mixing it with the white pigment and applying it on the resin surface by pouring or dripping. Remove any residues or greasiness with alcohol or acetone, once the resin has catalysed. To get the best effect, we recommend to use “Art Pro” or “Art Pro Deluxe” epoxy resin (high viscosity). https://youtu.be/ZbgKRgRfjaI
$19,95
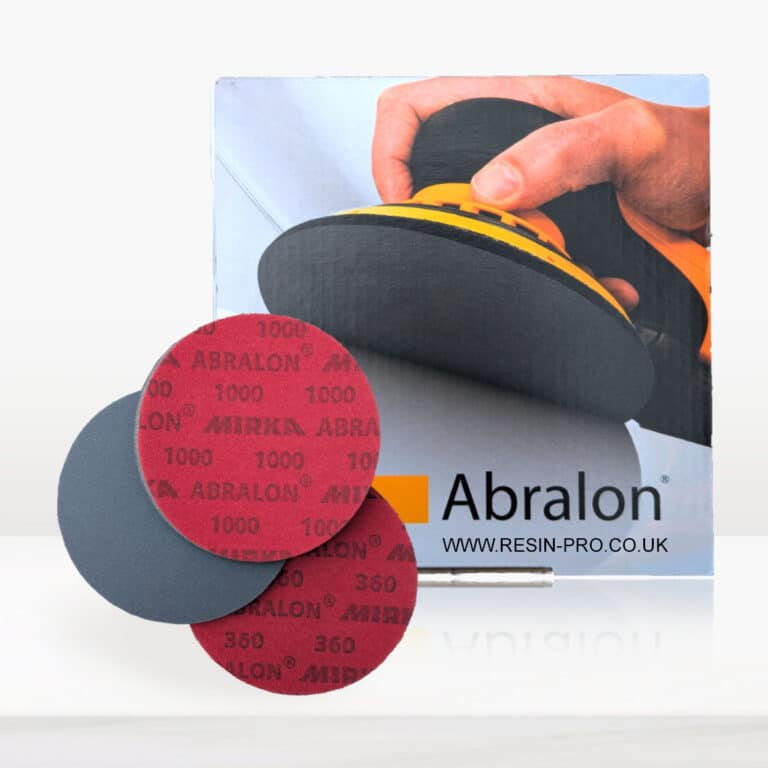
New line of polishing products SPECIFIC for plastic and resins industry. Ebonite Abralon Sanding Pads: - Ebonite Abralon Sanding Pad 150mm 360 grit - Ebonite Abralon Sanding Pad 150mm 500 grit - Ebonite Abralon Sanding Pad 150mm 1000 grit - Ebonite Abralon Sanding Pad 150mm 2000 grit - Ebonite Abralon Sanding Pad 150mm 3000 grit - Ebonite Abralon Sanding Pad 150mm 4000 grit Ebonite Abralon Sanding Pads Cosmetically appealing, consistent scratch pattern provides excellent traction. Combines the benefits of abrasive cloth and non-woven products. Opening in the fabric allows water to flow freely around the abrasive. Solid surface and foam backing provide even surface pressure. Last 5+ times longer than sandpaper. Use wet or dry (residual material can be removed by high pressure air). Now it's possible to get the most aggressive surface texture without that "cheese grater" look. Abralon sanding pads use silicon carbide particles that are precision sifted to a consistent grain size, then bonded evenly to a six-inch round fabric face for the most even scratch pattern available. WARNINGS: During processing, use protective masks, gloves, and other protective clothing. In case of contact with eyes, immediately rinse with cold water for 15 minutes and immediately consult a doctor. How to Use: Step 1: Thoroughly clean the surface with a cloth. Step 2: Now you can polish by hand or with an orbital polisher. We recommend using the lowest possible speed to get the best result. Start Polishing with 360-500 grit. Note: Sand the entire surface evenly with circular movements and light pressure. Moisten the pad or the surface with water from time to time. Step 3: Now use the 1000 grit sandpaper. Note: Moisten the sandpaper or the surface with water from time to time. Step 4: Afterwards, use 2000 grit sandpaper. Note: Moisten the sandpaper or the surface with water from time to time. Lastly, use 4000 grit sandpaper to finish sanding. Step 5: Remove the sandpaper from the polishing disc and attach a soft sponge to it. Rinse the surface or wipe it with a damp cloth to remove any residual grain of the sanding. Step 6: Apply EpoxyPolish Polishing cream on the damp sponge. Use by hand or with an orbital polisher, using a large circular motion and exerting slight pressure. Step 7: Clean the surface with plenty of water to remove all the remaining residues. Step 8: Enjoy the result!!!
$5,61
How to Remove Uncured Resin Residues
When it comes to removing uncured resin residues, acting promptly is key to preventing them from hardening. Here are some helpful steps to follow:
- Begin by gently scraping off the surface with a scraper to remove the majority of the residue.
- Apply a specialized solvent for uncured resins using a clean cloth, allowing it to sit for a few minutes.
- Use another clean cloth to vigorously scrub and eliminate the remaining residues.
- If needed, repeat the process until the surface is completely clean.
- Finally, thoroughly wash the surface with water and soap to ensure all solvent residues are removed.
By following these steps, you can effectively eliminate uncured resin residues from your desired surface.
How to Remove Uncured Resin
To effectively remove uncured resin, consider the following steps
- Use a scraper or spatula to eliminate most of the uncured resin.
- Apply a specific resin solvent like acetone with a clean cloth to dissolve and remove the residue.
- Repeat the process until all uncured resin is fully removed from the surface.
- Ensure proper ventilation while using the solvent and adhere to the manufacturer's instructions for correct resin removal.
By carefully following these steps, you can successfully remove uncured resin from various surfaces.
Cleaning Uncured Epoxy Resin
Prompt action is crucial when cleaning uncured epoxy resin. Follow these steps for optimal results:
Wear protective gloves and use a scraper to remove excess resin.
Utilize a solvent such as acetone or isopropyl alcohol to dissolve the resin.
Gently dab the area with a solvent-soaked cloth to eliminate any residue.
Repeat the process until all resin is removed entirely from the surface.
Conclude by washing the area with water and soap to remove any remaining traces of solvent.
Remember to adhere to safety precautions listed on chemical products and ensure proper ventilation during the cleaning process.
Removing Residues of Uncured Resin
For removing residues of uncured resin, follow these simple steps:
Gently scrape off larger residues using a scraper or spatula.
Apply a specialized solvent for uncured resins to the affected area.
Allow the solvent to work for the recommended duration as indicated on the packaging.
Wipe off softened residues with a cloth or sponge.
Repeat the process as needed until all residues are completely removed.
Finally, wash the surface thoroughly with water and soap to eliminate any remaining solvent residue.
These steps will aid in effectively removing residues of uncured resin from your desired surface.
Method for Removing Uncured Resin
To remove uncured resin from a surface, follow these steps:
Carefully scrape off the uncured resin using a sharp tool or spatula.
Apply a specialized solvent for uncured resins to the affected area.
Allow the solvent to work for the specified time according to the manufacturer's instructions.
Use a clean cloth or brush to remove the softened resin from the surface.
Repeat the process until all uncured resin is completely eliminated.
It's essential to pay close attention and follow the manufacturer's instructions to prevent damage to the treated surface.
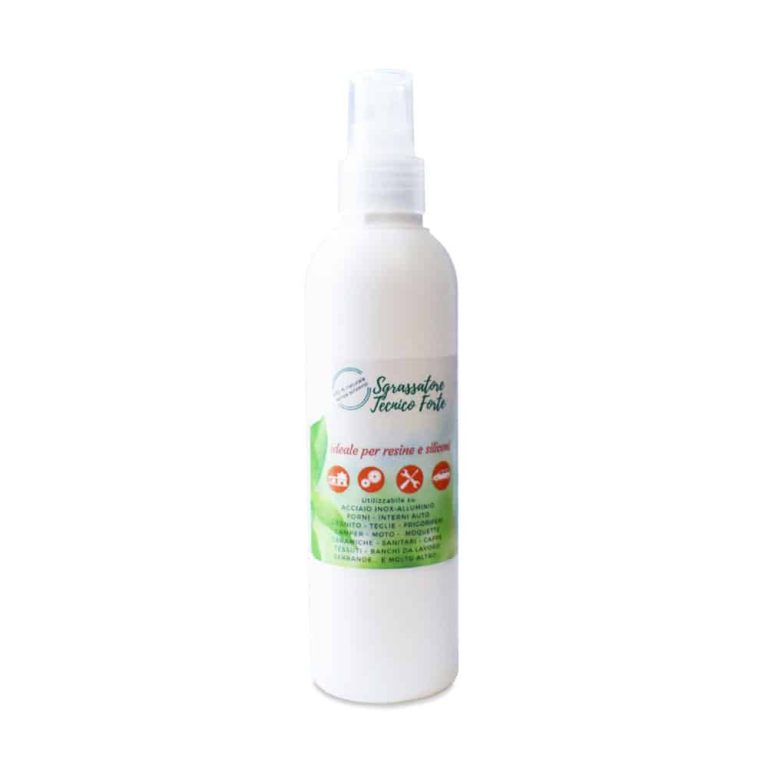
Strong technical degreaser Ideal for Resins and Silicones - it is a liquid degreaser, non-aggressive on the skin: it is dermatologically tested and hypoallergenic. Made only with solvent-free plant extracts. Its formula contains valuable plant extracts! 100% natural – solvent-free! Ingredients: Plant extracts - valerian, aloe vera, mint, rosemary, sage, lavender, calendula, linden, thyme, witch hazel. Extremely delicate. Suitable for use on: STAINLESS STEEL – ALUMINUM OVENS - CAR INTERIORS GRANITE - PANS – REFRIGERATORS CAMPERS - MOTORBIKES – CARPETS CERAMICS - SANITARY WARE – HOODS FABRICS - WORK BENCHES – SHUTTERS AND MUCH MORE ... Solvent-free and alcohol-free, made with raw materials of plant origin. Removes greases, oils, markers, encrustations, adhesive residues, silicone, wax, tar, permanent inks, paints, enamels, resins, pitch, gas oil.
$7,95
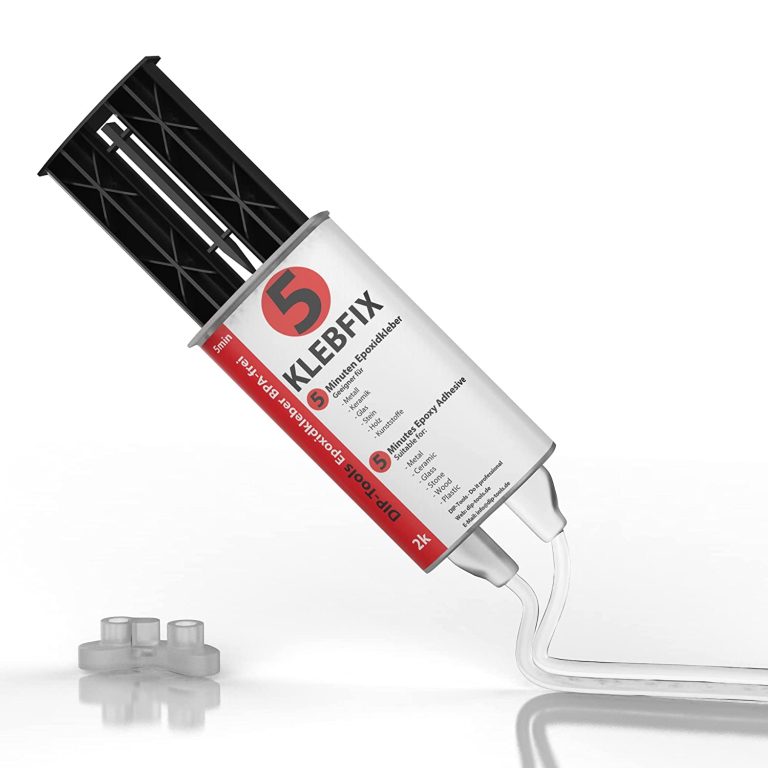
Advantages of Two-component Epoxy Resin Adhesive Extreme strength and resistance to thermal and mechanical influences Resistant to most aggressive substances and oils Available solvent free and BPA free It hardens even under water Compatible with a wide range of additives such as dyes and accelerators Expedited Potlife Application – BestPractice At room temperature (15-30 C The mixing ratio of the two components of 1: 1 is maintained automatically. Do not apply below 5 C outdoor temperature. The higher the ambient temperature, the more effectively the material polymerizes. This means that resistance increases at higher temperatures. It is recommended to have a cloth ready for cleaning. In addition, care must be taken that the work surface is protected and can be cleaned directly if necessary. The surface should be slightly roughened, because only then is the epoxy adhesive guaranteed to bond well with the material. To do this, you can sand or file the surface. To spread the sticker, a piece of cardboard or plastic is useful. After use, clean the tube so that the lid does not stick, and then close it tightly. The thickness of the adhesive should be thin enough (0.1-0.2 mm), but if necessary it can be thicker. The parts to be glued must be clean and free of oil and grease. Apply the adhesive on one side and join and press the parts to be glued. The potlife is about 5 minutes, good endurance is achieved after about 10-12 minutes, and total endurance after about 24 hours. Pot life is limited in time and describes the maximum working time of the uncured adhesive. Once the pot life has passed, the adhesive not yet applied must not be further processed, but must be disposed of! Until the manual force is reached, the binding must be additionally fixed, for example, with the help of a vice, adhesive tape or clamp. In the case of heat-assisted polymerisation, the temperature resistance of the joined parts must be guaranteed. In addition, the heating and cooling times of the parts to be joined must be respected. This time must be added to the curing time of the adhesive. Tension can occur in the glued joint during heating and cooling. With materials such as PP, PE, PTFE or silicone, the parts need to be pretreated with our primer. The need for a primer depends on the surface tension. If this is high enough it can be tested with water droplets on the surface. If the drops adhere well to the surface, a good bond is most likely. If the drops slip away, a primer is probably needed. Mixing There are several ways to mix the two components: - Mixing by hand - Use of a static mixing nozzle - Use of a dynamic mixing nozzle Hand mixing is sufficient in most cases. For this purpose, a toothpick or similar is used and the two components are mixed until a cloudy mass is formed. Make sure that no bubbles remain. When using a static mixing nozzle, the mixing of both components takes place inside the mixing nozzle so that the mixing is ideal. The first 2g should be discarded, given they are not yet mixed 1:1. However, the mixing nozzle can only be used until the adhesive in the mixing nozzle has dried. After that, you will need a new nozzle. W With a dynamic mixing nozzle, the speed of the mixer can be controlled electronically. This allows you to control the mixing intensity very precisely. However, this is intended for special industrial applications and is not necessary for everyday use. Harden The adhesive is chemically cured. This gives the advantage that gluing the surface is also possible, where adhesives that harden with moisture take a very long time. The bond is high strength and densely flexible. Thus, permanent resistance can be guaranteed in the event of shocks and vibrations. The use of the polymerised adhesive is also possible at high temperatures (up to about 120C), for a short time (30 min) up to 200C The polymerised adhesive has good resistance to physical (e.g. sunlight) or chemical (moisture, detergents, chemicals, etc.) influences. The great advantage of two-component epoxy adhesive is the fact that it hardens even under water and is robust. In addition, it is mouldable, so it can be inserted into any recess to fit. Technical data Epoxy Resin Hardener Base (amine mixture) Viscosity High Viscosity Transparent Color Density 1.1 g / ml Gap filling capacity 3mm Temperature resistance -40 up to +120 C Pot Life 5 min Hand resistance 10-12 min Final endurance 24 hours Shore hardness 60 Tensile shear strength 10 N / mm2 Module E 620 N / mm2
$32,95
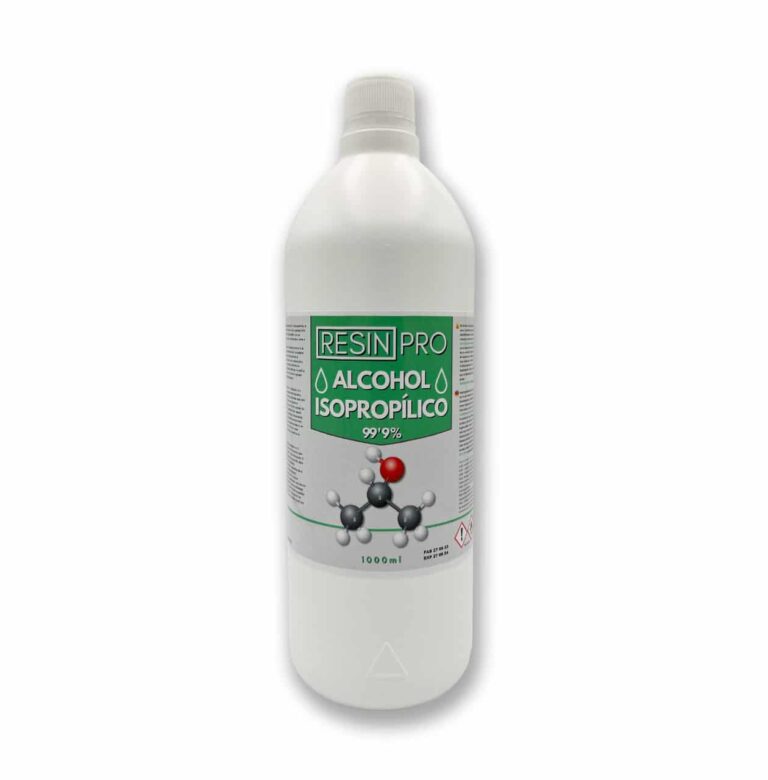
⚙️ In the world of resins: Used to remove surface bubbles from resin mixtures, if applied in drops on top of resin already mixed with mica pigments, it will create fantastic cells with very beautiful degradation and colour mixing. 💦 As a remedy for removing the formation of bubbles: By applying it to the inner surface of silicone moulds with a spray gun, you will remove bubbles on resin parts. 🎨 A multi-purpose product, ideal for: To remove bubbles from epoxy resin mixtures. To create the effect of craters and cells, it is applied to a mixture of epoxy resins with mica pigments. Solvent for coatings or for non-polar industrial processes. As a cleaning agent, it is highly recommended for cleaning electronic devices, LCD displays, DVDs… To remove stains from most fabrics, wood, cotton, etc... To remove oil-based paint residues for reuse. As a moisturiser in lithographic printing. A solvent for polishing varnish used in joinery. If you want to create beautiful effects on countertops, floors and surfaces, as well as easily remove bubbles in your resin products, then this is your product. Pure 99.9% Isopropyl Alcohol Resin Pro, also known as 2-propanol or isopropanol, is used as an electrical contact cleaner among many other applications. Trade Name: Medical ALCOHOL In the resin world, it is used to remove surface bubbles from mixtures, and when applied in drops over resin mixed with mica pigments, cells are formed. APPLICATION: For cleaning electronic components: Apply the product directly to the equipment, let it dry at room temperature or accelerate drying by applying compressed air, and finally reassemble the equipment. Do not use while the equipment is on. PRECAUTIONS: View the safety tab. Isopropyl alcohol in the vapor state is denser than air and is highly flammable, giving a very wide range of fuels. It should be kept away from sources of heat and fire. CHARACTERISTICS, PHYSICAL AND CHEMICAL PROPERTIES: Physical condition: Colourless liquid, very volatile Attention! Safety Guidelines for Using Isopropyl Alcohol (99.9%) Isopropyl alcohol (IPA) is a highly flammable substance. Improper use—especially near heat sources like torches or heat guns—can result in fire or explosion. To ensure safe use, follow these precautions: Primary Risks Highly flammable: IPA vapors can ignite from sparks, open flames, or hot surfaces. Forms explosive vapor-air mixtures, especially in enclosed or poorly ventilated spaces. Strictly Prohibited: Using gas torches or heat guns near areas treated with IPA. Spraying IPA near active heat sources. Storing IPA near flames, heaters, or hot tools. Recommended Safety Measures: 1. Ventilation: Always work in a well-ventilated area when using IPA. 2. Wait Time: After applying IPA, wait at least 5–10 minutes to allow complete evaporation before using any heat tools. 3. Safe Distance: Keep IPA containers at least 2 meters (6 feet) away from heat or flame sources. 4. Storage: Store IPA in a tightly sealed container, away from direct sunlight or high temperatures. 5. Fire Safety: Have a CO₂ or dry chemical fire extinguisher nearby when working with flammable substances and open flames. In Case of Fire: Do not use water to extinguish the fire. Use an appropriate extinguisher, cut off air supply if safe, and call emergency services if needed.
$14,08
Intense and brilliant color, ideal for Transparent Epoxy Resins. Mix small quantities to get a translucent effect. The high coverage of the “Colorful Original” range allows to obtain a full and bright color. The high concentration provides an opaque color with a few drops.
Usable to color the products of the RESIN PRO range.
💥 Ideal for epoxy creations and resin tables thanks to its features:
✔️ Intense colors
✔️ Easy to mix
✔️ Intense colors
✔️ High concentration
✔️ Easy to get a translucent effect
✔️ 5 stars on Trustpilot
🌿Cruelty Free, Vegan Friendly🐹
$16,00
 Free shipping on orders over €199,00
  Shipping Tracking!


 Google
 Facebook