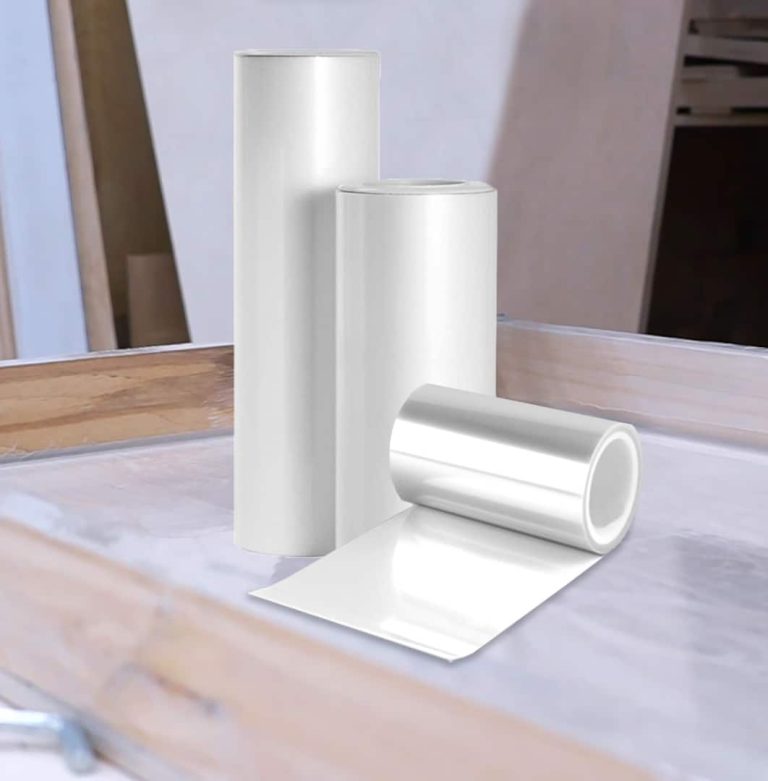
"SHINY SHIELD" - Glossy Release Film For Coasters & Table`s Frames Great tool for achieving the best results: ✔️ "Shiny Shield" release Film for Epoxy, Polyurethane and Acrylic Resins. ✔️ Transparent, adhesive and easily removable, it won’t leave any sticky traces on the workpiece; ✔️ Applicable on ALL SURFACES; ✔️ Specifically developed for CASTING FORMWORK EXTERNAL COATINGS. It is easy to apply without unevenness, creating a smooth, glossy and bubble-free surface, which will help easily release your epoxy project from the frame; ✔️ Once the resin has solidified, the "Shiny Shield" film can be easily removed, leaving a HIGHLY POLISHED even surface; ✔️ REUSABLE several times; ✔️ It does not require any kind of additional treatment and it is IMMEDIATELY READY to be poured. For any queries or if you may need some advice, please contact the ResinPro technical department!
$4,62
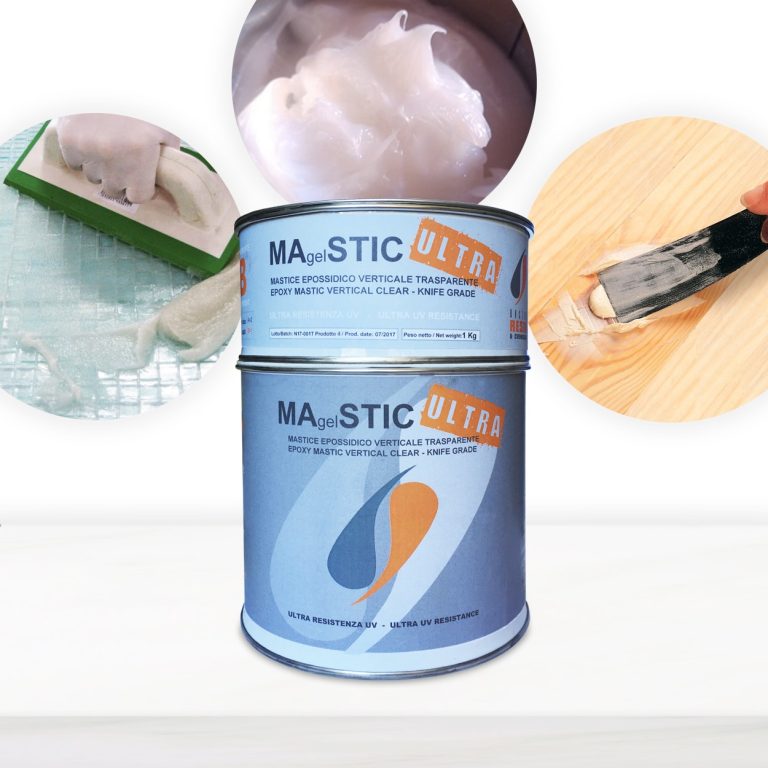
MAgelSTIC Epoxy Mastic Semi-transparent two-component with very high mechanical and adhesion properties weatherproof and with good UV resistance. Strongly recommended to bond and grout marble, granite, natural and artificial stones. Thanks to its high thixotropy and the near-zero shrinkage, the product excels both in vertical applications and in the correction of imperfections, even of medium / large dimensions. Two-component transparent epoxy mastic with very high mechanical and adhesion properties, unalterable to bad weather and with good UV resistance. Strongly recommended for bonding and grouting of marble, granite, natural and artificial stone. Thanks to its elevated thixotropy and a almost zero shrinkage, the product excels both in vertical applications and in the restoration of imperfections, even of medium / large size.
$62,95
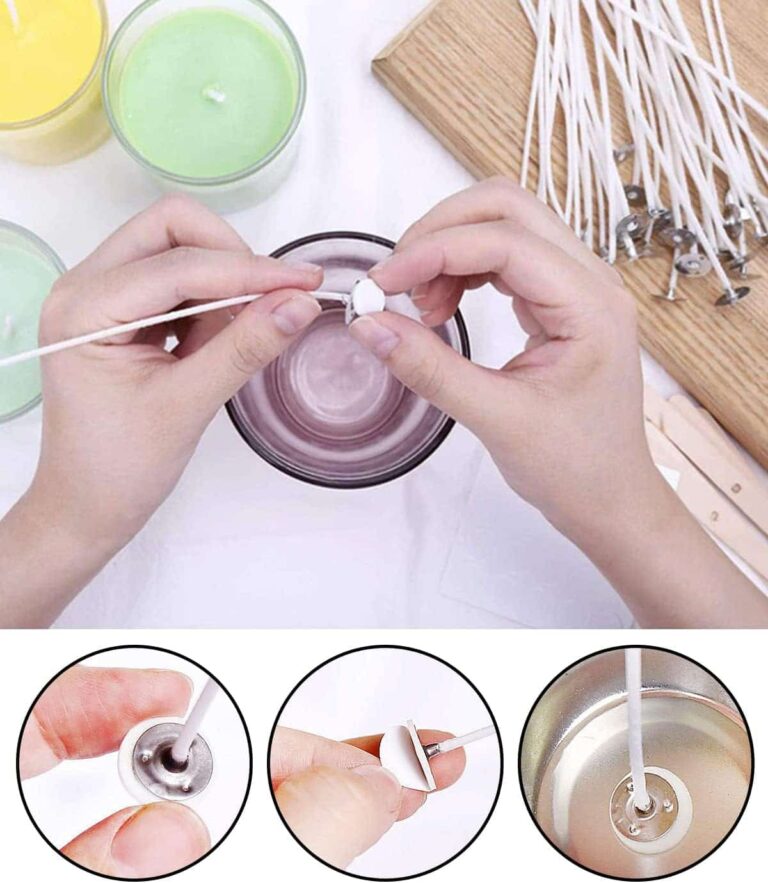
✅ Waxed cotton wicks: They are versatile and suitable for candles of all sizes, compatible with paraffin, soy, beeswax and natural wax. ✅ Wooden wicks: Ideal for creating a soothing sound when burning, for use in combination with soy or beeswax. ✅ Easy placement: Glue on the bottom to easily fix the wick in the container or mould. ✅ Minimal smoke: Designed to reduce smoke during burning. ✅ Ideal length: Available in different lengths (55-130 mm) to meet all creative needs. Choose from our waxed cotton or wooden wicks to personalise your homemade candles! Discover our LITELINE range of candle wicks, part of the CandlePro line designed for DIY candle makers and artisans in the industry. From classic waxed cotton wicks, perfect for their versatility, to charming wooden wicks that add a touch of nature and soothing sounds to your candle, we have what you need! How to use: Place the wick in the container or shape you have chosen for your candle. Thanks to the glue at the bottom of the wick, it will stay in place after being secured, providing a perfect candle. Our LITELINE range is compatible with all types of wax: paraffin, soy, bee or other natural wax blends. Cotton Wicks: waxed cotton wicks with metal backing and glue on the bottom, suitable for candles of all sizes. Wooden Wicks*: Easy to place as they support themselves. When they burn, they make a sound similar to the sound of wood in the fireplace, creating a unique atmosphere. Virtually no smoke: Our wicks are designed to minimise smoke during burning. Ideal length, our wicks range from 55 to 130 mm in length Suitable for all waxes: Our wicks are compatible with paraffin, soy, beeswax and many others. Don't wait! Discover the LITELINE range and spark your creativity! Attention: Wooden wicks should be used in pairs, not individually, when used for soy or beeswax. Also, you should always immerse them in liquid wax for 30 seconds before using them for candles to keep them burning properly.
$4,51
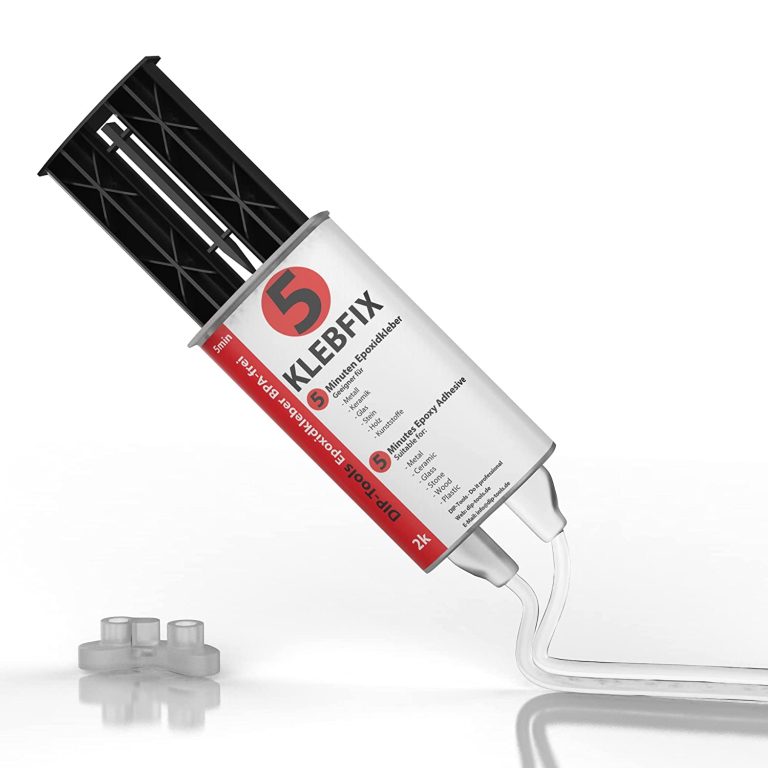
Advantages of Two-component Epoxy Resin Adhesive Extreme strength and resistance to thermal and mechanical influences Resistant to most aggressive substances and oils Available solvent free and BPA free It hardens even under water Compatible with a wide range of additives such as dyes and accelerators Expedited Potlife Application – BestPractice At room temperature (15-30 C The mixing ratio of the two components of 1: 1 is maintained automatically. Do not apply below 5 C outdoor temperature. The higher the ambient temperature, the more effectively the material polymerizes. This means that resistance increases at higher temperatures. It is recommended to have a cloth ready for cleaning. In addition, care must be taken that the work surface is protected and can be cleaned directly if necessary. The surface should be slightly roughened, because only then is the epoxy adhesive guaranteed to bond well with the material. To do this, you can sand or file the surface. To spread the sticker, a piece of cardboard or plastic is useful. After use, clean the tube so that the lid does not stick, and then close it tightly. The thickness of the adhesive should be thin enough (0.1-0.2 mm), but if necessary it can be thicker. The parts to be glued must be clean and free of oil and grease. Apply the adhesive on one side and join and press the parts to be glued. The potlife is about 5 minutes, good endurance is achieved after about 10-12 minutes, and total endurance after about 24 hours. Pot life is limited in time and describes the maximum working time of the uncured adhesive. Once the pot life has passed, the adhesive not yet applied must not be further processed, but must be disposed of! Until the manual force is reached, the binding must be additionally fixed, for example, with the help of a vice, adhesive tape or clamp. In the case of heat-assisted polymerisation, the temperature resistance of the joined parts must be guaranteed. In addition, the heating and cooling times of the parts to be joined must be respected. This time must be added to the curing time of the adhesive. Tension can occur in the glued joint during heating and cooling. With materials such as PP, PE, PTFE or silicone, the parts need to be pretreated with our primer. The need for a primer depends on the surface tension. If this is high enough it can be tested with water droplets on the surface. If the drops adhere well to the surface, a good bond is most likely. If the drops slip away, a primer is probably needed. Mixing There are several ways to mix the two components: - Mixing by hand - Use of a static mixing nozzle - Use of a dynamic mixing nozzle Hand mixing is sufficient in most cases. For this purpose, a toothpick or similar is used and the two components are mixed until a cloudy mass is formed. Make sure that no bubbles remain. When using a static mixing nozzle, the mixing of both components takes place inside the mixing nozzle so that the mixing is ideal. The first 2g should be discarded, given they are not yet mixed 1:1. However, the mixing nozzle can only be used until the adhesive in the mixing nozzle has dried. After that, you will need a new nozzle. W With a dynamic mixing nozzle, the speed of the mixer can be controlled electronically. This allows you to control the mixing intensity very precisely. However, this is intended for special industrial applications and is not necessary for everyday use. Harden The adhesive is chemically cured. This gives the advantage that gluing the surface is also possible, where adhesives that harden with moisture take a very long time. The bond is high strength and densely flexible. Thus, permanent resistance can be guaranteed in the event of shocks and vibrations. The use of the polymerised adhesive is also possible at high temperatures (up to about 120C), for a short time (30 min) up to 200C The polymerised adhesive has good resistance to physical (e.g. sunlight) or chemical (moisture, detergents, chemicals, etc.) influences. The great advantage of two-component epoxy adhesive is the fact that it hardens even under water and is robust. In addition, it is mouldable, so it can be inserted into any recess to fit. Technical data Epoxy Resin Hardener Base (amine mixture) Viscosity High Viscosity Transparent Color Density 1.1 g / ml Gap filling capacity 3mm Temperature resistance -40 up to +120 C Pot Life 5 min Hand resistance 10-12 min Final endurance 24 hours Shore hardness 60 Tensile shear strength 10 N / mm2 Module E 620 N / mm2
$32,95
How to Remove Tough Industrial Adhesives
Removing tough industrial adhesives can be a challenging task, but by following some effective steps you can successfully get rid of them without causing any damage to the surfaces.
- Heat the adhesive with a hairdryer to soften it, making it easier to peel off.
- Apply a specific solvent for adhesives, such as acetone or isopropyl alcohol, using a clean cloth.
- If the adhesive is on a water-resistant surface, try using hot water and soap to loosen it.
- Consider using dedicated adhesive removal products like specialized solvents or cooling sprays.
- After removing the adhesive, thoroughly clean the surface with a degreasing detergent to ensure a clean finish.
By following these methods, you can effectively remove tough industrial adhesives without causing any harm to the surfaces.
Tips for Removing Strong Adhesives
Dealing with strong adhesives may seem daunting, but there are several effective methods you can use to tackle the problem. Here are some helpful tips to guide you through the process:
- Start by heating the adhesive with a hairdryer to soften it before attempting to remove it.
- Use a plastic scraper or sandpaper to gently peel off the adhesive without damaging the surface underneath.
- Consider using specific solvents like isopropyl alcohol or acetone to dissolve the adhesive more efficiently.
- After removing the adhesive, clean the area thoroughly with water and soap to remove any leftover residue.
By following these steps, you can successfully remove strong adhesives without causing any harm to the surfaces.
Removing Stubborn Glue
Stubborn glue can be a real nuisance, but with the right approach, you can get rid of it effectively. Here's how you can tackle stubborn glue:
- Start by scraping off as much glue as possible with a scraper or spatula.
- Apply a specific solvent for glue removal, such as acetone or a resin-based solvent.
- Allow the solvent to sit for a few minutes to further soften the glue.
- Clean the area with a clean cloth after letting the solvent work its magic.
- Repeat the process if necessary until all the glue is removed completely.
By carefully following these steps, you can eliminate stubborn glue from various surfaces without causing any damage.
Degreasing Adhesive Surfaces
Degreasing adhesive surfaces is crucial to maintaining their integrity. Here are some steps to effectively degrease adhesive surfaces without compromising their adhesion:
Choose a gentle detergent specifically designed for degreasing adhesive surfaces to avoid damaging the material.
Apply the detergent on the adhesive surface and let it sit for the recommended time indicated on the package.
Clean the area carefully using a soft cloth or sponge to remove excess dirt without harming the adhesive.
By following these simple steps, you can effectively degrease adhesive surfaces while ensuring their adhesion remains intact.
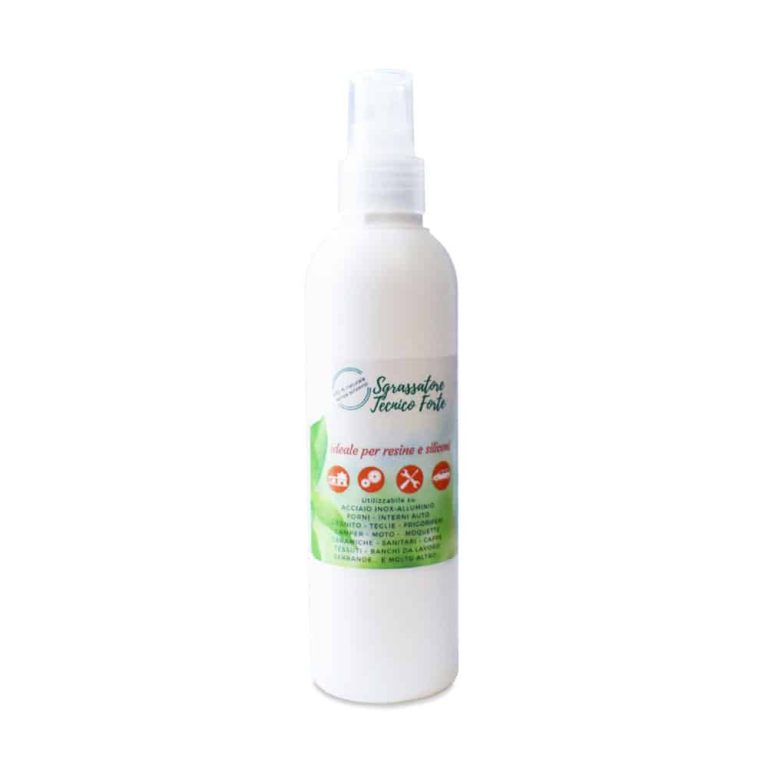
Strong technical degreaser Ideal for Resins and Silicones - it is a liquid degreaser, non-aggressive on the skin: it is dermatologically tested and hypoallergenic. Made only with solvent-free plant extracts. Its formula contains valuable plant extracts! 100% natural – solvent-free! Ingredients: Plant extracts - valerian, aloe vera, mint, rosemary, sage, lavender, calendula, linden, thyme, witch hazel. Extremely delicate. Suitable for use on: STAINLESS STEEL – ALUMINUM OVENS - CAR INTERIORS GRANITE - PANS – REFRIGERATORS CAMPERS - MOTORBIKES – CARPETS CERAMICS - SANITARY WARE – HOODS FABRICS - WORK BENCHES – SHUTTERS AND MUCH MORE ... Solvent-free and alcohol-free, made with raw materials of plant origin. Removes greases, oils, markers, encrustations, adhesive residues, silicone, wax, tar, permanent inks, paints, enamels, resins, pitch, gas oil.
$7,95
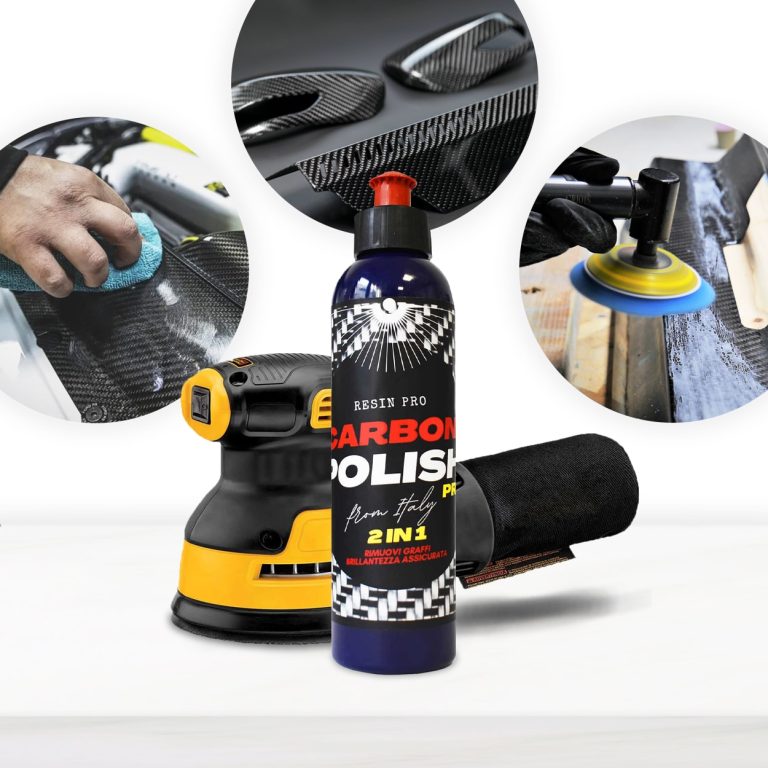
Carbon Polish Black (250ml) is the defined product for polishing your carbon, dark or black surfaces. The aesthetic and economic value of the carbon product is high, and for this reason it is essential to treat the surface with specific and dedicated products, which enhance the beauty of the “carbon look”. It is important to avoid “generic" products that can spoil the work done, with insufficient gloss or even worse, fail to remove scratches. EASY TO APPLY AND REMOVE MISCIBLE WITH WATER ODOURLESS DOES NOT WHITEN PLASTIC PARTS DOES NOT CONTAIN SILICONES VERY LOW ENVIRONMENTAL IMPACT The carbon polishing paste Carbon Polish Pro Black has been developed in a black colour precisely to ensure a brilliant finish and without white dots, typical of generic abrasive pastes. It can therefore be used for all dark surfaces (especially resin). Carbon Polish Pro Black is the specific paste for carbon; black colour prevents residues from remaining visible on surfaces after polishing. Thanks to the NAP (Nano Abrasive Particles) it is a 2 in 1 product; in fact it quickly removes scratches and defects from the surface and gives at the same time a deep shine like only a polish can do. In addition, its Synthetic Polymers allow you to correct and fill all the imperfections on the surfaces of Resin and carbon fiber artifacts. Eliminate scratches, defects and mirror shine with a single product! Carbon Polish Pro Black carbon polishing paste can be used both on the painted carbon and directly on the epoxy resin that covers the carbon fibers. Unlike commercial Polishes, Carbon Polish Pro Black is 100% Made in Italy, born from over 50 years of tradition in polishing. It allows both the hobbyist and the professions to obtain performing results quickly and easily. Here are the simple steps to polish or eliminate blemishes from your carbon fibre surfaces: If you need to use glass paper to remove the deepest scratches, you can do so without hesitation. The polishing paste will then be able to remove the sanding marks and make the surface smooth and shiny. Here's how:- The polishing paste Carbon Polish Black can be used by hand with extreme simplicity, with the help of a microfiber cloth or a foam pad. Or it can be used with electric tools, such as a drill and flexible, equipped with a special shepherd and foam pad (8000-12000 rpm) or with a polisher (1000-2000 rpm both rotary and ro orbital) with foam pad or wool (also synthetic). The use of tools of this kind will speed up the maintenance and ensure optimal results in even faster times. How to prepare the surface to be polished? Here are the tricks to make the most of NAP (Nano Abrasive Particles) technology:- Removals defects and scratches from sanding Depending on the depth of the scratch/defect, start with abrasive papers grit 800-1000 (for deep scratches) or simply 3000-4000 (for light scratches), always tend the surface wetted with water (this will help to make the result homogeneous) Apply the polishing paste for carbon fiber on the surface and spread it with circular and more or less energetic movements depending on the defect you want to remove. Or by directly attaching the buffer of the polisher / hose. We recommend one / two drops of carbon polishing paste every 3-4 cm. You can apply it several times thanks to synthetic polymers, without risking consuming the carbon, until the result is perfect. Clean up simply with water and a clean cloth. Put on your sunglasses and enjoy the dazzling result! Surface renewal: The product is also suitable as a fast and effective tool to renew your precious carbon surfaces, which wear out with normal use or exposure to atmospheric agents. In this case, the process is even easier: it is sufficient to apply the paste on the surface (well cleaned) and roll it out with circular movements, or by directly applying the buffer of the polisher / flexible. We recommend one / two drops of carbon polishing paste every 2-3 cm. The carbon polishing paste Carbon Polish Pro Black has been developed in black colour precisely to ensure a brilliant finish and without white dots, typical of generic abrasive pastes, and can therefore be used for all dark surfaces (especially resin). The special formula is free of volatile silicones and is therefore not harmful to health; it can also be used in painting processes.
$21,49
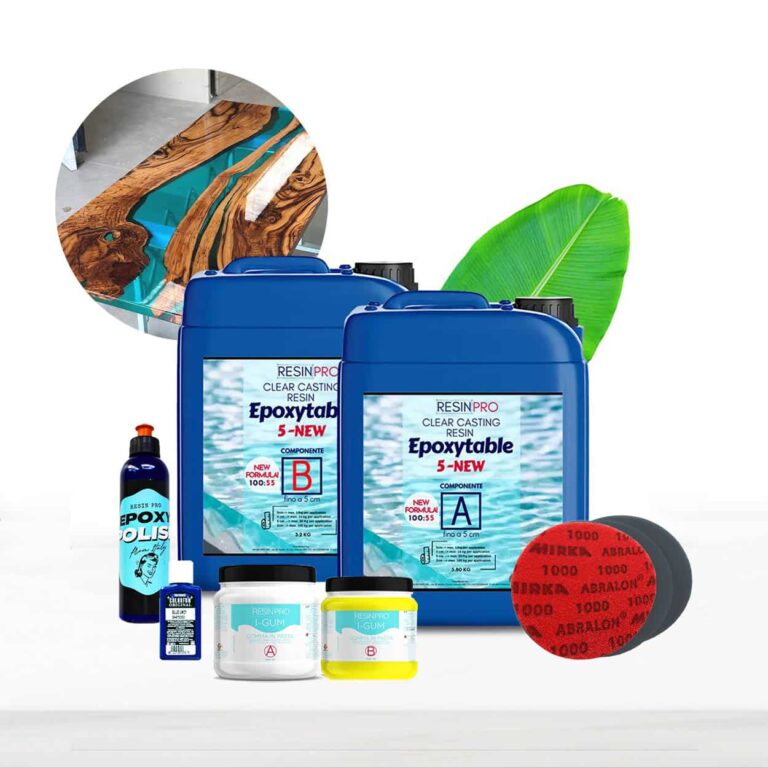
💥 About Сomplete Kit "RIVER-TABLE" - For Creating Your First Table: Resin Kit for Tables and Crafts - the perfect starter pack for resin enthusiasts of all levels. This comprehensive kit includes everything you need to create stunning resin tables, crafts, and more. With easy-to-follow instructions and high-quality materials, even beginners can achieve professional results. You will find everything you need to create the container, the resin and the final polish. Detailed instructions on how to create the formwork, and the tricks to cast the resin in few simple steps are also included. Dive into the world of resin artistry with our Beginner Resin Kit and unlock your creativity today! Resin Pro offers to chose between two epoxy types - -"Transparent" casting resin up to 2cm or -Deep pour "Epoxytable-5" up to 5cm. 💥What`s included: "BEGINNER" KIT - Have you always dreamed of owning a stunning, contemporary table crafted from wood and resin? Now, you can bring that dream to life without breaking the bank! Our BEGINNER kit offers an affordable solution, enabling you to effortlessly and swiftly create your very own wooden and resin table. • 9kg of deep pouring resin up to 5cm OR 8kg of casting resin up to 2cm. • Glossy "Shiny Shield" release film (32cm*2m) • 500gr Non-toxic silicone paste to seal your frame • Polishing KIT (polishing pads 6pcs + professional polishing paste 250ml) • 50ml colourants • Detailed instructions on how to create the formwork step by step and pour the resin. The kit is sufficient to create a table with an area of 0.5 m2 (e.g. 45 cm x 80 cm, thickness 2 cm) - These quantities are calculated by simulating a "classic" 2/3 wood and 1/3 resin table. For any queries or if you may need some advice, please contact the ResinPro technical team. "PRO" KIT - Ready to unleash your creativity with a sleek wood and resin table? Look no further! Our PRO kit offers everything you need to effortlessly and swiftly bring your vision to life. • 18kg of deep pouring resin up to 5cm OR 16kg of casting resin up to 2cm. • Glossy "Shiny Shield" release film (32cm*3m) • 500gr Non-toxic silicone paste to seal your frame • Polishing KIT (polishing pads 6pcs + professional polishing paste 250ml) • 100ml colourants • Detailed instructions on how to create the formwork step by step and pour the resin. The kit is sufficient to create a table with an area of 1 m2 (e.g. 70 cm x 100 cm, thickness 2 cm) - These quantities are calculated by simulating a "classic" 2/3 wood and 1/3 resin table. For any queries or if you may need some advice, please contact the ResinPro technical team. "MAESTRO" KIT - Are you a DIY enthusiast eager to craft a stunning, contemporary wood and resin table? This exclusive offer is tailored just for you! With the MAESTRO kit, you can effortlessly and promptly bring your wooden and resin table masterpiece to fruition. • 30kg of deep pouring resin up to 5cm OR 32kg of casting resin up to 2cm. • 500gr Non-toxic silicone paste to seal your frame • Polishing KIT (polishing pads 6pcs + professional polishing paste 250ml) • 150ml colourants • Detailed instructions on how to create the formwork step by step and pour the resin. The kit is sufficient to create a table with an area of 2 m2 (e.g. 90 cm x 150 cm, thickness 2 cm) - These quantities are calculated on a "classic" 2/3 wood and 1/3 resin table. For any queries or if you may need some advice, please contact the ResinPro technical team! If you have not enough experience, we insistly suggest to make a small test before working with large project. WARNINGS: During processing, use protective masks, gloves, and other protective clothing. In case of contact with eyes, immediately rinse with cold water for 15 minutes and immediately consult a doctor. Get inspired by creative works [pinterest_carousel gallery_id="776800704417739261"]
$270,49
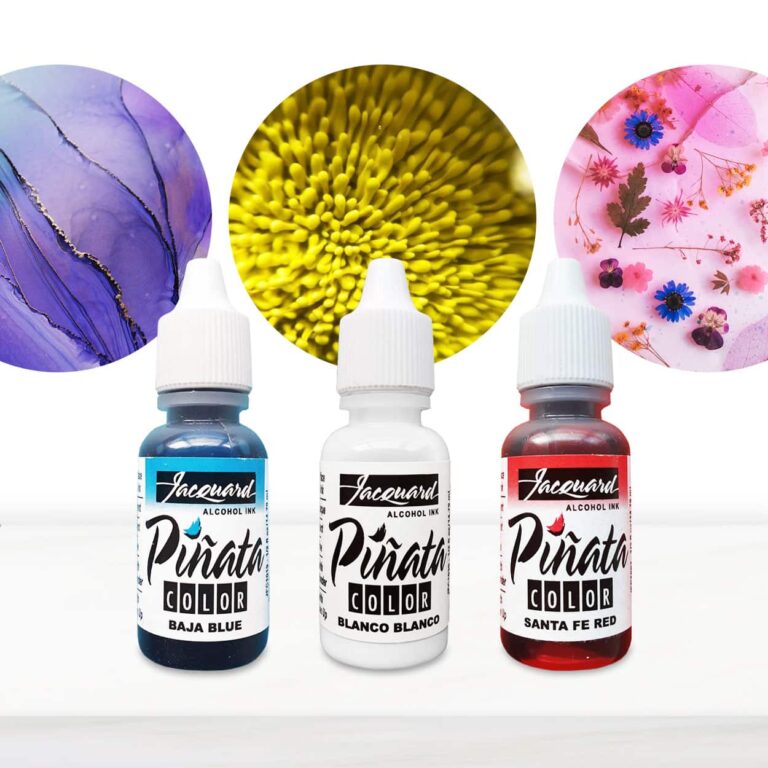
Piñata Colors are highly saturated, fast-drying alcohol inks for any hard surface, including glass, metal, plastic, ceramic, stone, leather, resin, polymer clay, YUPO® and more. Indelible and impervious to water, Piñata Colors clean up with alcohol and re-wet themselves, allowing for unique effects and techniques not easily achieved with water-based inks. As a dye-based, highly transparent ink*, Piñata Colors are unparalleled for vibrancy. Only the most lightfast dyes have been selected for the palette. Acid-free with excellent adhesive properties, Piñata Colors are the go-to inks for all non-porous surfaces. TECHNIQUES fine arts, scrapbooking, crafts, faux stained glass, card making, resin arts, faux finishing techniques and staining wood and leather SURFACES glass, metal, plastic, vinyl, ceramic, stone, leather, epoxy resins, YUPO®, foil, wood, encaustic, Claybord™, fiberglass, acrylic, polymer clay and more Warning: using inks in percentages higher than 1% may alter the mechanical resistance of the creation. In order to create the Blast Effect, it is necessary to use the colour WHITE. https://www.instagram.com/p/BuTHQjWDUSX/?utm_source=ig_web_copy_link Instruction: These beautiful, color-saturated, acid-free, transparent inks have an alcohol base which makes them indelible and moisture-resistant when dry. That means you can work freely on most any clean, oil-free surface, and makes them the ideal professional product. Highly versatile, Piñata can be used in a variety of applications, including rubber stamping, fine art, fiber art, and scrap booking. Also use Piñata in calligraphy, faux finishing techniques, graphic and airbrush applications, as well as wood and leather staining. Techniques: Mixing Piñata with Claro — it will stay shiny and not change color. It extends the drying and working time. Claro is also a transparentizer. Claro dropped or brushed on top of dry Piñata will make it spread, creating rings of marble or stone-like texture. Slight dulling occurs, but most will remain shiny. Just like real stone! Mixing Piñata with alcohol produces a slightly lighter color. When sponging this mixture, expect to see tiny bubble-like textures. This is very effective in making background papers and other interesting textural faux effects. Alcohol dropped or brushed on top of dry Piñata removes the shine. This is particularly effective on terra cotta surfaces or in faux finishing techniques where shine would detract from the overall effect. Spritz or brush layers of color over color. When wet, each layer will push aside the under layers creating amazing effects. Allowing each layer to dry will produce beautiful glazes and truly spectacular colors with clarity and depth. Add blanco Blanco to any of the Piñata Colors and achieva a completely new glowing range of pastel variations with a touch of opacity. Resists: Crayons: draw with various colors and apply Piñata. Wax.: following directions from the manufacturer, apply melted wax to fabric. Crinkle the fabric allowing the wax to crack, then apply Piñata. Iron the wax away to create beautiful batik effects. Gum Arabic: mix gum arabic with water to a heavy cream consistency. Apply this to a rubber stamp or paint it directly onto a surface. Apply Piñata. Gently wash away the gum arabic. Piñata Clean-Up Solution: Piñata Clean-Up Solution contains moisturizers to keep brushes soft and pliable. (TIP: Use regular rubbing alcohol to clean off most of the Piñata from brushes and sponges. Use the Clean-Up Solution for the final rinse to keep brushes soft and ready-to-use the next time!) Warning: Flammable • Eye Irratant • Contains: Denatured Alcohol • Keep Out Of Reach Of Children.
$6,95
ResinPro: one supplier for all your needs
15 years of experience at your complete disposal, supplying resins and accessories for creativity, industry, DIY, flooring and marine applications.
At your home, directly from the manufacturer!
ResinPro is the direct manufacturer of our resin range for companies and hobbyists, guaranteeing the lowest prices on the market.
Learn more
The widest range of resins in the US!
We offer resins for every need, from artistic creations to marine and construction applications, far beyond the “limited” selection typically found in local DIY stores.
Expert technical support!
Our technicians provide free remote consulting to help you avoid mistakes and ensure you achieve the result you want — unlike “generic retailers” who sell 1,000 different products.
get a free consultation
RESIN PRO is a leader in resin production and distribution!
24-hour delivery: We ship across the US on the same day. Enjoy convenient home delivery with our appointment service—our courier will contact you in advance and deliver the package to your preferred location, or leave it at an alternative address of your choice.

Full support!
We provide continuous support from preparation to final application, including remote technical assistance, ensuring a smooth experience.
Talk with a specialist and place a phone order without registration and without credit cards!
 Free shipping on orders over €199,00
  Shipping Tracking!


 Google
 Facebook