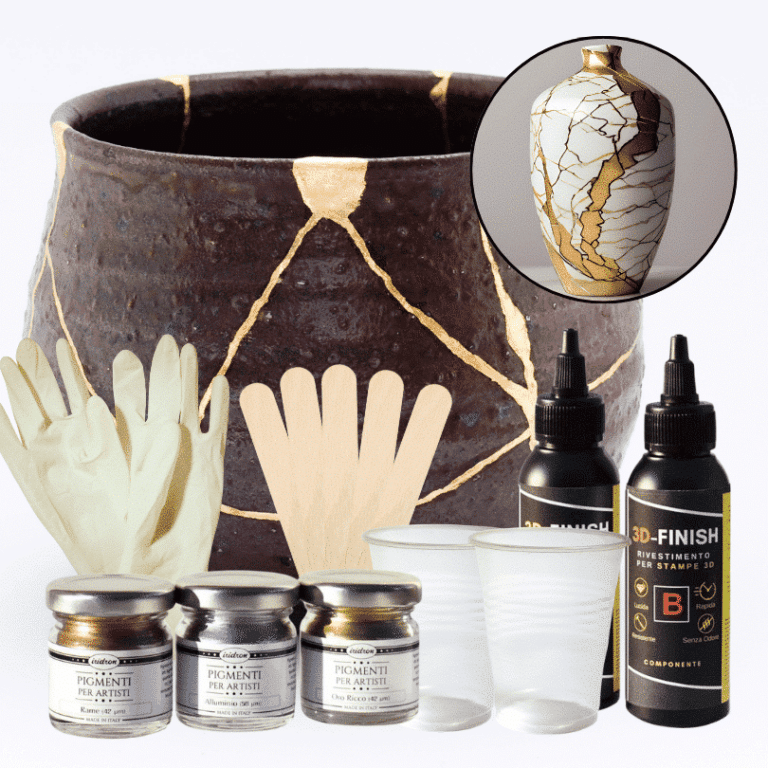
Kintsugi Repair Kit - Repair and Transform Your Ceramics with Elegance Celebrate imperfection with the ancient Japanese art Discover the traditional Japanese art of Kintsugi with our complete repair kit. Transform your broken ceramics into unique and fascinating works of art, highlighting imperfections with elegant gold, silver, or copper veins. Our kit is perfect for both beginners and experts, offering detailed instructions and everything you need to give new life and value to your most cherished items. 🌟 Specific epoxy resin (150g): slow catalysis to eliminate any bubbles or imperfections, allowing you to complete the work without rushing. 🎨 Dye of your choice (gold, copper, silver): customize your repair with a touch of elegance and refinement. ✨ Respect the tradition: follow the ancient art of Kintsugi and transform your ceramics into unique and precious treasures. The kit contains: 150g of resin for 3D decorations, 2 pairs of protective gloves, 2 mixing cups, and 5 spatulas for applying the resin, detailed instructions, everything you need in one kit. Give your ceramics a unique touch: repair them with style and make them even more beautiful. Buy the Kintsugi Repair Kit now and start creating your works of art today! Kintsugi Kit Instructions: Mix Resin: Measure 100A:50B by volume (or 100A:45B by weight) using a scale. Mix for 2 minutes, ensuring all surfaces are scraped. Add Colour: Mix your chosen metallic dye (gold, silver, or copper) into the resin to highlight the cracks. Prepare Surface: Ensure surfaces are clean, dry, and sanded. Apply Resin: Fill the cracks with the colored resin. Curing: Work in a temperature-controlled area, avoiding humidity. Safety: Wear protective gear.
$22,95
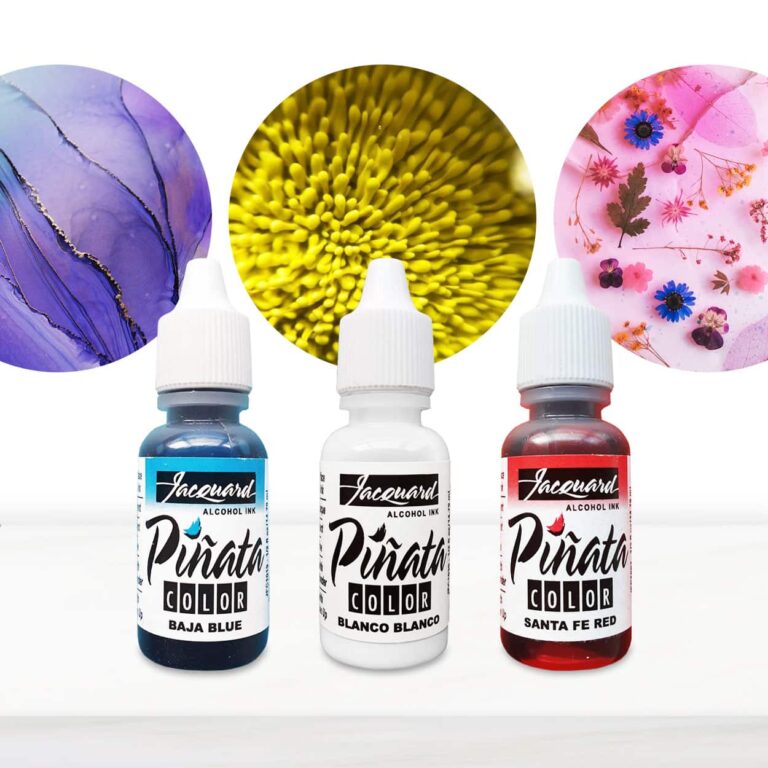
Piñata Colors are highly saturated, fast-drying alcohol inks for any hard surface, including glass, metal, plastic, ceramic, stone, leather, resin, polymer clay, YUPO® and more. Indelible and impervious to water, Piñata Colors clean up with alcohol and re-wet themselves, allowing for unique effects and techniques not easily achieved with water-based inks. As a dye-based, highly transparent ink*, Piñata Colors are unparalleled for vibrancy. Only the most lightfast dyes have been selected for the palette. Acid-free with excellent adhesive properties, Piñata Colors are the go-to inks for all non-porous surfaces. TECHNIQUES fine arts, scrapbooking, crafts, faux stained glass, card making, resin arts, faux finishing techniques and staining wood and leather SURFACES glass, metal, plastic, vinyl, ceramic, stone, leather, epoxy resins, YUPO®, foil, wood, encaustic, Claybord™, fiberglass, acrylic, polymer clay and more Warning: using inks in percentages higher than 1% may alter the mechanical resistance of the creation. In order to create the Blast Effect, it is necessary to use the colour WHITE. https://www.instagram.com/p/BuTHQjWDUSX/?utm_source=ig_web_copy_link Instruction: These beautiful, color-saturated, acid-free, transparent inks have an alcohol base which makes them indelible and moisture-resistant when dry. That means you can work freely on most any clean, oil-free surface, and makes them the ideal professional product. Highly versatile, Piñata can be used in a variety of applications, including rubber stamping, fine art, fiber art, and scrap booking. Also use Piñata in calligraphy, faux finishing techniques, graphic and airbrush applications, as well as wood and leather staining. Techniques: Mixing Piñata with Claro — it will stay shiny and not change color. It extends the drying and working time. Claro is also a transparentizer. Claro dropped or brushed on top of dry Piñata will make it spread, creating rings of marble or stone-like texture. Slight dulling occurs, but most will remain shiny. Just like real stone! Mixing Piñata with alcohol produces a slightly lighter color. When sponging this mixture, expect to see tiny bubble-like textures. This is very effective in making background papers and other interesting textural faux effects. Alcohol dropped or brushed on top of dry Piñata removes the shine. This is particularly effective on terra cotta surfaces or in faux finishing techniques where shine would detract from the overall effect. Spritz or brush layers of color over color. When wet, each layer will push aside the under layers creating amazing effects. Allowing each layer to dry will produce beautiful glazes and truly spectacular colors with clarity and depth. Add blanco Blanco to any of the Piñata Colors and achieva a completely new glowing range of pastel variations with a touch of opacity. Resists: Crayons: draw with various colors and apply Piñata. Wax.: following directions from the manufacturer, apply melted wax to fabric. Crinkle the fabric allowing the wax to crack, then apply Piñata. Iron the wax away to create beautiful batik effects. Gum Arabic: mix gum arabic with water to a heavy cream consistency. Apply this to a rubber stamp or paint it directly onto a surface. Apply Piñata. Gently wash away the gum arabic. Piñata Clean-Up Solution: Piñata Clean-Up Solution contains moisturizers to keep brushes soft and pliable. (TIP: Use regular rubbing alcohol to clean off most of the Piñata from brushes and sponges. Use the Clean-Up Solution for the final rinse to keep brushes soft and ready-to-use the next time!) Warning: Flammable • Eye Irratant • Contains: Denatured Alcohol • Keep Out Of Reach Of Children.
$6,95
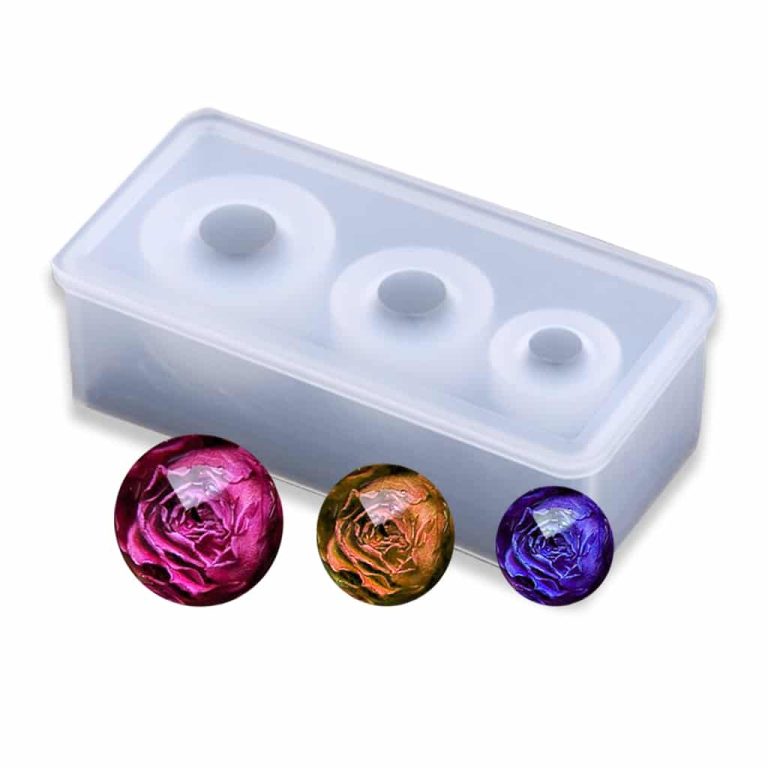
SILICONE MOULD FOR HANDCRAFTS. Easy to use, highly polished and perfect for creating beautiful jewellery or decorations. Suitable to be used with soap, plaster, resin, ice, ceramic, clay, wax and other casting materials proper for DIY. Moulds for objects, jewels and chocolate. DO-IT-YOURSELF. Material: Silicone, Colour: Semi-transparent; Reusable, non-stick, easy to use and clean. Measures of each mould: 1.5 CM [0,59"], 1 CM [0,39"], 2.5 CM [0,98"] Warning: do not use aggressive solvents, High-quality moulds, heat- resistant: -40°C to + 210°C [-104° F to +410° F] Attention! Remove the product from the mold no later than 12 hours after pouring the resin. Otherwise, there is a chance of local adhesion of the resin to the mold.
$7,95
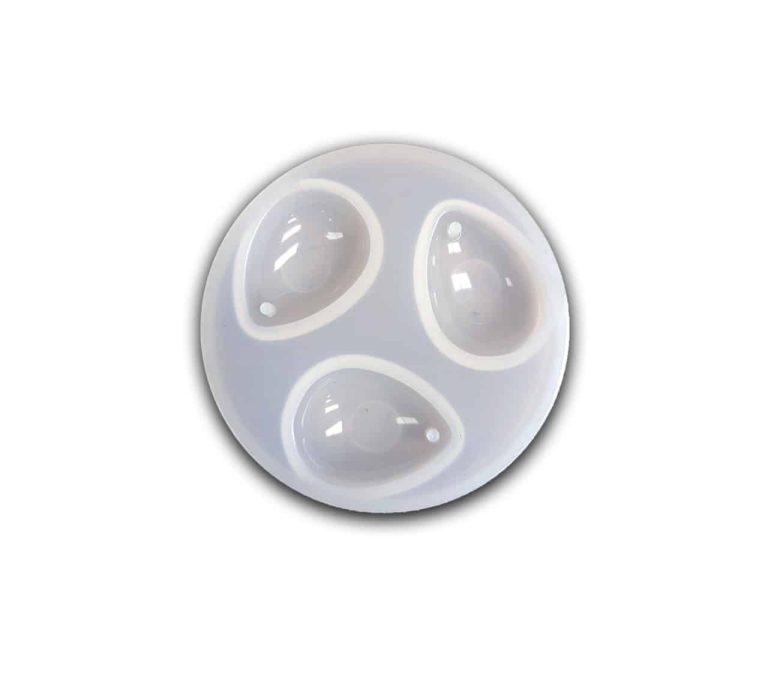
SILICONE MOULD FOR HANDCRAFTS. Easy to use, highly polished and perfect for creating beautiful jewellery or decorations. Suitable to be used with soap, plaster, resin, ice, ceramic, clay, wax and other casting materials proper for DIY. Moulds for objects, jewels and chocolate. DO-IT-YOURSELF. Material: Silicone, Colour: Semi-transparent; Reusable, non-stick, easy to use and clean. Measures of each mould: 1,10” x 0,78” Warning: do not use aggressive solvents, High-quality moulds, heat- resistant: -40°C to + 210°C [-104° F to +410° F] Attention! Remove the product from the mold no later than 12 hours after pouring the resin. Otherwise, there is a chance of local adhesion of the resin to the mold.
$7,95
How to Remove Residues from Glazed Ceramic Surfaces
Cleaning residues from glazed ceramic surfaces can be easily done by following these effective steps:
- Mix hot water with a mild detergent.
- Apply the solution onto the glazed surfaces and let it sit for a few minutes.
- Use a soft sponge or non-abrasive cloth to gently remove the residues.
- For stubborn residues, consider gently scrubbing with a mixture of baking soda and water.
- Rinse thoroughly with clean water and dry the surface with a soft cloth.
- Avoid using harsh products that could potentially damage the glaze. This method is highly effective in keeping glazed ceramic surfaces clean and shiny.
Epoxy Resin: A Versatile and Durable Coating Solution
Epoxy resin is a thermosetting material extensively utilized in the coatings and finishes industry. Comprised of two components ? epoxy resin and hardener, this material forms a resilient and long-lasting surface once cured. Its exceptional adhesion, chemical resistance, and mechanical strength make it ideal for protective coatings on various surfaces such as floors, countertops, and decorative elements. Besides industrial applications, epoxy resin is also widely embraced in the DIY sector for artistic and craft projects. It is crucial to meticulously follow the instructions for accurate mixing and application to achieve optimal results.
Resin Creations Tutorial for Unique Artistic Objects
Creating resin-based objects is gaining popularity as a creative activity. To craft unique items with resin, follow these steps:
- Prepare a well-ventilated workspace shielded from direct sunlight.
- Accurately measure the resin and hardener following the recommended proportions to ensure proper catalyzation.
- Gently mix the resin and hardener to avoid air bubble formation.
- Personalize the resin with colors and decorations such as pigments or glitter to achieve special effects.
- Pour the resin into molds and allow it to dry according to the recommended curing times.
- Carefully extract the hardened object from the mold once it has set.
By adhering to these steps, you can create exquisite DIY resin art pieces.
DIY Silicone Molds for Customized Creations
Crafting DIY silicone molds offers a simple and precise method to create bespoke objects. To create your own molds, you will need liquid silicone suitable for food contact and a model to replicate. Following the manufacturer's instructions, pour the silicone onto the model and allow it to dry completely. Once hardened, you can extract the object from the silicone mold and reuse it. This technique is perfect for crafting detailed reproductions or artistic creations at home without the necessity of professional tools.
Colored Resin Pigments for Vibrant Creations
Colored pigments for resin are substances utilized to dye and customize epoxy and polyurethane resins. These pigments are available in a wide array of colors, typically in liquid or powder form. By incorporating pigments into the resin, you can create unique and personalized chromatic effects for various projects such as artistic endeavors, DIY jewelry, and coatings. Ensure to carefully adhere to the dosage instructions to achieve the desired color without compromising the resin's properties. Colored resin pigments are favored by hobbyists, artists, and professionals alike to infuse vibrancy and creativity into their creations.
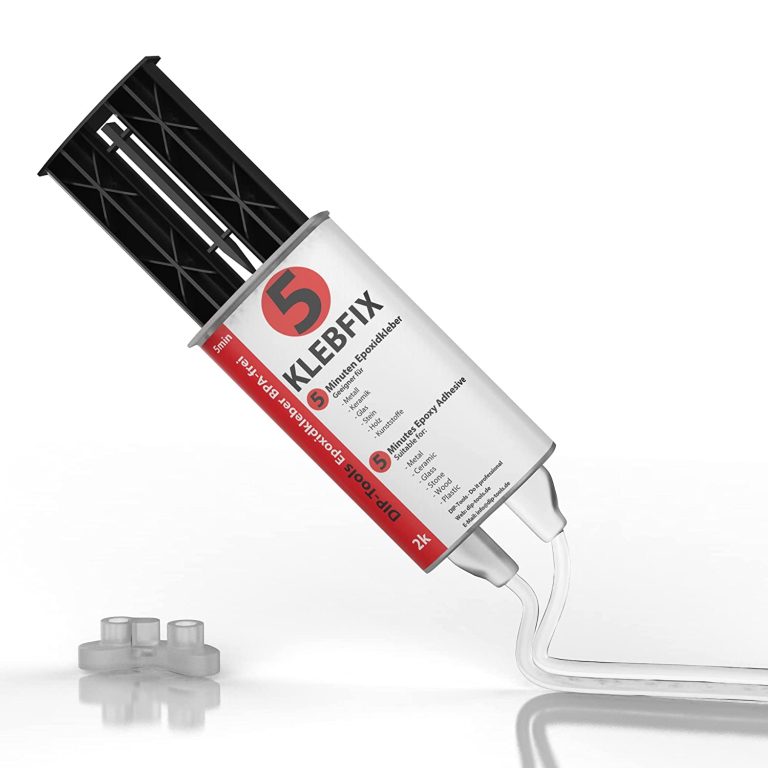
Advantages of Two-component Epoxy Resin Adhesive Extreme strength and resistance to thermal and mechanical influences Resistant to most aggressive substances and oils Available solvent free and BPA free It hardens even under water Compatible with a wide range of additives such as dyes and accelerators Expedited Potlife Application – BestPractice At room temperature (15-30 C The mixing ratio of the two components of 1: 1 is maintained automatically. Do not apply below 5 C outdoor temperature. The higher the ambient temperature, the more effectively the material polymerizes. This means that resistance increases at higher temperatures. It is recommended to have a cloth ready for cleaning. In addition, care must be taken that the work surface is protected and can be cleaned directly if necessary. The surface should be slightly roughened, because only then is the epoxy adhesive guaranteed to bond well with the material. To do this, you can sand or file the surface. To spread the sticker, a piece of cardboard or plastic is useful. After use, clean the tube so that the lid does not stick, and then close it tightly. The thickness of the adhesive should be thin enough (0.1-0.2 mm), but if necessary it can be thicker. The parts to be glued must be clean and free of oil and grease. Apply the adhesive on one side and join and press the parts to be glued. The potlife is about 5 minutes, good endurance is achieved after about 10-12 minutes, and total endurance after about 24 hours. Pot life is limited in time and describes the maximum working time of the uncured adhesive. Once the pot life has passed, the adhesive not yet applied must not be further processed, but must be disposed of! Until the manual force is reached, the binding must be additionally fixed, for example, with the help of a vice, adhesive tape or clamp. In the case of heat-assisted polymerisation, the temperature resistance of the joined parts must be guaranteed. In addition, the heating and cooling times of the parts to be joined must be respected. This time must be added to the curing time of the adhesive. Tension can occur in the glued joint during heating and cooling. With materials such as PP, PE, PTFE or silicone, the parts need to be pretreated with our primer. The need for a primer depends on the surface tension. If this is high enough it can be tested with water droplets on the surface. If the drops adhere well to the surface, a good bond is most likely. If the drops slip away, a primer is probably needed. Mixing There are several ways to mix the two components: - Mixing by hand - Use of a static mixing nozzle - Use of a dynamic mixing nozzle Hand mixing is sufficient in most cases. For this purpose, a toothpick or similar is used and the two components are mixed until a cloudy mass is formed. Make sure that no bubbles remain. When using a static mixing nozzle, the mixing of both components takes place inside the mixing nozzle so that the mixing is ideal. The first 2g should be discarded, given they are not yet mixed 1:1. However, the mixing nozzle can only be used until the adhesive in the mixing nozzle has dried. After that, you will need a new nozzle. W With a dynamic mixing nozzle, the speed of the mixer can be controlled electronically. This allows you to control the mixing intensity very precisely. However, this is intended for special industrial applications and is not necessary for everyday use. Harden The adhesive is chemically cured. This gives the advantage that gluing the surface is also possible, where adhesives that harden with moisture take a very long time. The bond is high strength and densely flexible. Thus, permanent resistance can be guaranteed in the event of shocks and vibrations. The use of the polymerised adhesive is also possible at high temperatures (up to about 120C), for a short time (30 min) up to 200C The polymerised adhesive has good resistance to physical (e.g. sunlight) or chemical (moisture, detergents, chemicals, etc.) influences. The great advantage of two-component epoxy adhesive is the fact that it hardens even under water and is robust. In addition, it is mouldable, so it can be inserted into any recess to fit. Technical data Epoxy Resin Hardener Base (amine mixture) Viscosity High Viscosity Transparent Color Density 1.1 g / ml Gap filling capacity 3mm Temperature resistance -40 up to +120 C Pot Life 5 min Hand resistance 10-12 min Final endurance 24 hours Shore hardness 60 Tensile shear strength 10 N / mm2 Module E 620 N / mm2
$32,95

Resin Pro offers the possibility to achieve a perfect polishing by using different types of abrasive pastes. It can be used by hand or with an orbital polisher to make your resin creations shiny. Ebonite Abralon Sanding Pads Cosmetically appealing, consistent scratch pattern provides excellent traction. Combines the benefits of abrasive cloth and non-woven products. Opening in the fabric allows water to flow freely around the abrasive. Solid surface and foam backing provide even surface pressure. Last 5+ times longer than sandpaper. Use wet or dry (residual material can be removed by high pressure air). Now it's possible to get the most aggressive surface texture without that "cheese grater" look. Abralon sanding pads use silicon carbide particles that are precision sifted to a consistent grain size, then bonded evenly to a six-inch round fabric face for the most even scratch pattern available. WARNINGS: During processing, use protective masks, gloves, and other protective clothing. In case of contact with eyes, immediately rinse with cold water for 15 minutes and immediately consult a doctor. The kits may include by variations: EpoxyPolish Polishing cream – 250 ml [8,79 oz] - 1pc Ebonite Abralon Sanding Pads: - Ebonite Abralon Sanding Pad 150mm 360 grit - 1pc - Ebonite Abralon Sanding Pad 150mm 500 grit - 1pc - Ebonite Abralon Sanding Pad 150mm 1000 grit - 1pc - Ebonite Abralon Sanding Pad 150mm 2000 grit - 1pc - Ebonite Abralon Sanding Pad 150mm 3000 grit - 1pc - Ebonite Abralon Sanding Pad 150mm 4000 grit - 1pc EpoxyPolish Polishing cream How to Use: Step 1: Thoroughly clean the surface with a cloth. Step 2: Now you can polish by hand or with an orbital polisher. We recommend using the lowest possible speed to get the best result. Start Polishing with 360-500 grit. Note: Sand the entire surface evenly with circular movements and light pressure. Moisten the pad or the surface with water from time to time. Step 3: Now use the 1000 grit sandpaper. Note: Moisten the sandpaper or the surface with water from time to time. Step 4: Afterwards, use 2000 grit sandpaper. Note: Moisten the sandpaper or the surface with water from time to time. Lastly, use 4000 grit sandpaper to finish sanding. Step 5: Remove the sandpaper from the polishing disc and attach a soft sponge to it. Rinse the surface or wipe it with a damp cloth to remove any residual grain of the sanding. Step 6: Apply EpoxyPolish Polishing cream on the damp sponge. Use by hand or with an orbital polisher, using a large circular motion and exerting slight pressure. Step 7: Clean the surface with plenty of water to remove all the remaining residues. Step 8: Enjoy the result!!!
$21,49
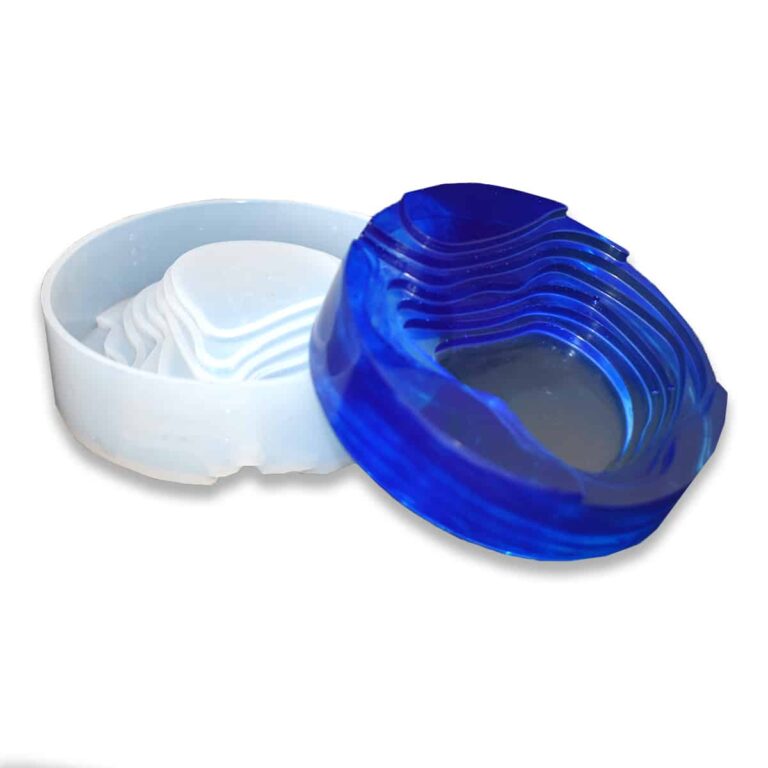
SILICONE MOULD FOR HANDCRAFTS. Easy to use, highly polished and perfect for creating beautiful jewellery or decorations. Suitable to be used with soap, plaster, resin, ice, ceramic, clay, wax and other casting materials proper for DIY. Moulds for objects, jewels and chocolate. DO-IT-YOURSELF. Material: Silicone, Colour: Semi-transparent; Reusable, Non-stick, Easy to use and clean. Measures of each mould: D 12.5 CM [4,92"] / H.3.6 CM [1,41"] Warning: do not use aggressive solvents, High-quality moulds, heat- resistant: -40°C to + 210°C [-104° F to +410° F] Attention! Remove the product from the mold no later than 12 hours after pouring the resin. Otherwise, there is a chance of local adhesion of the resin to the mold.
$15,51
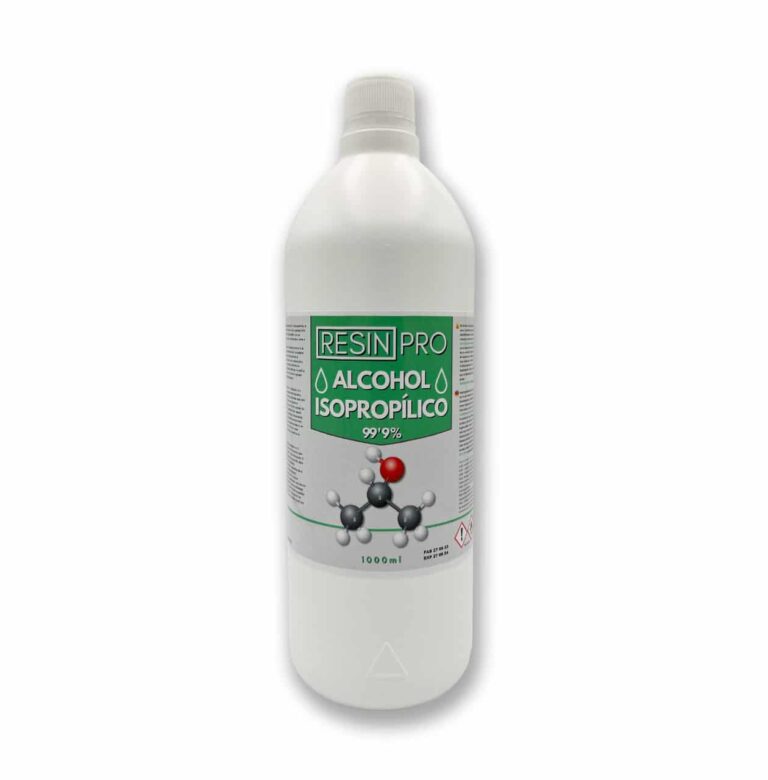
⚙️ In the world of resins: Used to remove surface bubbles from resin mixtures, if applied in drops on top of resin already mixed with mica pigments, it will create fantastic cells with very beautiful degradation and colour mixing. 💦 As a remedy for removing the formation of bubbles: By applying it to the inner surface of silicone moulds with a spray gun, you will remove bubbles on resin parts. 🎨 A multi-purpose product, ideal for: To remove bubbles from epoxy resin mixtures. To create the effect of craters and cells, it is applied to a mixture of epoxy resins with mica pigments. Solvent for coatings or for non-polar industrial processes. As a cleaning agent, it is highly recommended for cleaning electronic devices, LCD displays, DVDs… To remove stains from most fabrics, wood, cotton, etc... To remove oil-based paint residues for reuse. As a moisturiser in lithographic printing. A solvent for polishing varnish used in joinery. If you want to create beautiful effects on countertops, floors and surfaces, as well as easily remove bubbles in your resin products, then this is your product. Pure 99.9% Isopropyl Alcohol Resin Pro, also known as 2-propanol or isopropanol, is used as an electrical contact cleaner among many other applications. Trade Name: Medical ALCOHOL In the resin world, it is used to remove surface bubbles from mixtures, and when applied in drops over resin mixed with mica pigments, cells are formed. APPLICATION: For cleaning electronic components: Apply the product directly to the equipment, let it dry at room temperature or accelerate drying by applying compressed air, and finally reassemble the equipment. Do not use while the equipment is on. PRECAUTIONS: View the safety tab. Isopropyl alcohol in the vapor state is denser than air and is highly flammable, giving a very wide range of fuels. It should be kept away from sources of heat and fire. CHARACTERISTICS, PHYSICAL AND CHEMICAL PROPERTIES: Physical condition: Colourless liquid, very volatile Attention! Safety Guidelines for Using Isopropyl Alcohol (99.9%) Isopropyl alcohol (IPA) is a highly flammable substance. Improper use—especially near heat sources like torches or heat guns—can result in fire or explosion. To ensure safe use, follow these precautions: Primary Risks Highly flammable: IPA vapors can ignite from sparks, open flames, or hot surfaces. Forms explosive vapor-air mixtures, especially in enclosed or poorly ventilated spaces. Strictly Prohibited: Using gas torches or heat guns near areas treated with IPA. Spraying IPA near active heat sources. Storing IPA near flames, heaters, or hot tools. Recommended Safety Measures: 1. Ventilation: Always work in a well-ventilated area when using IPA. 2. Wait Time: After applying IPA, wait at least 5–10 minutes to allow complete evaporation before using any heat tools. 3. Safe Distance: Keep IPA containers at least 2 meters (6 feet) away from heat or flame sources. 4. Storage: Store IPA in a tightly sealed container, away from direct sunlight or high temperatures. 5. Fire Safety: Have a CO₂ or dry chemical fire extinguisher nearby when working with flammable substances and open flames. In Case of Fire: Do not use water to extinguish the fire. Use an appropriate extinguisher, cut off air supply if safe, and call emergency services if needed.
$14,08
ResinPro: one supplier for all your needs
15 years of experience at your complete disposal, supplying resins and accessories for creativity, industry, DIY, flooring and marine applications.
At your home, directly from the manufacturer!
ResinPro is the direct manufacturer of our resin range for companies and hobbyists, guaranteeing the lowest prices on the market.
Learn more
The widest range of resins in the US!
We offer resins for every need, from artistic creations to marine and construction applications, far beyond the “limited” selection typically found in local DIY stores.
Expert technical support!
Our technicians provide free remote consulting to help you avoid mistakes and ensure you achieve the result you want — unlike “generic retailers” who sell 1,000 different products.
get a free consultation
RESIN PRO is a leader in resin production and distribution!
24-hour delivery: We ship across the US on the same day. Enjoy convenient home delivery with our appointment service—our courier will contact you in advance and deliver the package to your preferred location, or leave it at an alternative address of your choice.

Full support!
We provide continuous support from preparation to final application, including remote technical assistance, ensuring a smooth experience.
Talk with a specialist and place a phone order without registration and without credit cards!
 Free shipping on orders over €199,00
  Shipping Tracking!


 Google
 Facebook