Magic Drops MEGA to create cells, lacing & blooming effects for Abstract Resin Art 15 ml [0,5 oz] Magic Drops is a one-component polymeric liquid that reacts with wet epoxy resins by repelling itself away, thereby stimulating movement in concentric outward circles. It is not paint or resin and will not cure on its own. Creates cells and lacing in resin art Safe & user-friendly Odourless Non-toxic & non-flammable Zero-VOC formula with no harsh chemical ingredients, solvents or alcohol-based ink. Magic Drops can be used along with our range of colours or metallic pigments. Please Note that Magic Drops was developed and tested with our proprietary artwork resins.
$8,49
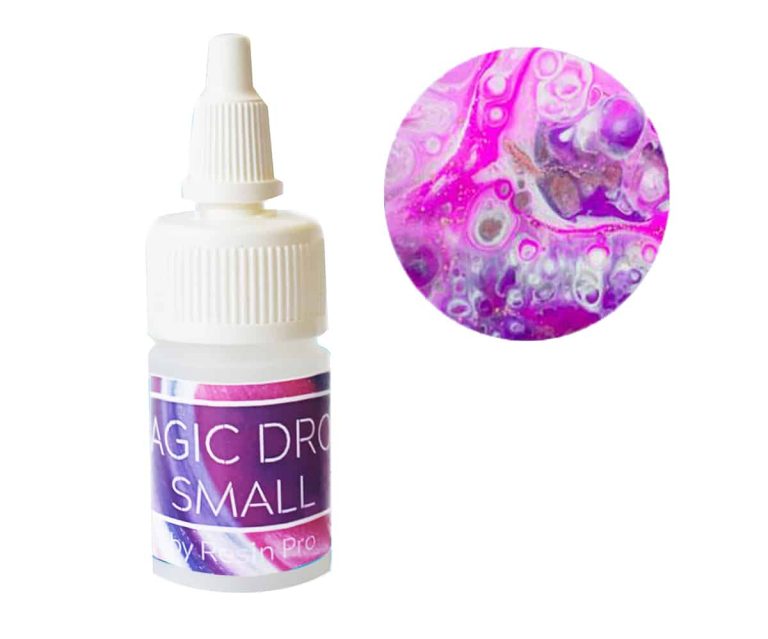
Magic Drops SMALL to create cells, lacing & blooming effects for Abstract Resin Art 15 ml [0,5 oz] Magic Drops is a one-component polymeric liquid that reacts with wet epoxy resins by repelling itself away, thereby stimulating movement in concentric outward circles. It is not paint or resin and will not cure on its own. Creates cells and lacing in resin art Safe & user-friendly Odourless Non-toxic & non-flammable Zero-VOC formula with no harsh chemical ingredients, solvents or alcohol-based ink. Magic Drops can be used along with our range of colours or metallic pigments. Please Note that Magic Drops was developed and tested with our proprietary artwork resins.
$8,49
High-quality product – perfect for artists, craftsmen and beginners. Sturdy MDF wood base. For all painting techniques, even for those with double colour application. Excellent for home decoration, resin tables, paintings or other handicrafts. Used to make resin-based paints, ornaments and tables. Dimensions: D.40 cm [15,74”] • D.60 cm [23,62”] • D.89 cm [35,03”] Thickness: 10 mm [0,39”] • 16 mm [0,62”] • 19 mm [0,74”] https://www.instagram.com/p/B0JcTwhIiYN/?igshid=1wl0z4gqoneee https://www.instagram.com/p/B1VjsE5oNqm/?igshid=1e0litiod0qmo
$25,95
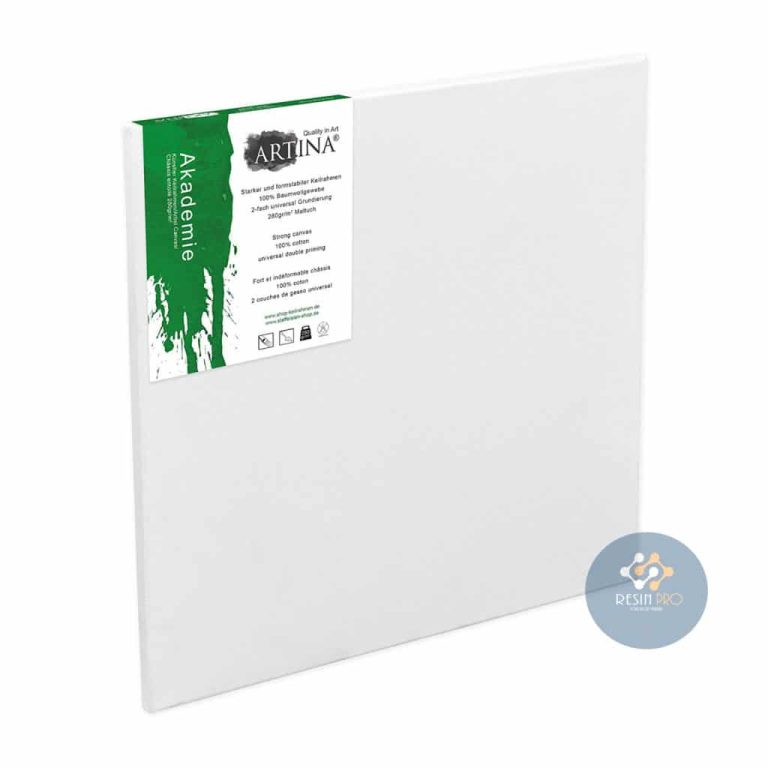
RECTANGULAR FRAME Double-dressed white frame - 100% cotton. High-quality product - perfect for artists and beginners. Strong cardboard base covered with real cloth. Suitable for all painting techniques, even for those with double colour application. Excellent for home decoration, paintings or other handicrafts. Ideal to make resin-based paints. Sizes: 30 x 30 cm [11,81” x 11,81”]; 20 x 20 cm [7,87” x 7,87”]
$6,27
Silk effect paints for home are products designed to give surfaces a satin and glossy appearance reminiscent of silk. These paints are highly valued for the elegant and refined finishes they provide to indoor spaces. Typically water-based, they offer a uniform and long-lasting coverage. Prior to application, it is recommended to properly prepare the surface by ensuring it is clean and smooth. Silk effect paints are perfect for enhancing walls, furniture, or home decor accessories, and can also be utilized in DIY projects to rejuvenate spaces with a touch of sophistication.
DIY Silk Effect Paint
DIY silk effect paint is an excellent solution for achieving elegant and sophisticated finishes on furniture, home decor items, and walls. This type of paint, with its silky texture, imparts a delicate and luminous appearance to the treated surface. To achieve optimal results, meticulous surface preparation is key. Apply multiple thin layers of silk effect paint using a specific brush or roller, allowing each coat to dry completely before the next application. For a professional finish, consider sealing the work with a suitable transparent protective varnish.
How to Achieve a Silk Effect Paint
To achieve a silk effect paint, it is essential to follow precise steps
- 1. Surface preparation: Ensure the surface is clean, smooth, and free of dust and grease.
- 2. Apply a coat of primer: Utilize a primer tailored to the type of surface being treated.
- 3. Apply the silk effect paint: Use a satin or glossy paint, applying it with a brush or a short nap roller to achieve a silky effect.
- 4. Let it dry: Adhere to the drying times specified on the paint packaging.
- Optionally apply a second coat for a more intense and uniform result.
By diligently following these steps, you can attain an elegant and silky finish on the desired surface.
Silk Effect Paint Tutorial
Silk effect paint is a decorative paint type that produces a smooth and glossy finish akin to silk. To achieve this effect, it is crucial to meticulously follow specific steps. Firstly, prepare the surface by ensuring it is clean and smooth. Apply a primer specifically designed for silk effect paints and allow it to dry thoroughly. Subsequently, apply the silk effect paint evenly with a wide brush or roller. After the first coat has dried, apply a second layer for optimal results. Finally, seal the surface with a transparent coating to protect the finish. By adhering to these straightforward steps, you can create beautiful silky effects on your surfaces.
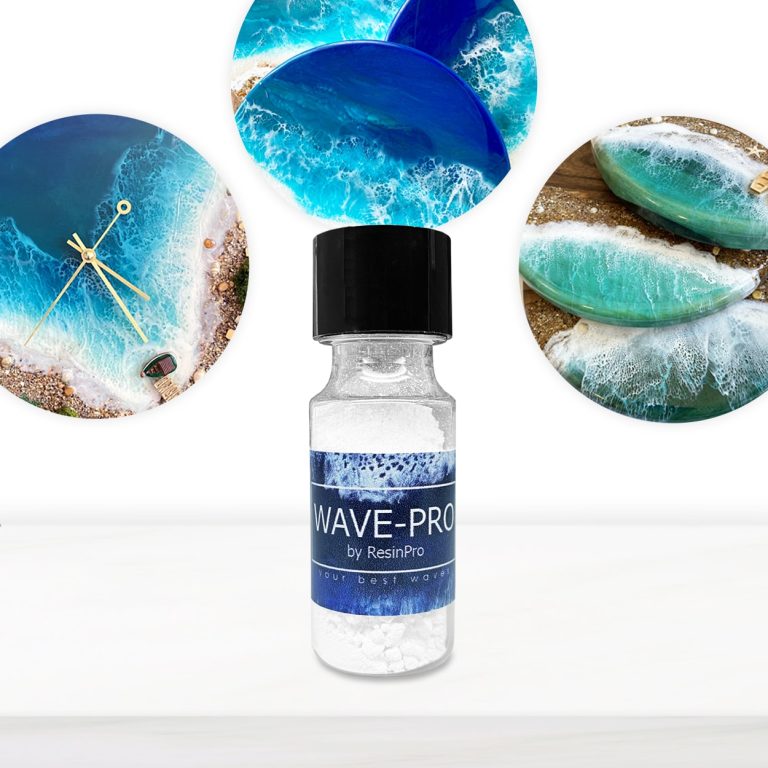
Create your personalized Sea Wave Effect! WAVE-PRO is a non-toxic powder that reacts with wet epoxy resins by repelling itself away, thereby stimulating movement in concentric outward circles and waves. Creates cells and waves in resin art Safe & user-friendly Odourless Non-toxic & non-flammable Zero-VOC formula with no harsh chemical ingredients, solvents or alcohol-based ink WAVE-PRO can be used along with our range of colours or metallic pigments. Please Note that WAVE-PRO was developed and tested with our proprietary artwork resins. Ideal for Ocean Resin Art How to use: How to work with Wave Pro - the ideal tool to create the natural sea waves effect! These instructions imply the presence of a "sea" background made of epoxy resin on your board / canvas (it can be done as acrylic paints, and just filled it with transparent resin on top, or you can make it entirely from coloured resin). The hardened "sea" background made of epoxy resin makes it possible to remove non-produced waves in case of failure. We mix the epoxy resin in the proportions indicated in the instructions (the volume depends on the scale of the work). In a cup, mix the resin and Wave Pro additive using the ratio: 3-4 teaspoons of resin and 1/2 teaspoon of Wave Pro). It is important to mix thoroughly and quickly so that the powder dissolves and turns from a pale white to a rich white. Let the mixture rest for 50-70 minutes, occasionally stirring it in a cup. Your main goal is to get a very thick mixture after the indicated time, since this is the perfect consistency for it to be blown with a blow dryer. Mix the newly obtained resin, and use it to make a transparent layer on top of your "sea" background (the key point is that without a liquid transparent layer, the wave effect will not work!). Pour a thin stream of white thick mixture onto this transparent epoxy layer and, holding the blow dryer at a 30 ° angle, blow the wave. Linger only at the beginning of the process, because the resin is thick, and the blow dryer needs to "soften" it, but as you see that the wave has gone, then immediately move along the entire wavelength without stopping. Go through the burner and wait for the resin to completely cure. Once cured, you will have your real sea :) We recommend to use the product with our TRANSPARENT EPOXY RESIN (low viscosity) https://resin-pro.co.uk/product/transparent-epoxy-resin-320-gr/ https://www.instagram.com/p/B0twAR1gDaE/?igshid=nvej64p9oa69
$4,84
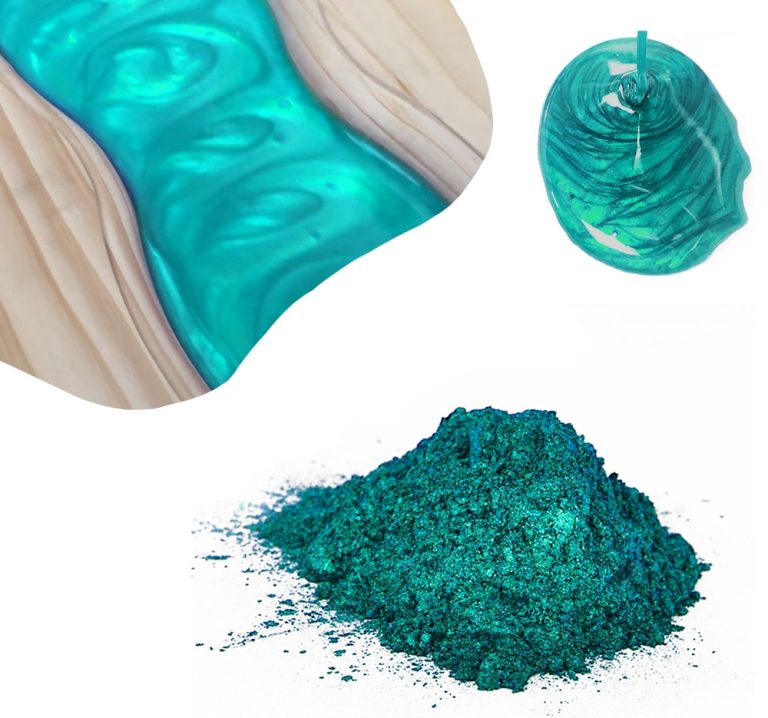
Mica Powder SAHARA is the perfect way to give even more emphasis to your creations. Thanks to its metallic pigments, you can create impressive 3D effects! Our new Mica Powder SAHARA is perfect to decorate your creations with resin! The mica-based pearlescent PEARLINE pigments have excellent fastness to light and high-temperature stability. Ideal for “glazing”, they can be used with all transparent resins. Thanks to the selection of colours, you can get truly unique and innovative chromatic effects. The selection of the finest raw materials and the high production technology allows us to offer a product with brilliant shades and high-dimensional constancy. Due to its wide range of colours, it can be used in several decorative applications, such as: hobbies, home decoration, fine arts, nail art.
$4,95
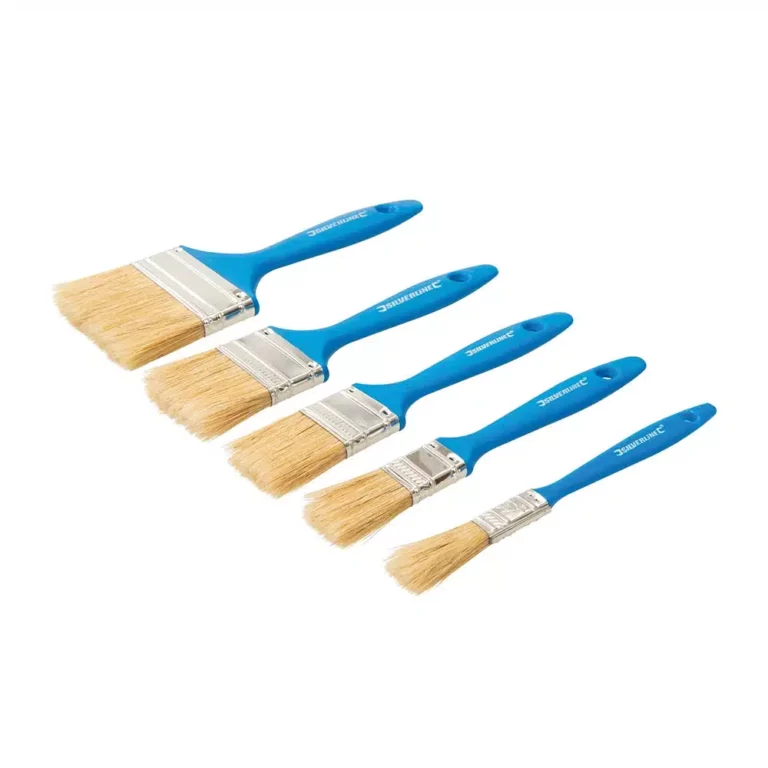
Disposable utility brushes with pure bristles, polymer handles and zinc-plated steel ferrules. Ideal for cleaning parts, painting trim and touch-up work. For use with paint, resin, glue, acetone and other solvents. Includes sizes 0,47", 0,98", 1,57", 1,97" and 2,95". Pure bristles Polymer handles & zinc-plated steel ferrules Ideal for cleaning parts, painting trim & touch-up work
$8,49
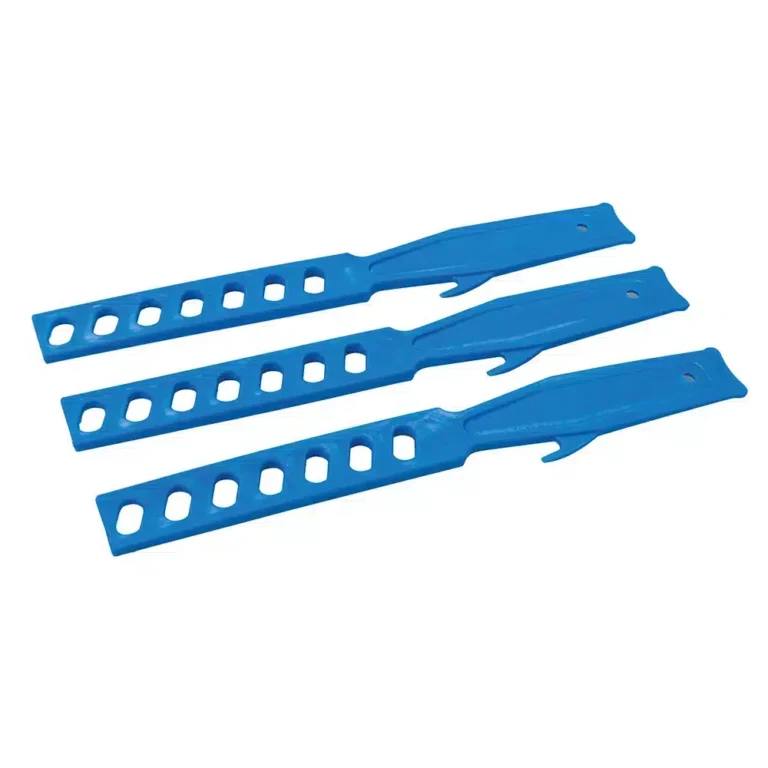
Durable polypropylene mixing sticks for preparation of paint, plaster and other mixtures. Strategic holes allow optimal stirring effect. Paint tin hook for temporary downtime. Hanging hole for simple storage. Lightweight plastic mixing sticks For mixing paint, plaster & other coatings Overall length 11"
$6,49
ResinPro: one supplier for all your needs
15 years of experience at your complete disposal, supplying resins and accessories for creativity, industry, DIY, flooring and marine applications.
At your home, directly from the manufacturer!
ResinPro is the direct manufacturer of our resin range for companies and hobbyists, guaranteeing the lowest prices on the market.
Learn more
The widest range of resins in the US!
We offer resins for every need, from artistic creations to marine and construction applications, far beyond the “limited” selection typically found in local DIY stores.
Expert technical support!
Our technicians provide free remote consulting to help you avoid mistakes and ensure you achieve the result you want — unlike “generic retailers” who sell 1,000 different products.
get a free consultation
RESIN PRO is a leader in resin production and distribution!
24-hour delivery: We ship across the US on the same day. Enjoy convenient home delivery with our appointment service—our courier will contact you in advance and deliver the package to your preferred location, or leave it at an alternative address of your choice.

Full support!
We provide continuous support from preparation to final application, including remote technical assistance, ensuring a smooth experience.
Talk with a specialist and place a phone order without registration and without credit cards!
 Free shipping on orders over €199,00