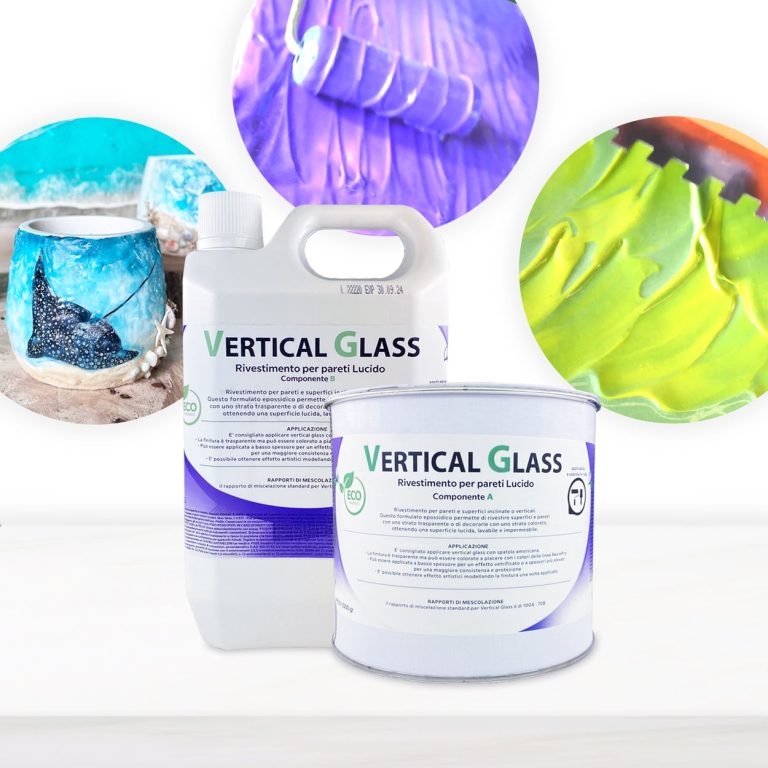
Coating for inclined or vertical walls and surfaces / This epoxy formulation allows you to coat surfaces and walls with a transparent layer or decorate them with a colored layer, resulting in a glossy, washable and waterproof surface. The Vertical Glass resin differs from normal resins allows creatives to create sharp shapes and designs on surfaces and canvases without the resin mixing unintentionally losing the original design! Transparent, UV-resistant epoxy system that creates a hard, glossy protective layer. Vertical Glass allows you to keep your initial design, faithfully respecting your creative idea! The surface will be perfectly smooth and resistant to moisture. Solvent-free and odorless epoxy resin. Applications: Floors and Walls (pre-existing) also vertical; Protection of material coatings and other artistic decorations; Coating, repair and decoration of shower trays and sanitary ware; Coating of surfaces, objects and furniture to give depth and brilliance to the color, even in Vertical! Features: For a smooth coating, it is applied with a spatula to the surface of any material: tile, concrete, wood, brick, etc. It has good hiding power, and completely covers the work surface in one application Creates a glossy, smooth and moisture-resistant layer To create a matte surface, it is easily sanded (48 hours after application, with a grain size of 1000-2000 P) Protects from moisture and gives a new life to surfaces It can be painted with dyes and pigments from our assortment Does not self-align: saves the drawing that you set for it 🙂 Please note that in the unpainted form, the material is not completely transparent, and there is a slight “milky” shade with almost imperceptible micro-particles, so we recommend painting it It is used for: Floor coverings, walls, furniture and other surfaces Protection of surfaces of materials Painting, repair and decoration of showers and bathrooms Creation of paintings, murals and other works of art
$109,49
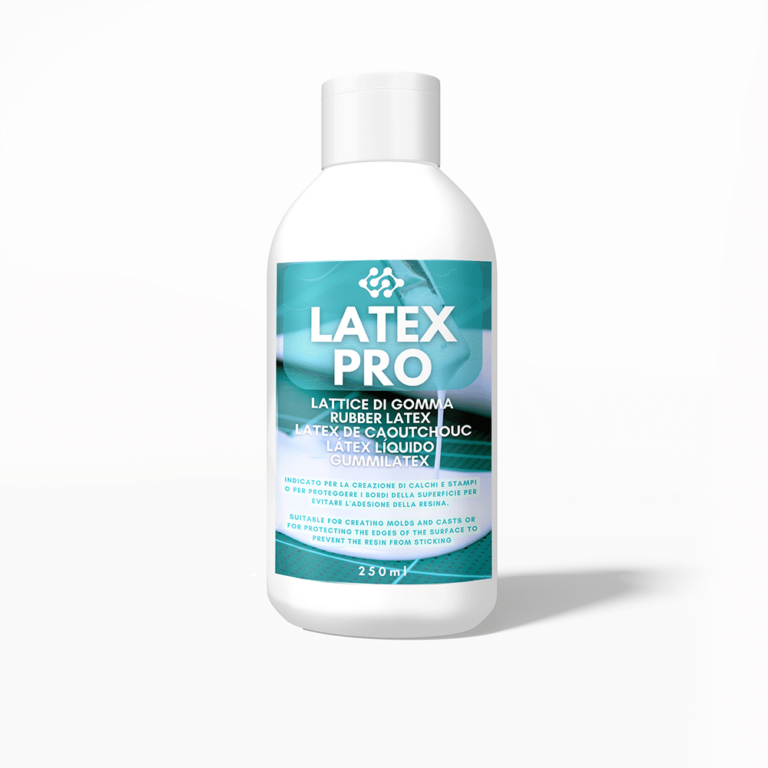
LatexPro , based on prevulcanized natural rubber latex, is the perfect solution to protect surfaces and prevent unsightly drops of resin, such as on the edges of paintings. In addition to this valuable feature, it is widely used in scenography, special effects and fabric treatment. Your perfect ally to create theatrical tricks and impressive special effects. What is LatexPro This is a type of product specifically designed to prevent drips from remaining on the opposite side of the surface during the pouring process (a kind of liquid scotch). This product has a liquid consistency and is used to create a barrier that prevents liquid from slipping or dripping onto unwanted parts. It is a practical solution to achieve cleaner and more accurate results in your artistic creations. Method of Use: Versatile and transparent, LatexPro It is ideal for creating moulds, masks, special effects and set designs. In addition, it is excellent in the treatment of fabrics, metals and other surfaces. Technical Specifications: For optimal storage, keep the product in a place away from heat and light, at temperatures between 15 and 20 C LatexPro: The protection you didn't see but knew you wanted
$14,52
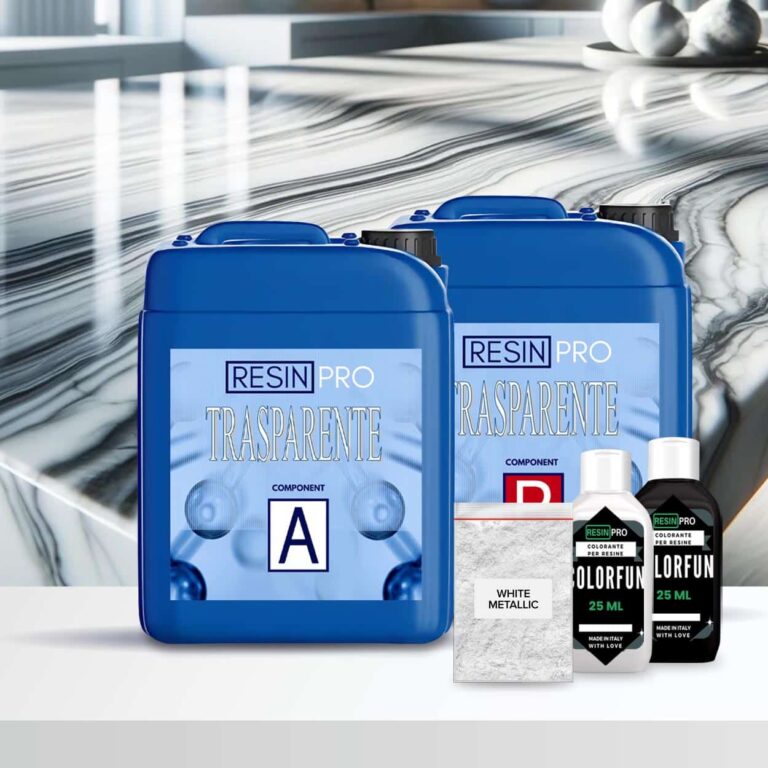
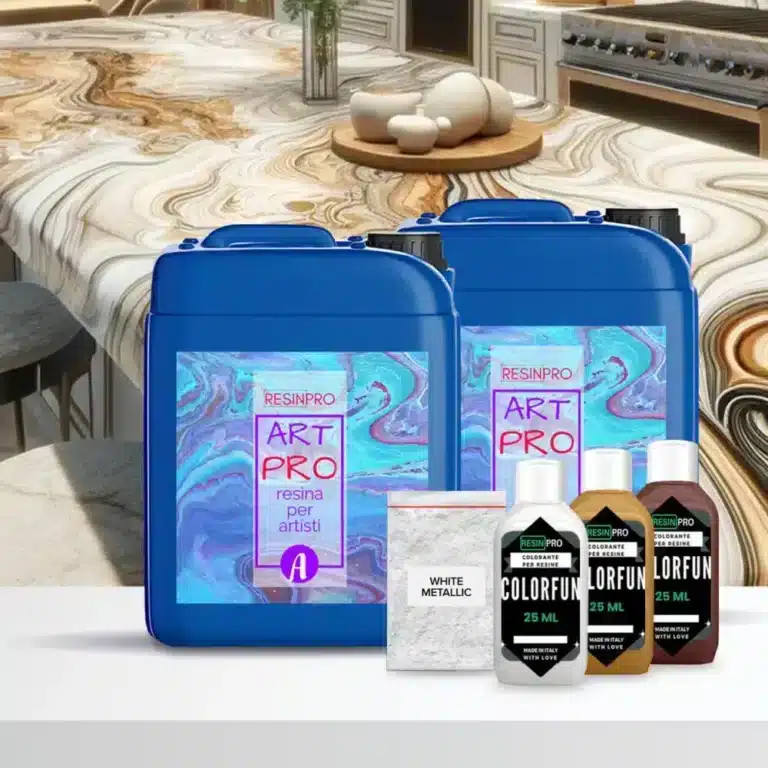
Top Cucina Kit Carrara Marble Effect with Epoxy Resin: The 2.4 kg kit (1.6 + 0.8) covers 1 square meter (+ 10 g white metallic pigment + 25 ml white dye +25 ml black dye) The 4 kg kit (2*1.6 + 0.8) covers 2 square meters (+ 2*10 g metallic pigment +2* 25 ml white dye + 2*25 ml black dye) The 8 kg kit covers 4 square meters (+ 4*10 g metallic pigment +4* 25 ml white dye+ 4*25 ml black dye) The 16 kg kit covers 8 square meters (+ 8*10 g white metallic pigment +8* 25 ml white dye 8*25 ml black dye) Kit Contents: 2.4kg, 4kg, 8kg or 16kg of "Art Pro" Epoxy Art Coat for a high quality base White dyeand Black of the "Colorfun" line for the perfect stone shades White Metallica Sahara pigment for that extra touch of sparkle Good to add: To enhance the appeal of the design:: Isopropanol 99.9% (additional option, not included in the price) To make the coating last longer: Polishield 100 Gloss (additional option, not included in the price). The coverage of a 0.5 kg kit is approximately 4 m2 Each kit includes dyes and pigment in sufficient quantity for the amount of resin required. HOW TO CREATE YOUR MARBLE EFFECT WITH EPOXY Guide Instructions: Step N1: Primer Start by carefully measuring the amount needed to cover the surface based on the consumption of 150 g/m2, making sure to follow the proportions indicated to obtain a homogeneous mixture. Once the base has been prepared, proceed with adding the dye, choosing between white or black depending on your needs. The quantity of colourant to add to the mixture can be measured in a few drops (max 5% by volume). This step is crucial to achieve the desired colour and ensure uniformity of the application. Before applying the primer, it is essential that the surface intended for treatment is adequately prepared. Sand the surface with a coarse grit (40 or 60) before any operation. Make sure it's completely clean, using a soft cloth or brush to remove any pigment, dirt or debris. The surface must also be completely dry; residual humidity can compromise the adhesion of the primer and its effectiveness in sealing the surface. Once the surface is ready, apply the mixture evenly, using a suitable tool such as a brush, roller or spatula, depending on the size of the area to be treated and your personal preference. The key is to get a thin, even layer that can cover the entire area without leaving gaps or excessive product buildup.. After application, it is essential to allow the primer to dry completely before proceeding with further treatments or finishes on the surface. The recommended waiting time is 12 hours; this range may vary slightly depending on environmental conditions, such as humidity and temperature, but offers a good compromise to ensure the mixture has time to dry and adhere properly. During this period, avoid touching or stressing the treated surface to ensure optimal results. Don't worry if you notice any discrepancies on the surface, the next main pour will level everything perfectly. Step N2: application Start by applying masking tape around the perimeter of your countertop to contain the epoxy you're about to pour. This step is essential to ensure the resin stays where it is needed. After applying the resin, wait about 1.5 hours before gently removing the tape. To ensure coverage is even and complete, plan to use approximately 1.6kg of resin for every square meter of surface area. When you are ready to mix the resin, use a drill equipped with a paddle mixer for quick and even action (use at low speed), taking about 2 minutes for this operation. If you prefer to mix by hand, be prepared to take double the time. Don't forget to scrape the sides and bottom of the container halfway through the process with a stick to ensure all the material is mixed well. Next, separate the already mixed resin into different glasses and add the desired colours, mixing the different colours in the different glasses until you obtain an intense and uniform colour per single glass. To create a striking visual effect, pour the coloured resin in random layers into a larger bucket, being careful not to mix the colours together too much. After filling the bucket, spread the contents over the surface of the worktop, leaving a small amount of resin aside to finish the edges later. To remove trapped air bubbles, gently run a propane torch or heat gun over the surface. Once the adhesive tapes have been removed, approximately 1.5 hours after application, if there are any dry edges, moisten them slightly by wearing a protective glove to promote an even appearance. Use appropriate tools, such as spatulas or plastic scrapers, to spread and level the resin along the edges, making sure to cover the entire area well. After letting the resin cure for 24 hours, you can apply a clear top coat or PoliShield scratch-resistant paint to further protect the surface. Finally, for even more refined visual effects, spray 99.9% isopropyl alcohol onto the surface just before the resin begins to fully harden. This will create unique lacy textures. Remember that when you remove the tape, it is essential that the resin is partially hardened, neither too liquid nor completely solid, to avoid unwanted drips. Attention! Safety Guidelines for Using Isopropyl Alcohol (99.9%) Isopropyl alcohol (IPA) is a highly flammable substance. Improper use—especially near heat sources like torches or heat guns—can result in fire or explosion. To ensure safe use, follow these precautions: Primary Risks Highly flammable: IPA vapors can ignite from sparks, open flames, or hot surfaces. Forms explosive vapor-air mixtures, especially in enclosed or poorly ventilated spaces. Strictly Prohibited: Using gas torches or heat guns near areas treated with IPA. Spraying IPA near active heat sources. Storing IPA near flames, heaters, or hot tools. Recommended Safety Measures: 1. Ventilation: Always work in a well-ventilated area when using IPA. 2. Wait Time: After applying IPA, wait at least 5–10 minutes to allow complete evaporation before using any heat tools. 3. Safe Distance: Keep IPA containers at least 2 meters (6 feet) away from heat or flame sources. 4. Storage: Store IPA in a tightly sealed container, away from direct sunlight or high temperatures. 5. Fire Safety: Have a CO₂ or dry chemical fire extinguisher nearby when working with flammable substances and open flames. In Case of Fire: Do not use water to extinguish the fire. Use an appropriate extinguisher, cut off air supply if safe, and call emergency services if needed.
$73,49
Amber Onyx Effect Kit with Epoxy resin: The 2.49 kg kit (1.66 + 0.83) covers 1 square meter (+ 10 g Sahara white pigment + 25 ml white dye + 25 ml brown dye + 25 ml OXIDE yellow dye) The 4.15 kg kit (2*1.66 + 0.83) covers 2 square meters (+ 2*10 g Sahara white pigment +2* 25 ml white dye +2* 25 ml brown dye +1*25 ml OXIDE yellow dye) The 8.33 kg kit covers 4 square meters (+ 4*10 g Sahara white pigment +4* 25 ml white dye +3* 25 ml brown dye+ 2*25 ml OXIDE yellow dye ) The 16.66kg kit covers 8 square meters (+8*10g Sahara white pigment +8*25ml white dye +4*25ml brown dye + 2 * 25 ml OXIDE Yellow dye) Kit Contents: 2.49 kg, 4.15 kg, 8.33 kg or 16.66 kg of Art Coat Epoxy "Art Pro" for a high quality base White Dye, Oxide Yellow Dye and Brown Dye from the "Colourful" Line for the perfect caramel stone shades - White Metallica Sahara pigment for that extra touch of sparkle Each kit includes dyes and pigment in sufficient quantity for the amount of resin required. Choose the Amber Onyx Effect Kit with Epoxy resin for an easy and elegant transformation of the worktop. Purchase your kit now and elevate your space with the warmth and beauty of caramel marble. Guide Instructions: Step N1: Primer Start by carefully measuring the amount needed to cover the surface based on the consumption of 150 g/m2, making sure to follow the proportions indicated to obtain a homogeneous mixture. Once the base has been prepared, proceed with adding the dye, choosing between white or black depending on your needs. The quantity of colourant to add to the mixture can be measured in a few drops (max 5% by volume). This step is crucial to achieve the desired colour and ensure uniformity of the application. Before applying the primer, it is essential that the surface intended for treatment is adequately prepared. Sand the surface with a coarse grit (40 or 60) before any operation. Make sure it's completely clean, using a soft cloth or brush to remove any pigment, dirt or debris. The surface must also be completely dry; residual humidity can compromise the adhesion of the primer and its effectiveness in sealing the surface. Once the surface is ready, apply the mixture evenly, using a suitable tool such as a brush, roller or spatula, depending on the size of the area to be treated and your personal preference. The key is to get a thin, even layer that can cover the entire area without leaving gaps or excessive product build-up.. After application, it is essential to allow the primer to dry completely before proceeding with further treatments or finishes on the surface. The recommended waiting time is 12 hours; this range may vary slightly depending on environmental conditions, such as humidity and temperature, but offers a good compromise to ensure the mixture has time to dry and adhere properly. During this period, avoid touching or stressing the treated surface to ensure optimal results. Don't worry if you notice any discrepancies on the surface, the next main pour will level everything perfectly. Step N2: application Start by applying masking tape around the perimeter of your countertop to contain the epoxy you're about to pour. This step is essential to ensure the resin stays where it is needed. After applying the resin, wait about 1.5 hours before gently removing the tape. To ensure coverage is even and complete, plan to use approximately 1.6kg of resin for every square meter of surface area. When you are ready to mix the resin, use a drill equipped with a paddle mixer for quick and even action (use at low speed), taking about 2 minutes for this operation. If you prefer to mix by hand, be prepared to take double the time. Don't forget to scrape the sides and bottom of the container halfway through the process with a stick to ensure all the material is mixed well. Next, separate the already mixed resin into different glasses and add the desired colours, mixing the different colours in the different glasses until you obtain an intense and uniform colour per single glass. To create a striking visual effect, pour the coloured resin in random layers into a larger bucket, being careful not to mix the colours together too much. After filling the bucket, spread the contents over the surface of the worktop, leaving a small amount of resin aside to finish the edges later. To remove trapped air bubbles, gently run a propane torch or heat gun over the surface. Once the adhesive tapes have been removed, approximately 1.5 hours after application, if there are any dry edges, moisten them slightly by wearing a protective glove to promote an even appearance. Use appropriate tools, such as spatulas or plastic scrapers, to spread and level the resin along the edges, making sure to cover the entire area well. After letting the resin cure for 24 hours, you can apply a clear top coat or PoliShield scratch-resistant paint to further protect the surface. Finally, for even more refined visual effects, spray 99.9% isopropyl alcohol onto the surface just before the resin begins to fully harden. This will create unique lacy textures. Remember that when you remove the tape, it is essential that the resin is partially hardened, neither too liquid nor completely solid, to avoid unwanted drips. Attention! Safety Guidelines for Using Isopropyl Alcohol (99.9%) Isopropyl alcohol (IPA) is a highly flammable substance. Improper use—especially near heat sources like torches or heat guns—can result in fire or explosion. To ensure safe use, follow these precautions: Primary Risks Highly flammable: IPA vapors can ignite from sparks, open flames, or hot surfaces. Forms explosive vapor-air mixtures, especially in enclosed or poorly ventilated spaces. Strictly Prohibited: Using gas torches or heat guns near areas treated with IPA. Spraying IPA near active heat sources. Storing IPA near flames, heaters, or hot tools. Recommended Safety Measures: 1. Ventilation: Always work in a well-ventilated area when using IPA. 2. Wait Time: After applying IPA, wait at least 5–10 minutes to allow complete evaporation before using any heat tools. 3. Safe Distance: Keep IPA containers at least 2 meters (6 feet) away from heat or flame sources. 4. Storage: Store IPA in a tightly sealed container, away from direct sunlight or high temperatures. 5. Fire Safety: Have a CO₂ or dry chemical fire extinguisher nearby when working with flammable substances and open flames. In Case of Fire: Do not use water to extinguish the fire. Use an appropriate extinguisher, cut off air supply if safe, and call emergency services if needed.
$83,49
Treating the sloping surface of your camper is crucial for ensuring its long-term protection and durability. To achieve this, it is recommended to use high-quality epoxy or polyurethane resins that offer exceptional resistance to weather and mechanical wear. Proper surface preparation, including thorough cleaning and sanding, is essential before applying the coating. Alternatively, specific silicones designed for campers can also be utilized to provide excellent adhesion and waterproofing. These treatments can easily be implemented in a DIY context by following the manufacturer's instructions for optimal results.
**Epoxy Resin for Campers**
Epoxy resin is a versatile and durable material commonly used for various coating and repair applications both inside and outside recreational vehicles. Once cured, this resin forms a hard and wear-resistant surface, making it ideal for protecting and enhancing surfaces such as floors, walls, countertops, and other camper components. Due to its strong adhesion properties to a variety of materials, epoxy resin is a popular choice in the DIY sector for camper renovation and customization projects. Prior to application, thorough surface cleaning and adherence to the manufacturer's instructions are crucial to ensure a proper and long-lasting finish.
**Silicone Molds for Campers**
Silicone molds are essential tools for DIY repairs and maintenance tasks on campers. Crafted from high-quality materials, these molds are designed to provide precision and durability over time. The flexibility and resilience of silicone allow for the easy creation of custom gaskets, protective coatings, and waterproof seals for campers and recreational vehicles. By using specially designed silicone molds, camper owners can undertake customized interventions to enhance the efficiency and safety of their vehicle in a cost-effective and practical manner.
**Decorating Campers with Pigments**
Pigments are a popular choice for customizing and enhancing the exterior appearance of campers. These colored particles can be mixed with resins and coatings to create vibrant and personalized colors. Proper surface preparation is essential before applying pigments to ensure optimal adhesion and longevity. It is recommended to use high-quality pigments for durable and weather-resistant results. A wide range of camper pigments are available in various colors and finishes, offering ample choices to suit individual aesthetic preferences.
**DIY Ideas for Campervans**
Engaging in DIY projects for campervans presents an excellent opportunity to customize and improve your recreational vehicle. Here are some practical ideas for DIY endeavors:
Installation of solar panels for energy efficiency
Construction of custom-made furniture to optimize space utilization
Application of thermal insulation coatings for climate control
Creation of blackout curtains for privacy and light reduction
Building supports for bicycles or sports equipment
Installation of shelves or storage compartments for organizing internal spaces
With a touch of creativity and expertise, you can transform your campervan into a functional and inviting space for memorable travels.
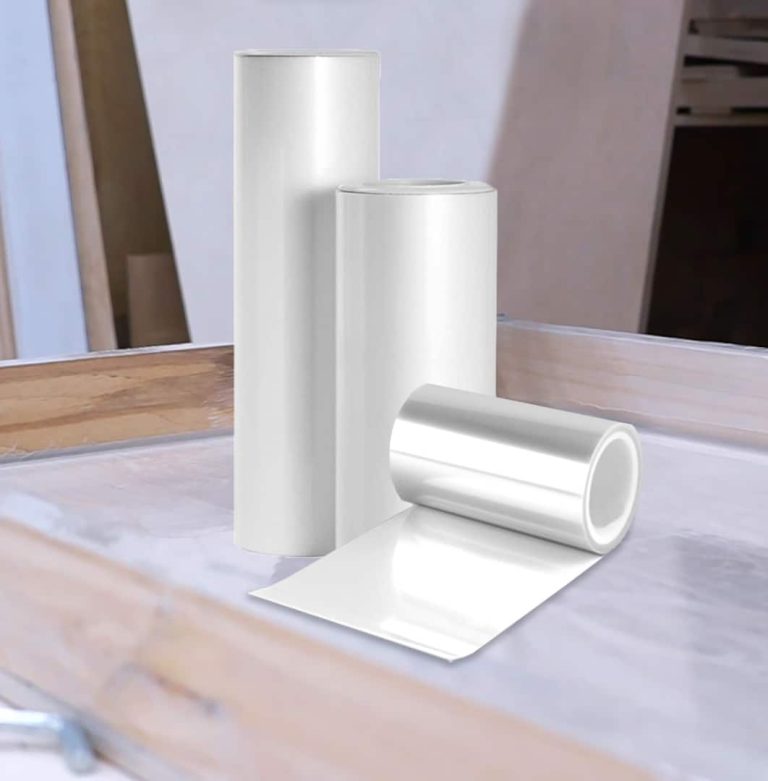
"SHINY SHIELD" - Glossy Release Film For Coasters & Table`s Frames Great tool for achieving the best results: ✔️ "Shiny Shield" release Film for Epoxy, Polyurethane and Acrylic Resins. ✔️ Transparent, adhesive and easily removable, it won’t leave any sticky traces on the workpiece; ✔️ Applicable on ALL SURFACES; ✔️ Specifically developed for CASTING FORMWORK EXTERNAL COATINGS. It is easy to apply without unevenness, creating a smooth, glossy and bubble-free surface, which will help easily release your epoxy project from the frame; ✔️ Once the resin has solidified, the "Shiny Shield" film can be easily removed, leaving a HIGHLY POLISHED even surface; ✔️ REUSABLE several times; ✔️ It does not require any kind of additional treatment and it is IMMEDIATELY READY to be poured. For any queries or if you may need some advice, please contact the ResinPro technical department!
$4,62
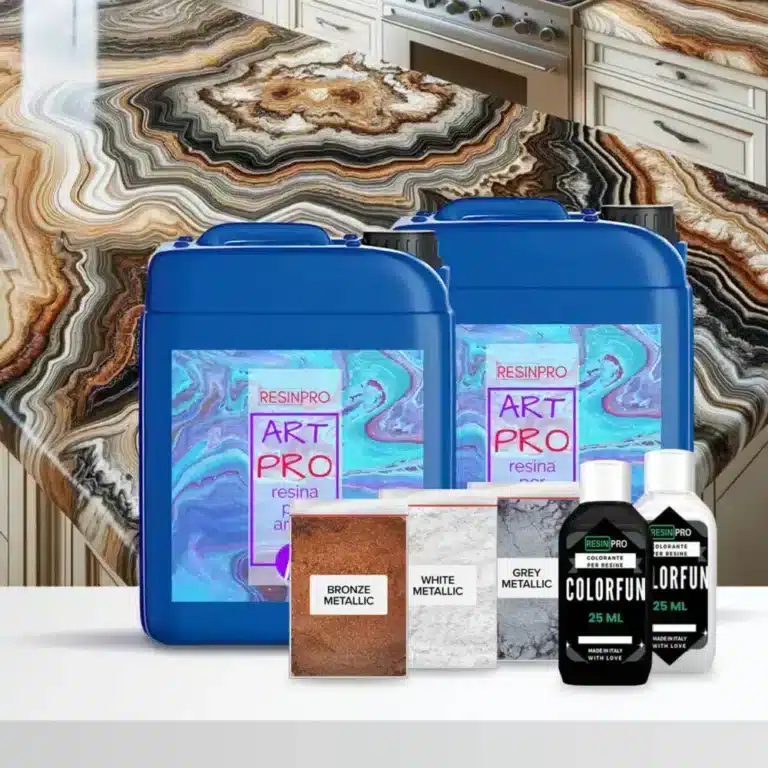
Kit Exotic white marble effect with Epoxy resin: The 2.49 kg kit (1.66 + 0.83) covers 1 square meter (+ 10 g white Sahara pigment + 10 g bronze Sahara pigment + 10 g dark gray Sahara pigment + 2*25 ml white dye + 1* 10 g colorfun black) The 4.15 kg kit (2*1.66 + 0.83) covers 2 square meters (+ 2*10 g white Sahara pigment + 2*10 g bronze Sahara pigment + 2*10 g dark gray Sahara pigment + 4 *25 ml white dye + 2* 10 g black colorfun) The 8.33 kg kit covers 4 square meters (+ 4*10 g white Sahara pigment + 4*10 g bronze Sahara pigment + 4*10 g dark gray Sahara pigment + 5*25 ml white dye + 2* 10 g colorfun black) The 16.66 kg kit covers 8 square meters (+ 6*10 g white Sahara pigment + 6*10 g bronze Sahara pigment + 6*10 g dark gray Sahara pigment + 8*25 ml white dye + 3* 10 g colorfun black) Kit Contents: 2.49 kg, 4.15 kg, 8.33 kg or 16.66 kg of Art Coat Epoxy "Art Pro" for a high quality base Black and White Dye from the "Colorfun" Line for the perfect stone shades Metallica Sahara white, bronze, gray pigment for that extra touch of sparkle Good to add: To enhance the appeal of the design: Isopropanol 99.9% To make the covering last longer: + polishield 100 GLOSS Each kit includes dyes and pigment in sufficient quantity for the amount of resin required. Guide Instructions: Step N1: Primer Start by carefully measuring the amount needed to cover the surface based on the consumption of 150 g/m2, making sure to follow the proportions indicated to obtain a homogeneous mixture. Once the base has been prepared, proceed with adding the dye, choosing between white or black depending on your needs. The quantity of colourant to add to the mixture can be measured in a few drops (max 5% by volume). This step is crucial to achieve the desired colour and ensure uniformity of the application. Before applying the primer, it is essential that the surface intended for treatment is adequately prepared. Sand the surface with a coarse grit (40 or 60) before any operation. Make sure it's completely clean, using a soft cloth or brush to remove any pigment, dirt or debris. The surface must also be completely dry; residual humidity can compromise the adhesion of the primer and its effectiveness in sealing the surface. Once the surface is ready, apply the mixture evenly, using a suitable tool such as a brush, roller or spatula, depending on the size of the area to be treated and your personal preference. The key is to get a thin, even layer that can cover the entire area without leaving gaps or excessive product buildup.. After application, it is essential to allow the primer to dry completely before proceeding with further treatments or finishes on the surface. The recommended waiting time is 12 hours; this range may vary slightly depending on environmental conditions, such as humidity and temperature, but offers a good compromise to ensure the mixture has time to dry and adhere properly. During this period, avoid touching or stressing the treated surface to ensure optimal results. Don't worry if you notice any discrepancies on the surface, the next main pour will level everything perfectly. Step N2: application Start by applying masking tape around the perimeter of your countertop to contain the epoxy you're about to pour. This step is essential to ensure the resin stays where it is needed. After applying the resin, wait about 1.5 hours before gently removing the tape. To ensure coverage is even and complete, plan to use approximately 1.6kg of resin for every square meter of surface area. When you are ready to mix the resin, use a drill equipped with a paddle mixer for quick and even action (use at low speed), taking about 2 minutes for this operation. If you prefer to mix by hand, be prepared to take double the time. Don't forget to scrape the sides and bottom of the container halfway through the process with a stick to ensure all the material is mixed well. Next, separate the already mixed resin into different glasses and add the desired colours, mixing the different colours in the different glasses until you obtain an intense and uniform colour per single glass. To create a striking visual effect, pour the coloured resin in random layers into a larger bucket, being careful not to mix the colours together too much. After filling the bucket, spread the contents over the surface of the worktop, leaving a small amount of resin aside to finish the edges later. To remove trapped air bubbles, gently run a propane torch or heat gun over the surface. Once the adhesive tapes have been removed, approximately 1.5 hours after application, if there are any dry edges, moisten them slightly by wearing a protective glove to promote an even appearance. Use appropriate tools, such as spatulas or plastic scrapers, to spread and level the resin along the edges, making sure to cover the entire area well. After letting the resin cure for 24 hours, you can apply a clear top coat or PoliShield scratch-resistant paint to further protect the surface. Finally, for even more refined visual effects, spray 99.9% isopropyl alcohol onto the surface just before the resin begins to fully harden. This will create unique lacy textures. Remember that when you remove the tape, it is essential that the resin is partially hardened, neither too liquid nor completely solid, to avoid unwanted drips. Attention! Safety Guidelines for Using Isopropyl Alcohol (99.9%) Isopropyl alcohol (IPA) is a highly flammable substance. Improper use—especially near heat sources like torches or heat guns—can result in fire or explosion. To ensure safe use, follow these precautions: Primary Risks Highly flammable: IPA vapors can ignite from sparks, open flames, or hot surfaces. Forms explosive vapor-air mixtures, especially in enclosed or poorly ventilated spaces. Strictly Prohibited: Using gas torches or heat guns near areas treated with IPA. Spraying IPA near active heat sources. Storing IPA near flames, heaters, or hot tools. Recommended Safety Measures: 1. Ventilation: Always work in a well-ventilated area when using IPA. 2. Wait Time: After applying IPA, wait at least 5–10 minutes to allow complete evaporation before using any heat tools. 3. Safe Distance: Keep IPA containers at least 2 meters (6 feet) away from heat or flame sources. 4. Storage: Store IPA in a tightly sealed container, away from direct sunlight or high temperatures. 5. Fire Safety: Have a CO₂ or dry chemical fire extinguisher nearby when working with flammable substances and open flames. In Case of Fire: Do not use water to extinguish the fire. Use an appropriate extinguisher, cut off air supply if safe, and call emergency services if needed.
$98,95

About Chopping Board Oil: Chopping Board Oil is the perfect choice for protecting, maintaining, and restoring wooden kitchen items including chopping boards, butcher blocks, wooden spoons and more. Regular application will prevent chopping boards from becoming dry, cracked, and brittle. Forming a protective barrier, Chopping Board Oil will also prevent liquid from penetrating the surface, working to reduce the proliferation of germs and bacteria. Chopping Board Oil is food-grade, making it perfect for use on items used for food preparation. The oil will never spoil, unlike many alternative treatments. The pure mineral oil penetrates the wood, providing protection, retaining and enhancing the wood's natural colour and character, while also prolonging the lifespan of your wooden kitchen boards, blocks and utensils. 250ml will treat a chopping board roughly 50 times. Once open, use within 3 years. 💥Cutting Board Oil is Suitable For: -Chopping boards -Butcher blocks -Countertops -Kitchen Utensils [xyz-ips snippet="TRUSTPILOT-WIDGET"]
$16,49
Intense and brilliant color, ideal for Transparent Epoxy Resins. Mix small quantities to get a translucent effect. The high coverage of the “Colorful Original” range allows to obtain a full and bright color. The high concentration provides an opaque color with a few drops.
Usable to color the products of the RESIN PRO range.
💥 Ideal for epoxy creations and resin tables thanks to its features:
✔️ Intense colors
✔️ Easy to mix
✔️ Intense colors
✔️ High concentration
✔️ Easy to get a translucent effect
✔️ 5 stars on Trustpilot
🌿Cruelty Free, Vegan Friendly🐹
$16,00
 Free shipping on orders over €199,00