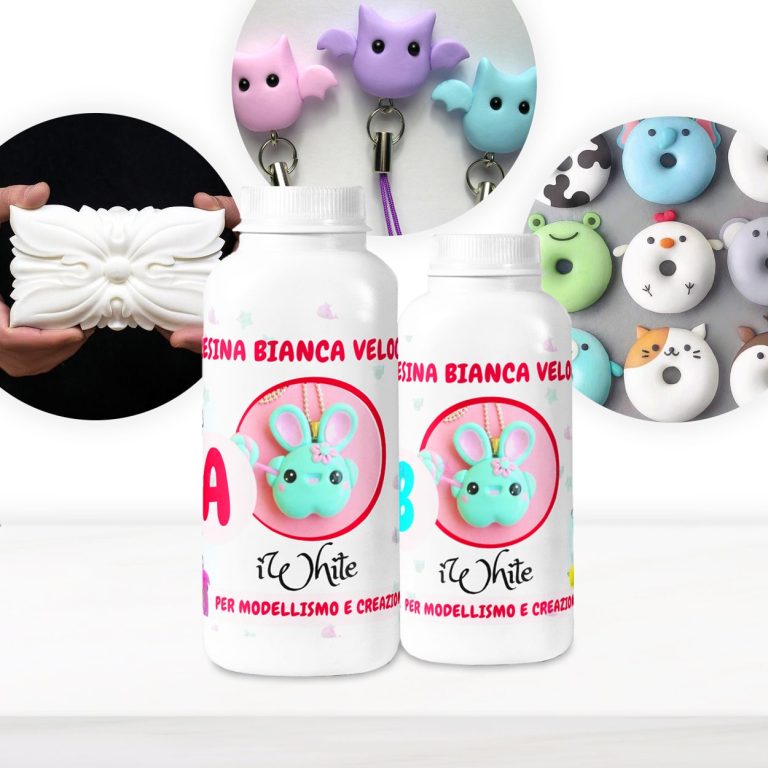
“IWHITE” WHITE POLYURETHANE CASTING RESIN - Two-Component A + B. Description. Highly fluid WHITE polyurethane casting resin with high hardening properties, for all kinds of handcrafted creations and fast prototyping in the modelling branch. Thanks to its high-speed catalysis (30 minutes), you can quickly reproduce objects of all sizes in a perfect way. In the liquid state, the resin can be easily coloured with any compatible colouring paste. Furthermore, once hardened it can be coloured with acrylic colours. Label: Component B: H351 Suspected of causing cancer. H332 Harmful if inhaled. H373 May cause damage to organs through prolonged or repeated exposure. H319 Causes serious eye irritation. H315 Causes skin irritation. H335 May cause respiratory irritation. H334 May cause allergy or asthma symptoms or breathing difficulties if inhaled. H317 May cause an allergic skin reaction. EUH204 Contains isocyanates. May produce an allergic reaction. P201 Obtain special instructions before use. P280 Wear protective gloves / protective clothing / eye protection / face protection. P284 Wear respiratory protection. P304 + P340 If inhaled: remove person to fresh air and keep comfortable for breathing. P308 + P313 If exposed or concerned: get medical advice/attention. P403 + P233 Store in a well-ventilated place. Keep container tightly closed. Contents: 4,4 'METHYLENEDIPHENYL DIISOCYANATE 4,4' - METHYLENEDIPHENYL DIISOCYANATE, OLIGOMERS Component A: RESIN. H303 - May be harmful if swallowed. H312 - Harmful in contact with skin. H332 - Harmful if inhaled. P260 - Do not breathe dust / fumes / gas / mist / vapours / spray. P262 – Do not get in eyes, on skin, or on clothing. Contains: Polyol Polyether, Polyol Glycol, 1,4 - diazabicyclooctane. Download Non toxicity Certificate [CP_CALCULATED_FIELDS id="1"]
$15,51

💥 BESTSELLER FOR: -Wood-working: Coating, Countertops and Tables, Works of art; -Restoration or surface coating: Wood, Concrete, Ceramics, Canvas, Glass fiber); -DIY: Jewellery making, and Dynamic modelling. 💥About “iCrystal ” – Transparent Epoxy Resin: Our iCrystal Transparent Epoxy Resin is a premium quality, multipurpose resin that is a popular choice for customers looking to create stunning art pieces, jewellery, countertops, and DIY projects. The new formula is specifically designed to provide maximum transparency, allowing you to create unique and beautiful pieces that will last for a long time. It is easy to use and can be mixed with a variety of pigments to create an endless range of works. iCrystal Transparent Epoxy Resin is safe and non-toxic, making it a great option for artists who are environmentally conscious. It is odourless, VOC-free, making it comfortable to use indoors. Although our epoxy resin is safe to use, we recommend taking proper safety precautions when working with any type of resin. It is important to wear gloves and masks and work in a well-ventilated area to avoid any potential irritation or allergic reactions. This Epoxy Resin is self-levelling and has a high-gloss finish, providing a smooth and professional look to your creations. It is also extremely durable, providing a super solid and shiny surface after full curing time. iCrystal epoxy resin can be used on a variety of surfaces, including wood, stone, ceramics, and more. It is perfect for creating unique and stunning pieces that are sure to impress. We offer free shipping on this product, so you can start your project right away. Plus, with its long shelf life, you can store it for future projects. Choose iCrystal Transparent Epoxy Resin for a safe, high-quality, and versatile option for all your creative needs. 💥Key features: ⚙️ 【CRYSTAL CLEAR EPOXY RESIN】-The clear epoxy resin is suitable for both beginners and professionals. Start making jewellery, paintings, and any professional creation that involves the use of resin. 🧪 【HIGH QUALITY】 -Crystal clear, No bubbles, Odourless - because of unique formula for DIY, craft and artistic creations. Ideal for casting and embedding objects too. Compatible with silicone, wood, fabric, glass, paper or photographs. Fast completed curing time - 24 h, Demould time is only 10 hours. 💧 【EASY TO USE】-The 100:50 mixing ratio makes this product very easy to use. Being a two-component resin, simply mix RESIN A + HARDENER B in the ratio indicated above the package and let it harden without the need for further additives. Can be coloured as desired. 🌿 【SAFE AND CERTIFIED】 -All our resins are Certified Non-Toxic, Solvent-free, non-flammable, and totally safe. 📞 【FREE PROFESSIONAL ASSISTANCE SERVICE】-Since we are directly a manufacturer, we have access to a professional laboratory that will happily help you with any complex project. 🇬🇧 【UK BASED TRUSTED COMPANY】-RESIN-PRO team fulfils your order as fast as possible. We produce and realise epoxy resins since 2015. Just check our social media, where you will find thousands of projects made with our products around the world. 💥Suitable for: -Model making; -DIY and wood-working; -Coatings of furniture and surfaces; -Artistic creations (paintings, liquid art, petri dish); -Jewellery and fashion; -Glass Fiber Repair; -Outdoor Protective Coatings; -Boat construction; -Impregnation of technical fabrics (glass fiber, carbon fiber, etc); Check and tag our social media for inspiration! We are always happy to publish your art-work –
$10,67
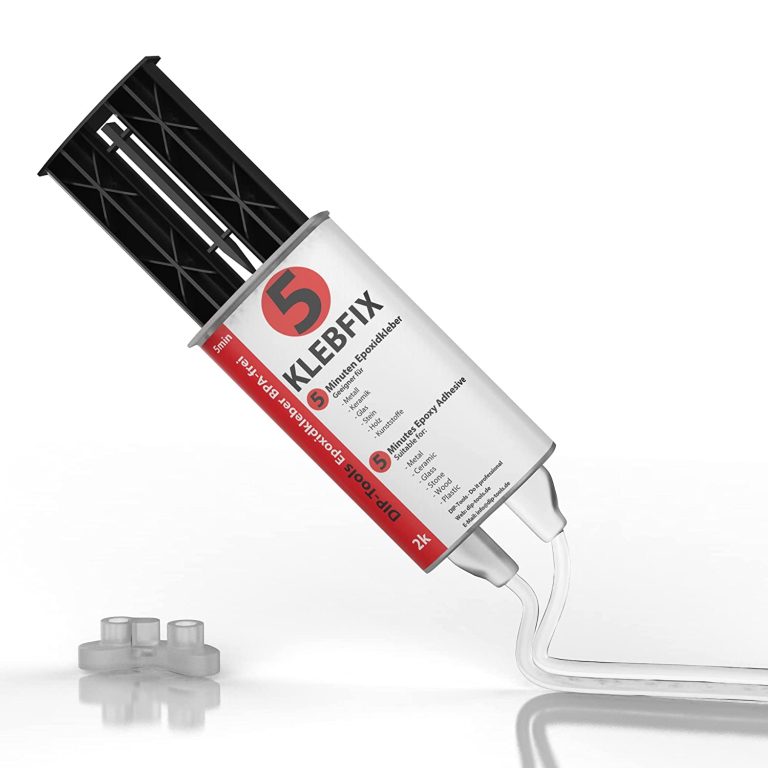
Advantages of Two-component Epoxy Resin Adhesive Extreme strength and resistance to thermal and mechanical influences Resistant to most aggressive substances and oils Available solvent free and BPA free It hardens even under water Compatible with a wide range of additives such as dyes and accelerators Expedited Potlife Application – BestPractice At room temperature (15-30 C The mixing ratio of the two components of 1: 1 is maintained automatically. Do not apply below 5 C outdoor temperature. The higher the ambient temperature, the more effectively the material polymerizes. This means that resistance increases at higher temperatures. It is recommended to have a cloth ready for cleaning. In addition, care must be taken that the work surface is protected and can be cleaned directly if necessary. The surface should be slightly roughened, because only then is the epoxy adhesive guaranteed to bond well with the material. To do this, you can sand or file the surface. To spread the sticker, a piece of cardboard or plastic is useful. After use, clean the tube so that the lid does not stick, and then close it tightly. The thickness of the adhesive should be thin enough (0.1-0.2 mm), but if necessary it can be thicker. The parts to be glued must be clean and free of oil and grease. Apply the adhesive on one side and join and press the parts to be glued. The potlife is about 5 minutes, good endurance is achieved after about 10-12 minutes, and total endurance after about 24 hours. Pot life is limited in time and describes the maximum working time of the uncured adhesive. Once the pot life has passed, the adhesive not yet applied must not be further processed, but must be disposed of! Until the manual force is reached, the binding must be additionally fixed, for example, with the help of a vice, adhesive tape or clamp. In the case of heat-assisted polymerisation, the temperature resistance of the joined parts must be guaranteed. In addition, the heating and cooling times of the parts to be joined must be respected. This time must be added to the curing time of the adhesive. Tension can occur in the glued joint during heating and cooling. With materials such as PP, PE, PTFE or silicone, the parts need to be pretreated with our primer. The need for a primer depends on the surface tension. If this is high enough it can be tested with water droplets on the surface. If the drops adhere well to the surface, a good bond is most likely. If the drops slip away, a primer is probably needed. Mixing There are several ways to mix the two components: - Mixing by hand - Use of a static mixing nozzle - Use of a dynamic mixing nozzle Hand mixing is sufficient in most cases. For this purpose, a toothpick or similar is used and the two components are mixed until a cloudy mass is formed. Make sure that no bubbles remain. When using a static mixing nozzle, the mixing of both components takes place inside the mixing nozzle so that the mixing is ideal. The first 2g should be discarded, given they are not yet mixed 1:1. However, the mixing nozzle can only be used until the adhesive in the mixing nozzle has dried. After that, you will need a new nozzle. W With a dynamic mixing nozzle, the speed of the mixer can be controlled electronically. This allows you to control the mixing intensity very precisely. However, this is intended for special industrial applications and is not necessary for everyday use. Harden The adhesive is chemically cured. This gives the advantage that gluing the surface is also possible, where adhesives that harden with moisture take a very long time. The bond is high strength and densely flexible. Thus, permanent resistance can be guaranteed in the event of shocks and vibrations. The use of the polymerised adhesive is also possible at high temperatures (up to about 120C), for a short time (30 min) up to 200C The polymerised adhesive has good resistance to physical (e.g. sunlight) or chemical (moisture, detergents, chemicals, etc.) influences. The great advantage of two-component epoxy adhesive is the fact that it hardens even under water and is robust. In addition, it is mouldable, so it can be inserted into any recess to fit. Technical data Epoxy Resin Hardener Base (amine mixture) Viscosity High Viscosity Transparent Color Density 1.1 g / ml Gap filling capacity 3mm Temperature resistance -40 up to +120 C Pot Life 5 min Hand resistance 10-12 min Final endurance 24 hours Shore hardness 60 Tensile shear strength 10 N / mm2 Module E 620 N / mm2
$32,95

FIX EXPRESS, two-component epoxy glue that repairs and fixes in just 5 minutes guaranteeing maximum mechanical resistance on wood, glass, fabric, ceramic paper, stone, plastics, rubber and metals. Weight/volume mixing ratio: 1A + 1B Don't wait any longer! Try FIX EXPRESS and discover the perfect solution for all your fixing and repair needs. Product features: Two-component epoxy glue, ideal for any application, both indoors and outdoors, solvent-free, for assembly of heterogeneous materials and quick repairs that hardens in just 5 minutes, guaranteeing maximum mechanical resistance on wood, glass, fabric, ceramic paper, stone, plastics, rubber and metals. ⏱️ Fast drying: Its advanced formula dries in just 5 minutes. After 20 minutes, it can be sanded and polished, giving you a perfect finish in no time. 💪 Strong and Versatile: Thanks to the epoxy molecules, FIX EXPRESS offers excellent adhesion on many different surfaces, making it a practical and powerful solution for every repair need. 🎨 Customisable: Can be easily coloured with Resinpro dyes, allowing you to unleash your creativity. 👍 Easy to use: Simply mix the two components in a 1:1 ratio for 30 to 45 seconds and apply immediately. The working time is 2-3 minutes, with complete setting in 5-6 minutes (at 25°C). 💧 Anti-Drip: Designed for a clean application, without unwanted drips during use. ✅ Safe and Practical: BPA-free and transparent, FIX EXPRESS is safe for use in any context. It comes with two separate bottles for easy dosing, avoiding accidental solidification. Applications for use with epoxy resin: It repairs and fixes in just 5 minutes with FIX EXPRESS, the two-component epoxy glue that guarantees maximum mechanical resistance on a wide range of materials: wood, glass, fabric, paper, ceramics, stone, plastic, rubber and metals. 🎨 Artistic creations: Ideal for unique and detailed works, paintings, photos, neons, jewellery, coatings, labels, doming, etc… ✅ Coatings: Achieves decorative, shiny and durable protective finishes. 💍 Jewellery: Designs shiny and resistant pieces, with a flexible finish. 🏗 Modeling: Perfect for creating mouldable, flexible and durable artistic works.
$36,49
How to Use Two-Component Resin: A Step-by-Step Guide
Two-component resin is a versatile and durable material that is perfect for crafting DIY jewelry and other projects. Here is a simple tutorial on how to use two-component resin effectively:
Preparation
Before starting, ensure you have the resin and hardener in the correct proportions, a mixing container, and any colors or glitter you want to add for customization.
Mixing
Pour the resin and hardener into the container in the right amounts and mix thoroughly for 2-3 minutes until you achieve a uniform mixture.
Application
Pour the resin onto your chosen surface, such as a tray, canvas, or jewelry, and spread it evenly using a stick or spatula.
Drying:
Allow the resin to dry for the specified time indicated in the product instructions. Make sure to do this in a clean, dust-free environment to prevent imperfections.
By following these steps carefully, you can create stunning objects using two-component resin with safety and professionalism.
Epoxy Resin Tutorial for Coatings and Projects
Epoxy resin is a versatile material commonly used for creating transparent and durable coatings on various surfaces. To work with epoxy resin effectively, follow these steps:
Preparation:
Ensure your work area is clean, dry, and well-ventilated before starting the project.
Mixing:
Accurately measure the resin and hardener following the manufacturer's recommended ratios. Mix them slowly to avoid trapping air bubbles.
Coloring:
Add colors or pigments to the mixture for special effects as desired.
Application:
Pour the resin onto the object to be coated, leveling it with a spatula.
Drying:
Wait for the recommended drying time and protect the work from dust and dirt during this period.
By following these steps, you can create beautiful epoxy resin coatings for your DIY projects effectively.
Creating Jewelry with Epoxy Resin: A Step-by-Step Guide
Crafting jewelry with epoxy resin is a rewarding and creative activity. Here's a guide to making your DIY jewelry using epoxy resin:
Preparation:
Gather materials such as epoxy resin, jewelry molds, colors, pigments, glitter, and small decorative objects.
Mixing:
Accurately measure the resin and hardener following the manufacturer's instructions.
Customization:
Add colors, pigments, glitter, or small objects to personalize your jewelry pieces.
Curing:
Pour the resin into the molds and let it cure for the required time.
Finishing:
Carefully remove the jewelry from the mold once hardened and refine it with sandpaper if needed. Assemble the jewelry with chains, cords, or earring hooks.
Remember to always follow the manufacturer's instructions and work in a well-ventilated environment to ensure safety when working with epoxy resin.
Instructions for Making Epoxy Resin Tables: A Creative Process
Creating tables with epoxy resin is a fulfilling and creative endeavor. Here's a step-by-step guide to help you through the process:
Preparation:
Select a raw wooden tabletop or an old table for recycling.
Protection:
Cover the tabletop with parchment paper, ensuring it is level.
Mixing:
Carefully measure and mix the epoxy resin following the product instructions for the correct resin-to-hardener ratio.
Customization:
Add colors or pigments for special effects before pouring the resin onto the tabletop.
Drying:
Let the resin dry for the recommended time, typically between 24 to 48 hours.
Finishing:
Once fully cured, polish the surface to achieve a shiny finish on your DIY epoxy resin table.
By following these steps, you can create stunning epoxy resin tables for your space.
Step-by-Step Guide to Creating Epoxy Resin Art
Creating artwork with epoxy resin is a fascinating and creative process. Here are the main steps to follow to create epoxy resin art:
Preparation:
Protect your work area and gather all necessary materials.
Support:
Choose a suitable support such as canvas or wood for your artwork.
Prep:
Level the surface of the support and apply a base color if needed.
Mixing:
Carefully mix the resin and hardener following the manufacturer's instructions.
Coloring:
Add dyes or pigments to the resin for desired effects.
Application:
Pour the resin onto the support evenly.
Design:
Use brushes or other tools to create unique effects and designs on the resin.
Drying:
Allow the artwork to dry in a dust-free, dry place for the specified time.
Finishing:
Once dry, polish and protect the artwork with a clear coating for a beautiful finish.
By following these steps attentively, you can create stunning epoxy resin art pieces for your space.

Polyurethane two-component varnish, glossy or matte (depending on the preparation), in 100 ml [3,51 oz] jar (100 ml [3,51 oz] correspond to a 400 ml [14,07 oz] can). Universal two-component kit to achieve the desired effect: depending on the preparation, it is possible to obtain either a glossy or a matte finish. Ideal to protect any resin and paint in a professional way. When catalysed, the protective clear coat is resistant to chemicals, UV rays and scratches. The package features two separate containers for the two components (the polyurethane clear coat and the catalyst), which should be mixed at the time of use. Recommended for resins that do not contain phosphorescent pigments, wood and various types of surfaces. Its unique properties fulfil the requirements for the protection, the sanding and the polishing of resins that do not contain phosphorescent pigments, wood and various types of surfaces The kit includes: – Component A; – Component B (catalyst); – Measuring cup. Properties: – Scratch-resistant protective finish; – Prevents the yellowing of the resin; – UV-resistant; – Easy to apply; – Depending on the preparation, you can obtain either a glossy or a matte finish; – Completely dries after 48 hours; – Always remember to prepare only the quantity you need, after the preparation the mixture can last for about 24 hours (20°C) [68 F]. 100 ml [3,51 oz] of transparent varnish with the addition of polyurethane thinner can cover an area of around 1.5-2.50 square meters. Warning: at first it develops a strong smell, which disappears once dried. Work in a ventilated area. Tips for use: Prepare the mixture of polyurethane clear coat and catalyst in the measuring cup included in the kit. For applications with Spray Gun, dilute the preparation with polyurethane thinner (you can use our polyurethane thinner). Spray Gun and polyurethane thinner are not included in the kit. Always remember to prepare only the quantity you need, after the preparation the mixture can last for about 24 hours (20°C) [68 F]. Examples of quantities for the preparation of the glossy transparent varnish: 100 ml [3,51 oz] CLEAR COAT + 50 ml [1,75 oz] CATALYST + 15-20 ml [0,52-0,70 oz] POLYURETHANIC THINNER (ONLY FOR APPLICATIONS WITH SPRAY GUN) Examples of quantities for the preparation of the matte transparent varnish: 100 ml [3,51 oz] CLEAR COAT + 30 ml [1,05 oz] CATALYST + 50-70 ml [1,75-2,46 oz] POLYURETHANIC THINNER (ONLY FOR APPLICATIONS WITH SPRAY GUN) Drying time (at 20°C [68 F] and 60% RH): Skin forming 15-20 min Touch dry 30-60 min Fully dried: 48 hours To recoat, allow to dry for 1-2 hours (20°C) [68 F] between each coat. REMOVE WITH ACETONE AND/OR NITRO THINNER (before the product has completely dried).
$14,04

Polyurethane two-component varnish, glossy or matte (depending on the preparation), in 100 ml [3,51 oz] jar (100 ml [3,51 oz] correspond to a 400 ml [14,07 oz] can). Universal two-component kit to achieve the desired effect: depending on the preparation, it is possible to obtain either a glossy or a matte finish. Ideal to protect any resin and paint in a professional way. When catalysed, the protective clear coat is resistant to chemicals, UV rays and scratches. The package features two separate containers for the two components (the polyurethane clear coat and the catalyst), which should be mixed at the time of use. Recommended for resins that do not contain phosphorescent pigments, wood and various types of surfaces. Its unique properties fulfil the requirements for the protection, the sanding and the polishing of resins that do not contain phosphorescent pigments, wood and various types of surfaces The kit includes: – Component A; – Component B (catalyst); – Measuring cup. Properties: – Scratch-resistant protective finish; – Prevents the yellowing of the resin; – UV-resistant; – Easy to apply; – Depending on the preparation, you can obtain either a glossy or a matte finish; – Completely dries after 48 hours; – Always remember to prepare only the quantity you need, after the preparation the mixture can last for about 24 hours (20°C) [68 F]. 100 ml [3,51 oz] of transparent varnish with the addition of polyurethane thinner can cover an area of around 1.5-2.50 square meters. Warning: at first it develops a strong smell, which disappears once dried. Work in a ventilated area. Tips for use: Prepare the mixture of polyurethane clear coat and catalyst in the measuring cup included in the kit. For applications with Spray Gun, dilute the preparation with polyurethane thinner (you can use our polyurethane thinner). Spray Gun and polyurethane thinner are included in the kit. Always remember to prepare only the quantity you need, after the preparation the mixture can last for about 24 hours (20°C) [68 F]. Examples of quantities for the preparation of the glossy transparent varnish: 100 ml [3,51 oz] CLEAR COAT + 50 ml [1,75 oz] CATALYST + 15-20 ml [0,52-0,70 oz] POLYURETHANIC THINNER (ONLY FOR APPLICATIONS WITH SPRAY GUN) Examples of quantities for the preparation of the matte transparent varnish: 100 ml [3,51 oz] CLEAR COAT + 30 ml [1,05 oz] CATALYST + 50-70 ml [1,75-2,46 oz] POLYURETHANIC THINNER (ONLY FOR APPLICATIONS WITH SPRAY GUN) Drying time (at 20°C [68 F] and 60% RH): Skin forming 15-20 min Touch dry 30-60 min Fully dried: 48 hours To recoat, allow to dry for 1-2 hours (20°C) [68 F] between each coat. REMOVE WITH ACETONE AND/OR NITRO THINNER (before the product has completely dried).
$34,49

💥 BESTSELLER FOR: –Resin-art: Geode-art, Ocean-art, Coasters, Trays, Fluid art (pour paint) and Art objects; –Surface coating: Coating + very good for vertical applications by brush or roller; –Restoration : Covering objects and furniture to add depth and brilliance to the colour. The surface is perfectly smooth and moisture-resistant. Solvent-free and odourless epoxy resin. 💥About ULTRA-HIGH VISCOSITY epoxy resin for artists "ART PRO DELUXE": The epoxy resin for the artistic sector: thanks to its special formula and its dense structure, it allows you to create paintings with the "pour paint" and liquid paint technique. It does not leak out from the working surface, slowly reaching the corners of the frame. Great choice for ocean-art; coasters and trays! ART PRO DELUXE preserves your original design and prevents any possible modification due to the casting of the resin: because of its special thick formula, the layers of colours do not expand and do not mix (unless you deliberately intervene), faithfully keeping with your creative idea! Additional features: Crystal Clear; + Odourless; + Excellent mechanical strength; + High impregnation and reinforcement of technical fabrics. The product can be coloured with any epoxy dye (both in paste and powder) in a percentage no more than 5% from the mix weight. It can also be thickened by the use of aggregates such as powders and fumed silica. DEAR ARTISTS! This type of epoxy has higher viscosity than you may expect! Please, read this note - 1. If you have no a lot of experience or you prefer to work with more liquid resin, please, check this Resin 👉🏽 ART PRO 2. If you prefer to do art-works in more viscosity resin, please, choose ART PRO DELUXE. But if it`s your first experience, we suggest to design your project before pouring, because, in this case you have short working-time (15-20 min). Due to its exceptionally high viscosity, our Deluxe epoxy resin is ideally suited for delicate casting projects, including ocean art, pour-art, and other creations that demand a resin with superior viscosity. When undertaking basic castings of 1-1.5cm, special care is needed to address bubble formation. We recommend a multi-layer approach for such castings, employing a heat gun after each application. For these projects, we suggest considering our lower viscosity resins - "Transparente" and "Art-Pro" - as the optimal solutions. Transparent self-levelling UV-resistant epoxy system, which creates a hard and glossy protective layer for casting up to 1 cm [0,39”] (ex. coasters, trays, art objects). The surface is perfectly smooth and moisture-resistant. Solvent-free and odourless epoxy resin. 💥Key features: ⚙️ 【RESIN ART EPOXY】 ART PRO DELUXE EPOXY RESIN is a ultra-high viscosity and high resistance product. The best choice for Resin-art, making Coasters, Trays, Ocean and Geode-art and casting surfaces. The particular formulation makes it a resistant product suitable for both the surface finishes of paintings, tables or even artistic floors. 🧪 【PROFESSIONAL QUALITY】Art Pro Deluxe Resin, unlike traditional "multipurpose" resins, has a special formulation and viscosity, which allows to obtain an impeccably transparent and glossy surface in any condition. Easily polished. The added UV Anti-Yellowing Filters helps save transparency over time. The low density allows prevent the incorporation of air bubbles making it perfectly suitable for river tables and countertops. Compatible with silicone and wood, fabric, glass, paper or photographs. Complete catalysis ~ 24-48 hours, but it will be ready for "unmoulding" after about 12 hours. 🌿 【SAFE AND CERTIFIED】 All our resins are Certified Non-Toxic, Solvent-free, non-flammable, and totally safe. 💧 【EASY TO USE】 The 100:70 mixing ratio (by weight) makes this product very easy to use. Being a two-component resin, simply mix RESIN A + HARDENER B in the ratio indicated above the package and let it harden without the need for further additives. Can be coloured as desired. 📞 【FREE PROFESSIONAL ASSISTANCE SERVICE】 Since we are directly a manufacturer, we have access to a professional laboratory that will happily help you with any complex project. 🇬🇧 【UK BASED TRUSTED COMPANY】 – RESIN-PRO team collect and send your order as fast as possible. We produce and realise epoxy resins since 2015. Just google our social media, where you find thousands of projects made with our products around the world. ____________________________________________________________________ 💥 Applications: - artworks, creation of art objects (paintings, panels, etc.) with the "fluid-art" (pour paint) technique (pouring up to 1 cm [0,39”]); - vertical applications by brush or roller - coating of surfaces, objects and furniture to add depth and brilliance to the colour; - create a 3D effect on prints, photos and images in general; - creation of a perfectly transparent protective layer on your projects. The "ART-PRO DELUXE" formula is specifically developed for coating in artistic applications. Compatible with colouring agents, powder pigments, alcohol-based and oil-based dyes, aerosol paints. Warning: the product is moisture sensitive, do not use on wet surfaces or with water-based dyes (e.g. Acrylics) ____________________________________________________________________ Epoxy resin is a complicated technical product, but if you follow the basic rules, you will get wonderful results! If you need any assistance, just call us - 07596 850968 or email us –
[email protected] With best regards, RESIN PRO TEAM😊 Check and tag our social media for inspiration! We are always happy to publish your art-work – [CP_CALCULATED_FIELDS id="1"]
$48,49
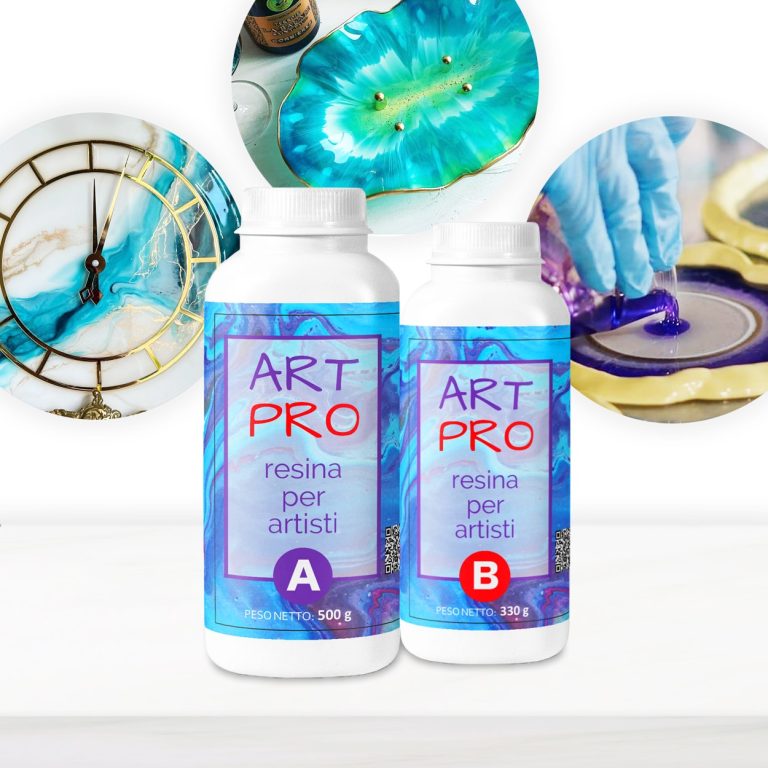
💥 BESTSELLER FOR: – Resin Artworks on surfaces, panels: Ocean Art, Marble Effect, Geode Art and etc; – Coasters and Trays with colour effects (layer thickness up to 1 cm [0,39”]); – Coating of surfaces - Floors, Canvases, Furniture, Etc; – 3D effect on prints, photos and images in general; – Fixation of decorative objects (decorative elements, glass, stone, quartz pieces, etc.); – Creation of a perfectly transparent protective layer on your projects. 💥About “ART PRO ” – Ultra Clear Medium Viscosity Epoxy Resin for Artists: First class quality epoxy resin for the artistic sector: thanks to its special dense formula, it allows you to create Resin Art works. It does not leak out from the working surface, slowly reaching the corners of the frame. ART PRO preserves your original design and prevents any possible modification due to the thickness of the resin: because of its special formula, the layers of colours do not expand and do not mix (unless you deliberately intervene), faithfully keeping with your creative idea! Additional features: Long working time; + Odourless; + Excellent mechanical strength; + High impregnation and reinforcement of technical fabrics. The product can be coloured with any epoxy dye (both in paste and powder) in a percentage ranging from 0.1% to 2.0%). It can also be thickened by the use of aggregates such as powders and fumed silica. 💥Key features: ⚙️ ULTRA TRANSPARENT EPOXY RESIN: -The crystal clear epoxy resin is suitable for both beginners and professionals. Start making Resin Art works, coasters, trays and any other DIY – creation that involves the use of medium viscosity resin. 🧪PROFESSIONAL QUALITY: -Made from high quality materials – Excellent transparency, Glossy surface, Odourless – because of unique formula for DIY, craft and artistic creations. Compatible with silicone, wood, fabric, glass and paper. 🌿 SAFE AND CERTIFIED: -All our resins are Certified Non-Toxic, Solvent-free, non-flammable, and totally safe. 💧 EASY TO USE: -The 3:2 mixing ratio makes this product very easy to use. Being a two-component resin, simply mix RESIN A + HARDENER B in the ratio indicated above the package and let it harden without the need for further additives. Can be coloured as desired. 📞 FREE PROFESSIONAL ASSISTANCE SERVICE: -Since we are directly a manufacturer, we have access to a professional laboratory that will happily help you with any complex project. 🇬🇧 UK BASED TRUSTED COMPANY: -RESIN-PRO team collects and sends your order as fast as possible. We produce and realise epoxy resins since 2015. Just google our social media, where you will find thousands of projects made with our products around the world. The "ART-PRO" formula is specifically developed for coating in artistic applications. Compatible with colouring agents, powder pigments, alcohol-based and oil-based dyes, aerosol paints. The migration laboratory test on cured resin samples ensures that the final product does not release any harmful substances, if applied following the instructions. Warning: the product is moisture sensitive, do not use on wet surfaces or with water-based dyes (e.g. Acrylics) ____________________________________________________________________ if you have not enough experience, we insistly suggest to make a small test before working with large project.
$28,49
 Free shipping on orders over €199,00


