The structure of the lessons that you will get access to: Preparation of the workspace and mixing of resin. We will show you how to quickly level the work surface, what temperature and what other conditions are needed for a good solidification of the resin. Let’s prepare the moulds for pouring. We will show you how to mix the resin, give you ready-made calculations of proportions and teach you how to use the automatic proportion calculator in a couple of clicks. Working with glitters: Let’s explain how to add our glitter and sparkles to the filling so that they do not float to the surface and how to ensure we don’t over-pour or use too little resin. Let’s show you three different ways to add glitters. Dropping ink into the resin: This is where the magic happens, because the process of dropping ink into the resin is simply mesmerising! The inks can be seen spinning in the resin! We prepare the ink, and drop it into the resin at the right time and in a way and sequence that creates the most beautiful and unique results – we will show everything! In the course, we shared 6 wonderful colour schemes for ink combinations from the PIÑATA line. After the course you will feel confident about which colours are better for which combination, and which colours can be diversified if desired. Finishing touches! We take the work out of the mould at the right time, and check the backdrop for sharp corners. If there are any found, we “smooth” them with a nail file as shown in the video. Also, here we will show you how to use a marker for creating gold or silver edges. The finishing layer: How to apply the finish correctly for the best effect. How to calculate the amount of resin for the finish of a decoration and how to overcome smudges, if they suddenly flow onto the back of the product. Bows: We will teach you how to tie a festive bow on a decoration so that it looks even more attractive and aesthetically pleasing, as well as beautifully hung on a festive tree. Bonus additional technique of filling “Silk” – how to do it and what will be needed for this? Bonus additional technique of filling “Flame ” – how to do it and what will be needed for this? Bonus additional technique for filling the “Cloud” – How is it done and what is needed for this? Bonus additional technique of filling with shiny ink-three options for working with them
$28,49
Soft silicone mould for resins. Mould made with professional silicone and absolutely free of imperfections. Non-deformable mould, of great resistance and durability. Type of manual technique: creation of jewelry box. Material: Silicone Color: Semi-Transparent; Reusable, non-stick, easy to use and clean. Glass measures: 11 x 11 CM / H. 6. 5 CM Caution: do not use aggressive solvents for cleaning. High quality moulds, thermal resistance: -40 + 210 centigrade. Attention! Remove the product from the mold no later than 12 hours after pouring the resin. Otherwise, there is a chance of local adhesion of the resin to the mold. Copyright © Resin Pro Srl. The reproduction (total or partial) of the work by any means made and its making available to third parties, either free of charge or for a fee is prohibited.
$7,95
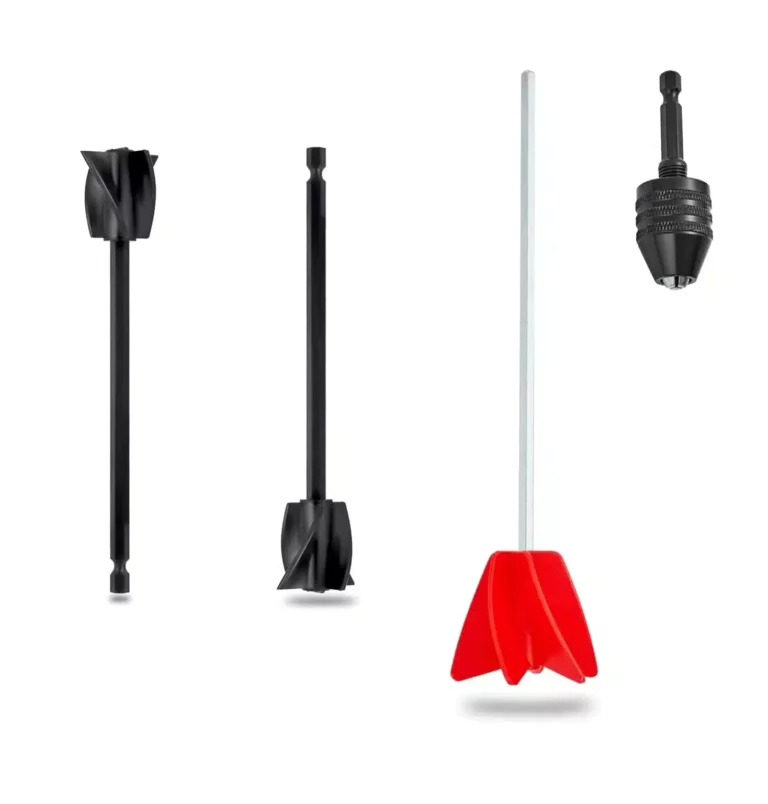
Ensures perfect mixing, avoiding bubble formation and saving time, our anti-bubble mixer is easy to use and reusable. The anti-bubble mixer for epoxy mixing is a high-quality tool that allows you to achieve perfect and uniform mixing of epoxy resins without the formation of bubbles. Thanks to its innovative technology, this blender guarantees professional results, reducing the time and effort required for mixing. In addition, the stirring blender is easy to use, clean and reusable, which makes it an environmentally friendly and economical choice for those working with epoxy resins.
$6,49
Soft silicone mould for resins. Silicone mould with which you can create a large mineral, made with professional silicone and absolutely free of imperfections. Non-deformable mould, with great strength and durability Manual type of technique: Creating a large ore. Material: Silicone Colour: Semi-Transparent; Reusable, non-stick, easy to use and clean. Caution: Do not use aggressive solvents for cleaning. High quality moulds, thermal resistance: -40 + 210 centigrade Attention! Remove the product from the mold no later than 12 hours after pouring the resin. Otherwise, there is a chance of local adhesion of the resin to the mold.
$5,50
Tips for achieving flawless inclusions
In the epoxy resin and coating industry, mastering techniques for flawless inclusions is crucial for optimal results. Follow these steps to ensure success:
- Thoroughly clean the surface before treatment.
- Use appropriate products to eliminate residues and grease.
- Apply specific primers to enhance inclusion adhesion.
- Ensure precise resin or silicone dosing to prevent excess.
- Utilize suitable tools for uniform material spreading.
- Eliminate air bubbles by using a degreasing agent or heat.
- Pay attention to meticulous finishing and sanding for a smooth and consistent final outcome.
By adhering to these procedures, you can achieve clean and high-quality inclusions.
Crystal Clear Epoxy Resin
Crystal clear epoxy resin is a versatile material extensively utilized across various industries. Comprising epoxy resin and hardener components, this resin, when mixed and applied on surfaces like wood, metal, or plastic, solidifies into a transparent and durable finish. Its resistance to solvents, moisture, and environmental factors makes it ideal for dental prostheses, floor coatings, glass object repairs, and artistic creations. With its transparency, epoxy resin is commonly employed to create glossy coatings on tables, jewelry, and more.
Resin Crafting Guide
Resin crafting involves crafting unique and artistic pieces using epoxy or polyurethane resins. To create resin crafts, follow these steps:
- Gather materials: epoxy resin, hardener, colors, and molds.
- Measure and mix resin and hardener per recommended ratios.
- Incorporate colors or pigments for desired effects.
- Pour resin into molds and allow it to cure as per instructions.
- Once hardened, carefully demold the object and refine if needed.
By following these steps, you can craft beautiful, personalized, and innovative resin creations.
Transparent Resin Pigments
Transparent resin pigments are specially formulated to color transparent resins like epoxy or polyurethane without compromising their clarity. Available in various shades, these pigments enable the creation of unique artistic and decorative effects. Follow the manufacturer's guidelines for proper dosing to achieve desired results. Conduct tests on small areas before full application to confirm the final appearance. The choice of transparent resin colors significantly impacts your project's final aesthetics, so thoughtful planning is recommended.
DIY Silicone Molds
DIY silicone molds provide a simple and efficient method for crafting custom items. To create a silicone mold:
Acquire food-safe liquid silicone, a model, and follow instructions.
Pour silicone over the model and let it dry.
Obtain a flexible and durable mold for replicating objects.
Silicone molds are perfect for designing jewelry, decorations, and more, offering easy customization for intricate details.

💥 Bestseller for: –Prototyping:Polyurethane resin is frequently employed for rapid prototyping in industries such as automotive, medical, product design, and more. Its quick curing time and high casting precision make it ideal for efficiently producing test prototypes; –Modeling:Thanks to its high durability and the ability to replicate intricate details, polyurethane resin is used in art and design for creating models. This includes artistic sculptures, architectural prototypes, and decorative elements; –Small Batch Production:The "vacuum casting" technique with polyurethane resin enables cost-effective and rapid production of small batches of items with high detail. This is useful for manufacturing limited quantities of products with consistent characteristics; –Repair and Restoration:Polyurethane resin can be employed for the restoration and repair of various materials, including wood, stone, plastic, and metal. It is used to fill cracks, create missing components, or restore surfaces; –Manufacturing Seals and Components: Due to its chemical resistance and high wear resistance, polyurethane resin is widely used in the production of seals, including rubber seals, gaskets, and components for automobiles and industrial machinery; –Creative Projects:Artists and craftsmen use polyurethane resin for a wide range of creative projects, including art installations, decorative items, unique shapes, and even jewelry. 💥About “POLYFORM” POLYURETHANE CASTING RESIN: PolyForm, our cutting-edge polyurethane casting resin, is a high-performance solution designed for rapid prototyping in the modeling and automation industries. With a carefully formulated blend that boasts high fluidity and a remarkable Shore A hardness of 100, PolyForm empowers you to bring your creative visions to life with precision and efficiency. Key Features: Versatile Application: PolyForm is ideal for a wide range of applications, from creating detailed models to automating production processes. Its adaptability makes it a valuable asset in various industries. Rapid Prototyping: Craft prototypes with ease using silicone molds and PolyForm resin. These prototypes serve as crucial tools for pre-processing, strength testing, and dimensional analysis before moving on to mass production. Vacuum Casting Technique: Explore the "Vacuum casting" technique with PolyForm, enabling the production of small series of objects with identical mechanical, aesthetic, and dimensional properties to the final product. Quick Curing: Experience a fast pot life of 3 minutes and a maturation time of 30 minutes, allowing you to work efficiently and bring your ideas to life in a short span. Non-Toxic Certification: PolyForm is certified non-toxic for skin contact post-catalysis, ensuring the safety of handling the artifacts created with this resin. Technical Specifications: Viscosity: 70 mPa*s Weight Ratio A/B: 90/100 Color: Beige Usage Guidelines: Not suitable for coloring with dyes Do not use at temperatures below 8-10°C. Wear gloves and protective eyewear during mixing and application. Clean tools with epoxy or nitro thinner. Dispose of packaging following local regulations. PolyForm is your reliable partner for bringing innovation to your projects. Whether you're a hobbyist or a professional, PolyForm delivers exceptional results, providing the precision and reliability you need for your creative endeavors. Start creating with PolyForm today! [CP_CALCULATED_FIELDS id="1"] Download Non toxicity Certificate
$20,95
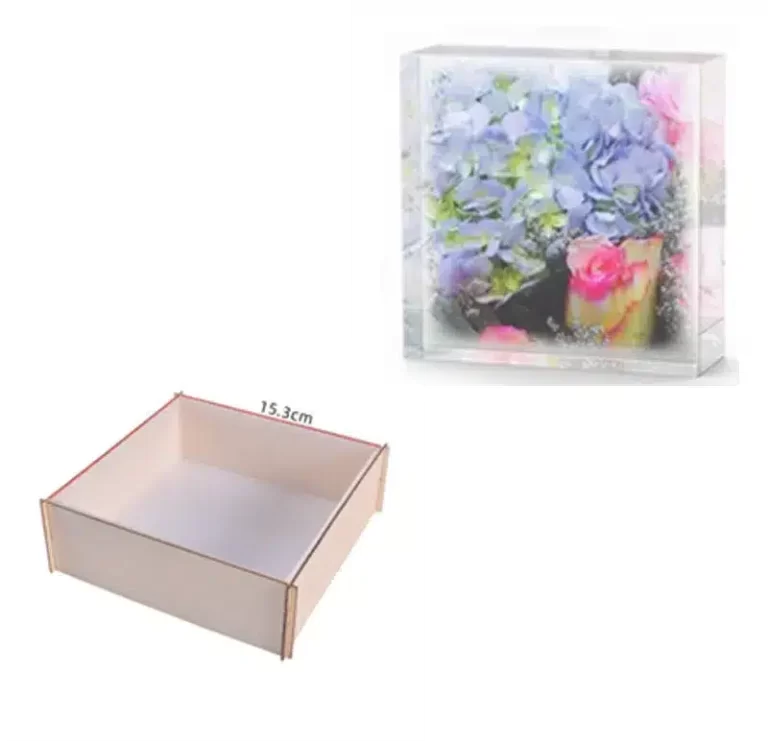
Non-deformable formwork, of great strength and durability . Type of manual technique: Square creation. Material: Professional silicone and chipboard wood dowels Reusable, non-stick, easy to use and clean. Mould Measurements: 6×6 in. Warning: do not use aggressive solvents, High-quality moulds, heat-resistant: -40°C to + 210°C [-104° F to +410° F] Attention! Remove the product from the mold no later than 12 hours after pouring the resin. Otherwise, there is a chance of local adhesion of the resin to the mold.
$11,22
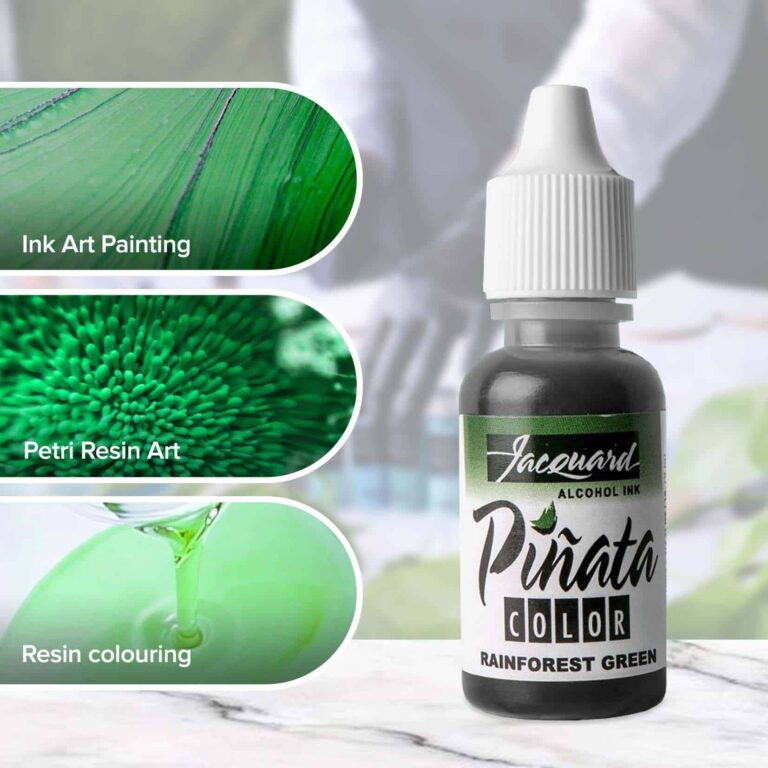
Piñata Colors are highly saturated, fast-drying alcohol inks for any hard surface, including glass, metal, plastic, ceramic, stone, leather, resin, polymer clay, YUPO® and more. Indelible and impervious to water, Piñata Colors clean up with alcohol and re-wet themselves, allowing for unique effects and techniques not easily achieved with water-based inks. As a dye-based, highly transparent ink*, Piñata Colors are unparalleled for vibrancy. Only the most lightfast dyes have been selected for the palette. Acid-free with excellent adhesive properties, Piñata Colors are the go-to inks for all non-porous surfaces. TECHNIQUES fine arts, scrapbooking, crafts, faux stained glass, card making, resin arts, faux finishing techniques and staining wood and leather SURFACES glass, metal, plastic, vinyl, ceramic, stone, leather, epoxy resins, YUPO®, foil, wood, encaustic, Claybord™, fiberglass, acrylic, polymer clay and more Warning: using inks in percentages higher than 1% may alter the mechanical resistance of the creation. In order to create the Blast Effect, it is necessary to use the colour WHITE. https://www.instagram.com/p/BuTHQjWDUSX/?utm_source=ig_web_copy_link Instruction: These beautiful, color-saturated, acid-free, transparent inks have an alcohol base which makes them indelible and moisture-resistant when dry. That means you can work freely on most any clean, oil-free surface, and makes them the ideal professional product. Highly versatile, Piñata can be used in a variety of applications, including rubber stamping, fine art, fiber art, and scrap booking. Also use Piñata in calligraphy, faux finishing techniques, graphic and airbrush applications, as well as wood and leather staining. Techniques: Mixing Piñata with Claro — it will stay shiny and not change color. It extends the drying and working time. Claro is also a transparentizer. Claro dropped or brushed on top of dry Piñata will make it spread, creating rings of marble or stone-like texture. Slight dulling occurs, but most will remain shiny. Just like real stone! Mixing Piñata with alcohol produces a slightly lighter color. When sponging this mixture, expect to see tiny bubble-like textures. This is very effective in making background papers and other interesting textural faux effects. Alcohol dropped or brushed on top of dry Piñata removes the shine. This is particularly effective on terra cotta surfaces or in faux finishing techniques where shine would detract from the overall effect. Spritz or brush layers of color over color. When wet, each layer will push aside the under layers creating amazing effects. Allowing each layer to dry will produce beautiful glazes and truly spectacular colors with clarity and depth. Add blanco Blanco to any of the Piñata Colors and achieva a completely new glowing range of pastel variations with a touch of opacity. Resists: Crayons: draw with various colors and apply Piñata. Wax.: following directions from the manufacturer, apply melted wax to fabric. Crinkle the fabric allowing the wax to crack, then apply Piñata. Iron the wax away to create beautiful batik effects. Gum Arabic: mix gum arabic with water to a heavy cream consistency. Apply this to a rubber stamp or paint it directly onto a surface. Apply Piñata. Gently wash away the gum arabic. Piñata Clean-Up Solution: Piñata Clean-Up Solution contains moisturizers to keep brushes soft and pliable. (TIP: Use regular rubbing alcohol to clean off most of the Piñata from brushes and sponges. Use the Clean-Up Solution for the final rinse to keep brushes soft and ready-to-use the next time!) Warning: Flammable • Eye Irratant • Contains: Denatured Alcohol • Keep Out Of Reach Of Children.
$6,95
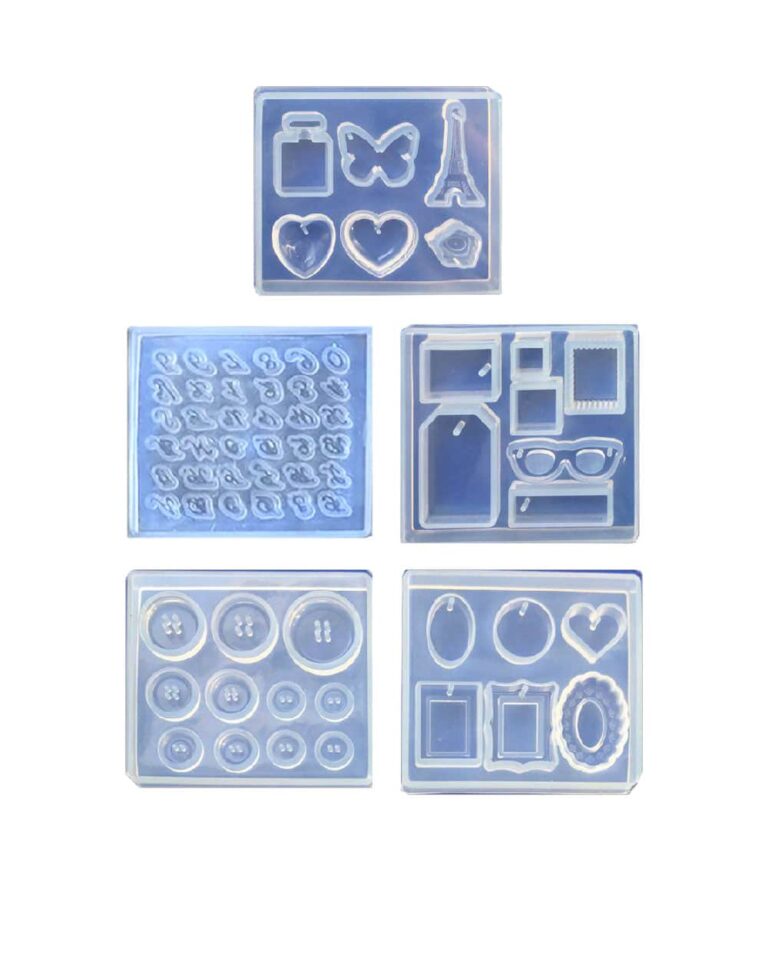
5-MOULDS SET Ideal for your handmade gifts and to create YOUR OWN jewellery collection! 5 silicone moulds will help you shape your imagination. Prepare a present for someone close or a friend, give a pendant with your photo to the ones you love!! Bring beauty and creativity everywhere you go! Manual technique: Creation Material: Silicone Colour: Semi-transparent; Reusable, non-stick, easy to use and clean. Measures of each mould: 9.0 x 8.0 CM [3,54” x 3,14”] Warning: do not use aggressive solvents, High-quality moulds, heat- resistant: -40°C to + 210°C [-104° F to +410° F] Attention! Remove the product from the mold no later than 12 hours after pouring the resin. Otherwise, there is a chance of local adhesion of the resin to the mold.
$13,09
 Free shipping on orders over €199,00
  Shipping Tracking!


 Google
 Facebook