Creative Kit: Create your own resin tray! KIT INSTRUCTIONS This kit contains: 1.66 kg of epoxy resin Silicone mould "tray" + handles 5 dense dyes Spread out the plastic tarpaulin to protect the work surface. Make sure that the silicone mould is clean and all materials are at hand. Do not forget to wear disposable gloves and follow the safety instructions. Mix the epoxy resin according to the mixing ratio Art Pro 100: 66 – by weight) – 180 g A and 119 g B-for a filling thickness of 5 mm. Carefully weigh and mix both components for 3 minutes, making sure that all sides and bottom of the mixing container are included for effective mixing. Let the mixture stand for 2-3 minutes. Divide the resulting resin into separate containers for each colour you are going to use. Add resin-specific dyes to each container to get the desired shades. Mix thoroughly. Put the colours in one large container without mixing them, allowing them to stack on top of each other. Pour this mixture in layers into a mould for a dynamic abstract effect. In addition, you can pour each colour into different places of the mould according to your design concept. After 24 hours, you can remove the resin tray. After another 12-24 hours (the resin reaches full strength), you can make your tray workable by using the screws included in the kit to attach the tray handles. Drill the holes in the tray, then secure the handles with screws. Geodetic effect- To get the geode effect when casting, use the layering technique. Divide the mixed resin into separate containers for each colour you are going to use + one part with transparent resin and one white. Start by pouring clear resin into the center of the mould. Then alternate layers of white and transparent resin with coloured resin, allowing them to spread naturally. Finish by adding the last layer of transparent resin for a beautiful 3D effect. Let it harden to reveal a stunning geodesic-inspired design. Other ideas: Ocean Art Resin Tray: Capture the beauty of the ocean using different shades of blue and white resin, adding a few shells or a small starfish for an authentic nautical feel. Real Pressed Flowers: Add real dried flowers or leaves to the resin to create a natural and timeless look. Gold leaf Accents: Use a gold or metal sheet to add a touch of luxury to your tray.
$78,49
Resin Pro offers the possibility to achieve a perfect polishing by using different types of abrasive pastes. It can be used by hand or with an orbital polisher to make your resin creations shiny. Ebonite Abralon Sanding Pads Cosmetically appealing, consistent scratch pattern provides excellent traction. Combines the benefits of abrasive cloth and non-woven products. Opening in the fabric allows water to flow freely around the abrasive. Solid surface and foam backing provide even surface pressure. Last 5+ times longer than sandpaper. Use wet or dry (residual material can be removed by high pressure air). Now it's possible to get the most aggressive surface texture without that "cheese grater" look. Abralon sanding pads use silicon carbide particles that are precision sifted to a consistent grain size, then bonded evenly to a six-inch round fabric face for the most even scratch pattern available. WARNINGS: During processing, use protective masks, gloves, and other protective clothing. In case of contact with eyes, immediately rinse with cold water for 15 minutes and immediately consult a doctor. The kits may include by variations: EpoxyPolish Polishing cream – 250 ml [8,79 oz] - 1pc Ebonite Abralon Sanding Pads: - Ebonite Abralon Sanding Pad 150mm 360 grit - 1pc - Ebonite Abralon Sanding Pad 150mm 500 grit - 1pc - Ebonite Abralon Sanding Pad 150mm 1000 grit - 1pc - Ebonite Abralon Sanding Pad 150mm 2000 grit - 1pc - Ebonite Abralon Sanding Pad 150mm 3000 grit - 1pc - Ebonite Abralon Sanding Pad 150mm 4000 grit - 1pc EpoxyPolish Polishing cream How to Use: Step 1: Thoroughly clean the surface with a cloth. Step 2: Now you can polish by hand or with an orbital polisher. We recommend using the lowest possible speed to get the best result. Start Polishing with 360-500 grit. Note: Sand the entire surface evenly with circular movements and light pressure. Moisten the pad or the surface with water from time to time. Step 3: Now use the 1000 grit sandpaper. Note: Moisten the sandpaper or the surface with water from time to time. Step 4: Afterwards, use 2000 grit sandpaper. Note: Moisten the sandpaper or the surface with water from time to time. Lastly, use 4000 grit sandpaper to finish sanding. Step 5: Remove the sandpaper from the polishing disc and attach a soft sponge to it. Rinse the surface or wipe it with a damp cloth to remove any residual grain of the sanding. Step 6: Apply EpoxyPolish Polishing cream on the damp sponge. Use by hand or with an orbital polisher, using a large circular motion and exerting slight pressure. Step 7: Clean the surface with plenty of water to remove all the remaining residues. Step 8: Enjoy the result!!!
$21,49
💥 Bestseller for: –Wood-working: Coating, Countertops and Tables, Lamps and Works of art; –Restoration and surface coating: Wood, Concrete, Ceramics, Canvas, Glass fiber, Floors; –DIY: Coasters, Penny-floors, Jewellery making, Dynamic modelling and Artistic creations; –Industrial: Boat care and maintenance; Impregnation of technical fabrics (fiberglass, carbon fiber, etc). 💥About “TRANSPARENT” – Ultra Clear Multipurpose Epoxy Resin: Our Non-Toxic Transparent Epoxy Resin is a high-quality, multipurpose resin that has become a top choice for thousands of customers around the world. It is perfect for creating stunning art pieces, tables jewellery, countertops, DIY projects, and woodworking. This resin is formulated to be safe and non-toxic, making it a great option for artists who are conscious of their environmental impact. It is odourless and VOC-free, making it safe to use indoors. While our Non-Toxic Transparent Epoxy Resin is safe to use, we do advise taking proper safety precautions when working with any type of resin. We recommend using gloves and masks or working in a well-ventilated area to avoid any potential irritation or allergic reactions. Non-Toxic Transparent Epoxy Resin is self-levelling and has a high-gloss finish. It is easy to use and can be mixed with a variety of pigments to create a wide range of colours. One of the best features of our Non-Toxic Transparent Epoxy Resin is its ability to create a super solid and shiny surface after full curing time. It can be used on a variety of surfaces, including wood, stone, ceramics, and more. It is perfect for creating unique and stunning pieces that are sure to impress. Plus, with its long shelf life, you can store it for future projects. Choose our Non-Toxic Transparent Epoxy Resin for a safe, high-quality, multipurpose option for all your creative needs. 💥Key features: ⚙️ ULTRA TRANSPARENT EPOXY RESIN: -The crystal clear epoxy resin is suitable for both beginners and professionals. Start making jewellery, tables, and any other DIY – creation that involves the use of resin. 🧪 PROFESSIONAL QUALITY: -Made from high quality materials – Excellent transparency, No bubbles, Odourless – because of unique formula for DIY, craft and artistic creations. Ideal for casting and embedding objects too. Compatible with silicone, wood, fabric, glass and paper. 🌿 SAFE AND CERTIFIED: -All our resins are Certified Non-Toxic, Solvent-free, non-flammable, and totally safe. 💧 EASY TO USE: -The 100:60 mixing ratio makes this product very easy to use. Being a two-component resin, simply mix RESIN A + HARDENER B in the ratio indicated above the package and let it harden without the need for further additives. Can be coloured as desired. 📞 FREE PROFESSIONAL ASSISTANCE SERVICE: -Since we are directly a manufacturer, we have access to a professional laboratory that will happily help you with any complex project. 🇬🇧 UK BASED TRUSTED COMPANY: -RESIN-PRO team fulfils your order as fast as possible. We produce and realise epoxy resins since 2015. Just check our social media, where you will find thousands of projects made with our products around the world. 💥Suitable for: –Wood-working: Coating, Countertops and Tables, Lamps and Works of art; –Restoration or surface coating: Wood, Concrete, Ceramics, Canvas, Glass fiber, Floors; –DIY: Coasters, Penny-floors, Jewellery making, Dynamic modelling and Artistic creations; –Industrial: Boat care and maintenance; Impregnation of technical fabrics (fiberglass, carbon fiber, etc). + Heat and chemical resistance (Up to 70C); + Long working time; + Odourless; + Excellent mechanical strength; Get inspired by creative works [pinterest_carousel gallery_id="776800704417739265"]
$28,49
Resin art kit to make your own piece of ocean! Attention! If the resin (component A) is cloudy or with sediment, be sure to read this article: The set already includes everything you need to create a real marine masterpiece! Thick resin, liquid dyes in the colour of the sea, an additive for creating real waves – now you no longer need to search for goods separately to assemble a set to create your own miniature sea 🙂
$59,95
Embedding Flowers in Epoxy Resin
Embedding flowers in resin is a popular technique in the epoxy resin and silicone industry for creating bespoke decorative items. Prior to pouring the material into the mold, delicately arranging the flowers inside can result in a unique aesthetic effect. It is crucial to ensure that the flowers are thoroughly dry to prevent any moisture from being released into the resin or silicone. Additionally, positioning the flowers so that they are fully immersed in the material guarantees even distribution and secure adhesion. This method is highly valued in the DIY sector for crafting personalized artistic objects, jewelry, and ornaments.
How to Incorporate Flowers in Epoxy Resin
To incorporate flowers in epoxy resin, follow these steps
- 1. Flower Preparation: Select fresh and dry flowers, removing excess stems and leaves.
- 2. Pre-treatment: To prevent decomposition, soak the flowers in a water and glycerin mixture for a few days.
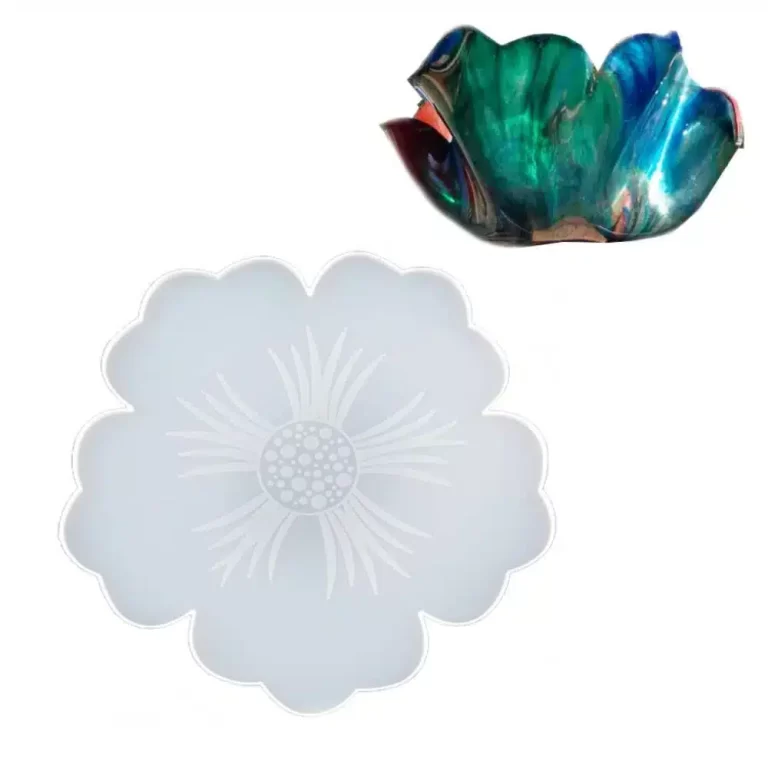
- 3. Mold and Pouring: Place the flowers at the mold's base and pour transparent or colored resin over them.
- 4. Removing Air Bubbles: Use a torch to eliminate any air bubbles in the resin.
- 5. Curing: Allow the resin to dry and cure following the manufacturer's instructions.
By following these steps, you can create stunning artifacts with flowers embedded in resin.
Tutorial: Decorating with Resin Flowers
Decorating with resin flowers is a fulfilling and imaginative activity. Here's a tutorial to help you create unique decorations:
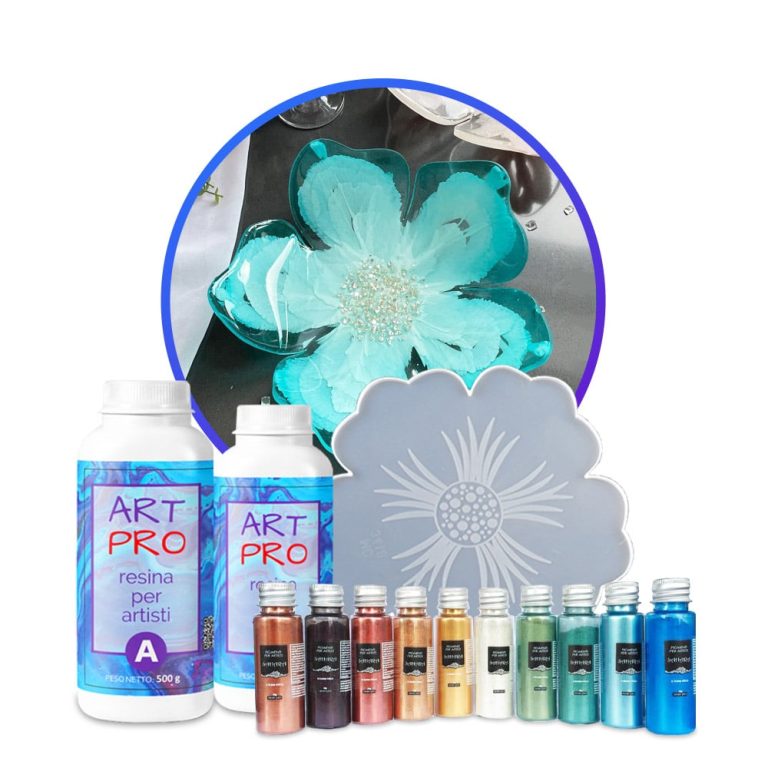
Prepare the necessary materials: transparent epoxy resin, dried or artificial flowers, silicone molds, transparent colors or pigments for coloring the resin.
Choose and place the flowers in the silicone molds, ensuring they are dry and clean to prevent air bubbles.
Prepare the resin according to the manufacturer's instructions, adding desired colorants.
Pour the resin into the molds with the flowers, taking care to avoid air bubbles. Use a toothpick to position the flowers as desired.
Allow the resin to dry for the specified time. Once completely hardened, remove the decorations from the molds.
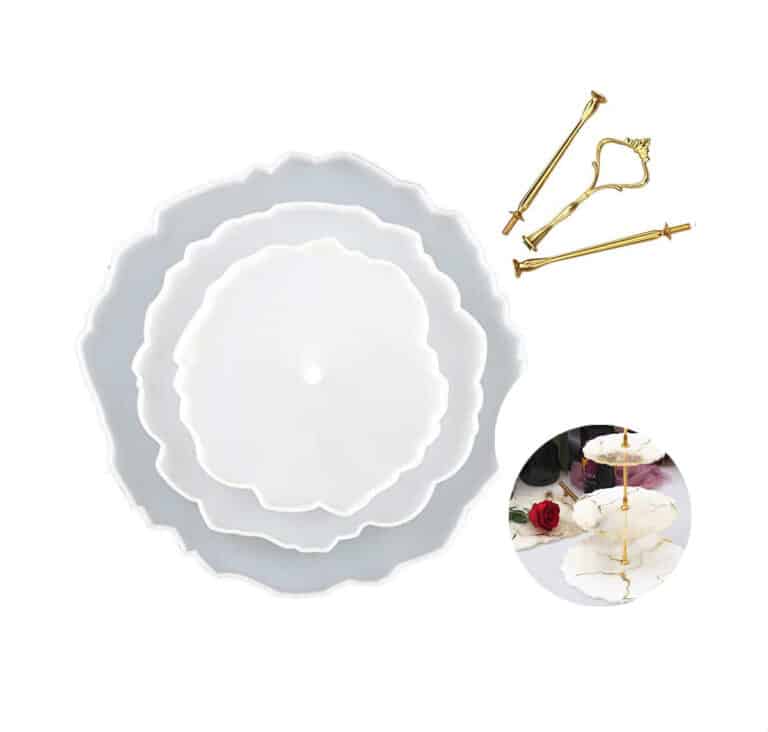
Optionally, polish the surface if needed. Use your creations to adorn frames, trays, jewelry, and more.
By following these simple steps, you can create exquisite resin flower decorations to embellish your home or craft unique and personalized gifts.
Dried Flowers in Epoxy Resin Tutorial
Using dried flowers in resin is a wonderful way to create personalized jewelry and decorations. Here's a brief tutorial on how to achieve this:
Select the dried flowers you wish to embed in the resin.
Prepare the epoxy resin following the manufacturer's instructions.
Pour a thin layer of resin into the mold's base.
Gently place the dried flowers in the resin layer.
Cover the flowers with another resin layer, ensuring they are fully immersed.
Allow the resin to dry and harden as per the recommended drying times.
Once fully cured, carefully remove the object from the mold.
By following these steps, you can create beautiful dried flowers embedded in resin for your DIY projects.
"RAPHAEL" KIT for Pour Paint & Resin Art Create your unique painting with the "RAPHAEL" kit. Experience the countless mixtures and design the perfect artwork! The "RAPHAEL" KIT includes: TRANSPARENT RESIN FOR ARTWORK AND DIY 1.66 KG [3,65 LB] NEON PIGMENTS SET RECTANGULAR FRAME CANVAS 30*30cm WOODEN SPATULA * 5pcs NITRILE GLOVES INSTRUCTION "TIPS HOW TO WORK WITH EPOXY" Transparent resin for artwork and DIY 1.66 KG [3,65 LB]. Transparent self-levelling UV-resistant epoxy system, which creates a hard and glossy protective layer for casting up to 1 cm [0,39”]. ART PRO, the epoxy resin for the artistic sector: thanks to its special formula and its dense structure, it allows you to create paintings with the "pour paint" and liquid paint technique. It does not leak out from the working surface, slowly reaching the corners of the frame. ART PRO preserves your original design and prevents any possible modification due to the casting of the resin: because of its special formula, the layers of colours do not expand and do not mix (unless you deliberately intervene), faithfully keeping with your creative idea! The surface is perfectly smooth and moisture-resistant. Solvent-free and odourless epoxy resin. Applications: - artworks, creation of art objects (paintings, panels, etc.) with the "fluid-art" (pour paint) technique (pouring up to 1 cm [0,39”]); - coating of surfaces, objects and furniture to add depth and brilliance to the colour; - create a 3D effect on prints, photos and images in general; - fixation of fillers (decorative elements, glass, stone, quartz, etc.) - creation of a perfectly transparent protective layer on your projects. The "ART-PRO" formula is specifically developed for coating in artistic applications. Compatible with colouring agents, powder pigments, alcohol-based and oil-based dyes, aerosol paints. Warning: the product is moisture sensitive, do not use on wet surfaces or with water-based dyes (e.g. Acrylics) Technical data: Usage ratio 100:66 (in weight) Pot Life (150 gr at 30°C) [0,33 lb at 86 F]: 1h20 ', Film (1 mm at 30°C) [0,03” at 86 F]: 6:00'. Full catalysis after 24 hours. Neon Pigments Set. PIGMENTS WITH COLOURED BASE are perfect for decoupage, decoration and anything related to DIY. By simply adding them to resins, paints or varnishes, you can express your creativity with truly brilliant shades (neon effect!). WARNING: pigments do not glow in the dark, as they are not fluorescent.
$69,95
Complete kit to apply the fibreglass together with the Polyester Resin, for fast, simple and long-lasting repairs! Includes all the necessary to prepare, mix and apply the product. 700 gr [1,54 lb] of orthophthalic polyester resin; 20 ml [0,70 oz] of hardener (to be applied at 3%); 1 square meter of fibreglass MAT 300 gr /m2 [0,66 lb]; 1 brush for application; 2 latex gloves; 1 instruction sheet; 1 container to mix the components; Ideal to repair fenders, car bodies, boats, pipes, water tanks, swimming pools, etc. Are you looking for a simple, fast and inexpensive product to make your repairs in a professional way? We offer you this repair kit, in which you will find everything you need for your application, and we will ship it to your home in 24 hours. This kit is designed to be used as a reinforcement and/or structural material. It consists of a sheet of high-quality glass filaments, a polyester resin (including hardener) for the impregnation of fibreglass, as well as latex gloves, a brush and an instruction sheet for its application. With this practical kit you can immediately repair car bodies, boats, pipes, tanks, swimming pools, roofs, and many others! It is also applicable on several types of materials and surfaces, such as metal, wood, rigid plastic, polyester, glass, porcelain, fibreglass, etc. USE: As described above, this kit is used as a reinforcement and structural material. It features a 1 m2 of high-quality fibreglass mat (300g/m2 [0,66 lb]) together with polyester resin. AREAS OF APPLICATION Composite materials such as skis, canoes, boats, etc. Automotive: composite materials for vehicle components. Industrial: composite for the reinforcement of plastic parts, reinforcement fabrics for structures, decorations, insulators. Sealant for swimming pools, tanks and liquid containers.
$18,49
Kintsugi Repair Kit - Repair and Transform Your Ceramics with Elegance Celebrate imperfection with the ancient Japanese art Discover the traditional Japanese art of Kintsugi with our complete repair kit. Transform your broken ceramics into unique and fascinating works of art, highlighting imperfections with elegant gold, silver, or copper veins. Our kit is perfect for both beginners and experts, offering detailed instructions and everything you need to give new life and value to your most cherished items. 🌟 Specific epoxy resin (150g): slow catalysis to eliminate any bubbles or imperfections, allowing you to complete the work without rushing. 🎨 Dye of your choice (gold, copper, silver): customize your repair with a touch of elegance and refinement. ✨ Respect the tradition: follow the ancient art of Kintsugi and transform your ceramics into unique and precious treasures. The kit contains: 150g of resin for 3D decorations, 2 pairs of protective gloves, 2 mixing cups, and 5 spatulas for applying the resin, detailed instructions, everything you need in one kit. Give your ceramics a unique touch: repair them with style and make them even more beautiful. Buy the Kintsugi Repair Kit now and start creating your works of art today! Kintsugi Kit Instructions: Mix Resin: Measure 100A:50B by volume (or 100A:45B by weight) using a scale. Mix for 2 minutes, ensuring all surfaces are scraped. Add Colour: Mix your chosen metallic dye (gold, silver, or copper) into the resin to highlight the cracks. Prepare Surface: Ensure surfaces are clean, dry, and sanded. Apply Resin: Fill the cracks with the colored resin. Curing: Work in a temperature-controlled area, avoiding humidity. Safety: Wear protective gear.
$22,95
💥 About Сomplete Kit "RIVER-TABLE" - For Creating Your First Table: Resin Kit for Tables and Crafts - the perfect starter pack for resin enthusiasts of all levels. This comprehensive kit includes everything you need to create stunning resin tables, crafts, and more. With easy-to-follow instructions and high-quality materials, even beginners can achieve professional results. You will find everything you need to create the container, the resin and the final polish. Detailed instructions on how to create the formwork, and the tricks to cast the resin in few simple steps are also included. Dive into the world of resin artistry with our Beginner Resin Kit and unlock your creativity today! Resin Pro offers to chose between two epoxy types - -"Transparent" casting resin up to 2cm or -Deep pour "Epoxytable-5" up to 5cm. 💥What`s included: "BEGINNER" KIT - Have you always dreamed of owning a stunning, contemporary table crafted from wood and resin? Now, you can bring that dream to life without breaking the bank! Our BEGINNER kit offers an affordable solution, enabling you to effortlessly and swiftly create your very own wooden and resin table. • 9kg of deep pouring resin up to 5cm OR 8kg of casting resin up to 2cm. • Glossy "Shiny Shield" release film (32cm*2m) • 500gr Non-toxic silicone paste to seal your frame • Polishing KIT (polishing pads 6pcs + professional polishing paste 250ml) • 50ml colourants • Detailed instructions on how to create the formwork step by step and pour the resin. The kit is sufficient to create a table with an area of 0.5 m2 (e.g. 45 cm x 80 cm, thickness 2 cm) - These quantities are calculated by simulating a "classic" 2/3 wood and 1/3 resin table. For any queries or if you may need some advice, please contact the ResinPro technical team. "PRO" KIT - Ready to unleash your creativity with a sleek wood and resin table? Look no further! Our PRO kit offers everything you need to effortlessly and swiftly bring your vision to life. • 18kg of deep pouring resin up to 5cm OR 16kg of casting resin up to 2cm. • Glossy "Shiny Shield" release film (32cm*3m) • 500gr Non-toxic silicone paste to seal your frame • Polishing KIT (polishing pads 6pcs + professional polishing paste 250ml) • 100ml colourants • Detailed instructions on how to create the formwork step by step and pour the resin. The kit is sufficient to create a table with an area of 1 m2 (e.g. 70 cm x 100 cm, thickness 2 cm) - These quantities are calculated by simulating a "classic" 2/3 wood and 1/3 resin table. For any queries or if you may need some advice, please contact the ResinPro technical team. "MAESTRO" KIT - Are you a DIY enthusiast eager to craft a stunning, contemporary wood and resin table? This exclusive offer is tailored just for you! With the MAESTRO kit, you can effortlessly and promptly bring your wooden and resin table masterpiece to fruition. • 30kg of deep pouring resin up to 5cm OR 32kg of casting resin up to 2cm. • 500gr Non-toxic silicone paste to seal your frame • Polishing KIT (polishing pads 6pcs + professional polishing paste 250ml) • 150ml colourants • Detailed instructions on how to create the formwork step by step and pour the resin. The kit is sufficient to create a table with an area of 2 m2 (e.g. 90 cm x 150 cm, thickness 2 cm) - These quantities are calculated on a "classic" 2/3 wood and 1/3 resin table. For any queries or if you may need some advice, please contact the ResinPro technical team! If you have not enough experience, we insistly suggest to make a small test before working with large project. WARNINGS: During processing, use protective masks, gloves, and other protective clothing. In case of contact with eyes, immediately rinse with cold water for 15 minutes and immediately consult a doctor. Get inspired by creative works [pinterest_carousel gallery_id="776800704417739261"]
$270,49