Lacquer marker “Edding ” Multifunctional lacquer marker in 4 colors The legendary Japanese marker for decorating resin works in the style of Resin Art and Fluid Art, as well as for covering the ends of cup holders, geodes and other creations 🙂 It is convenient and multifunctional to use! The following colors are available to choose from: White Black Silver Gold Specifications: Lacquer marker “Edding 750” Ink base: nitrocolor Letter line thickness, mm: 2-4 Tip shape: round Body Material: Aluminum Country of manufacture: Japan Lacquer marker “Edding 751” Ink base: nitrocolor Letter line thickness, mm: 1-2 Tip shape: round Body Material: Aluminum Country of manufacture: Japan.
$9,95
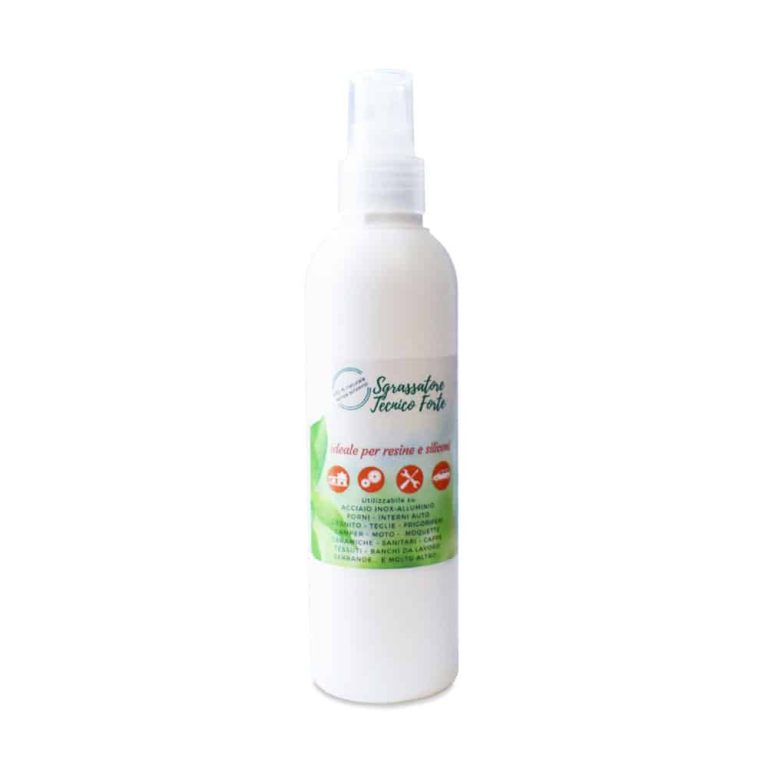
Strong technical degreaser Ideal for Resins and Silicones - it is a liquid degreaser, non-aggressive on the skin: it is dermatologically tested and hypoallergenic. Made only with solvent-free plant extracts. Its formula contains valuable plant extracts! 100% natural – solvent-free! Ingredients: Plant extracts - valerian, aloe vera, mint, rosemary, sage, lavender, calendula, linden, thyme, witch hazel. Extremely delicate. Suitable for use on: STAINLESS STEEL – ALUMINUM OVENS - CAR INTERIORS GRANITE - PANS – REFRIGERATORS CAMPERS - MOTORBIKES – CARPETS CERAMICS - SANITARY WARE – HOODS FABRICS - WORK BENCHES – SHUTTERS AND MUCH MORE ... Solvent-free and alcohol-free, made with raw materials of plant origin. Removes greases, oils, markers, encrustations, adhesive residues, silicone, wax, tar, permanent inks, paints, enamels, resins, pitch, gas oil.
$7,95
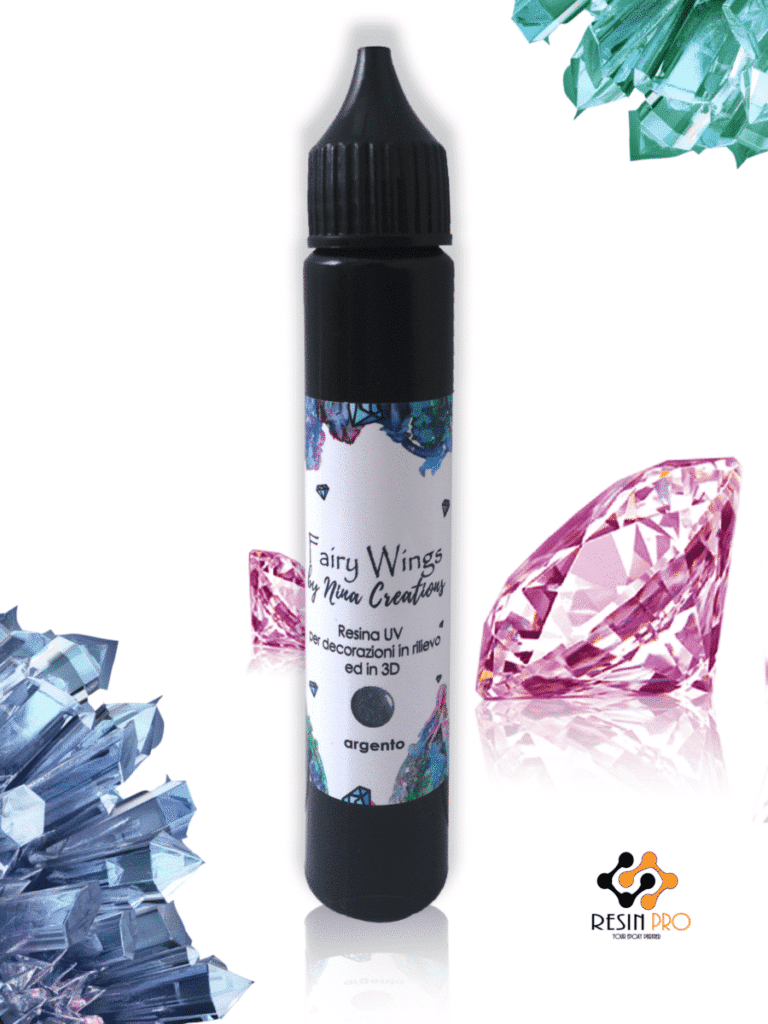
💥About UV resin "FAIRY WINGS" - UV Resin For Volumetric Reliefs. UV resin “Fairy Wings" is an acrylic gel that dries under the influence of the rays of a UV torch or UV lamp. This resin can be used to make three–dimensional reliefs, as well as decorative elements for products made of other materials, such as polymer clay. The difference between this resin and epoxy resin is in its one–component nature (it does not require mixing two different components, it is already ready for use), in a small filling thickness (applied in thin layers 3 mm thick) and in a high curing rate (only 3-5 minutes under UV rays). The curing time depends on the thickness of the layer or the amount of dye added to the gel. You can use lamps with a power of 3w, 9w and 36w. The main thing is that the wavelength of the lamp should be 365nm -405nm. 💥Instructions for use: 1) Clean the film on which you want to create a pattern with acetone/alcohol so that after the resin hardens, it can be easily peeled off (use a regular file /cover or our Shiny Shield film). 2) For convenience, you can outline the outline of the future drawing with a marker. Apply the gel evenly. 4) Keep the UV lamp turned on at a distance of 1-2 cm from the product for 2-5 minutes, directing the light at the product. If you want to make the contour thickness more than 3 mm, then work in layers, “drying” each layer with UV rays before applying a new one. It is recommended to work with the material in personal protective equipment: gloves, a respirator mask and protective glasses. Store the product with the cap tightly closed in a dark and dry place out of the reach of children. Work with the material by children under 18 years of age is allowed only in the presence of parents or other responsible persons and only when the child uses personal protective equipment for the skin, respiratory organs and eyes.
$16,95

The structure of the lessons that you will get access to: Preparation of the workspace and mixing of resin. We will show you how to quickly level the work surface, what temperature and what other conditions are needed for a good solidification of the resin. Let’s prepare the moulds for pouring. We will show you how to mix the resin, give you ready-made calculations of proportions and teach you how to use the automatic proportion calculator in a couple of clicks. Working with glitters: Let’s explain how to add our glitter and sparkles to the filling so that they do not float to the surface and how to ensure we don’t over-pour or use too little resin. Let’s show you three different ways to add glitters. Dropping ink into the resin: This is where the magic happens, because the process of dropping ink into the resin is simply mesmerising! The inks can be seen spinning in the resin! We prepare the ink, and drop it into the resin at the right time and in a way and sequence that creates the most beautiful and unique results – we will show everything! In the course, we shared 6 wonderful colour schemes for ink combinations from the PIÑATA line. After the course you will feel confident about which colours are better for which combination, and which colours can be diversified if desired. Finishing touches! We take the work out of the mould at the right time, and check the backdrop for sharp corners. If there are any found, we “smooth” them with a nail file as shown in the video. Also, here we will show you how to use a marker for creating gold or silver edges. The finishing layer: How to apply the finish correctly for the best effect. How to calculate the amount of resin for the finish of a decoration and how to overcome smudges, if they suddenly flow onto the back of the product. Bows: We will teach you how to tie a festive bow on a decoration so that it looks even more attractive and aesthetically pleasing, as well as beautifully hung on a festive tree. Bonus additional technique of filling “Silk” – how to do it and what will be needed for this? Bonus additional technique of filling “Flame ” – how to do it and what will be needed for this? Bonus additional technique for filling the “Cloud” – How is it done and what is needed for this? Bonus additional technique of filling with shiny ink-three options for working with them
$28,49
**Permanent Markers for Personalized Resin Creations**
Permanent markers for personalized resin creations are the perfect choice for adding unique and enduring messages to your resin projects. These markers are specially designed to bond securely to the resin surface, ensuring a stable and long-lasting finish. Before using the marker, ensure that the resin surface is clean and free of any dust or grease. Once you have written your dedication, allow the marker to dry completely for optimal adhesion. This method is highly valued in the DIY community for customizing jewelry, home decor items, and other resin pieces.
**Epoxy Resin: A Versatile and Durable Solution**
Epoxy resin, a thermosetting material widely used for creating smooth and resilient surfaces, is a popular choice in the construction, building, and DIY industries. Composed of epoxy resins and hardeners, this material is commonly utilized to apply protective coatings on floors, furniture, art pieces, and more. Epoxy resin offers a scratch-resistant, chemical-resistant, and weather-resistant finish, making it suitable for both indoor and outdoor applications. Its versatility and durability make it an ideal option for coating and embellishing projects.
**Clear Epoxy Resin for Stunning Jewelry Designs**
Clear epoxy resin is a versatile and robust material perfect for crafting DIY jewelry. Once cured, this resin provides a beautiful glossy and transparent finish to your creations. To design unique and personalized jewelry, simply pour the resin into molds and add decorative elements like dried flowers, pigments, or glitter. It is crucial to carefully adhere to the mixing and application instructions to achieve optimal results. With clear epoxy resin, you can unleash your creativity by making necklaces, earrings, bracelets, and more, adding a touch of uniqueness to your fashion accessories.
**How to Add Color to Epoxy Resin**
To add color to epoxy resin, follow these steps:
Utilize specific dyes formulated for epoxy resin, available in powder or liquid forms.
Incorporate the dye into the transparent epoxy resin following the recommended proportions to maintain the resin's properties.
Thoroughly blend the dye into the resin until a uniform color is achieved.
Verify the color by gradually adding more dye if needed but avoid exceeding the recommended amount to prevent compromising the resin's catalyzation.
Pour the colored resin into the molds and allow it to cure following the manufacturer's instructions.
**Crafting Handmade Objects with Epoxy Resin**
Epoxy resin is a versatile and durable material perfect for crafting handmade objects of various kinds. This resin, comprising two liquid components that solidify through a chemical reaction, is ideal for creating jewelry, decorations, furniture pieces, and more. Thanks to its transparency and long-lasting characteristics, epoxy resin enables high-quality outcomes. It can be tinted with specific pigments or have objects embedded within to produce unique effects. With the right tools and techniques, one can explore and shape their creativity in the crafting realm.
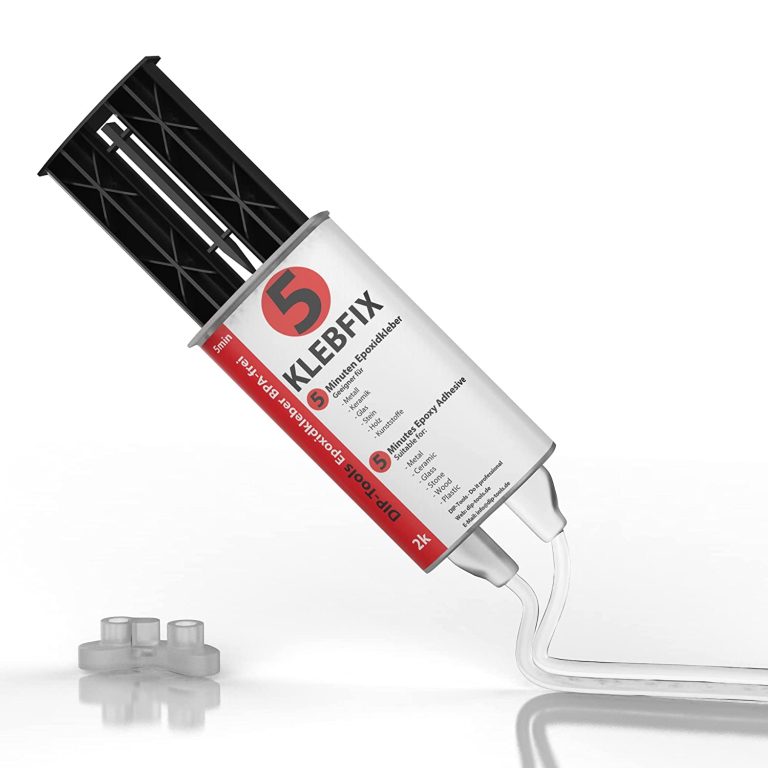
Advantages of Two-component Epoxy Resin Adhesive Extreme strength and resistance to thermal and mechanical influences Resistant to most aggressive substances and oils Available solvent free and BPA free It hardens even under water Compatible with a wide range of additives such as dyes and accelerators Expedited Potlife Application – BestPractice At room temperature (15-30 C The mixing ratio of the two components of 1: 1 is maintained automatically. Do not apply below 5 C outdoor temperature. The higher the ambient temperature, the more effectively the material polymerizes. This means that resistance increases at higher temperatures. It is recommended to have a cloth ready for cleaning. In addition, care must be taken that the work surface is protected and can be cleaned directly if necessary. The surface should be slightly roughened, because only then is the epoxy adhesive guaranteed to bond well with the material. To do this, you can sand or file the surface. To spread the sticker, a piece of cardboard or plastic is useful. After use, clean the tube so that the lid does not stick, and then close it tightly. The thickness of the adhesive should be thin enough (0.1-0.2 mm), but if necessary it can be thicker. The parts to be glued must be clean and free of oil and grease. Apply the adhesive on one side and join and press the parts to be glued. The potlife is about 5 minutes, good endurance is achieved after about 10-12 minutes, and total endurance after about 24 hours. Pot life is limited in time and describes the maximum working time of the uncured adhesive. Once the pot life has passed, the adhesive not yet applied must not be further processed, but must be disposed of! Until the manual force is reached, the binding must be additionally fixed, for example, with the help of a vice, adhesive tape or clamp. In the case of heat-assisted polymerisation, the temperature resistance of the joined parts must be guaranteed. In addition, the heating and cooling times of the parts to be joined must be respected. This time must be added to the curing time of the adhesive. Tension can occur in the glued joint during heating and cooling. With materials such as PP, PE, PTFE or silicone, the parts need to be pretreated with our primer. The need for a primer depends on the surface tension. If this is high enough it can be tested with water droplets on the surface. If the drops adhere well to the surface, a good bond is most likely. If the drops slip away, a primer is probably needed. Mixing There are several ways to mix the two components: - Mixing by hand - Use of a static mixing nozzle - Use of a dynamic mixing nozzle Hand mixing is sufficient in most cases. For this purpose, a toothpick or similar is used and the two components are mixed until a cloudy mass is formed. Make sure that no bubbles remain. When using a static mixing nozzle, the mixing of both components takes place inside the mixing nozzle so that the mixing is ideal. The first 2g should be discarded, given they are not yet mixed 1:1. However, the mixing nozzle can only be used until the adhesive in the mixing nozzle has dried. After that, you will need a new nozzle. W With a dynamic mixing nozzle, the speed of the mixer can be controlled electronically. This allows you to control the mixing intensity very precisely. However, this is intended for special industrial applications and is not necessary for everyday use. Harden The adhesive is chemically cured. This gives the advantage that gluing the surface is also possible, where adhesives that harden with moisture take a very long time. The bond is high strength and densely flexible. Thus, permanent resistance can be guaranteed in the event of shocks and vibrations. The use of the polymerised adhesive is also possible at high temperatures (up to about 120C), for a short time (30 min) up to 200C The polymerised adhesive has good resistance to physical (e.g. sunlight) or chemical (moisture, detergents, chemicals, etc.) influences. The great advantage of two-component epoxy adhesive is the fact that it hardens even under water and is robust. In addition, it is mouldable, so it can be inserted into any recess to fit. Technical data Epoxy Resin Hardener Base (amine mixture) Viscosity High Viscosity Transparent Color Density 1.1 g / ml Gap filling capacity 3mm Temperature resistance -40 up to +120 C Pot Life 5 min Hand resistance 10-12 min Final endurance 24 hours Shore hardness 60 Tensile shear strength 10 N / mm2 Module E 620 N / mm2
$32,95
Reliability: ARTSOAP, a renowned Italian brand, it is known for its quality and dedication to safety. Our moulds are manufactured in compliance with all European safety standards, to guarantee you a safe experience. Lunga Long life: ARTSOAP soap moulds are designed to last, thanks to their robust design and high quality material. You will be able to reuse the same mould many times, without losing the precision of the shape or the quality of your soaps💫 Not just for soaps! Despite being their primary destination, ARTSOAP moulds lend themselves to a number of other creative uses. In addition to the production of soaps, you can use them to create candles, chalks and resins. Your imagination is the only limit! Regain your inner balance with the Stampo Size:4.5x5cm Important: The price on the website is presented for one mold.
$6,95
Intense and brilliant color, ideal for Transparent Epoxy Resins. Mix small quantities to get a translucent effect. The high coverage of the “Colorful Original” range allows to obtain a full and bright color. The high concentration provides an opaque color with a few drops.
Usable to color the products of the RESIN PRO range.
💥 Ideal for epoxy creations and resin tables thanks to its features:
✔️ Intense colors
✔️ Easy to mix
✔️ Intense colors
✔️ High concentration
✔️ Easy to get a translucent effect
✔️ 5 stars on Trustpilot
🌿Cruelty Free, Vegan Friendly🐹
$16,00
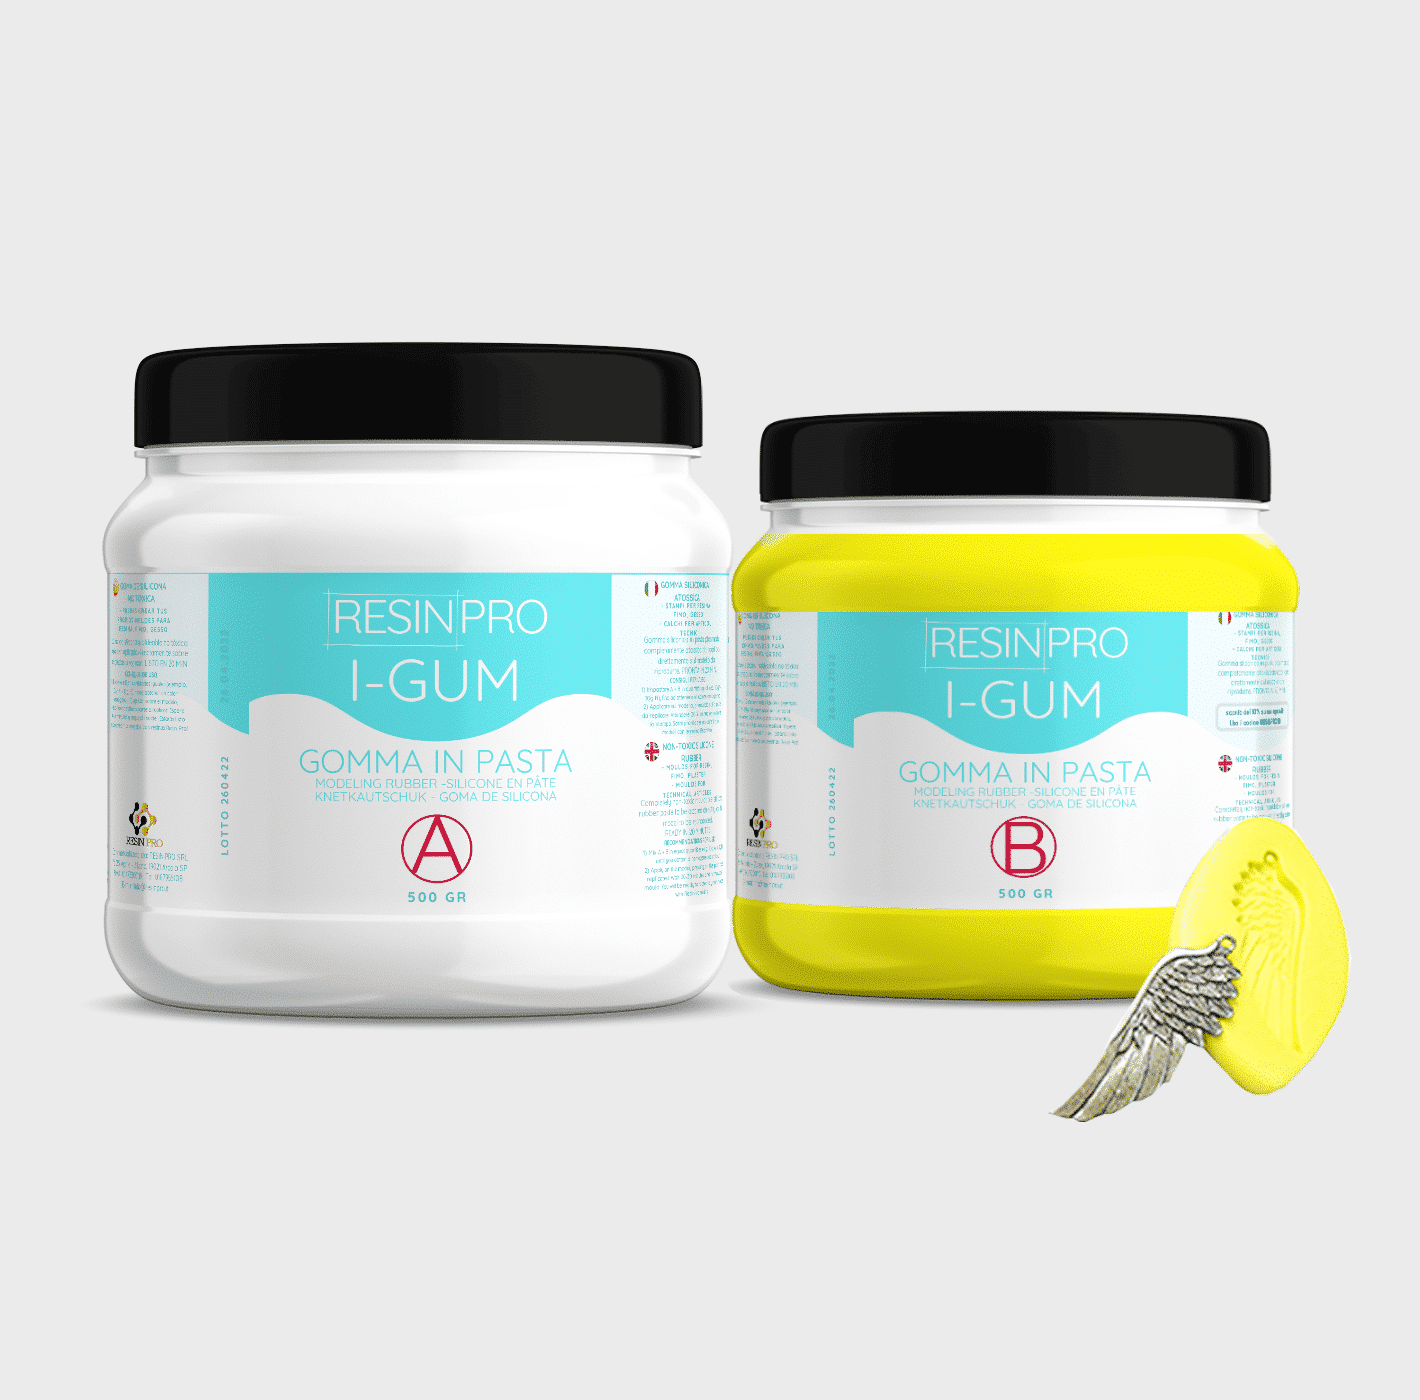
• "I-GUM" - Non-Toxic Silicone Rubber - Paste Form
Pasty silicone rubber "I-GUM" is a two–component product for creating moulds and forms for pouring with epoxy resin.
• Superior formula proven by years of experience:
✔️ Easy to use -> 1:1 mix ratio
✔️ Non-toxic -> You can work without gloves
✔️ Without smell
✔️ Long working time -> 20 minutes
✔️ European quality -> Directly from Italy
✔️ Ideal for creating moulds and frames for working with resin, polyurethanes, wax, cement and other materials
✔️ 🌿Cruelty Free, Vegan Friendly🐹
$22,00
 Free shipping on orders over €199,00