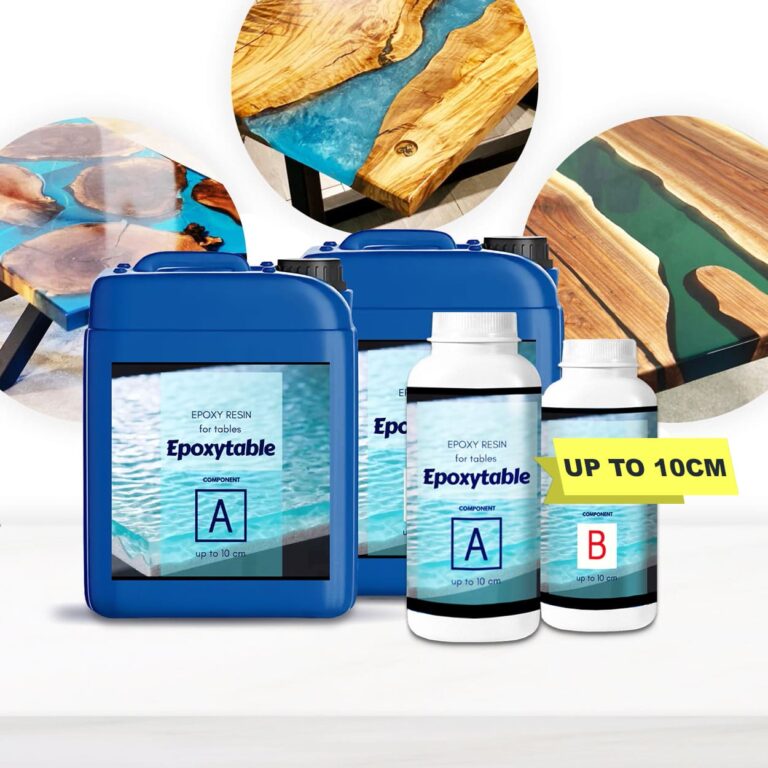
Specially designed for Deep pour applications including: –River tables: Suitable for creating thick, clear resin castings with a maximum thickness of up to 10 cm. –DIY & Artistic creations: Night lighs, flowers preserving and other projects, which requires super-deep casting up to 10cm. 💥 About "EPOXYTABLE 10-TEN" - Epoxy Resin For Large Projects - Casting up to 10cm: Introducing "EPOXYTABLE 10-TEN," the ultimate solution for your high-thickness casting needs. Crafted to perfection, this epoxy resin offers unparalleled qualities that make it ideal for tables and expansive artistic creations. "EPOXYTABLE 10-TEN" is not limited to just tables. It's designed for a wide range of large casting projects, including artistic works that demand exceptional clarity and depth. The possibilities are endless, allowing you to unleash your creativity without constraints. 💥Key features: ⚙️ 【HIGH-THICKNESS CASTING】-"EPOXYTABLE 10-TEN" is specially formulated to handle deep pour applications with ease. It allows you to create captivating castings that can reach thicknesses of up to 10 cm (4 inches). Whether you're crafting a one-of-a-kind tabletop or a large-scale artistic masterpiece, this epoxy resin is up to the task. 🧪 【NON-YELLOWING BRILLIANCE】-Say goodbye to worries about your creations turning yellow over time. "EPOXYTABLE 10-TEN" remains perfectly transparent and non-yellowing, preserving the beauty of your projects for years to come. Your creations will continue to shine with the same brilliance as when you first made them. 🌿 【SAFE AND CERTIFIED】-All our resins are Certified Non-Toxic, Solvent-free, non-flammable, and totally safe. 💧 【EASY TO USE】-The 4:1 mixing ratio makes this product very easy to use. Being a two-component resin, simply mix RESIN A + HARDENER B in the ratio indicated above the package and let it harden without the need for further additives. Can be coloured as desired. 🇬🇧 【UK BASED TRUSTED COMPANY】 - RESIN-PRO team fulfils your order as fast as possible. We produce and realise epoxy resins since 2015. Just check our social media, where you will find thousands of projects made with our products around the world. THINGS TO KNOW: If one of the sides of the project is more than 100cm or the total weight of pouring epoxy is more than 8kg we insistently recommend to do a casting in two and more layers! (waiting 6- 8 hours between them).
$46,99
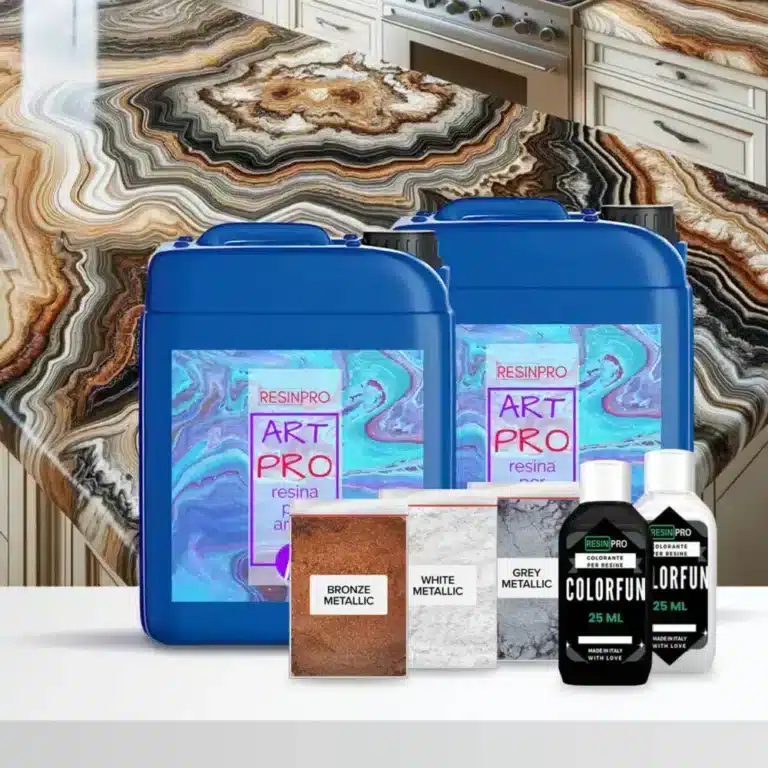
Kit Exotic white marble effect with Epoxy resin: The 2.49 kg kit (1.66 + 0.83) covers 1 square meter (+ 10 g white Sahara pigment + 10 g bronze Sahara pigment + 10 g dark gray Sahara pigment + 2*25 ml white dye + 1* 10 g colorfun black) The 4.15 kg kit (2*1.66 + 0.83) covers 2 square meters (+ 2*10 g white Sahara pigment + 2*10 g bronze Sahara pigment + 2*10 g dark gray Sahara pigment + 4 *25 ml white dye + 2* 10 g black colorfun) The 8.33 kg kit covers 4 square meters (+ 4*10 g white Sahara pigment + 4*10 g bronze Sahara pigment + 4*10 g dark gray Sahara pigment + 5*25 ml white dye + 2* 10 g colorfun black) The 16.66 kg kit covers 8 square meters (+ 6*10 g white Sahara pigment + 6*10 g bronze Sahara pigment + 6*10 g dark gray Sahara pigment + 8*25 ml white dye + 3* 10 g colorfun black) Kit Contents: 2.49 kg, 4.15 kg, 8.33 kg or 16.66 kg of Art Coat Epoxy "Art Pro" for a high quality base Black and White Dye from the "Colorfun" Line for the perfect stone shades Metallica Sahara white, bronze, gray pigment for that extra touch of sparkle Good to add: To enhance the appeal of the design: Isopropanol 99.9% To make the covering last longer: + polishield 100 GLOSS Each kit includes dyes and pigment in sufficient quantity for the amount of resin required. Guide Instructions: Step N1: Primer Start by carefully measuring the amount needed to cover the surface based on the consumption of 150 g/m2, making sure to follow the proportions indicated to obtain a homogeneous mixture. Once the base has been prepared, proceed with adding the dye, choosing between white or black depending on your needs. The quantity of colourant to add to the mixture can be measured in a few drops (max 5% by volume). This step is crucial to achieve the desired colour and ensure uniformity of the application. Before applying the primer, it is essential that the surface intended for treatment is adequately prepared. Sand the surface with a coarse grit (40 or 60) before any operation. Make sure it's completely clean, using a soft cloth or brush to remove any pigment, dirt or debris. The surface must also be completely dry; residual humidity can compromise the adhesion of the primer and its effectiveness in sealing the surface. Once the surface is ready, apply the mixture evenly, using a suitable tool such as a brush, roller or spatula, depending on the size of the area to be treated and your personal preference. The key is to get a thin, even layer that can cover the entire area without leaving gaps or excessive product buildup.. After application, it is essential to allow the primer to dry completely before proceeding with further treatments or finishes on the surface. The recommended waiting time is 12 hours; this range may vary slightly depending on environmental conditions, such as humidity and temperature, but offers a good compromise to ensure the mixture has time to dry and adhere properly. During this period, avoid touching or stressing the treated surface to ensure optimal results. Don't worry if you notice any discrepancies on the surface, the next main pour will level everything perfectly. Step N2: application Start by applying masking tape around the perimeter of your countertop to contain the epoxy you're about to pour. This step is essential to ensure the resin stays where it is needed. After applying the resin, wait about 1.5 hours before gently removing the tape. To ensure coverage is even and complete, plan to use approximately 1.6kg of resin for every square meter of surface area. When you are ready to mix the resin, use a drill equipped with a paddle mixer for quick and even action (use at low speed), taking about 2 minutes for this operation. If you prefer to mix by hand, be prepared to take double the time. Don't forget to scrape the sides and bottom of the container halfway through the process with a stick to ensure all the material is mixed well. Next, separate the already mixed resin into different glasses and add the desired colours, mixing the different colours in the different glasses until you obtain an intense and uniform colour per single glass. To create a striking visual effect, pour the coloured resin in random layers into a larger bucket, being careful not to mix the colours together too much. After filling the bucket, spread the contents over the surface of the worktop, leaving a small amount of resin aside to finish the edges later. To remove trapped air bubbles, gently run a propane torch or heat gun over the surface. Once the adhesive tapes have been removed, approximately 1.5 hours after application, if there are any dry edges, moisten them slightly by wearing a protective glove to promote an even appearance. Use appropriate tools, such as spatulas or plastic scrapers, to spread and level the resin along the edges, making sure to cover the entire area well. After letting the resin cure for 24 hours, you can apply a clear top coat or PoliShield scratch-resistant paint to further protect the surface. Finally, for even more refined visual effects, spray 99.9% isopropyl alcohol onto the surface just before the resin begins to fully harden. This will create unique lacy textures. Remember that when you remove the tape, it is essential that the resin is partially hardened, neither too liquid nor completely solid, to avoid unwanted drips. Attention! Safety Guidelines for Using Isopropyl Alcohol (99.9%) Isopropyl alcohol (IPA) is a highly flammable substance. Improper use—especially near heat sources like torches or heat guns—can result in fire or explosion. To ensure safe use, follow these precautions: Primary Risks Highly flammable: IPA vapors can ignite from sparks, open flames, or hot surfaces. Forms explosive vapor-air mixtures, especially in enclosed or poorly ventilated spaces. Strictly Prohibited: Using gas torches or heat guns near areas treated with IPA. Spraying IPA near active heat sources. Storing IPA near flames, heaters, or hot tools. Recommended Safety Measures: 1. Ventilation: Always work in a well-ventilated area when using IPA. 2. Wait Time: After applying IPA, wait at least 5–10 minutes to allow complete evaporation before using any heat tools. 3. Safe Distance: Keep IPA containers at least 2 meters (6 feet) away from heat or flame sources. 4. Storage: Store IPA in a tightly sealed container, away from direct sunlight or high temperatures. 5. Fire Safety: Have a CO₂ or dry chemical fire extinguisher nearby when working with flammable substances and open flames. In Case of Fire: Do not use water to extinguish the fire. Use an appropriate extinguisher, cut off air supply if safe, and call emergency services if needed.
$98,95

FIX EXPRESS, two-component epoxy glue that repairs and fixes in just 5 minutes guaranteeing maximum mechanical resistance on wood, glass, fabric, ceramic paper, stone, plastics, rubber and metals. Weight/volume mixing ratio: 1A + 1B Don't wait any longer! Try FIX EXPRESS and discover the perfect solution for all your fixing and repair needs. Product features: Two-component epoxy glue, ideal for any application, both indoors and outdoors, solvent-free, for assembly of heterogeneous materials and quick repairs that hardens in just 5 minutes, guaranteeing maximum mechanical resistance on wood, glass, fabric, ceramic paper, stone, plastics, rubber and metals. ⏱️ Fast drying: Its advanced formula dries in just 5 minutes. After 20 minutes, it can be sanded and polished, giving you a perfect finish in no time. 💪 Strong and Versatile: Thanks to the epoxy molecules, FIX EXPRESS offers excellent adhesion on many different surfaces, making it a practical and powerful solution for every repair need. 🎨 Customisable: Can be easily coloured with Resinpro dyes, allowing you to unleash your creativity. 👍 Easy to use: Simply mix the two components in a 1:1 ratio for 30 to 45 seconds and apply immediately. The working time is 2-3 minutes, with complete setting in 5-6 minutes (at 25°C). 💧 Anti-Drip: Designed for a clean application, without unwanted drips during use. ✅ Safe and Practical: BPA-free and transparent, FIX EXPRESS is safe for use in any context. It comes with two separate bottles for easy dosing, avoiding accidental solidification. Applications for use with epoxy resin: It repairs and fixes in just 5 minutes with FIX EXPRESS, the two-component epoxy glue that guarantees maximum mechanical resistance on a wide range of materials: wood, glass, fabric, paper, ceramics, stone, plastic, rubber and metals. 🎨 Artistic creations: Ideal for unique and detailed works, paintings, photos, neons, jewellery, coatings, labels, doming, etc… ✅ Coatings: Achieves decorative, shiny and durable protective finishes. 💍 Jewellery: Designs shiny and resistant pieces, with a flexible finish. 🏗 Modeling: Perfect for creating mouldable, flexible and durable artistic works.
$36,49

Resin Pro offers the possibility to achieve a perfect polishing by using different types of abrasive pastes. It can be used by hand or with an orbital polisher to make your resin creations shiny. Ebonite Abralon Sanding Pads Cosmetically appealing, consistent scratch pattern provides excellent traction. Combines the benefits of abrasive cloth and non-woven products. Opening in the fabric allows water to flow freely around the abrasive. Solid surface and foam backing provide even surface pressure. Last 5+ times longer than sandpaper. Use wet or dry (residual material can be removed by high pressure air). Now it's possible to get the most aggressive surface texture without that "cheese grater" look. Abralon sanding pads use silicon carbide particles that are precision sifted to a consistent grain size, then bonded evenly to a six-inch round fabric face for the most even scratch pattern available. WARNINGS: During processing, use protective masks, gloves, and other protective clothing. In case of contact with eyes, immediately rinse with cold water for 15 minutes and immediately consult a doctor. The kits may include by variations: EpoxyPolish Polishing cream – 250 ml [8,79 oz] - 1pc Ebonite Abralon Sanding Pads: - Ebonite Abralon Sanding Pad 150mm 360 grit - 1pc - Ebonite Abralon Sanding Pad 150mm 500 grit - 1pc - Ebonite Abralon Sanding Pad 150mm 1000 grit - 1pc - Ebonite Abralon Sanding Pad 150mm 2000 grit - 1pc - Ebonite Abralon Sanding Pad 150mm 3000 grit - 1pc - Ebonite Abralon Sanding Pad 150mm 4000 grit - 1pc EpoxyPolish Polishing cream How to Use: Step 1: Thoroughly clean the surface with a cloth. Step 2: Now you can polish by hand or with an orbital polisher. We recommend using the lowest possible speed to get the best result. Start Polishing with 360-500 grit. Note: Sand the entire surface evenly with circular movements and light pressure. Moisten the pad or the surface with water from time to time. Step 3: Now use the 1000 grit sandpaper. Note: Moisten the sandpaper or the surface with water from time to time. Step 4: Afterwards, use 2000 grit sandpaper. Note: Moisten the sandpaper or the surface with water from time to time. Lastly, use 4000 grit sandpaper to finish sanding. Step 5: Remove the sandpaper from the polishing disc and attach a soft sponge to it. Rinse the surface or wipe it with a damp cloth to remove any residual grain of the sanding. Step 6: Apply EpoxyPolish Polishing cream on the damp sponge. Use by hand or with an orbital polisher, using a large circular motion and exerting slight pressure. Step 7: Clean the surface with plenty of water to remove all the remaining residues. Step 8: Enjoy the result!!!
$21,49
 Free shipping on orders over €199,00
  Shipping Tracking!


 Google
 Facebook




