Dried flowers for decorating works made of epoxy resin
$7,95
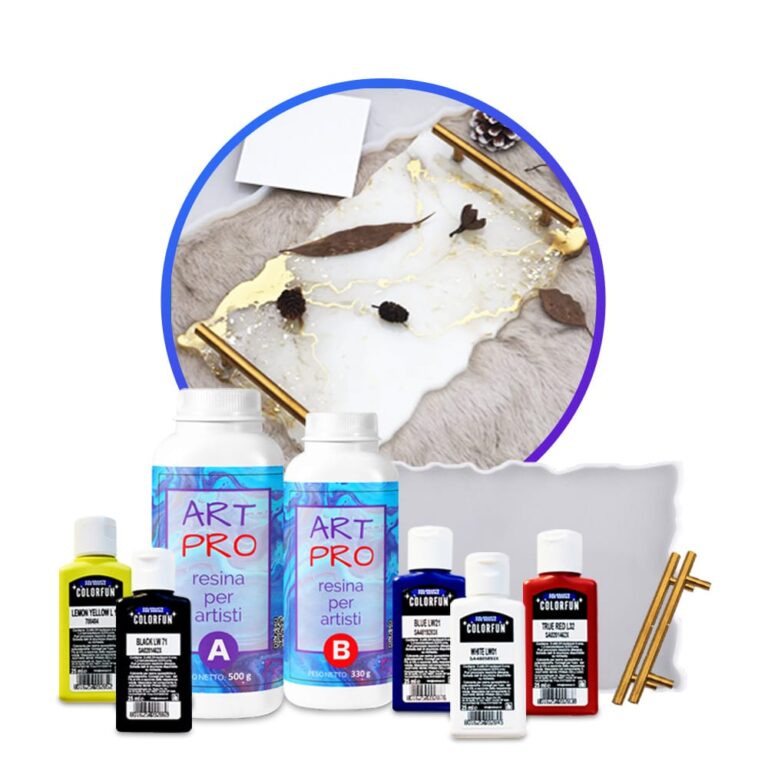
Creative Kit: Create your own resin tray! KIT INSTRUCTIONS This kit contains: 1.66 kg of epoxy resin Silicone mould "tray" + handles 5 dense dyes Spread out the plastic tarpaulin to protect the work surface. Make sure that the silicone mould is clean and all materials are at hand. Do not forget to wear disposable gloves and follow the safety instructions. Mix the epoxy resin according to the mixing ratio Art Pro 100: 66 – by weight) – 180 g A and 119 g B-for a filling thickness of 5 mm. Carefully weigh and mix both components for 3 minutes, making sure that all sides and bottom of the mixing container are included for effective mixing. Let the mixture stand for 2-3 minutes. Divide the resulting resin into separate containers for each colour you are going to use. Add resin-specific dyes to each container to get the desired shades. Mix thoroughly. Put the colours in one large container without mixing them, allowing them to stack on top of each other. Pour this mixture in layers into a mould for a dynamic abstract effect. In addition, you can pour each colour into different places of the mould according to your design concept. After 24 hours, you can remove the resin tray. After another 12-24 hours (the resin reaches full strength), you can make your tray workable by using the screws included in the kit to attach the tray handles. Drill the holes in the tray, then secure the handles with screws. Geodetic effect- To get the geode effect when casting, use the layering technique. Divide the mixed resin into separate containers for each colour you are going to use + one part with transparent resin and one white. Start by pouring clear resin into the center of the mould. Then alternate layers of white and transparent resin with coloured resin, allowing them to spread naturally. Finish by adding the last layer of transparent resin for a beautiful 3D effect. Let it harden to reveal a stunning geodesic-inspired design. Other ideas: Ocean Art Resin Tray: Capture the beauty of the ocean using different shades of blue and white resin, adding a few shells or a small starfish for an authentic nautical feel. Real Pressed Flowers: Add real dried flowers or leaves to the resin to create a natural and timeless look. Gold leaf Accents: Use a gold or metal sheet to add a touch of luxury to your tray.
$78,49
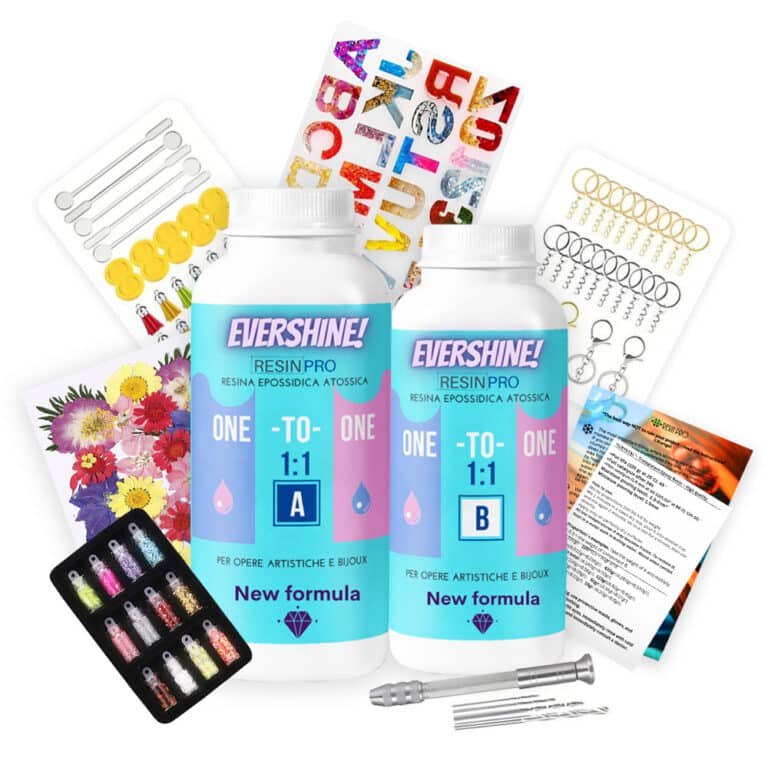
Everything you need is included in the kit: ✨ 500g of crystal-clear "One to One" epoxy resin 🌸 12 dazzling decorative pigments + a set of dried flowers 🔤 Silicone mold with letters — perfect for making personalized keychains and charms 🔧 Mini drill with attachments for precise and detailed work 🔑 Keychain bases, clasps, rings, and over 100 handy accessories ✅ All-in-one kit — no extra tools needed 🎨 Beginner-friendly — easy to use even if you're just starting out 🎁 Beautifully packaged — makes a thoughtful and creative gift Create, get inspired, and bring your ideas to life with ease and joy!
$29,95
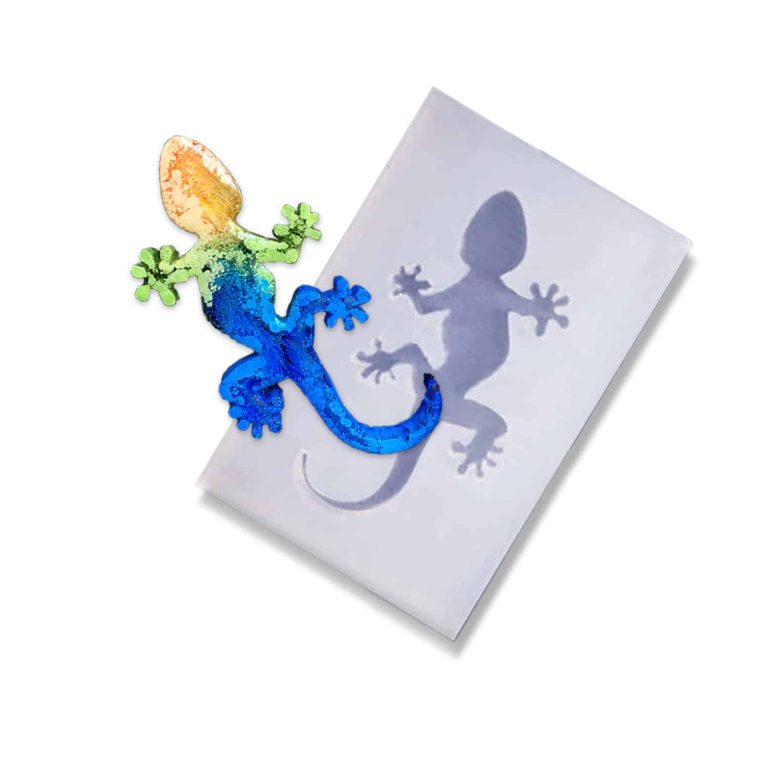
Animals & Plants silicone moulds Reusable silicone mold, perfect for casting with epoxy! You can put dried flowers, glitter and other decorative elements inside before pouring.Colored pigments will also help make your jewelry unique and unique. Create your collection! Specifications: Material: Silicone; Color: translucent; Designed for reusable use, easy to clean. Withstands temperatures from -40 ° C to + 210 ° C Caution: do not use aggressive solvents to clean the mould Attention! Remove the product from the mold no later than 12 hours after pouring the resin. Otherwise, there is a chance of local adhesion of the resin to the mold.
$9,68
Dry Flower Epoxy Resin: A Comprehensive Guide
Dry flower epoxy resin is a versatile and transparent material, perfect for preserving and safeguarding dried flowers and plants. This type of resin has gained significant popularity in the DIY and creative hobby sectors due to its flexibility and durability. It allows for the creation of stunning jewelry, decorative pieces, and personalized keepsakes. The unique formulation of dry flower resin ensures a glossy and enduring finish that accentuates the natural beauty of dried flowers. Prior to using the resin, it is crucial to meticulously adhere to the manufacturer's instructions and safety guidelines to achieve optimal and secure results.
Tutorial: Epoxy Resin and Dried Flowers
Crafting jewelry or decorations with epoxy resin and dried flowers is a captivating and imaginative process that results in one-of-a-kind pieces. Here are some essential steps to follow:
- 1. Prepare the dried flowers: Select small-sized dried flowers, remove any stems, and ensure they are completely dry to prevent the formation of air bubbles in the resin.
- 2. Pour the resin: Utilize transparent epoxy resin and hardener according to the manufacturer's instructions. Pour a thin layer of resin into a mold.
- 3. Arrange the flowers: Gently place the dried flowers in the resin, using a toothpick to push them down and prevent air bubbles.
- 4. Cure the resin: Allow the resin to dry for the specified time. Additional layers of resin and flowers can be added to create dimensional effects.
- 5. Remove from the mold: Once fully cured, carefully extract your creation from the mold.
By following these steps meticulously, you can craft exquisite custom jewelry or decorations using epoxy resin and dried flowers.
Epoxy Resin for Botanical Creations
Epoxy resin for botanical creations is a resilient and versatile material ideal for crafting jewelry, home decor items, and decorations incorporating natural elements such as flowers, leaves, and small plants. This transparent resin allows botanicals to be encapsulated, resulting in unique and enduring aesthetic effects. Proper preparation of botanical elements is crucial to prevent air bubbles and ensure a flawless final outcome. It is imperative to diligently adhere to the resin's mixing and curing instructions to achieve high-quality work.
How to Preserve Dried Flowers in Epoxy Resin
Follow these steps to preserve dried flowers in resin effectively:
Select a transparent epoxy resin suitable for your project.
Prepare the dried flowers, ensuring they are thoroughly dry to prevent mold formation.
Pour a thin layer of resin into a container.
Arrange the dried flowers harmoniously in the container.
Carefully pour more resin over the flowers, ensuring they are fully covered.
Eliminate any air bubbles using a stick.
Let the resin cure following the manufacturer's instructions.
Once dry, the resin block with flowers can be used as a decorative element or in jewelry making.
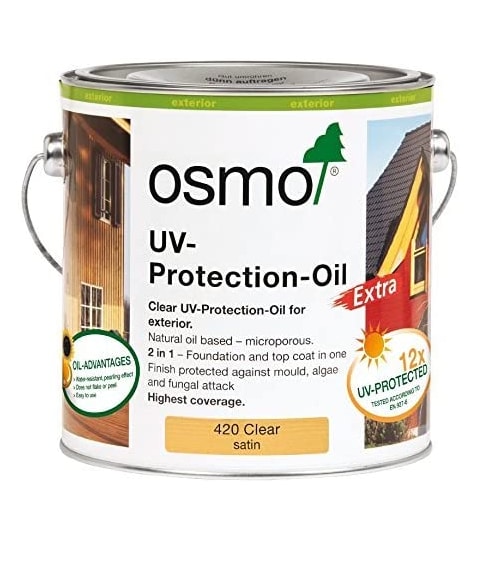
Perfectly protected against the sun – the first clear UV-protection for the outdoors! All resins / woods turn amber in colour over time, but UV-Protection-Oil has been developed to preserve epoxy's clear colour and slow down the yellowing process by (UV factor) 12 times compared to untreated epoxy. Ideal for River tables, epoxy furniture, exterior design pieces, windows, doors, claddings, fencings and other complex joinery. Natural oil-based and microporous finish, it does not crack, flake or peel. Water-resistant and dirt-resistant, it is moisture regulating and minimise the damaging. Description Natural oil-based clear satin wood finish for outdoor use. The microporous surface allows the wood to breathe and reduces swelling and shrinkage. Water-repellent, will not crack, peel or flake. As top coat on already treated coloured wood, Osmo UV-Protection-Oil Extra significantly extends the intervals between each restoration. When used as a single product, with a two-coat application it prevents greying on vertical surfaces with a 12 UV-protection factor compared to untreated wood. Osmo UV-Protection-Oil Extra features active ingredients to protect the coating against the action of mould, algae and fungi. No need to sand before application, easy and smooth. During coating, the finish is still workable. Recommended use Osmo UV-Protection-Oil Extra is perfect for all vertical wood surfaces for outdoor use: doors, windows, window shutters (dimensionally stable parts), parking places, resin coatings, balconies, fences, pergolas, and holiday cottages (dimensionally unstable parts). Also suitable for bamboo poles (e.g. in screens). Ingredients Based on natural plant oils (sunflower oil, soybean oil, thistle oil and linseed oil), desiccants and additives. Biocidal active ingredient: Propiconazole. Dearomatized turpentine (benzene-free). EU limit value for this product (cat. A/e): 400 g/l [0,02 lb/oz] VOC (2010). This product contains max. 400 g/l [0,02 lb/oz] VOC. Detailed declaration of ingredients available upon request. Storage Up to 5 years and longer if the can is stored in a dry place and hermetically sealed. If thickened by frost, store for 24-36 hours at room temperature before use. Surface preparation Wood surface must be clean, dry and frost-free (moisture content max. 20%). Osmo UV-Protection-Oil Extra is ready to use and should not be diluted. Stir well before use. If possible, please apply the first coat to all sides before installation. Particularly oily timbers need to weather off (for approximately 6 weeks) after installation. Thereby the wood will gain more absorbent power and the finish will penetrate optimally. A coloured base coat is recommended, e.g. Osmo One Coat Only, Natural Oil Woodstain or Country Colour. For renovations, clean all old microporous wood finishes thoroughly. Freshen up greyed wood with Osmo Wood Reviver Power-Gel before applying Osmo Clear Uv-Protection-Oil. Old paints and lacquers must be completely removed. As a general rule, wear a dust mask during sanding. Do not sand smooth surfaces thinner than P120. The final result may be influenced by several factors, including the natural features of the wood. Therefore, a trial application is always recommended, especially for unfamiliar timbers. If you wish to have additional protection against blue stains, decaying and insects, you should pre-treat the wood on all sides with Osmo WR Base Coat. Technical data Specific weight: 0.9-1.0 g/cm³ [0,03 lb/in³] Viscosity: >50s DIN EN ISO 2431/3 mm, viscous Odour: faint/mild, odourless after drying Flash point: >60 °C [140 F] acc. DIN EN ISO 2719 Documentation ⏩ TDS ⏩ SDS
$39,95
New Year silicone moulds for creating a Christmas tree decoration. After being removed from the mould, the products have a smooth and glossy surface. Before pouring, you can put dried flowers, glitter and other decorative elements in the mould. Colour pigments will also help to give your decoration uniqueness. Create your own collection of Christmas tree decorations! Specifications: Material: Silicone Colour: Turquoise Designed for reusable use, easy to clean. Withstands temperatures from -40 °C to + 210 ° C Attention! Remove the product from the mould no later than 12 hours after pouring the resin. Otherwise, there is a chance of adhesion of the resin to the mould.Do not use aggressive solvents to clean the mould
$18,49
Intense and brilliant color, ideal for Transparent Epoxy Resins. Mix small quantities to get a translucent effect. The high coverage of the “Colorful Original” range allows to obtain a full and bright color. The high concentration provides an opaque color with a few drops.
Usable to color the products of the RESIN PRO range.
💥 Ideal for epoxy creations and resin tables thanks to its features:
✔️ Intense colors
✔️ Easy to mix
✔️ Intense colors
✔️ High concentration
✔️ Easy to get a translucent effect
✔️ 5 stars on Trustpilot
🌿Cruelty Free, Vegan Friendly🐹
$16,00
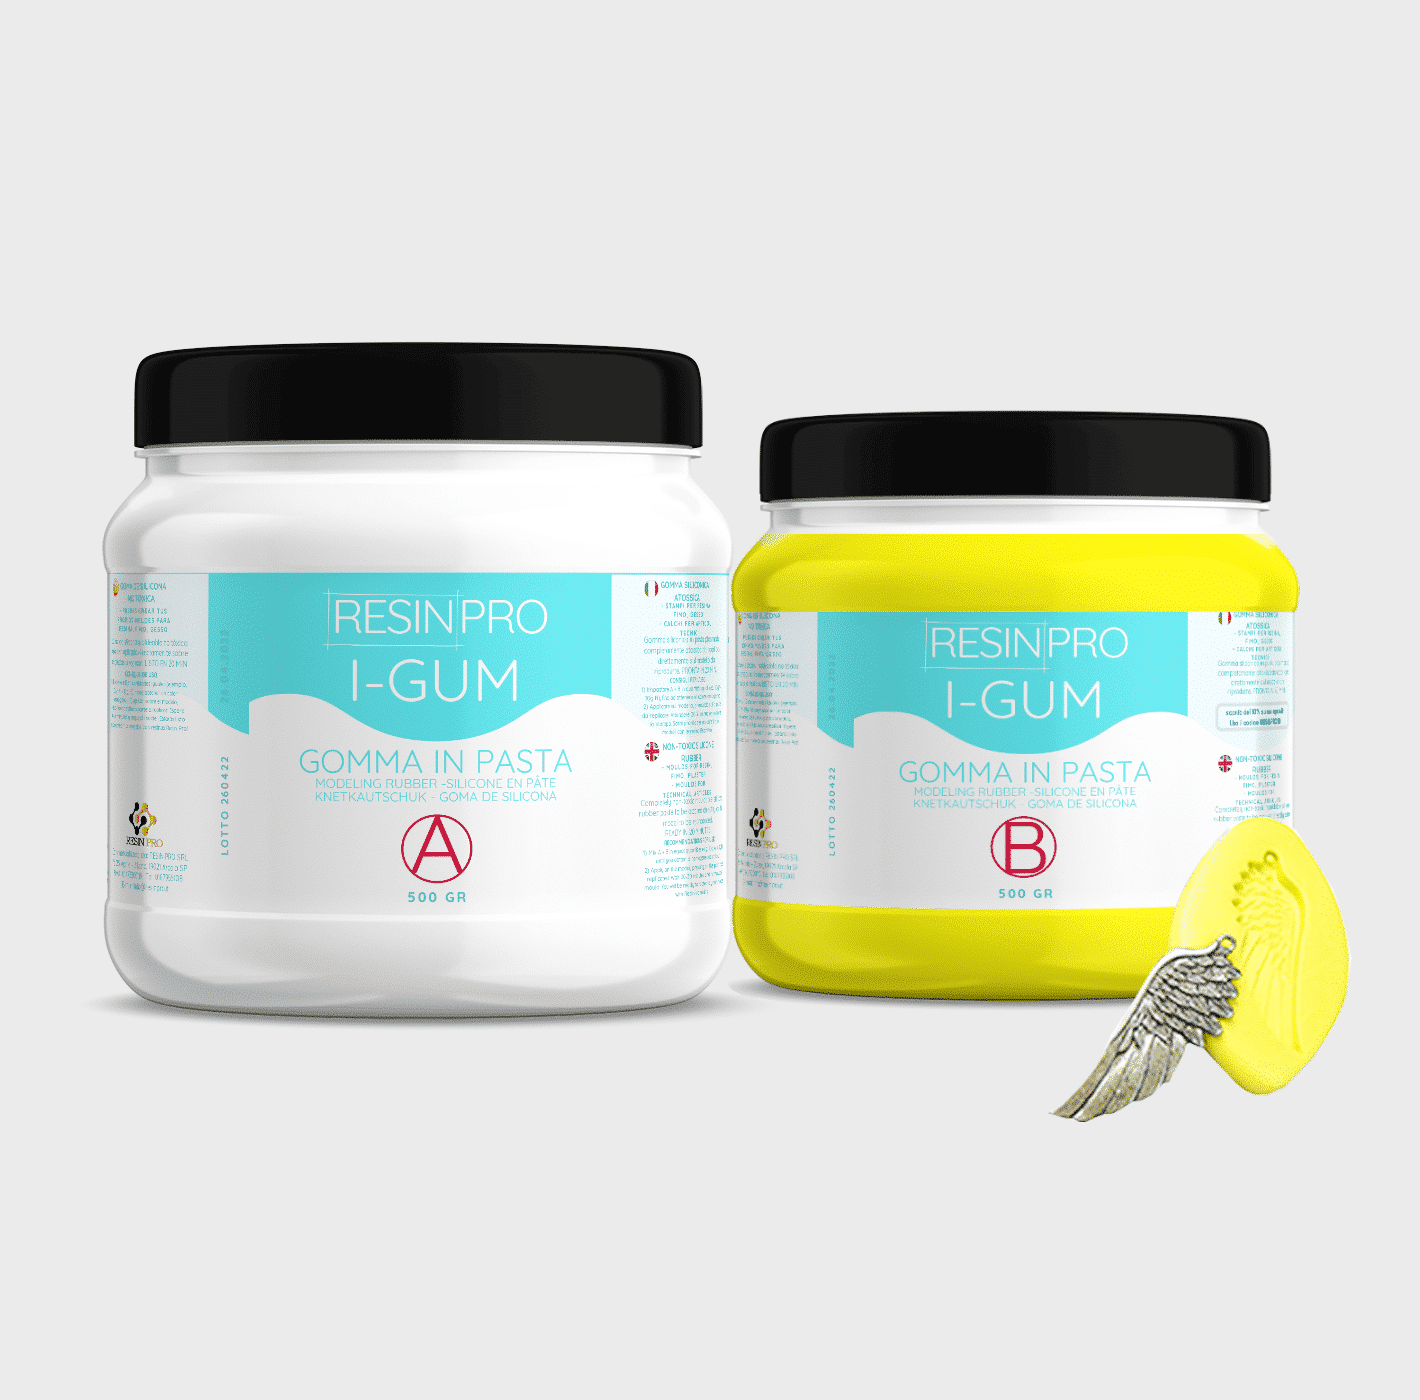
• "I-GUM" - Non-Toxic Silicone Rubber - Paste Form
Pasty silicone rubber "I-GUM" is a two–component product for creating moulds and forms for pouring with epoxy resin.
• Superior formula proven by years of experience:
✔️ Easy to use -> 1:1 mix ratio
✔️ Non-toxic -> You can work without gloves
✔️ Without smell
✔️ Long working time -> 20 minutes
✔️ European quality -> Directly from Italy
✔️ Ideal for creating moulds and frames for working with resin, polyurethanes, wax, cement and other materials
✔️ 🌿Cruelty Free, Vegan Friendly🐹
$22,00
 Free shipping on orders over €199,00
  Shipping Tracking!


 Google
 Facebook