Complete kit to apply the fibreglass together with the Polyester Resin, for fast, simple and long-lasting repairs! Includes all the necessary to prepare, mix and apply the product. 700 gr [1,54 lb] of orthophthalic polyester resin; 20 ml [0,70 oz] of hardener (to be applied at 3%); 1 square meter of fibreglass MAT 300 gr /m2 [0,66 lb]; 1 brush for application; 2 latex gloves; 1 instruction sheet; 1 container to mix the components; Ideal to repair fenders, car bodies, boats, pipes, water tanks, swimming pools, etc. Are you looking for a simple, fast and inexpensive product to make your repairs in a professional way? We offer you this repair kit, in which you will find everything you need for your application, and we will ship it to your home in 24 hours. This kit is designed to be used as a reinforcement and/or structural material. It consists of a sheet of high-quality glass filaments, a polyester resin (including hardener) for the impregnation of fibreglass, as well as latex gloves, a brush and an instruction sheet for its application. With this practical kit you can immediately repair car bodies, boats, pipes, tanks, swimming pools, roofs, and many others! It is also applicable on several types of materials and surfaces, such as metal, wood, rigid plastic, polyester, glass, porcelain, fibreglass, etc. USE: As described above, this kit is used as a reinforcement and structural material. It features a 1 m2 of high-quality fibreglass mat (300g/m2 [0,66 lb]) together with polyester resin. AREAS OF APPLICATION Composite materials such as skis, canoes, boats, etc. Automotive: composite materials for vehicle components. Industrial: composite for the reinforcement of plastic parts, reinforcement fabrics for structures, decorations, insulators. Sealant for swimming pools, tanks and liquid containers.
$18,49
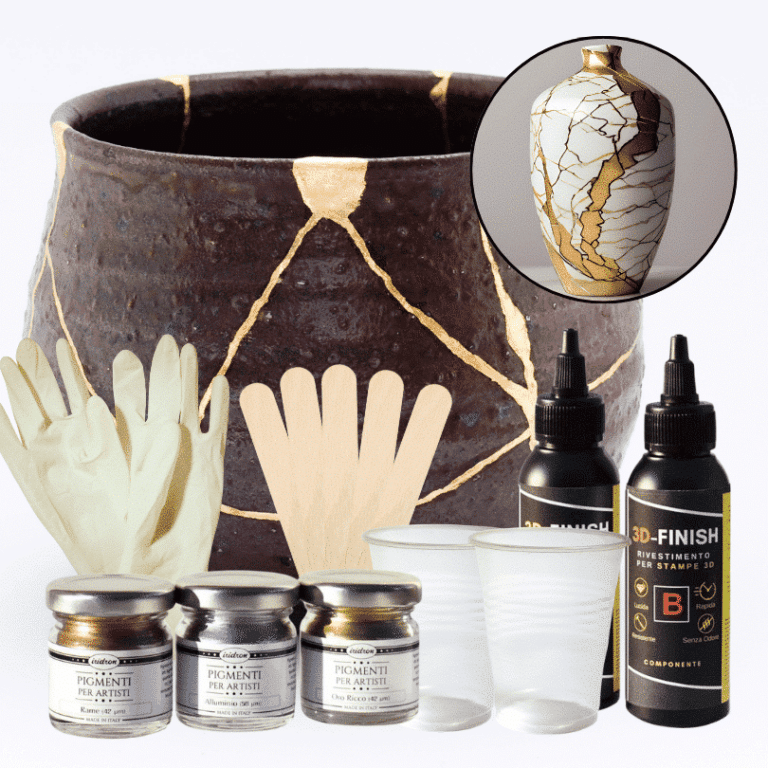
Kintsugi Repair Kit - Repair and Transform Your Ceramics with Elegance Celebrate imperfection with the ancient Japanese art Discover the traditional Japanese art of Kintsugi with our complete repair kit. Transform your broken ceramics into unique and fascinating works of art, highlighting imperfections with elegant gold, silver, or copper veins. Our kit is perfect for both beginners and experts, offering detailed instructions and everything you need to give new life and value to your most cherished items. 🌟 Specific epoxy resin (150g): slow catalysis to eliminate any bubbles or imperfections, allowing you to complete the work without rushing. 🎨 Dye of your choice (gold, copper, silver): customize your repair with a touch of elegance and refinement. ✨ Respect the tradition: follow the ancient art of Kintsugi and transform your ceramics into unique and precious treasures. The kit contains: 150g of resin for 3D decorations, 2 pairs of protective gloves, 2 mixing cups, and 5 spatulas for applying the resin, detailed instructions, everything you need in one kit. Give your ceramics a unique touch: repair them with style and make them even more beautiful. Buy the Kintsugi Repair Kit now and start creating your works of art today! Kintsugi Kit Instructions: Mix Resin: Measure 100A:50B by volume (or 100A:45B by weight) using a scale. Mix for 2 minutes, ensuring all surfaces are scraped. Add Colour: Mix your chosen metallic dye (gold, silver, or copper) into the resin to highlight the cracks. Prepare Surface: Ensure surfaces are clean, dry, and sanded. Apply Resin: Fill the cracks with the colored resin. Curing: Work in a temperature-controlled area, avoiding humidity. Safety: Wear protective gear.
$22,95
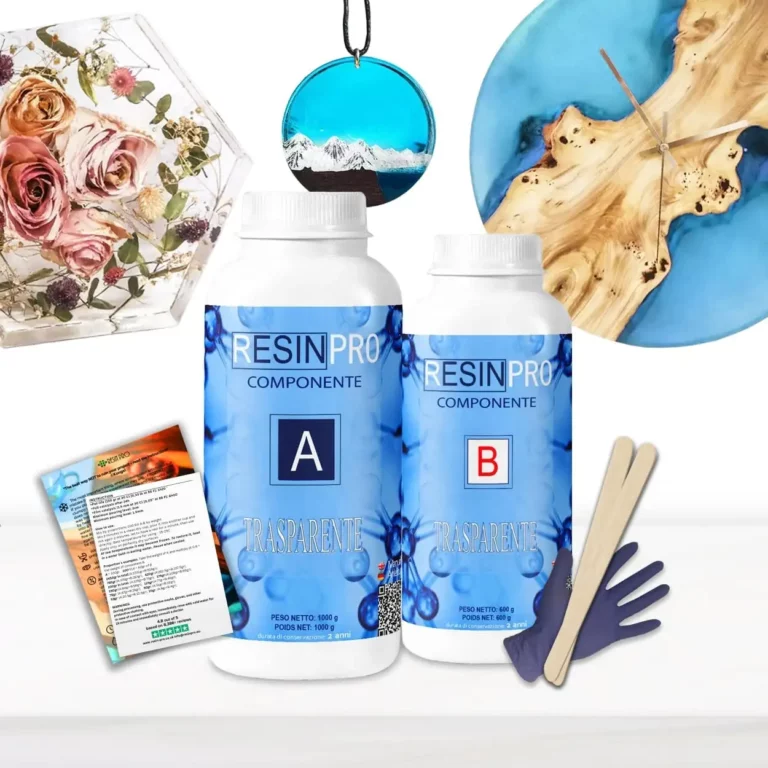
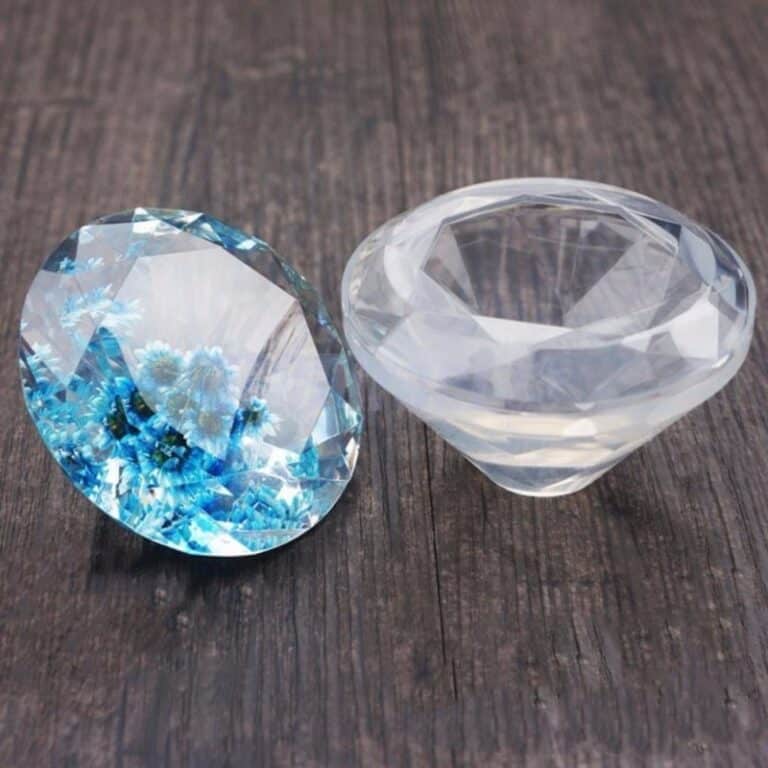
💥 Bestseller for: –Wood-working: Coating, Countertops and Tables, Lamps and Works of art; –Restoration and surface coating: Wood, Concrete, Ceramics, Canvas, Glass fiber, Floors; –DIY: Coasters, Penny-floors, Jewellery making, Dynamic modeling and Artistic creations; –Industrial: Boat care and maintenance; Impregnation of technical fabrics (fiberglass, carbon fiber, etc). 💥About “TRANSPARENT” – Ultra Clear Multipurpose Epoxy Resin: Our Non-Toxic Transparent Epoxy Resin is a high-quality, multipurpose resin that has become a top choice for thousands of customers around the world. It is perfect for creating stunning art pieces, tables jewelry, countertops, DIY projects, and woodworking. This resin is formulated to be safe and non-toxic, making it a great option for artists who are conscious of their environmental impact. It is odorless and VOC-free, making it safe to use indoors. While our Non-Toxic Transparent Epoxy Resin is safe to use, we do advise taking proper safety precautions when working with any type of resin. We recommend using gloves and masks or working in a well-ventilated area to avoid any potential irritation or allergic reactions. Non-Toxic Transparent Epoxy Resin is self-leveling and has a high-gloss finish. It is easy to use and can be mixed with a variety of pigments to create a wide range of colors. One of the best features of our Non-Toxic Transparent Epoxy Resin is its ability to create a super solid and shiny surface after full curing time. It can be used on a variety of surfaces, including wood, stone, ceramics, and more. It is perfect for creating unique and stunning pieces that are sure to impress. We offer free shipping on this product, so you can get started on your project right away. Plus, with its long shelf life, you can store it for future projects. Choose our Non-Toxic Transparent Epoxy Resin for a safe, high-quality, multipurpose option for all your creative needs. 💥Key features: • ⚙️ 【ULTRA TRANSPARENT EPOXY RESIN】-The crystal clear epoxy resin is suitable for both beginners and professionals. Start making jewelry, tables, and any other DIY – creation that involves the use of resin. • 🧪 【PROFESSIONAL QUALITY】-Made from high-quality materials – Excellent transparency, No bubbles, Odourless – because of a unique formula for DIY, craft and artistic creations. Ideal for casting and embedding objects too. Compatible with silicone, wood, fabric, glass and paper. • 🌿 【SAFE AND CERTIFIED】-All our resins are Certified Non-Toxic, Solvent-free, non-flammable, and totally safe. • 💧 【EASY TO USE】-The 100:60 mixing ratio makes this product very easy to use. Being a two-component resin, simply mix RESIN A + HARDENER B in the ratio indicated above the package and let it harden without the need for further additives. Can be colored as desired. • 📞 【FREE PROFESSIONAL ASSISTANCE SERVICE】-Since we are directly a manufacturer, we have access to a professional laboratory that will happily help you with any complex project 💥Suitable for: –Wood-working: Coating, Countertops and Tables, Lamps and Works of art; –Restoration or surface coating: Wood, Concrete, Ceramics, Canvas, Glass fiber, Floors; –DIY: Coasters, Penny-floors, Jewellery making, Dynamic modeling and Artistic creations; –Industrial: Boat care and maintenance; Impregnation of technical fabrics (fiberglass, carbon fiber, etc). + Heat and chemical resistance (Up to 70C); + Long working time; + Odourless; + Excellent mechanical strength;
$10,67

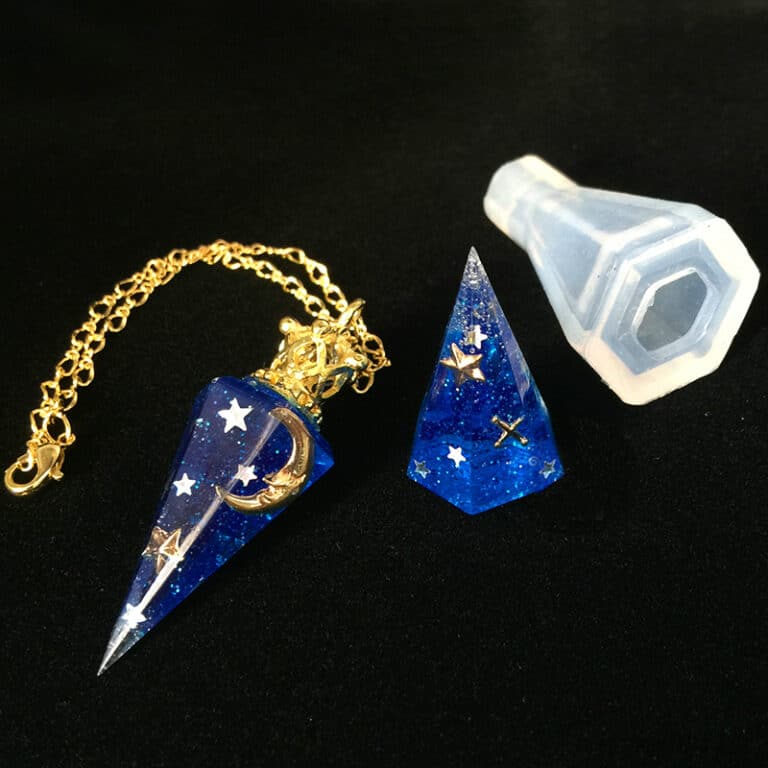
💥About "UV-CREATION" - Fast Acrylic Resin - 3 Minutes: Introducing our UV Resin, a versatile and high-quality solution for all your hand crafting needs. UV resin is an acrylic gel that dries under the influence of the rays of a UV torch or UV lamp in a short time - 3-5 minutes. The difference between this resin and epoxy resin is in its one–component nature (it does not require mixing two different components; it is ready for use), in a small filling thickness (applied in thin layers 3 mm thick) and in a high curing rate (only 3-5 minutes under UV rays). 💥 Bestseller for: Artistic Creations: Ideal for creating stunning resin art pieces, jewellery, and decorative items. DIY Projects: Perfect for a wide range of DIY projects, including encapsulating objects, and crafting personalized gifts. Crafting and Modelling: Explore its versatility in crafting, modelling, and various creative pursuits. 💥Key features: ✔️ Fast curing time: No more waiting: Create instantly - UV-CREATION is your ultimate crafting companion for fast, hassle-free creations. Say goodbye to long catalysis times and welcome instant results! Only a couple of minutes under uv-lamp and your creation is ready! ✔️ Maximum hardness, maximum shine: Our new formula guarantees first-rate hardness and a clear, glossy finish that is second to none. ✔️ Time-efficient formula: UV-CREATION's innovative formula ensures surfaces are no longer sticky after curing, saving time and material. ✔️ Non toxic: Experience the joy of creating in freedom. Our acrylic and non-toxic materials ensure that your jewellery and decorative items are safe and spectacular. -The curing time depends on the thickness of the layer or the amount of dye added to the gel. You can use lamps with a power of 3w, 9w and 36w. The main thing is that the wavelength of the lamp is 365nm -405nm. -The recommended application layer is 3 mm. You can apply 2-3 layers of 3 mm, drying each layer well with UV light before applying the next one. It is not recommended to use the product for castings with a thickness of more than 3 mm in one approach. -UV resin can be painted with dry pigments and liquid pigments, glitter and other decorative elements can be added. Alcohol ink is not suitable for UV resin staining.
$12,65
 Free shipping on orders over €199,00