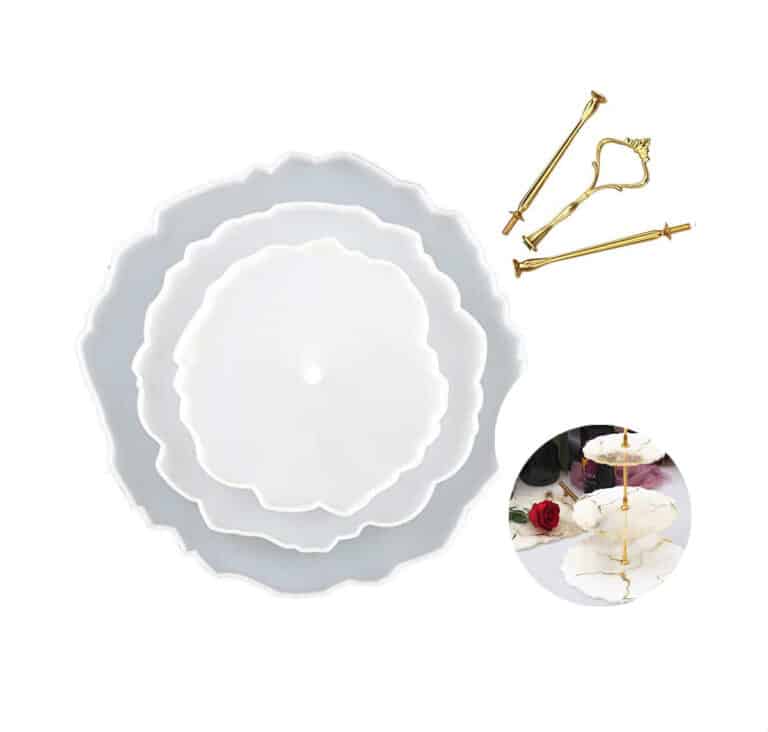
HIGH-QUALITY SILICONE MOULD FOR HANDCRAFTS This flat Coaster Mould has a smooth interior and produces a beautiful coaster with a professional finish. Use our heat-resistant resin to make something that is not only functional but also ideal for making three-tier fruit and dessert trays, coasters, decorative elements and home and office decorations. This product can be reused over the years. The Set includes: Silicone molds: D. 155 mm – 1 pcs → 6.1 in – 1 pc D. 205 mm – 1 pcs → 8.1 in – 1 pc D. 255 mm – 1 pcs → 10.0 in – 1 pc Support rod (by variation): 110 mm – 2 pcs → 4.3 in – 2 pcs 122 mm x P. 47 – 1 pcs → 4.8 in x P. 1.9 – 1 pc If you're using these moulds to make coasters, we recommend that you add a 3mm thick clear layer of Heat-Resistant resin first in your mould. Let it set and then add more resin with colour, ink, glitter, flowers etc. Once turned out (after 3-4 days), what was the bottom will be the top and heat-resistant up to 200C! Remember that our Heat-Resistant resin needs up to 72 hours to achieve full cure, so don't place a hot cup on it too early. DO-IT-YOURSELF. Material: Silicone, Colour: Semi-transparent; Reusable, Non-stick, Easy to use and clean. Warning: do not use aggressive solvents, High-quality moulds, heat-resistant: -40°C to + 210°C [-104° F to +410° F]
$17,49

Complete kit to apply the fibreglass together with the Polyester Resin, for fast, simple and long-lasting repairs! Includes all the necessary to prepare, mix and apply the product. 700 gr [1,54 lb] of orthophthalic polyester resin; 20 ml [0,70 oz] of hardener (to be applied at 3%); 1 square meter of fibreglass MAT 300 gr /m2 [0,66 lb]; 1 brush for application; 2 latex gloves; 1 instruction sheet; 1 container to mix the components; Ideal to repair fenders, car bodies, boats, pipes, water tanks, swimming pools, etc. Are you looking for a simple, fast and inexpensive product to make your repairs in a professional way? We offer you this repair kit, in which you will find everything you need for your application, and we will ship it to your home in 24 hours. This kit is designed to be used as a reinforcement and/or structural material. It consists of a sheet of high-quality glass filaments, a polyester resin (including hardener) for the impregnation of fibreglass, as well as latex gloves, a brush and an instruction sheet for its application. With this practical kit you can immediately repair car bodies, boats, pipes, tanks, swimming pools, roofs, and many others! It is also applicable on several types of materials and surfaces, such as metal, wood, rigid plastic, polyester, glass, porcelain, fibreglass, etc. USE: As described above, this kit is used as a reinforcement and structural material. It features a 1 m2 of high-quality fibreglass mat (300g/m2 [0,66 lb]) together with polyester resin. AREAS OF APPLICATION Composite materials such as skis, canoes, boats, etc. Automotive: composite materials for vehicle components. Industrial: composite for the reinforcement of plastic parts, reinforcement fabrics for structures, decorations, insulators. Sealant for swimming pools, tanks and liquid containers.
$18,49
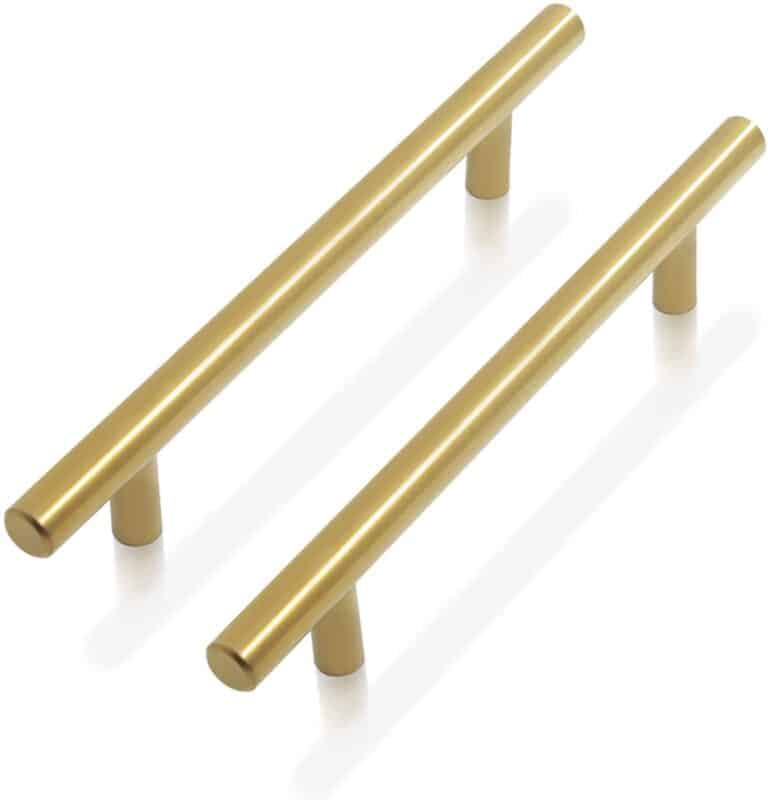
The handles for trays are made following an elegant design that characterizes as a versatile accessory suitable also for drawers and furniture of various kinds. Size: 150 mm x 30 mm x D. 10 mm Color: bronze effect Ideal for epoxy resin trays.
$7,49
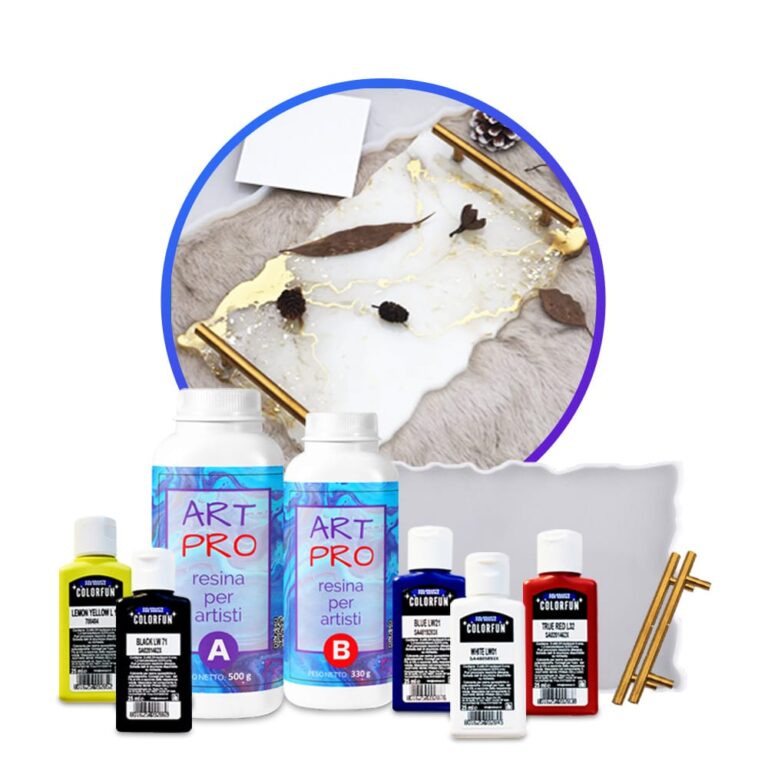
Creative Kit: Create your own resin tray! KIT INSTRUCTIONS This kit contains: 1.66 kg of epoxy resin Silicone mould "tray" + handles 5 dense dyes Spread out the plastic tarpaulin to protect the work surface. Make sure that the silicone mould is clean and all materials are at hand. Do not forget to wear disposable gloves and follow the safety instructions. Mix the epoxy resin according to the mixing ratio Art Pro 100: 66 – by weight) – 180 g A and 119 g B-for a filling thickness of 5 mm. Carefully weigh and mix both components for 3 minutes, making sure that all sides and bottom of the mixing container are included for effective mixing. Let the mixture stand for 2-3 minutes. Divide the resulting resin into separate containers for each colour you are going to use. Add resin-specific dyes to each container to get the desired shades. Mix thoroughly. Put the colours in one large container without mixing them, allowing them to stack on top of each other. Pour this mixture in layers into a mould for a dynamic abstract effect. In addition, you can pour each colour into different places of the mould according to your design concept. After 24 hours, you can remove the resin tray. After another 12-24 hours (the resin reaches full strength), you can make your tray workable by using the screws included in the kit to attach the tray handles. Drill the holes in the tray, then secure the handles with screws. Geodetic effect- To get the geode effect when casting, use the layering technique. Divide the mixed resin into separate containers for each colour you are going to use + one part with transparent resin and one white. Start by pouring clear resin into the center of the mould. Then alternate layers of white and transparent resin with coloured resin, allowing them to spread naturally. Finish by adding the last layer of transparent resin for a beautiful 3D effect. Let it harden to reveal a stunning geodesic-inspired design. Other ideas: Ocean Art Resin Tray: Capture the beauty of the ocean using different shades of blue and white resin, adding a few shells or a small starfish for an authentic nautical feel. Real Pressed Flowers: Add real dried flowers or leaves to the resin to create a natural and timeless look. Gold leaf Accents: Use a gold or metal sheet to add a touch of luxury to your tray.
$78,49
The average cost of repairing an enameled shower tray can vary depending on the extent and severity of the damage. Typically, the cost ranges from $100 to $300, depending on whether it involves minor scratches or more significant cracks. It is crucial to contact a specialized professional to assess the necessary intervention and receive a detailed quote. In some cases, it may be more cost-effective to replace the shower tray rather than repair it, especially if the damage is extensive. Consulting multiple specialized companies and comparing quotes can help find the most suitable solution for your needs and budget.
Repairing an Enameled Shower Tray
Repairing an enameled shower tray can be done with a few simple yet effective steps. Here's what to do:
- Thoroughly clean the shower tray to remove dirt and residues.
- Use epoxy resin to fill any cracks or superficial scratches.
- Gently sand the repaired surface to make it smooth.
- Apply a specific enamel to restore the original color and protect the repair.
- Wait for the recommended drying time before using the shower tray again.
By following these steps carefully, it is possible to effectively repair a damaged enameled shower tray.
Shower Tray Resin Repair
Repairing a resin shower tray is an operation that can be easily carried out, even independently. First, thoroughly clean the shower tray and remove any residues. Next, use epoxy resin to fill any cracks or scratches. Be sure to carefully follow the manufacturer's instructions to ensure correct application and optimal drying. Once the repair is completed, make sure to let the resin dry completely before using the shower tray again. This process will allow you to effectively repair your resin shower tray, extending its lifespan over time.
DIY Shower Tray Repair
Repairing a shower tray as a DIY project can be done by following a few steps. First and foremost, it is important to assess the type of damage. If it involves small cracks or superficial scratches, epoxy resins can be used to fill the imperfections. In the case of more severe damage, such as deep fractures or chippings, specific resins may be necessary for more substantial repairs. Thoroughly cleaning the damaged surface, carefully following the manufacturer's instructions, and allowing the material to dry completely before using the shower again are crucial steps. In any case, it is advisable to consult a professional for complex interventions or if you lack experience in using epoxy resins.
Professional Shower Tray Repair
Repairing a shower tray requires professional skills to ensure an effective and long-lasting intervention. Typically, the repair process involves the following steps:
Evaluation of the shower tray's condition to identify any damage or wear.
Cleaning and preparation of the surface to be repaired.
Application of specific resins or silicones for repairs on ceramic or resin surfaces.
Sanding and finishing to achieve a smooth and durable surface.
Verification of the repair's integrity and waterproofing check.
Relying on an experienced professional is essential to ensure a high-quality and long-lasting repair over time.
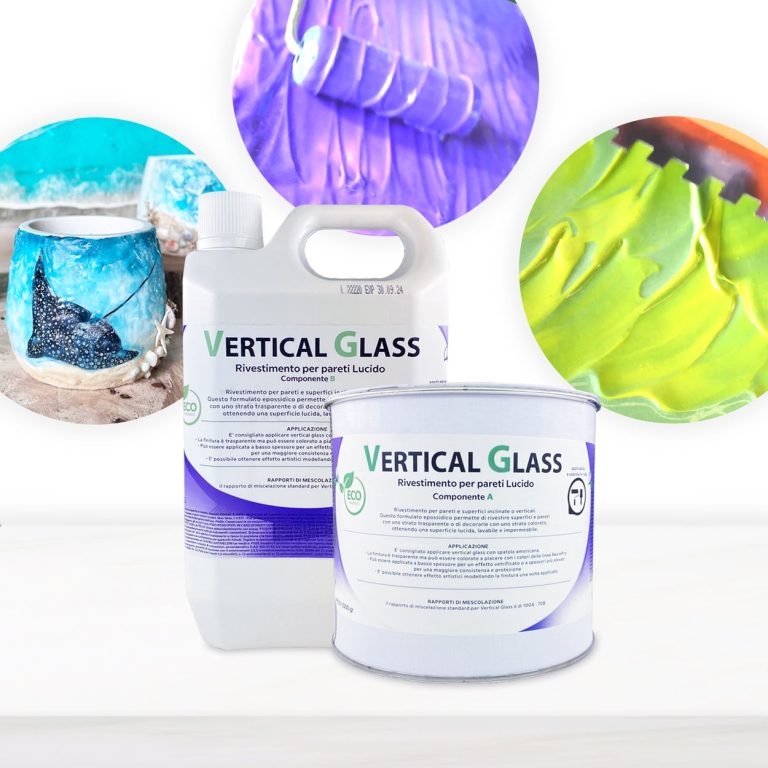
Coating for inclined or vertical walls and surfaces / This epoxy formulation allows you to coat surfaces and walls with a transparent layer or decorate them with a colored layer, resulting in a glossy, washable and waterproof surface. The Vertical Glass resin differs from normal resins allows creatives to create sharp shapes and designs on surfaces and canvases without the resin mixing unintentionally losing the original design! Transparent, UV-resistant epoxy system that creates a hard, glossy protective layer. Vertical Glass allows you to keep your initial design, faithfully respecting your creative idea! The surface will be perfectly smooth and resistant to moisture. Solvent-free and odorless epoxy resin. Applications: Floors and Walls (pre-existing) also vertical; Protection of material coatings and other artistic decorations; Coating, repair and decoration of shower trays and sanitary ware; Coating of surfaces, objects and furniture to give depth and brilliance to the color, even in Vertical! Features: For a smooth coating, it is applied with a spatula to the surface of any material: tile, concrete, wood, brick, etc. It has good hiding power, and completely covers the work surface in one application Creates a glossy, smooth and moisture-resistant layer To create a matte surface, it is easily sanded (48 hours after application, with a grain size of 1000-2000 P) Protects from moisture and gives a new life to surfaces It can be painted with dyes and pigments from our assortment Does not self-align: saves the drawing that you set for it 🙂 Please note that in the unpainted form, the material is not completely transparent, and there is a slight “milky” shade with almost imperceptible micro-particles, so we recommend painting it It is used for: Floor coverings, walls, furniture and other surfaces Protection of surfaces of materials Painting, repair and decoration of showers and bathrooms Creation of paintings, murals and other works of art
$109,49
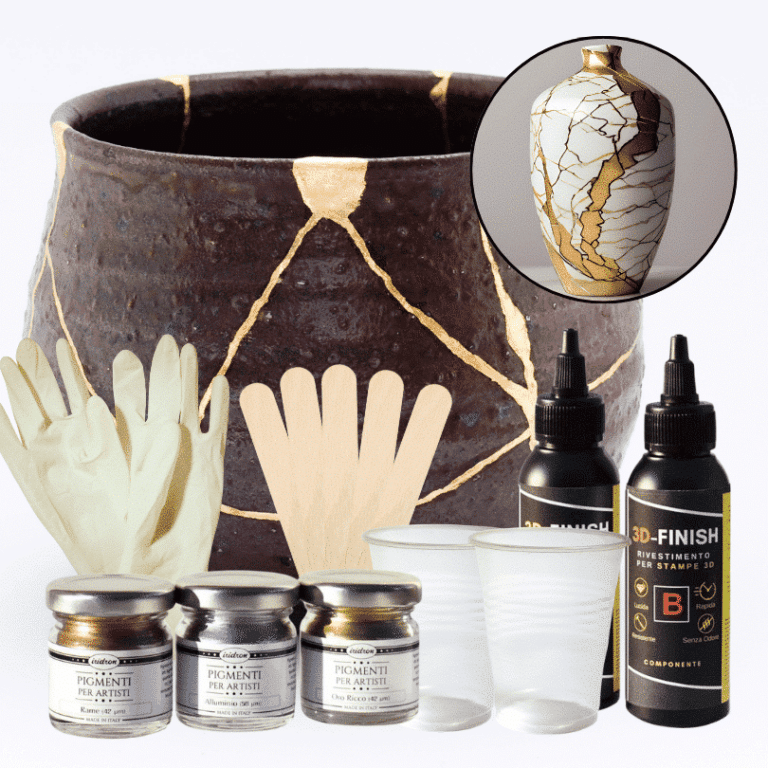
Kintsugi Repair Kit - Repair and Transform Your Ceramics with Elegance Celebrate imperfection with the ancient Japanese art Discover the traditional Japanese art of Kintsugi with our complete repair kit. Transform your broken ceramics into unique and fascinating works of art, highlighting imperfections with elegant gold, silver, or copper veins. Our kit is perfect for both beginners and experts, offering detailed instructions and everything you need to give new life and value to your most cherished items. 🌟 Specific epoxy resin (150g): slow catalysis to eliminate any bubbles or imperfections, allowing you to complete the work without rushing. 🎨 Dye of your choice (gold, copper, silver): customize your repair with a touch of elegance and refinement. ✨ Respect the tradition: follow the ancient art of Kintsugi and transform your ceramics into unique and precious treasures. The kit contains: 150g of resin for 3D decorations, 2 pairs of protective gloves, 2 mixing cups, and 5 spatulas for applying the resin, detailed instructions, everything you need in one kit. Give your ceramics a unique touch: repair them with style and make them even more beautiful. Buy the Kintsugi Repair Kit now and start creating your works of art today! Kintsugi Kit Instructions: Mix Resin: Measure 100A:50B by volume (or 100A:45B by weight) using a scale. Mix for 2 minutes, ensuring all surfaces are scraped. Add Colour: Mix your chosen metallic dye (gold, silver, or copper) into the resin to highlight the cracks. Prepare Surface: Ensure surfaces are clean, dry, and sanded. Apply Resin: Fill the cracks with the colored resin. Curing: Work in a temperature-controlled area, avoiding humidity. Safety: Wear protective gear.
$22,95
HIGH-QUALITY SILICONE MOULD FOR HANDCRAFTS This flat Coaster Mould has a smooth interior and produces a beautiful coaster with a professional finish. Use our heat-resistant resin to make something that is not only functional. Dimensions: D.26 cm Height: 1cm If you’re using these moulds to make coasters, we recommend that you add a 3mm thick clear layer of Heat-Resistant resin first in your mould. Let it set and then add more resin with colour, ink, glitter, flowers etc. Once turned out (after 3-4 days), what was the bottom will be the top and heat-resistant up to 20oC! Remember that our Heat-Resistant resin needs between 72 h to achieve full cure, so don’t place a hot cup on it too early. DO-IT-YOURSELF. Material: Silicone, Colour: Semi-transparent; Reusable, Non-stick, Easy to use and clean. Warning: do not use aggressive solvents, High-quality moulds, heat-resistant: -40°C to + 210°C [-104° F to +410° F]
$13,20
Professional mold "tray" composed of high quality silicone for resin creations. Excellent for making coasters, decorative elements, and home or office decor, this product can be reused over the years. Size: 30.5 cm x 17 cm Thickness:1 cm Color: white The mold is characterized by flexibility and versatility of use. Resistant to temperatures ranging from -60° C to +230° C. Ideal for professional use in the decorative world. Advantage: * Easy storage * Easy to wash, does not change the shape for long time. * Easy extraction Please, pay your attention! Handles are not included. Copyright © Resin Pro Srl. The reproduction (total or partial) of the work by any means made and its making available to third parties, either free of charge or for a fee is prohibited.
$17,49
 Free shipping on orders over €199,00