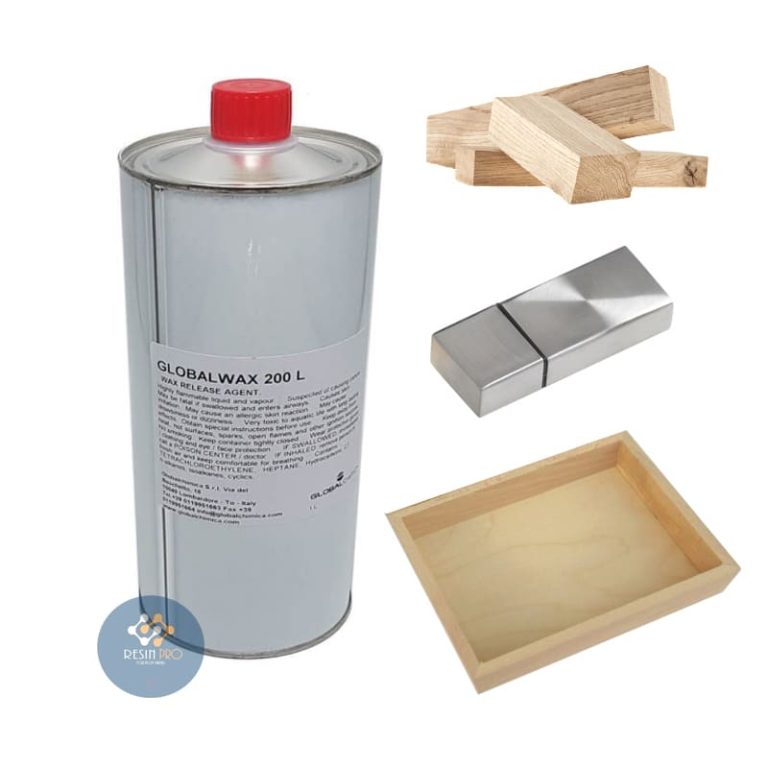
Global Distacc A Distacc Release Wax (Liquid) for Epoxy, Polyurethane and Acrylic Resins. The GlobalA A 2 200 L Liquid is a wax-based product for application with a pen or spray gun Resistant up to + 180 C The Global -a A distacc release agent (Liquid) creates a wax film on the mould surface and model, with a strong anti-adhesion action and high temperature resistance (up to + 180 C It is particularly recommended in the preparation of moulds and formwork in which to cast resin. You can apply it on wood, metal, plastic and even cardboard, making the surface perfectly anti-adherent in which to pour resin or other compounds in just a few minutes. IT IS NOT RECOMMENDED TO USE LIGHTERS, HEAT GUNS OR DEVICES THAT INCREASE THE TEMPERATURE (FOR EXAMPLE WHEN YOU WANT TO REMOVE BUBBLES FROM THE RESIN OR ACCELERATE THE CATALYSIS TIME). Application-brush or spray gun Colour – - white It is a liquid wax release agent packed in 1 liter packs. It is a very effective detachment agent that can be applied by brush or gun. It dries quickly in 2-3 minutes and keeps all the details of the mould. This product belongs to the second category; work only with protective equipment during use. The second category of products - Air freshener, candles, pressed wood, mothballs, non-stick frying pans, plastic bottles. May have carcinogenic properties. CAUSES SKIN IRRITATION. THIS MAY CAUSE AN ALLERGIC SKIN REACTION. THIS MAY CAUSE DROWSINESS OR DIZZINESS. VERY TOXIC TO AQUATIC ORGANISMS WITH LONG-LASTING EFFECTS. HIGH PRESSURE BOTTLE: IT MAY EXPLODE WHEN HEATED. KEEP AWAY FROM HEAT SOURCES, HOT SURFACES, SPARKS, OPEN FLAMES OR OTHER SOURCES OF IGNITION. DON'T SMOKE. DO NOT PIERCE OR BURN EVEN AFTER USE. PROTECT FROM SUNLIGHT. DO NOT EXPOSE TO TEMPERATURES ABOVE 50°C/122°F DO NOT VAPORIZE OVER AN OPEN FLAME OR A SOURCE OF STRONG EXPOSURE TO THE EYES/FACE. DO NOT SPRAY IN THE ENVIRONMENT. contains: TETRACHLOROETHYLENE, heptane, HYDROCARBONS, C7, N-ALKANES, ISOALKANES CYCLIC.
$22,95
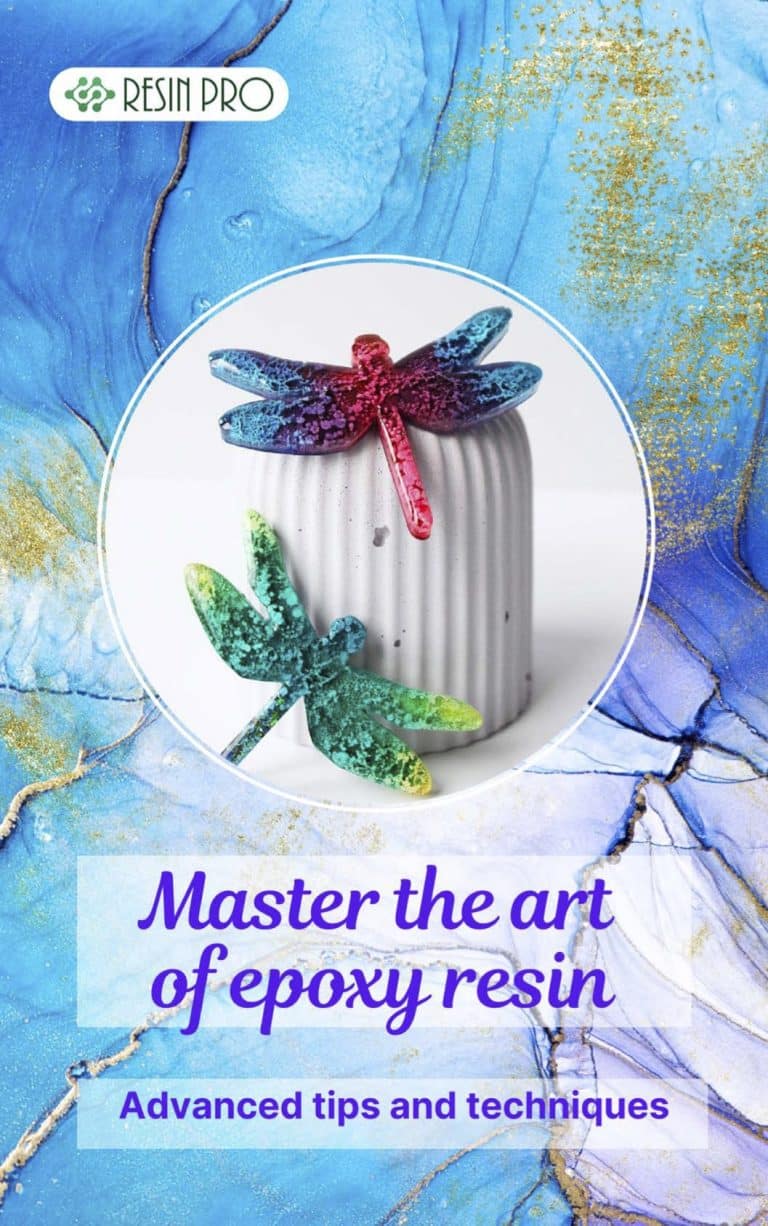
Discover the captivating world of epoxy resin with our e-book "Mastering the Art of Epoxy Resin: Tips and Advanced Techniques." Whether you're a passionate artist, an experienced DIYer, or looking to express your creativity, this book will guide you in learning and mastering this versatile technique. This comprehensive e-book offers an in-depth opportunity to learn advanced epoxy resin manipulation techniques. You'll uncover the secrets of harmonious blends, vibrant pigments, and flawless finishes to create unique works of art. Additionally, our practical tips will help you avoid common mistakes and overcome challenges encountered when working with this fascinating material. Whether you want to create epoxy resin jewelry, make stunning paintings, or design unique decorative objects, this e-book will be your essential companion. Unleash your creativity and master the art of epoxy resin with our expert advice and detailed instructions. Download "Mastering the Art of Epoxy Resin: Tips and Advanced Techniques" now to uncover the secrets of this versatile artistic method. Develop your artistic skills and create one-of-a-kind pieces that will captivate your friends and family. Don't miss this opportunity to become an epoxy resin expert and make your artistic mark
$21,95
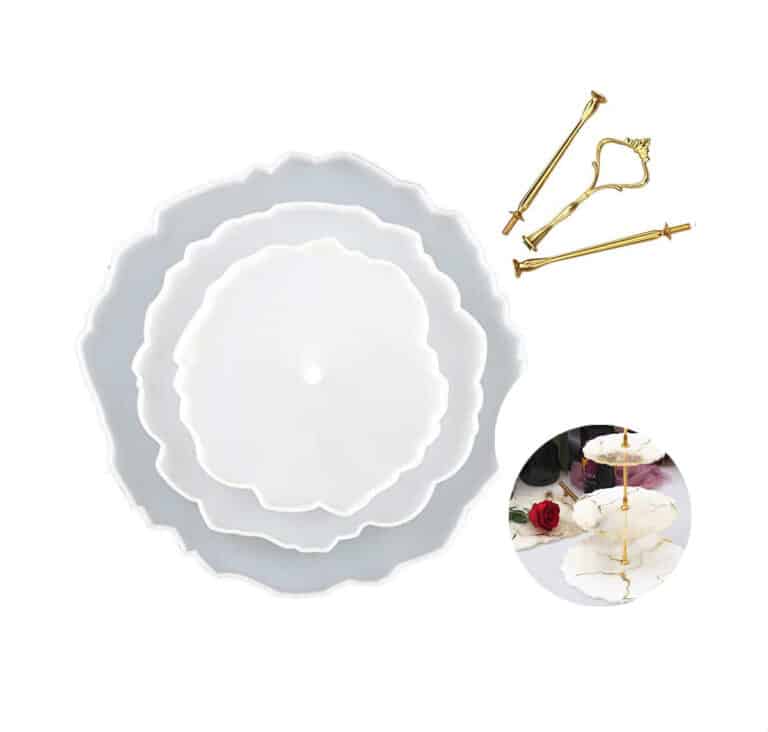
HIGH-QUALITY SILICONE MOULD FOR HANDCRAFTS This flat Coaster Mould has a smooth interior and produces a beautiful coaster with a professional finish. Use our heat-resistant resin to make something that is not only functional but also ideal for making three-tier fruit and dessert trays, coasters, decorative elements and home and office decorations. This product can be reused over the years. The Set includes: Silicone molds: D. 155 mm – 1 pcs → 6.1 in – 1 pc D. 205 mm – 1 pcs → 8.1 in – 1 pc D. 255 mm – 1 pcs → 10.0 in – 1 pc Support rod (by variation): 110 mm – 2 pcs → 4.3 in – 2 pcs 122 mm x P. 47 – 1 pcs → 4.8 in x P. 1.9 – 1 pc If you're using these moulds to make coasters, we recommend that you add a 3mm thick clear layer of Heat-Resistant resin first in your mould. Let it set and then add more resin with colour, ink, glitter, flowers etc. Once turned out (after 3-4 days), what was the bottom will be the top and heat-resistant up to 200C! Remember that our Heat-Resistant resin needs up to 72 hours to achieve full cure, so don't place a hot cup on it too early. DO-IT-YOURSELF. Material: Silicone, Colour: Semi-transparent; Reusable, Non-stick, Easy to use and clean. Warning: do not use aggressive solvents, High-quality moulds, heat-resistant: -40°C to + 210°C [-104° F to +410° F]
$17,49
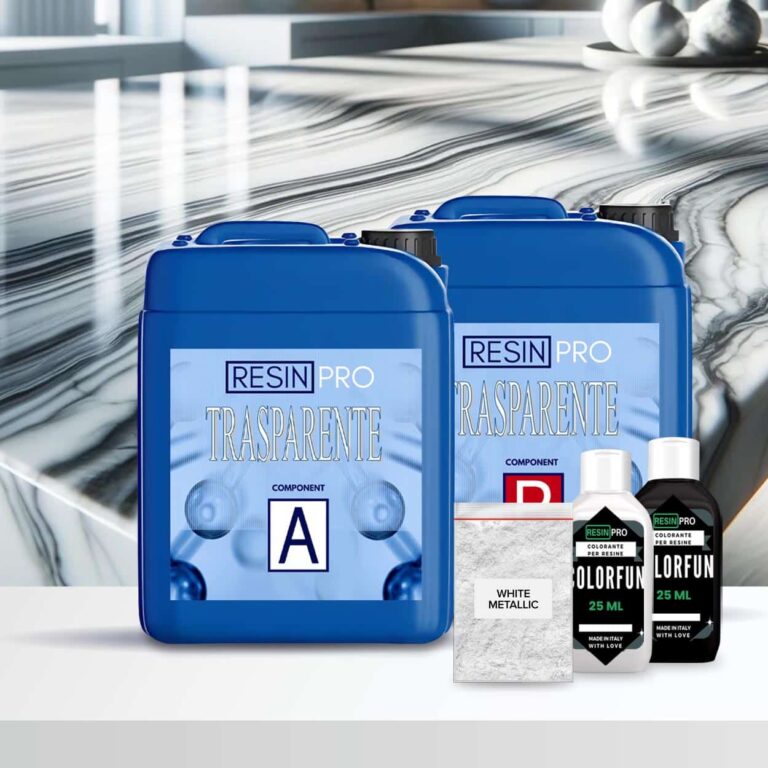
Top Cucina Kit Carrara Marble Effect with Epoxy Resin: The 2.4 kg kit (1.6 + 0.8) covers 1 square meter (+ 10 g white metallic pigment + 25 ml white dye +25 ml black dye) The 4 kg kit (2*1.6 + 0.8) covers 2 square meters (+ 2*10 g metallic pigment +2* 25 ml white dye + 2*25 ml black dye) The 8 kg kit covers 4 square meters (+ 4*10 g metallic pigment +4* 25 ml white dye+ 4*25 ml black dye) The 16 kg kit covers 8 square meters (+ 8*10 g white metallic pigment +8* 25 ml white dye 8*25 ml black dye) Kit Contents: 2.4kg, 4kg, 8kg or 16kg of "Art Pro" Epoxy Art Coat for a high quality base White dyeand Black of the "Colorfun" line for the perfect stone shades White Metallica Sahara pigment for that extra touch of sparkle Good to add: To enhance the appeal of the design:: Isopropanol 99.9% (additional option, not included in the price) To make the coating last longer: Polishield 100 Gloss (additional option, not included in the price). The coverage of a 0.5 kg kit is approximately 4 m2 Each kit includes dyes and pigment in sufficient quantity for the amount of resin required. HOW TO CREATE YOUR MARBLE EFFECT WITH EPOXY Guide Instructions: Step N1: Primer Start by carefully measuring the amount needed to cover the surface based on the consumption of 150 g/m2, making sure to follow the proportions indicated to obtain a homogeneous mixture. Once the base has been prepared, proceed with adding the dye, choosing between white or black depending on your needs. The quantity of colourant to add to the mixture can be measured in a few drops (max 5% by volume). This step is crucial to achieve the desired colour and ensure uniformity of the application. Before applying the primer, it is essential that the surface intended for treatment is adequately prepared. Sand the surface with a coarse grit (40 or 60) before any operation. Make sure it's completely clean, using a soft cloth or brush to remove any pigment, dirt or debris. The surface must also be completely dry; residual humidity can compromise the adhesion of the primer and its effectiveness in sealing the surface. Once the surface is ready, apply the mixture evenly, using a suitable tool such as a brush, roller or spatula, depending on the size of the area to be treated and your personal preference. The key is to get a thin, even layer that can cover the entire area without leaving gaps or excessive product buildup.. After application, it is essential to allow the primer to dry completely before proceeding with further treatments or finishes on the surface. The recommended waiting time is 12 hours; this range may vary slightly depending on environmental conditions, such as humidity and temperature, but offers a good compromise to ensure the mixture has time to dry and adhere properly. During this period, avoid touching or stressing the treated surface to ensure optimal results. Don't worry if you notice any discrepancies on the surface, the next main pour will level everything perfectly. Step N2: application Start by applying masking tape around the perimeter of your countertop to contain the epoxy you're about to pour. This step is essential to ensure the resin stays where it is needed. After applying the resin, wait about 1.5 hours before gently removing the tape. To ensure coverage is even and complete, plan to use approximately 1.6kg of resin for every square meter of surface area. When you are ready to mix the resin, use a drill equipped with a paddle mixer for quick and even action (use at low speed), taking about 2 minutes for this operation. If you prefer to mix by hand, be prepared to take double the time. Don't forget to scrape the sides and bottom of the container halfway through the process with a stick to ensure all the material is mixed well. Next, separate the already mixed resin into different glasses and add the desired colours, mixing the different colours in the different glasses until you obtain an intense and uniform colour per single glass. To create a striking visual effect, pour the coloured resin in random layers into a larger bucket, being careful not to mix the colours together too much. After filling the bucket, spread the contents over the surface of the worktop, leaving a small amount of resin aside to finish the edges later. To remove trapped air bubbles, gently run a propane torch or heat gun over the surface. Once the adhesive tapes have been removed, approximately 1.5 hours after application, if there are any dry edges, moisten them slightly by wearing a protective glove to promote an even appearance. Use appropriate tools, such as spatulas or plastic scrapers, to spread and level the resin along the edges, making sure to cover the entire area well. After letting the resin cure for 24 hours, you can apply a clear top coat or PoliShield scratch-resistant paint to further protect the surface. Finally, for even more refined visual effects, spray 99.9% isopropyl alcohol onto the surface just before the resin begins to fully harden. This will create unique lacy textures. Remember that when you remove the tape, it is essential that the resin is partially hardened, neither too liquid nor completely solid, to avoid unwanted drips. Attention! Safety Guidelines for Using Isopropyl Alcohol (99.9%) Isopropyl alcohol (IPA) is a highly flammable substance. Improper use—especially near heat sources like torches or heat guns—can result in fire or explosion. To ensure safe use, follow these precautions: Primary Risks Highly flammable: IPA vapors can ignite from sparks, open flames, or hot surfaces. Forms explosive vapor-air mixtures, especially in enclosed or poorly ventilated spaces. Strictly Prohibited: Using gas torches or heat guns near areas treated with IPA. Spraying IPA near active heat sources. Storing IPA near flames, heaters, or hot tools. Recommended Safety Measures: 1. Ventilation: Always work in a well-ventilated area when using IPA. 2. Wait Time: After applying IPA, wait at least 5–10 minutes to allow complete evaporation before using any heat tools. 3. Safe Distance: Keep IPA containers at least 2 meters (6 feet) away from heat or flame sources. 4. Storage: Store IPA in a tightly sealed container, away from direct sunlight or high temperatures. 5. Fire Safety: Have a CO₂ or dry chemical fire extinguisher nearby when working with flammable substances and open flames. In Case of Fire: Do not use water to extinguish the fire. Use an appropriate extinguisher, cut off air supply if safe, and call emergency services if needed.
$191,95
The average cost of an acrylic bathtub restoration kit can vary depending on the brand and quality of the product. Typically, a high-quality kit can range in price from $50 to $100. These restoration kits are specifically formulated to repair scratches, chips, and other surface damages on acrylic bathtubs, giving them a refreshed appearance. It is crucial to carefully adhere to the manufacturer's instructions and possess adequate DIY skills to achieve satisfactory results. Before starting the restoration process, ensure that the bathtub is thoroughly cleaned and the surface is properly prepared for the best outcome.
Acrylic Bathtub Restoration Kit - 1
An acrylic bathtub restoration kit is a comprehensive and specialized product aimed at repairing and revitalizing damaged bathtubs. These kits usually include epoxy or polyester resins, catalysts, putties for fixing cracks and scratches, sandpaper of various grits for smoothing the surface, protective gloves, and detailed application instructions. With an acrylic bathtub restoration kit, it is possible to conduct repair work in a DIY manner without the need for costly professional interventions or replacing the entire bathtub.
Epoxy Resin for Bathtubs - 2
Epoxy resins for bathtubs offer a durable and resilient solution for coating and repairing ceramic or metal surfaces. Once cured, these resins form a waterproof layer that safeguards the bathtub from wear, stains, and cracks. Prior to application, it is essential to thoroughly clean and prepare the surface to ensure optimal adhesion. Epoxy resins for bathtubs come in various shades to complement the bathroom decor. It is vital to meticulously follow the manufacturer's instructions for a proper and long-lasting application.
DIY Acrylic Bathtub Repair Tutorial - Part 3
To create a DIY tutorial for repairing an acrylic bathtub, follow these steps
- 1. Cleaning: Wash the bathtub with water and mild soap.
- 2. Preparation: Protect the faucet and edges by covering them with adhesive tape.
- 3. Sanding: Smooth out damaged areas using fine-grit sandpaper.
- 4. Application of Acrylic Resin: Evenly apply the resin to the sanded areas.
- 5. Leveling: Use a spatula to level the resin for a smooth surface.
- 6. Drying: Allow the resin to dry completely following the manufacturer's instructions.
- 7. Finishing: Lightly sand the surface to ensure uniformity.
- 8. Tape Removal: Remove the adhesive tape and admire the final result.
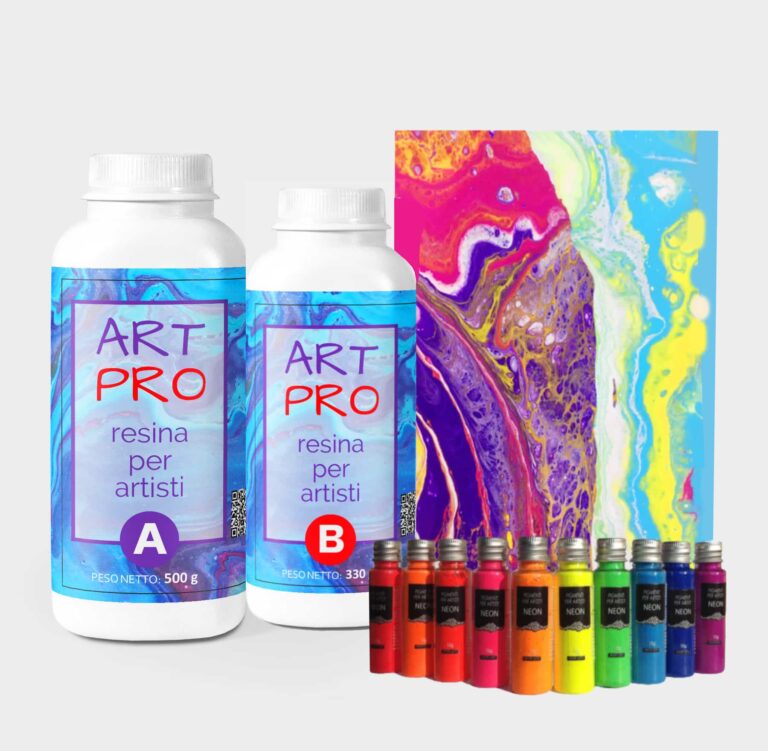
"RAPHAEL" KIT for Pour Paint & Resin Art Create your unique painting with the "RAPHAEL" kit. Experience the countless mixtures and design the perfect artwork! The "RAPHAEL" KIT includes: TRANSPARENT RESIN FOR ARTWORK AND DIY 1.66 KG [3,65 LB] NEON PIGMENTS SET RECTANGULAR FRAME CANVAS 30*30cm WOODEN SPATULA * 5pcs NITRILE GLOVES INSTRUCTION "TIPS HOW TO WORK WITH EPOXY" Transparent resin for artwork and DIY 1.66 KG [3,65 LB]. Transparent self-levelling UV-resistant epoxy system, which creates a hard and glossy protective layer for casting up to 1 cm [0,39”]. ART PRO, the epoxy resin for the artistic sector: thanks to its special formula and its dense structure, it allows you to create paintings with the "pour paint" and liquid paint technique. It does not leak out from the working surface, slowly reaching the corners of the frame. ART PRO preserves your original design and prevents any possible modification due to the casting of the resin: because of its special formula, the layers of colours do not expand and do not mix (unless you deliberately intervene), faithfully keeping with your creative idea! The surface is perfectly smooth and moisture-resistant. Solvent-free and odourless epoxy resin. Applications: - artworks, creation of art objects (paintings, panels, etc.) with the "fluid-art" (pour paint) technique (pouring up to 1 cm [0,39”]); - coating of surfaces, objects and furniture to add depth and brilliance to the colour; - create a 3D effect on prints, photos and images in general; - fixation of fillers (decorative elements, glass, stone, quartz, etc.) - creation of a perfectly transparent protective layer on your projects. The "ART-PRO" formula is specifically developed for coating in artistic applications. Compatible with colouring agents, powder pigments, alcohol-based and oil-based dyes, aerosol paints. Warning: the product is moisture sensitive, do not use on wet surfaces or with water-based dyes (e.g. Acrylics) Technical data: Usage ratio 100:66 (in weight) Pot Life (150 gr at 30°C) [0,33 lb at 86 F]: 1h20 ', Film (1 mm at 30°C) [0,03” at 86 F]: 6:00'. Full catalysis after 24 hours. Neon Pigments Set. PIGMENTS WITH COLOURED BASE are perfect for decoupage, decoration and anything related to DIY. By simply adding them to resins, paints or varnishes, you can express your creativity with truly brilliant shades (neon effect!). WARNING: pigments do not glow in the dark, as they are not fluorescent.
$69,95

Resin Pro offers the possibility to achieve a perfect polishing by using different types of abrasive pastes. It can be used by hand or with an orbital polisher to make your resin creations shiny. Ebonite Abralon Sanding Pads Cosmetically appealing, consistent scratch pattern provides excellent traction. Combines the benefits of abrasive cloth and non-woven products. Opening in the fabric allows water to flow freely around the abrasive. Solid surface and foam backing provide even surface pressure. Last 5+ times longer than sandpaper. Use wet or dry (residual material can be removed by high pressure air). Now it's possible to get the most aggressive surface texture without that "cheese grater" look. Abralon sanding pads use silicon carbide particles that are precision sifted to a consistent grain size, then bonded evenly to a six-inch round fabric face for the most even scratch pattern available. WARNINGS: During processing, use protective masks, gloves, and other protective clothing. In case of contact with eyes, immediately rinse with cold water for 15 minutes and immediately consult a doctor. The kits may include by variations: EpoxyPolish Polishing cream – 250 ml [8,79 oz] - 1pc Ebonite Abralon Sanding Pads: - Ebonite Abralon Sanding Pad 150mm 360 grit - 1pc - Ebonite Abralon Sanding Pad 150mm 500 grit - 1pc - Ebonite Abralon Sanding Pad 150mm 1000 grit - 1pc - Ebonite Abralon Sanding Pad 150mm 2000 grit - 1pc - Ebonite Abralon Sanding Pad 150mm 3000 grit - 1pc - Ebonite Abralon Sanding Pad 150mm 4000 grit - 1pc EpoxyPolish Polishing cream How to Use: Step 1: Thoroughly clean the surface with a cloth. Step 2: Now you can polish by hand or with an orbital polisher. We recommend using the lowest possible speed to get the best result. Start Polishing with 360-500 grit. Note: Sand the entire surface evenly with circular movements and light pressure. Moisten the pad or the surface with water from time to time. Step 3: Now use the 1000 grit sandpaper. Note: Moisten the sandpaper or the surface with water from time to time. Step 4: Afterwards, use 2000 grit sandpaper. Note: Moisten the sandpaper or the surface with water from time to time. Lastly, use 4000 grit sandpaper to finish sanding. Step 5: Remove the sandpaper from the polishing disc and attach a soft sponge to it. Rinse the surface or wipe it with a damp cloth to remove any residual grain of the sanding. Step 6: Apply EpoxyPolish Polishing cream on the damp sponge. Use by hand or with an orbital polisher, using a large circular motion and exerting slight pressure. Step 7: Clean the surface with plenty of water to remove all the remaining residues. Step 8: Enjoy the result!!!
$21,49
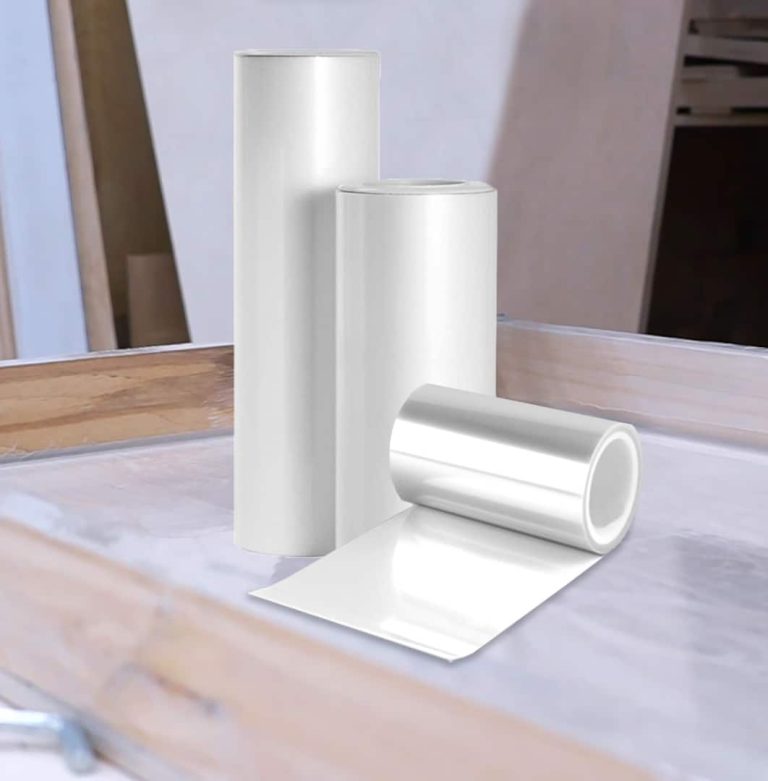
"SHINY SHIELD" - Glossy Release Film For Coasters & Table`s Frames Great tool for achieving the best results: ✔️ "Shiny Shield" release Film for Epoxy, Polyurethane and Acrylic Resins. ✔️ Transparent, adhesive and easily removable, it won’t leave any sticky traces on the workpiece; ✔️ Applicable on ALL SURFACES; ✔️ Specifically developed for CASTING FORMWORK EXTERNAL COATINGS. It is easy to apply without unevenness, creating a smooth, glossy and bubble-free surface, which will help easily release your epoxy project from the frame; ✔️ Once the resin has solidified, the "Shiny Shield" film can be easily removed, leaving a HIGHLY POLISHED even surface; ✔️ REUSABLE several times; ✔️ It does not require any kind of additional treatment and it is IMMEDIATELY READY to be poured. For any queries or if you may need some advice, please contact the ResinPro technical department!
$4,62
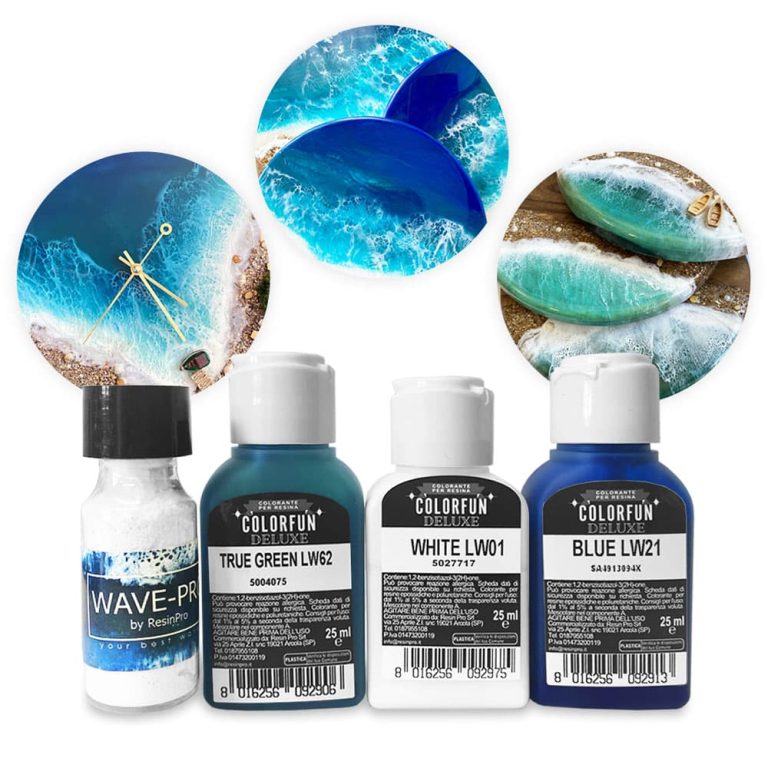
Set of dyes in a marine palette for works on marine and oceanic themes Ingredients: 3 dyes RESIN COLOUR TRANSLUCENT EFFECT 25 ML, Wave-pro powder for creating waves 15 ml, instructions for working with powder for waves. The kit is designed to create works of epoxy resin on a marine theme: take an artboard or a decorative board / saw cut and epoxy resin for painting to the set - and you can safely start creating a marine masterpiece 🙂 The kit is enough for many fillings, since a couple of drops of dye are enough to stain the resin.
$16,95
ResinPro: one supplier for all your needs
15 years of experience at your complete disposal, supplying resins and accessories for creativity, industry, DIY, flooring and marine applications.
At your home, directly from the manufacturer!
ResinPro is the direct manufacturer of our resin range for companies and hobbyists, guaranteeing the lowest prices on the market.
Learn more
The widest range of resins in the US!
We offer resins for every need, from artistic creations to marine and construction applications, far beyond the “limited” selection typically found in local DIY stores.
Expert technical support!
Our technicians provide free remote consulting to help you avoid mistakes and ensure you achieve the result you want — unlike “generic retailers” who sell 1,000 different products.
get a free consultation
RESIN PRO is a leader in resin production and distribution!
24-hour delivery: We ship across the US on the same day. Enjoy convenient home delivery with our appointment service—our courier will contact you in advance and deliver the package to your preferred location, or leave it at an alternative address of your choice.

Full support!
We provide continuous support from preparation to final application, including remote technical assistance, ensuring a smooth experience.
Talk with a specialist and place a phone order without registration and without credit cards!
 Free shipping on orders over €199,00