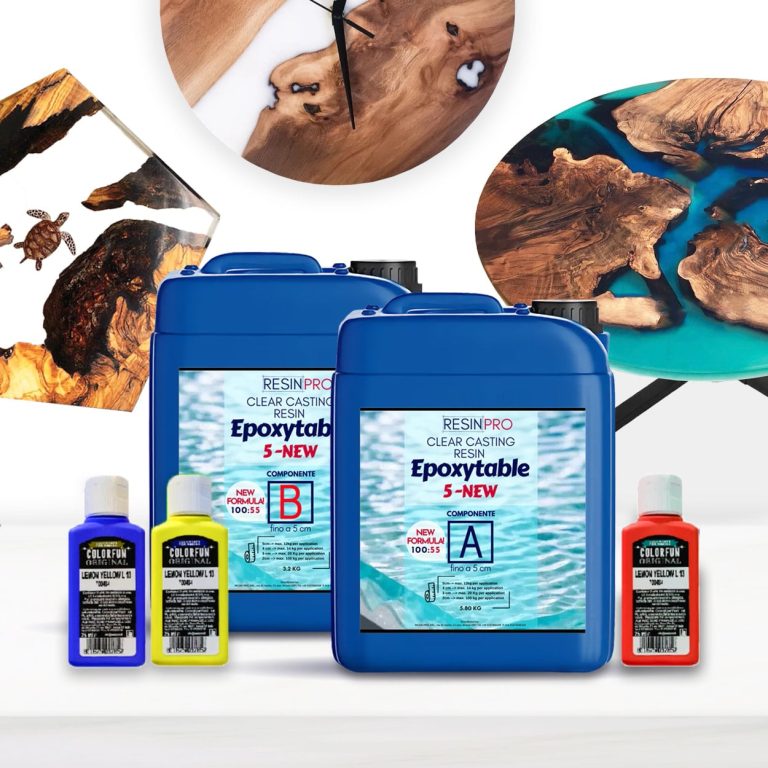
Bestseller for projects up to 5cm: –Tabletops & furniture: Ideal for creating & coating tabletops, including dining tables and countertops. –DIY & Home Decor: Use it for artistic projects and decorative elements. –Craft & Wood-working: A versatile choice for creative crafting projects, like dioramas and dynamic modelling. 💥About “EPOXYTABLE 5-FIVE” - deep pour epoxy resin for tables & large projects: Finally, the ultimate product that allows high-thickness castings, non-yellowing and scratch-resistant. Ultra-low exothermic reaction allows high-thickness castings WITHOUT OVERHEATING and DEFORMATIONS. Perfectly TRANSPARENT and BUBBLE-FREE. Specially designed to be used to create wooden and resin tables and for large castings for artistic works. 💥Key features: ⚙️ 【RIVERTABLE, COUNTERTOPS AND DEEP COATING RESIN】-Ideal for the wood and deep river tables, countertops or for the creation of objects that require high thickness casting. Special low exothermic reaction and its low viscosity are perfectly to deep thickness castings, guaranteeing stability and resistance to your creations. Detailed instruction and gloves for free. 🧪 【HIGH QUALITY】-Totally shiny, self-leveling and odourless epoxy resin. Easily polished. The added UV Anti-Yellowing Filters helps save transparency over time. The low density allows prevent the incorporation of air bubbles making it perfectly suitable for river tables and countertops. Compatible with silicone and wood, fabric, glass, paper or photographs. Complete catalysis ~ 5-7 days, but it will already be workable after about 72 hours. 🌿 【SAFE AND CERTIFIED】-All our resins are Certified Non-Toxic, Solvent-free, non-flammable, and totally safe. 💧 【EASY TO USE】-The 100:55 mixing ratio makes this product very easy to use. Being a two-component resin, simply mix RESIN A + HARDENER B in the ratio indicated above the package and let it harden without the need for further additives. Can be coloured as desired. 🇬🇧 【UK BASED TRUSTED COMPANY】 - RESIN-PRO team fulfils your order as fast as possible. We produce and realise epoxy resins since 2015. Just check our social media, where you will find thousands of projects made with our products around the world. THINGS TO KNOW: If one of the sides of the project is more than 100cm or the total weight of pouring epoxy is more than 8kg we insistently recommend to do a casting in two and more layers! (waiting 6- 8 hours between them). Please, pay extra attention mixing bulky amounts! 5cm–> max. 12kg per application 4cm –> max. 14 kg per application 3cm .–> max. 20 Kg per application 2cm –> max. 100 kg per application *Free colorant is just a sample. For getting a solid color you need the next quantity - 9kg - 3pcs of 25ml (75ml) 18kg - 6pcs of 25ml (150ml) You can add additional items here - RESIN COLOUR TRANSLUCENT EFFECT 25 ML
$21,49
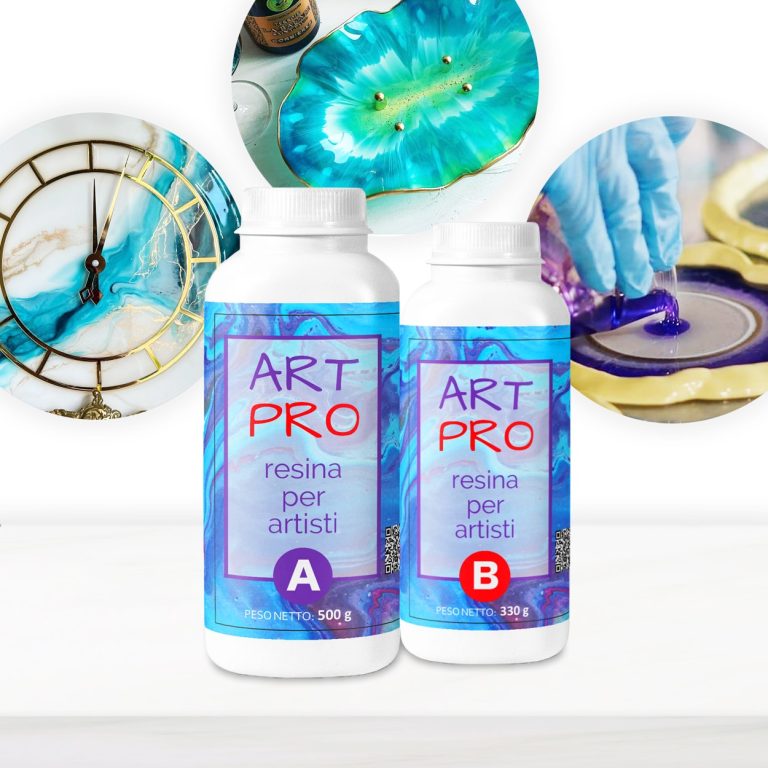
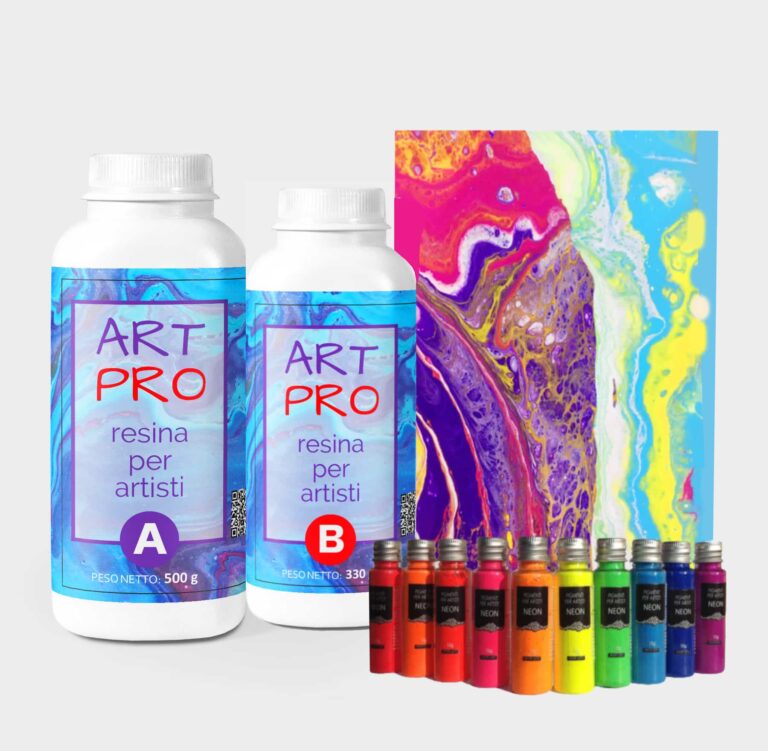
💥 BESTSELLER FOR: – Resin Artworks on surfaces, panels: Ocean Art, Marble Effect, Geode Art and etc; – Coasters and Trays with colour effects (layer thickness up to 1 cm [0,39”]); – Coating of surfaces - Floors, Canvases, Furniture, Etc; – 3D effect on prints, photos and images in general; – Fixation of decorative objects (decorative elements, glass, stone, quartz pieces, etc.); – Creation of a perfectly transparent protective layer on your projects. 💥About “ART PRO ” – Ultra Clear Medium Viscosity Epoxy Resin for Artists: First class quality epoxy resin for the artistic sector: thanks to its special dense formula, it allows you to create Resin Art works. It does not leak out from the working surface, slowly reaching the corners of the frame. ART PRO preserves your original design and prevents any possible modification due to the thickness of the resin: because of its special formula, the layers of colours do not expand and do not mix (unless you deliberately intervene), faithfully keeping with your creative idea! Additional features: Long working time; + Odourless; + Excellent mechanical strength; + High impregnation and reinforcement of technical fabrics. The product can be coloured with any epoxy dye (both in paste and powder) in a percentage ranging from 0.1% to 2.0%). It can also be thickened by the use of aggregates such as powders and fumed silica. 💥Key features: ⚙️ ULTRA TRANSPARENT EPOXY RESIN: -The crystal clear epoxy resin is suitable for both beginners and professionals. Start making Resin Art works, coasters, trays and any other DIY – creation that involves the use of medium viscosity resin. 🧪PROFESSIONAL QUALITY: -Made from high quality materials – Excellent transparency, Glossy surface, Odourless – because of unique formula for DIY, craft and artistic creations. Compatible with silicone, wood, fabric, glass and paper. 🌿 SAFE AND CERTIFIED: -All our resins are Certified Non-Toxic, Solvent-free, non-flammable, and totally safe. 💧 EASY TO USE: -The 3:2 mixing ratio makes this product very easy to use. Being a two-component resin, simply mix RESIN A + HARDENER B in the ratio indicated above the package and let it harden without the need for further additives. Can be coloured as desired. 📞 FREE PROFESSIONAL ASSISTANCE SERVICE: -Since we are directly a manufacturer, we have access to a professional laboratory that will happily help you with any complex project. 🇬🇧 UK BASED TRUSTED COMPANY: -RESIN-PRO team collects and sends your order as fast as possible. We produce and realise epoxy resins since 2015. Just google our social media, where you will find thousands of projects made with our products around the world. The "ART-PRO" formula is specifically developed for coating in artistic applications. Compatible with colouring agents, powder pigments, alcohol-based and oil-based dyes, aerosol paints. The migration laboratory test on cured resin samples ensures that the final product does not release any harmful substances, if applied following the instructions. Warning: the product is moisture sensitive, do not use on wet surfaces or with water-based dyes (e.g. Acrylics) ____________________________________________________________________ if you have not enough experience, we insistly suggest to make a small test before working with large project.
$28,49

💥 BESTSELLER FOR: –Resin-art: Geode-art, Ocean-art, Coasters, Trays, Fluid art (pour paint) and Art objects; –Surface coating: Coating + very good for vertical applications by brush or roller; –Restoration : Covering objects and furniture to add depth and brilliance to the colour. The surface is perfectly smooth and moisture-resistant. Solvent-free and odourless epoxy resin. 💥About ULTRA-HIGH VISCOSITY epoxy resin for artists "ART PRO DELUXE": The epoxy resin for the artistic sector: thanks to its special formula and its dense structure, it allows you to create paintings with the "pour paint" and liquid paint technique. It does not leak out from the working surface, slowly reaching the corners of the frame. Great choice for ocean-art; coasters and trays! ART PRO DELUXE preserves your original design and prevents any possible modification due to the casting of the resin: because of its special thick formula, the layers of colours do not expand and do not mix (unless you deliberately intervene), faithfully keeping with your creative idea! Additional features: Crystal Clear; + Odourless; + Excellent mechanical strength; + High impregnation and reinforcement of technical fabrics. The product can be coloured with any epoxy dye (both in paste and powder) in a percentage no more than 5% from the mix weight. It can also be thickened by the use of aggregates such as powders and fumed silica. DEAR ARTISTS! This type of epoxy has higher viscosity than you may expect! Please, read this note - 1. If you have no a lot of experience or you prefer to work with more liquid resin, please, check this Resin 👉🏽 ART PRO 2. If you prefer to do art-works in more viscosity resin, please, choose ART PRO DELUXE. But if it`s your first experience, we suggest to design your project before pouring, because, in this case you have short working-time (15-20 min). Due to its exceptionally high viscosity, our Deluxe epoxy resin is ideally suited for delicate casting projects, including ocean art, pour-art, and other creations that demand a resin with superior viscosity. When undertaking basic castings of 1-1.5cm, special care is needed to address bubble formation. We recommend a multi-layer approach for such castings, employing a heat gun after each application. For these projects, we suggest considering our lower viscosity resins - "Transparente" and "Art-Pro" - as the optimal solutions. Transparent self-levelling UV-resistant epoxy system, which creates a hard and glossy protective layer for casting up to 1 cm [0,39”] (ex. coasters, trays, art objects). The surface is perfectly smooth and moisture-resistant. Solvent-free and odourless epoxy resin. 💥Key features: ⚙️ 【RESIN ART EPOXY】 ART PRO DELUXE EPOXY RESIN is a ultra-high viscosity and high resistance product. The best choice for Resin-art, making Coasters, Trays, Ocean and Geode-art and casting surfaces. The particular formulation makes it a resistant product suitable for both the surface finishes of paintings, tables or even artistic floors. 🧪 【PROFESSIONAL QUALITY】Art Pro Deluxe Resin, unlike traditional "multipurpose" resins, has a special formulation and viscosity, which allows to obtain an impeccably transparent and glossy surface in any condition. Easily polished. The added UV Anti-Yellowing Filters helps save transparency over time. The low density allows prevent the incorporation of air bubbles making it perfectly suitable for river tables and countertops. Compatible with silicone and wood, fabric, glass, paper or photographs. Complete catalysis ~ 24-48 hours, but it will be ready for "unmoulding" after about 12 hours. 🌿 【SAFE AND CERTIFIED】 All our resins are Certified Non-Toxic, Solvent-free, non-flammable, and totally safe. 💧 【EASY TO USE】 The 100:70 mixing ratio (by weight) makes this product very easy to use. Being a two-component resin, simply mix RESIN A + HARDENER B in the ratio indicated above the package and let it harden without the need for further additives. Can be coloured as desired. 📞 【FREE PROFESSIONAL ASSISTANCE SERVICE】 Since we are directly a manufacturer, we have access to a professional laboratory that will happily help you with any complex project. 🇬🇧 【UK BASED TRUSTED COMPANY】 – RESIN-PRO team collect and send your order as fast as possible. We produce and realise epoxy resins since 2015. Just google our social media, where you find thousands of projects made with our products around the world. ____________________________________________________________________ 💥 Applications: - artworks, creation of art objects (paintings, panels, etc.) with the "fluid-art" (pour paint) technique (pouring up to 1 cm [0,39”]); - vertical applications by brush or roller - coating of surfaces, objects and furniture to add depth and brilliance to the colour; - create a 3D effect on prints, photos and images in general; - creation of a perfectly transparent protective layer on your projects. The "ART-PRO DELUXE" formula is specifically developed for coating in artistic applications. Compatible with colouring agents, powder pigments, alcohol-based and oil-based dyes, aerosol paints. Warning: the product is moisture sensitive, do not use on wet surfaces or with water-based dyes (e.g. Acrylics) ____________________________________________________________________ Epoxy resin is a complicated technical product, but if you follow the basic rules, you will get wonderful results! If you need any assistance, just call us - 07596 850968 or email us –
[email protected] With best regards, RESIN PRO TEAM😊 Check and tag our social media for inspiration! We are always happy to publish your art-work – [CP_CALCULATED_FIELDS id="1"]
$48,49
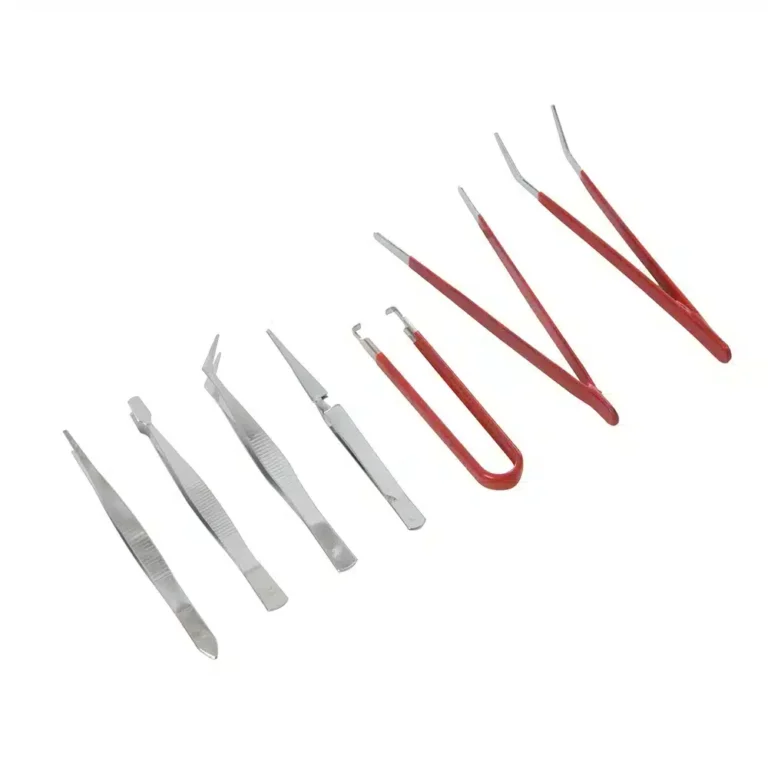
Carbon steel. Ideal for model building, clock repairs and other delicate work. Includes straight point, straight jaw, straight jaw with cushioned grip, angled jaw, angled jaw with cushioned grip, duck bill and bent cross with cushioned grip. Carbon steel Ideal for model building, clock repairs & other delicate work Includes straight point, straight jaw, straight jaw with cushioned grip, angled jaw, angled jaw with cushioned grip, bent cross with cushioned jaw & duck bill Features: Variety of Tips: The set includes pointed, slanted, and flat-tipped tweezers, among others, catering to different needs such as placing small objects, handling delicate components, and applying intricate details. Durable Construction: Made from high-quality stainless steel, these tweezers are built to last. They are resistant to corrosion and staining, ensuring long-term reliability even when working with sticky or resin-coated materials. Precision Handling: The fine tips and ergonomic design provide excellent control and accuracy, making it easy to manipulate tiny elements or achieve precise placements within your epoxy resin projects. Comfortable Grip: Each tweezer is designed with a comfortable handle that reduces hand strain during extended use, allowing for steady and precise movements. Versatile Use: Ideal for a range of tasks, including embedding decorations, positioning small items, or fine-tuning details, this set is perfect for both professional and hobbyist resin crafters. With this Tweezer Set, you'll be equipped to handle all aspects of your epoxy resin work with confidence, achieving professional-quality results and enhancing your overall crafting experience.
$9,95
Protecting your workshop from corrosion is crucial for maintaining the longevity of metal equipment and structures. Utilizing specific protective coatings like epoxy resins or silicone is essential to create a barrier against moisture and corrosive agents, preventing direct contact with metal surfaces. Before applying the coating, thorough surface preparation is key, involving meticulous cleaning and rust removal. Regular inspections are also recommended to detect early signs of corrosion and address them promptly. By adhering to these preventive measures and using the appropriate products, you can safeguard your workshop equipment from wear and corrosion in the long run.
Quotes for Metal Protection
Ensuring the protection of metals is paramount to prevent oxidation and deterioration over time. Various solutions exist for metal protection, including the application of epoxy or polyurethane resins, the use of anti-rust primers, or silicone coatings. These solutions establish a protective shield against environmental elements, moisture, and corrosive substances, thereby prolonging the lifespan of metals and preserving their aesthetic appeal. Quotes for metal protection may vary based on the type of metal, object size, and required level of protection. Consultation with an expert can provide a personalized and effective quote tailored to your specific needs.
DIY Anti-Corrosion Treatments
DIY anti-corrosion treatments offer convenient solutions for safeguarding metal surfaces from corrosion-induced damages. These treatments can be conducted independently without the need for specialized professionals. The primary steps for a successful DIY anti-corrosion treatment include thorough cleaning of the metal surface, application of designated anti-corrosion primers, and subsequent painting with suitable products. Adhering to the manufacturer's instructions is crucial to ensure a correct and effective application. DIY anti-corrosion treatments present a cost-effective option for protecting and extending the lifespan of metal surfaces exposed to atmospheric elements.
Preventing Rust Solutions
Implementing effective measures to prevent rust on metal surfaces is imperative. Consider the following solutions:
Apply protective coatings such as anti-rust paints or epoxy resins
Utilize hot-dip galvanizing or galvanization to create a protective layer on metal surfaces
Maintain dry and well-ventilated surfaces to prevent moisture accumulation
Use anti-corrosion oils or greases to shield exposed surfaces
Isolate and safeguard metal surfaces from adverse weather conditions
Conduct routine inspections and maintenance to identify and address early signs of rust
"RAPHAEL" KIT for Pour Paint & Resin Art Create your unique painting with the "RAPHAEL" kit. Experience the countless mixtures and design the perfect artwork! The "RAPHAEL" KIT includes: TRANSPARENT RESIN FOR ARTWORK AND DIY 1.66 KG [3,65 LB] NEON PIGMENTS SET RECTANGULAR FRAME CANVAS 30*30cm WOODEN SPATULA * 5pcs NITRILE GLOVES INSTRUCTION "TIPS HOW TO WORK WITH EPOXY" Transparent resin for artwork and DIY 1.66 KG [3,65 LB]. Transparent self-levelling UV-resistant epoxy system, which creates a hard and glossy protective layer for casting up to 1 cm [0,39”]. ART PRO, the epoxy resin for the artistic sector: thanks to its special formula and its dense structure, it allows you to create paintings with the "pour paint" and liquid paint technique. It does not leak out from the working surface, slowly reaching the corners of the frame. ART PRO preserves your original design and prevents any possible modification due to the casting of the resin: because of its special formula, the layers of colours do not expand and do not mix (unless you deliberately intervene), faithfully keeping with your creative idea! The surface is perfectly smooth and moisture-resistant. Solvent-free and odourless epoxy resin. Applications: - artworks, creation of art objects (paintings, panels, etc.) with the "fluid-art" (pour paint) technique (pouring up to 1 cm [0,39”]); - coating of surfaces, objects and furniture to add depth and brilliance to the colour; - create a 3D effect on prints, photos and images in general; - fixation of fillers (decorative elements, glass, stone, quartz, etc.) - creation of a perfectly transparent protective layer on your projects. The "ART-PRO" formula is specifically developed for coating in artistic applications. Compatible with colouring agents, powder pigments, alcohol-based and oil-based dyes, aerosol paints. Warning: the product is moisture sensitive, do not use on wet surfaces or with water-based dyes (e.g. Acrylics) Technical data: Usage ratio 100:66 (in weight) Pot Life (150 gr at 30°C) [0,33 lb at 86 F]: 1h20 ', Film (1 mm at 30°C) [0,03” at 86 F]: 6:00'. Full catalysis after 24 hours. Neon Pigments Set. PIGMENTS WITH COLOURED BASE are perfect for decoupage, decoration and anything related to DIY. By simply adding them to resins, paints or varnishes, you can express your creativity with truly brilliant shades (neon effect!). WARNING: pigments do not glow in the dark, as they are not fluorescent.
$69,95
Stylefile Marker Refill You get 25 ml of alcohol-based ink, which is suited for multiple refills and because of the special refill tip your bag and your fingers remain clean. The tip is designed to prevent unwanted dripping and only works if you give it a controlled squeeze.
$4,07
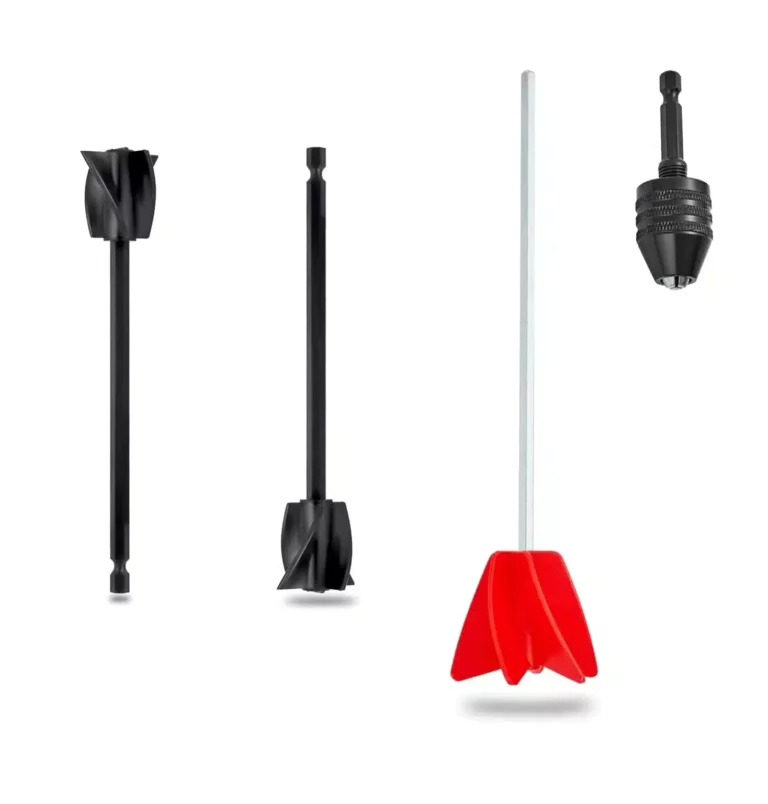
Ensures perfect mixing, avoiding bubble formation and saving time, our anti-bubble mixer is easy to use and reusable. The anti-bubble mixer for epoxy mixing is a high-quality tool that allows you to achieve perfect and uniform mixing of epoxy resins without the formation of bubbles. Thanks to its innovative technology, this blender guarantees professional results, reducing the time and effort required for mixing. In addition, the stirring blender is easy to use, clean and reusable, which makes it an environmentally friendly and economical choice for those working with epoxy resins.
$6,49

About Chopping Board Oil: Chopping Board Oil is the perfect choice for protecting, maintaining, and restoring wooden kitchen items including chopping boards, butcher blocks, wooden spoons and more. Regular application will prevent chopping boards from becoming dry, cracked, and brittle. Forming a protective barrier, Chopping Board Oil will also prevent liquid from penetrating the surface, working to reduce the proliferation of germs and bacteria. Chopping Board Oil is food-grade, making it perfect for use on items used for food preparation. The oil will never spoil, unlike many alternative treatments. The pure mineral oil penetrates the wood, providing protection, retaining and enhancing the wood's natural colour and character, while also prolonging the lifespan of your wooden kitchen boards, blocks and utensils. 250ml will treat a chopping board roughly 50 times. Once open, use within 3 years. 💥Cutting Board Oil is Suitable For: -Chopping boards -Butcher blocks -Countertops -Kitchen Utensils [xyz-ips snippet="TRUSTPILOT-WIDGET"]
$16,49
ResinPro: one supplier for all your needs
15 years of experience at your complete disposal, supplying resins and accessories for creativity, industry, DIY, flooring and marine applications.
At your home, directly from the manufacturer!
ResinPro is the direct manufacturer of our resin range for companies and hobbyists, guaranteeing the lowest prices on the market.
Learn more
The widest range of resins in the US!
We offer resins for every need, from artistic creations to marine and construction applications, far beyond the “limited” selection typically found in local DIY stores.
Expert technical support!
Our technicians provide free remote consulting to help you avoid mistakes and ensure you achieve the result you want — unlike “generic retailers” who sell 1,000 different products.
get a free consultation
RESIN PRO is a leader in resin production and distribution!
24-hour delivery: We ship across the US on the same day. Enjoy convenient home delivery with our appointment service—our courier will contact you in advance and deliver the package to your preferred location, or leave it at an alternative address of your choice.

Full support!
We provide continuous support from preparation to final application, including remote technical assistance, ensuring a smooth experience.
Talk with a specialist and place a phone order without registration and without credit cards!
 Free shipping on orders over €199,00