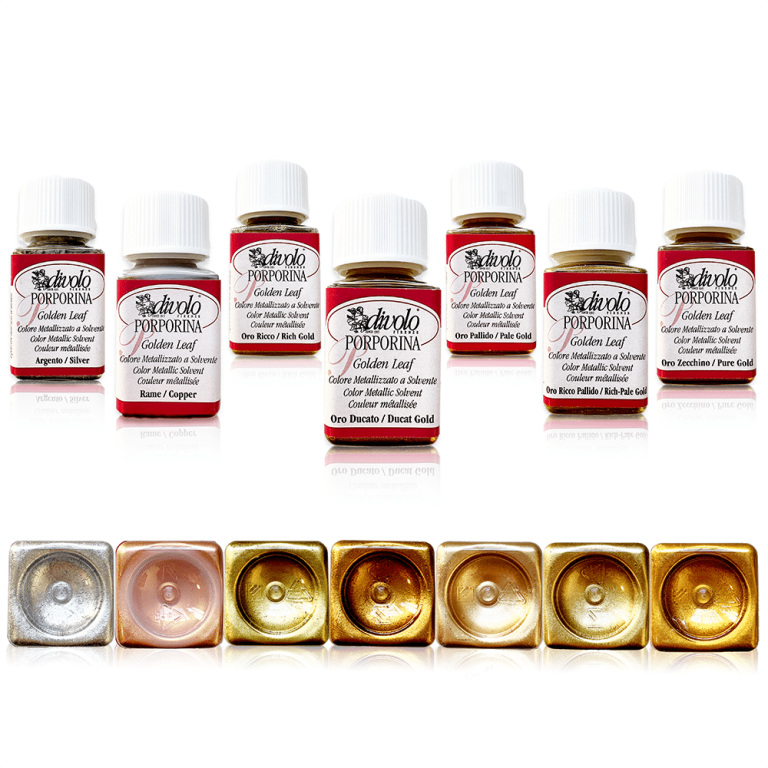
Golden Leaf is a particular paint based on metallic purples, dispersed in a solution of petroleum resin and white spirit. Once spread, the product forms a highly effective metallized film. The product can be used for finishes in the field of decoration and hobby, it is resistant and very stable when used on substrates intended for internal use. To apply this paint, just put the desired amount on a brush with which you will slowly massage the work surface. Drying time: 24 h The Golden Leaf series is available in 7 shades of different colors: Oro Ricco, Oro Pallido, Oro Ricco Pallido, Oro Zecchino, Oro Ducato, Rame, Silver.
$10,23
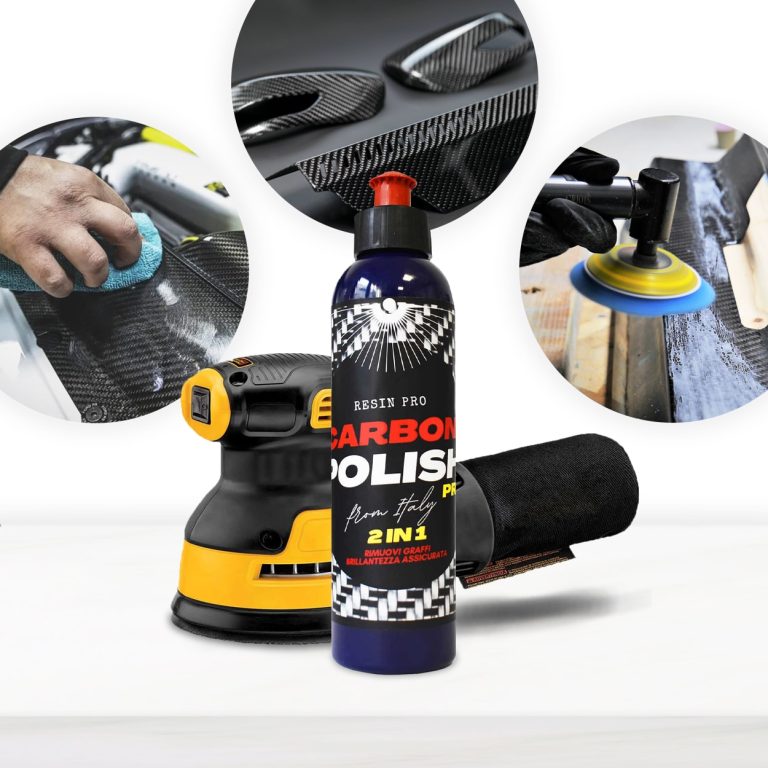
Carbon Polish Black (250ml) is the defined product for polishing your carbon, dark or black surfaces. The aesthetic and economic value of the carbon product is high, and for this reason it is essential to treat the surface with specific and dedicated products, which enhance the beauty of the “carbon look”. It is important to avoid “generic" products that can spoil the work done, with insufficient gloss or even worse, fail to remove scratches. EASY TO APPLY AND REMOVE MISCIBLE WITH WATER ODOURLESS DOES NOT WHITEN PLASTIC PARTS DOES NOT CONTAIN SILICONES VERY LOW ENVIRONMENTAL IMPACT The carbon polishing paste Carbon Polish Pro Black has been developed in a black colour precisely to ensure a brilliant finish and without white dots, typical of generic abrasive pastes. It can therefore be used for all dark surfaces (especially resin). Carbon Polish Pro Black is the specific paste for carbon; black colour prevents residues from remaining visible on surfaces after polishing. Thanks to the NAP (Nano Abrasive Particles) it is a 2 in 1 product; in fact it quickly removes scratches and defects from the surface and gives at the same time a deep shine like only a polish can do. In addition, its Synthetic Polymers allow you to correct and fill all the imperfections on the surfaces of Resin and carbon fiber artifacts. Eliminate scratches, defects and mirror shine with a single product! Carbon Polish Pro Black carbon polishing paste can be used both on the painted carbon and directly on the epoxy resin that covers the carbon fibers. Unlike commercial Polishes, Carbon Polish Pro Black is 100% Made in Italy, born from over 50 years of tradition in polishing. It allows both the hobbyist and the professions to obtain performing results quickly and easily. Here are the simple steps to polish or eliminate blemishes from your carbon fibre surfaces: If you need to use glass paper to remove the deepest scratches, you can do so without hesitation. The polishing paste will then be able to remove the sanding marks and make the surface smooth and shiny. Here's how:- The polishing paste Carbon Polish Black can be used by hand with extreme simplicity, with the help of a microfiber cloth or a foam pad. Or it can be used with electric tools, such as a drill and flexible, equipped with a special shepherd and foam pad (8000-12000 rpm) or with a polisher (1000-2000 rpm both rotary and ro orbital) with foam pad or wool (also synthetic). The use of tools of this kind will speed up the maintenance and ensure optimal results in even faster times. How to prepare the surface to be polished? Here are the tricks to make the most of NAP (Nano Abrasive Particles) technology:- Removals defects and scratches from sanding Depending on the depth of the scratch/defect, start with abrasive papers grit 800-1000 (for deep scratches) or simply 3000-4000 (for light scratches), always tend the surface wetted with water (this will help to make the result homogeneous) Apply the polishing paste for carbon fiber on the surface and spread it with circular and more or less energetic movements depending on the defect you want to remove. Or by directly attaching the buffer of the polisher / hose. We recommend one / two drops of carbon polishing paste every 3-4 cm. You can apply it several times thanks to synthetic polymers, without risking consuming the carbon, until the result is perfect. Clean up simply with water and a clean cloth. Put on your sunglasses and enjoy the dazzling result! Surface renewal: The product is also suitable as a fast and effective tool to renew your precious carbon surfaces, which wear out with normal use or exposure to atmospheric agents. In this case, the process is even easier: it is sufficient to apply the paste on the surface (well cleaned) and roll it out with circular movements, or by directly applying the buffer of the polisher / flexible. We recommend one / two drops of carbon polishing paste every 2-3 cm. The carbon polishing paste Carbon Polish Pro Black has been developed in black colour precisely to ensure a brilliant finish and without white dots, typical of generic abrasive pastes, and can therefore be used for all dark surfaces (especially resin). The special formula is free of volatile silicones and is therefore not harmful to health; it can also be used in painting processes.
$21,49
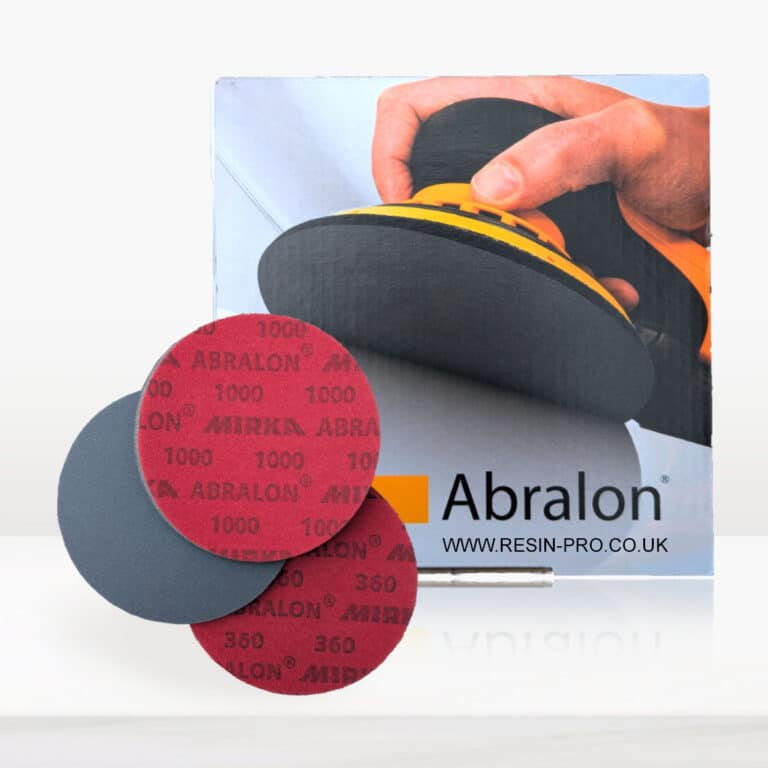
New line of polishing products SPECIFIC for plastic and resins industry. Ebonite Abralon Sanding Pads: - Ebonite Abralon Sanding Pad 150mm 360 grit - Ebonite Abralon Sanding Pad 150mm 500 grit - Ebonite Abralon Sanding Pad 150mm 1000 grit - Ebonite Abralon Sanding Pad 150mm 2000 grit - Ebonite Abralon Sanding Pad 150mm 3000 grit - Ebonite Abralon Sanding Pad 150mm 4000 grit Ebonite Abralon Sanding Pads Cosmetically appealing, consistent scratch pattern provides excellent traction. Combines the benefits of abrasive cloth and non-woven products. Opening in the fabric allows water to flow freely around the abrasive. Solid surface and foam backing provide even surface pressure. Last 5+ times longer than sandpaper. Use wet or dry (residual material can be removed by high pressure air). Now it's possible to get the most aggressive surface texture without that "cheese grater" look. Abralon sanding pads use silicon carbide particles that are precision sifted to a consistent grain size, then bonded evenly to a six-inch round fabric face for the most even scratch pattern available. WARNINGS: During processing, use protective masks, gloves, and other protective clothing. In case of contact with eyes, immediately rinse with cold water for 15 minutes and immediately consult a doctor. How to Use: Step 1: Thoroughly clean the surface with a cloth. Step 2: Now you can polish by hand or with an orbital polisher. We recommend using the lowest possible speed to get the best result. Start Polishing with 360-500 grit. Note: Sand the entire surface evenly with circular movements and light pressure. Moisten the pad or the surface with water from time to time. Step 3: Now use the 1000 grit sandpaper. Note: Moisten the sandpaper or the surface with water from time to time. Step 4: Afterwards, use 2000 grit sandpaper. Note: Moisten the sandpaper or the surface with water from time to time. Lastly, use 4000 grit sandpaper to finish sanding. Step 5: Remove the sandpaper from the polishing disc and attach a soft sponge to it. Rinse the surface or wipe it with a damp cloth to remove any residual grain of the sanding. Step 6: Apply EpoxyPolish Polishing cream on the damp sponge. Use by hand or with an orbital polisher, using a large circular motion and exerting slight pressure. Step 7: Clean the surface with plenty of water to remove all the remaining residues. Step 8: Enjoy the result!!!
$5,61
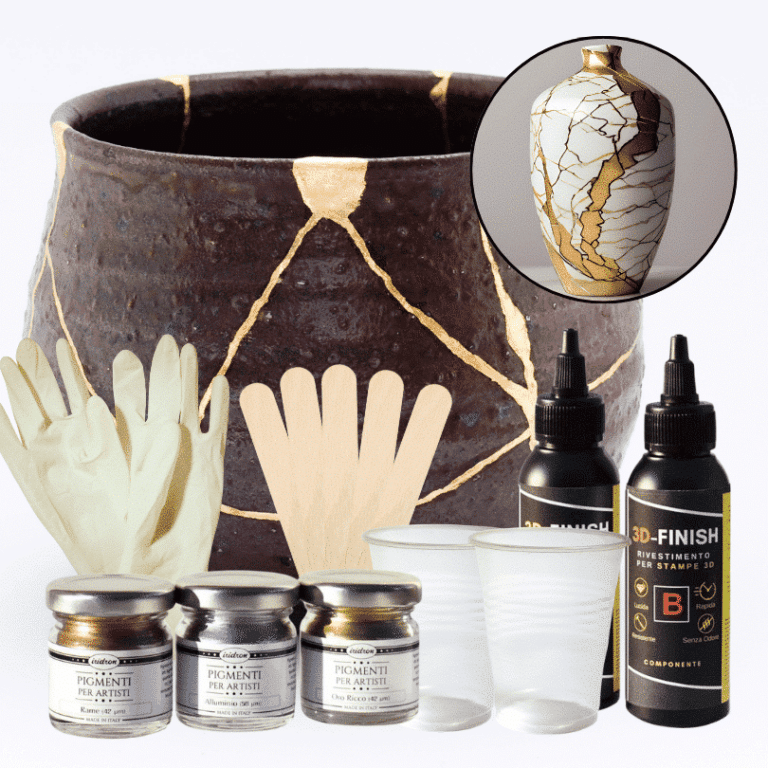
Kintsugi Repair Kit - Repair and Transform Your Ceramics with Elegance Celebrate imperfection with the ancient Japanese art Discover the traditional Japanese art of Kintsugi with our complete repair kit. Transform your broken ceramics into unique and fascinating works of art, highlighting imperfections with elegant gold, silver, or copper veins. Our kit is perfect for both beginners and experts, offering detailed instructions and everything you need to give new life and value to your most cherished items. 🌟 Specific epoxy resin (150g): slow catalysis to eliminate any bubbles or imperfections, allowing you to complete the work without rushing. 🎨 Dye of your choice (gold, copper, silver): customize your repair with a touch of elegance and refinement. ✨ Respect the tradition: follow the ancient art of Kintsugi and transform your ceramics into unique and precious treasures. The kit contains: 150g of resin for 3D decorations, 2 pairs of protective gloves, 2 mixing cups, and 5 spatulas for applying the resin, detailed instructions, everything you need in one kit. Give your ceramics a unique touch: repair them with style and make them even more beautiful. Buy the Kintsugi Repair Kit now and start creating your works of art today! Kintsugi Kit Instructions: Mix Resin: Measure 100A:50B by volume (or 100A:45B by weight) using a scale. Mix for 2 minutes, ensuring all surfaces are scraped. Add Colour: Mix your chosen metallic dye (gold, silver, or copper) into the resin to highlight the cracks. Prepare Surface: Ensure surfaces are clean, dry, and sanded. Apply Resin: Fill the cracks with the colored resin. Curing: Work in a temperature-controlled area, avoiding humidity. Safety: Wear protective gear.
$22,95
Applying Coatings on Metal: Dry vs. Wet Surfaces
Coatings can be applied to metal in both dry and wet conditions, but it is recommended to apply them on dry surfaces for better adhesion and durability. In cases where wet or damp metal needs to be coated, using specific primers or coatings designed to adhere effectively in the presence of moisture is advisable. Prior to application, ensure the surface is clean and free from oil, grease, or dirt residues that could affect adhesion. Always follow the manufacturer's instructions carefully to achieve optimal results.
Applying Epoxy Resin on Metal: A Step-by-Step Guide
To apply epoxy resin on metal effectively, follow these steps
- 1. Surface Preparation: Ensure the metal is clean, dry, and free from grease or residues. Lightly sand if necessary to enhance adhesion.
- 2. Resin Selection: Choose a resin suitable for the specific metal and intended use, such as epoxy for mechanical resistance or polyurethane for flexibility.
- 3. Mixing: Follow the manufacturer's instructions to properly mix the resin and hardener.
- 4. Application: Spread the resin evenly on the metal surface to avoid air bubbles or build-ups.
- 5. Curing: Allow the resin to dry and cure according to the recommended processing times.
By following these steps, you can successfully apply resin on metal surfaces.
Epoxy Resin on Metal: Protection and Durability
Epoxy resin on metal offers a versatile and durable solution for creating protective and decorative coatings. Composed of epoxy resins, this material provides a hard surface that is resistant to wear, weathering, and corrosion. Prior to application, it is crucial to prepare the metal surface by removing oils, grease, and impurities. The epoxy resin is then mixed and evenly spread on the metal to create an impermeable protective layer, ideal for preventing oxidation and enhancing aesthetics.
How to Use Epoxy Resin on Metal Surfaces
Epoxy resin is a versatile material for coating and protecting metal. Here's how to apply it:
Surface Preparation: Ensure the metal is clean, grease-free, and completely dry.
Mix the resin and hardener following the manufacturer's instructions.
Apply the resin evenly on the metal surface using a brush or applicator to avoid air bubbles.
Allow the resin to dry and harden for the recommended time indicated in the instructions.
Apply additional layers if needed, waiting for the drying time between each layer to achieve the desired thickness.
By following these instructions carefully, you can achieve a durable and resistant coating on metal surfaces.
Epoxy Resin for Metal Creations: Versatile and Durable
Epoxy resin is a versatile and durable material for creating jewelry, decorations, and artistic objects with metal. When mixed with specific hardeners, this resin forms a smooth and transparent surface that protects and enhances metal creations. Its strong adhesion to metal ensures a long-lasting finish. Follow the mixing and application instructions diligently to achieve optimal results. Widely used in the DIY and crafting sector, epoxy resin allows for the creation of unique and personalized pieces.
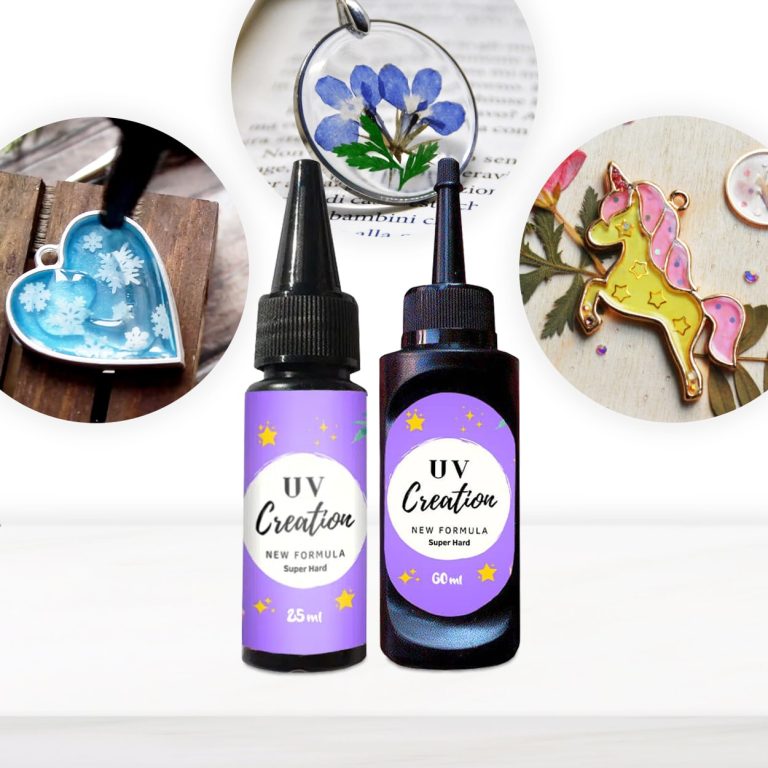
💥About "UV-CREATION" - Fast Acrylic Resin - 3 Minutes: Introducing our UV Resin, a versatile and high-quality solution for all your hand crafting needs. UV resin is an acrylic gel that dries under the influence of the rays of a UV torch or UV lamp in a short time - 3-5 minutes. The difference between this resin and epoxy resin is in its one–component nature (it does not require mixing two different components; it is ready for use), in a small filling thickness (applied in thin layers 3 mm thick) and in a high curing rate (only 3-5 minutes under UV rays). 💥 Bestseller for: Artistic Creations: Ideal for creating stunning resin art pieces, jewellery, and decorative items. DIY Projects: Perfect for a wide range of DIY projects, including encapsulating objects, and crafting personalized gifts. Crafting and Modelling: Explore its versatility in crafting, modelling, and various creative pursuits. 💥Key features: ✔️ Fast curing time: No more waiting: Create instantly - UV-CREATION is your ultimate crafting companion for fast, hassle-free creations. Say goodbye to long catalysis times and welcome instant results! Only a couple of minutes under uv-lamp and your creation is ready! ✔️ Maximum hardness, maximum shine: Our new formula guarantees first-rate hardness and a clear, glossy finish that is second to none. ✔️ Time-efficient formula: UV-CREATION's innovative formula ensures surfaces are no longer sticky after curing, saving time and material. ✔️ Non toxic: Experience the joy of creating in freedom. Our acrylic and non-toxic materials ensure that your jewellery and decorative items are safe and spectacular. -The curing time depends on the thickness of the layer or the amount of dye added to the gel. You can use lamps with a power of 3w, 9w and 36w. The main thing is that the wavelength of the lamp is 365nm -405nm. -The recommended application layer is 3 mm. You can apply 2-3 layers of 3 mm, drying each layer well with UV light before applying the next one. It is not recommended to use the product for castings with a thickness of more than 3 mm in one approach. -UV resin can be painted with dry pigments and liquid pigments, glitter and other decorative elements can be added. Alcohol ink is not suitable for UV resin staining.
$12,65
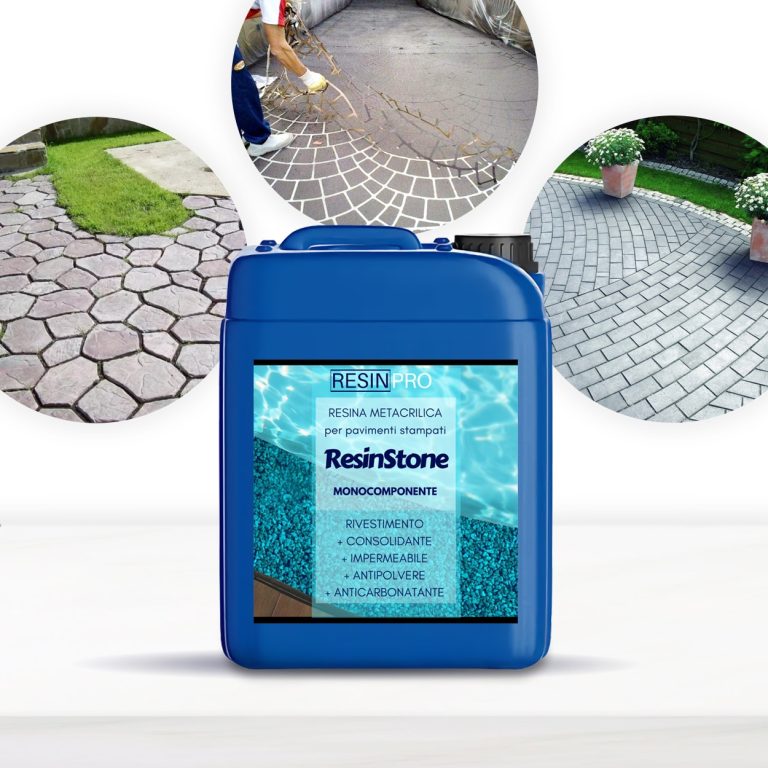
ONE-COMPONENT METHACRYLIC RESIN “RESINSTONE” for stamped floors 5 KG [176,37 Oz] ONE-COMPONENT METHACRYLIC RESIN for stamped floors CONSOLIDANT, WATERPROOF, DUSTPROOF AND ANTI-CARBONATION METHACRYLIC COATING FOR CONCRETE FLOORS. “RESINSTONE” is a low-viscosity, one-component, liquid formula that penetrates deeply for capillary absorption in concrete floors and surfaces, providing moisture protection and increasing both mechanical resistance and protection against chemical agents. “RESINSTONE” is formulated with enhanced methacrylic polymers in order to guarantee: Ø Consolidation and protection of concrete surfaces Ø Moisture protection Ø Protection against oils, acids and other chemical agents (perfect also for industrial environments) Ø Revitalization of the colour tone Concrete surfaces treated with “RESINSTONE” do not absorb water, creating polished, clean, dust-proof but still breathable surfaces. Resistant to yellowing, washing, bad weather (even acid rain). MAIN APPLICATIONS ✓ Consolidation and protection for concrete surfaces. ✓ Great to protect indoor spaces such as cellars, warehouses, garages, etc. ✓ Thanks to its excellent anti-UV rays features, it is ideal for outdoor areas such as yards, parking lots, paths, courtyards, etc. ✓ “RESINSTONE” can be applied 8 hours after the execution of the concrete artifact (following preventive test) ADVANTAGES ✓ Easy to apply (one-component, ready to use, just pour it over the concrete and wait a few hours until it is dry) ✓ Its low viscosity allows it to deeply penetrate and strengthen ✓ Fast: ready in less than 12 hours! ✓ Waterproof and water vapor permeable (thus allowing surfaces to breathe with no moisture penetration!) ✓ Good chemical resistance to oils, grease and acids. ✓ Range of applications from +5°C [41 F] to +35°C [95 F]. ✓ Resistant to temperature changes from -30°C [86 F] to +80°C [176 F]. ✓ Excellent mechanical properties make it a lasting product over the years and with high scratch-resistance if you have not enough experience, we insistly suggest to make a small test before working with large project. WARNINGS: During processing, use protective masks, gloves, and other protective clothing. In case of contact with eyes, immediately rinse with cold water for 15 minutes and immediately consult a doctor.
$42,95
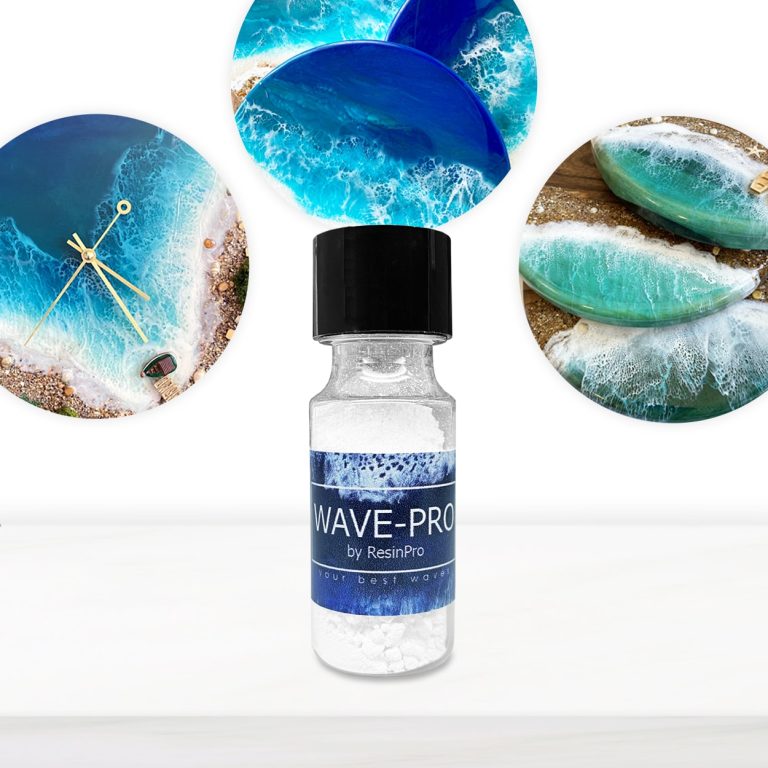
Create your personalized Sea Wave Effect! WAVE-PRO is a non-toxic powder that reacts with wet epoxy resins by repelling itself away, thereby stimulating movement in concentric outward circles and waves. Creates cells and waves in resin art Safe & user-friendly Odourless Non-toxic & non-flammable Zero-VOC formula with no harsh chemical ingredients, solvents or alcohol-based ink WAVE-PRO can be used along with our range of colours or metallic pigments. Please Note that WAVE-PRO was developed and tested with our proprietary artwork resins. Ideal for Ocean Resin Art How to use: How to work with Wave Pro - the ideal tool to create the natural sea waves effect! These instructions imply the presence of a "sea" background made of epoxy resin on your board / canvas (it can be done as acrylic paints, and just filled it with transparent resin on top, or you can make it entirely from coloured resin). The hardened "sea" background made of epoxy resin makes it possible to remove non-produced waves in case of failure. We mix the epoxy resin in the proportions indicated in the instructions (the volume depends on the scale of the work). In a cup, mix the resin and Wave Pro additive using the ratio: 3-4 teaspoons of resin and 1/2 teaspoon of Wave Pro). It is important to mix thoroughly and quickly so that the powder dissolves and turns from a pale white to a rich white. Let the mixture rest for 50-70 minutes, occasionally stirring it in a cup. Your main goal is to get a very thick mixture after the indicated time, since this is the perfect consistency for it to be blown with a blow dryer. Mix the newly obtained resin, and use it to make a transparent layer on top of your "sea" background (the key point is that without a liquid transparent layer, the wave effect will not work!). Pour a thin stream of white thick mixture onto this transparent epoxy layer and, holding the blow dryer at a 30 ° angle, blow the wave. Linger only at the beginning of the process, because the resin is thick, and the blow dryer needs to "soften" it, but as you see that the wave has gone, then immediately move along the entire wavelength without stopping. Go through the burner and wait for the resin to completely cure. Once cured, you will have your real sea :) We recommend to use the product with our TRANSPARENT EPOXY RESIN (low viscosity) https://resin-pro.co.uk/product/transparent-epoxy-resin-320-gr/ https://www.instagram.com/p/B0twAR1gDaE/?igshid=nvej64p9oa69
$4,84
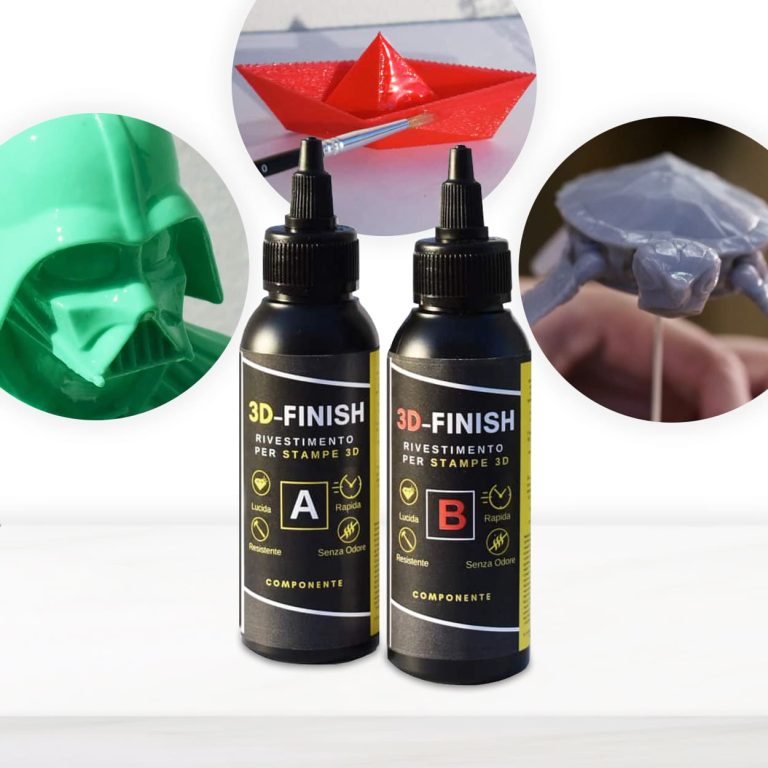
3D – FINISH “Fast” Post-print coating for polishing and finishing 3D prints. Applied on any kind print, it makes the treated surface glossy, smooth and impact-resistant. Specifically developed to be used in 3D applications, it does not drip or cover small details, faithfully respecting all the shapes of the printing. Eliminates unevenness between the different layers; Glossy; Strengthens the mechanical resistance of the printing; Can be polished and painted. If you want to paint your printing according to your tastes, 3D Finish “Fast” can be coloured with colouring pastes and metal powders. Excellent adhesion and reinforcement on PLA, LAYWOOD, ABS. Fast and effective, it is an easy-to-apply solution to create finished items through 3D printing more quickly, improving their aesthetic uniformity and their impact strength. Thanks to its high mechanical resistance, it is also perfect to be used as a bonding agent between printings or to repair damaged 3D artefacts. We recommend to store the product in a dark, cool and dry place away from direct sunlight. The tools must be washed with IPA (isopropyl alcohol).
$16,49
 Free shipping on orders over €199,00
  Shipping Tracking!


 Google
 Facebook