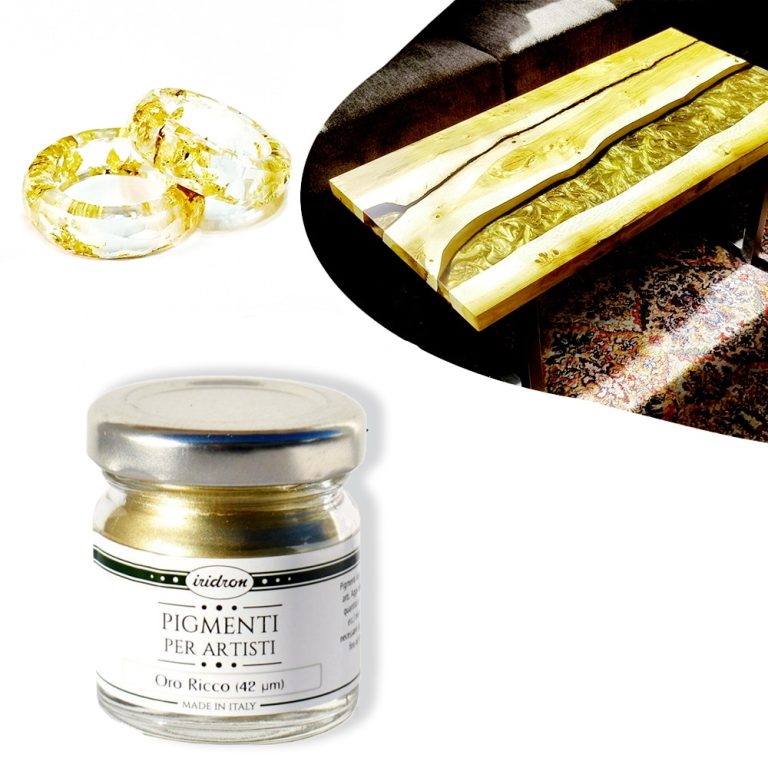
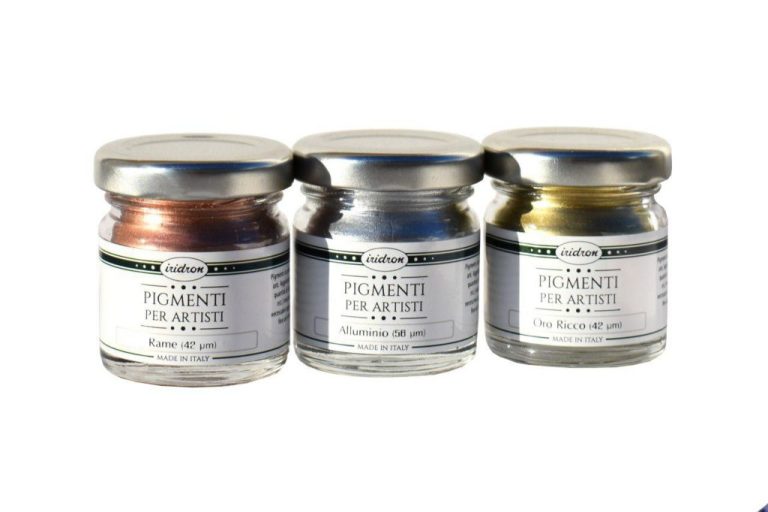
High-gloss metallic pigments with excellent covering power. Thanks to the wide range of shades, the pigments can be used in fine arts, in decoration, in restoration and in several industrial applications. THREE colours are available: aluminium, rich gold, copper. By simply adding them to resins, paints or varnishes, they are perfect for decoupage, decoration and anything related to DIY. Here is a video for those who want to start working with the Metallic Pigments Kit! https://www.youtube.com/watch?v=yW-n2AUfpBA&feature=youtu.be
$8,49
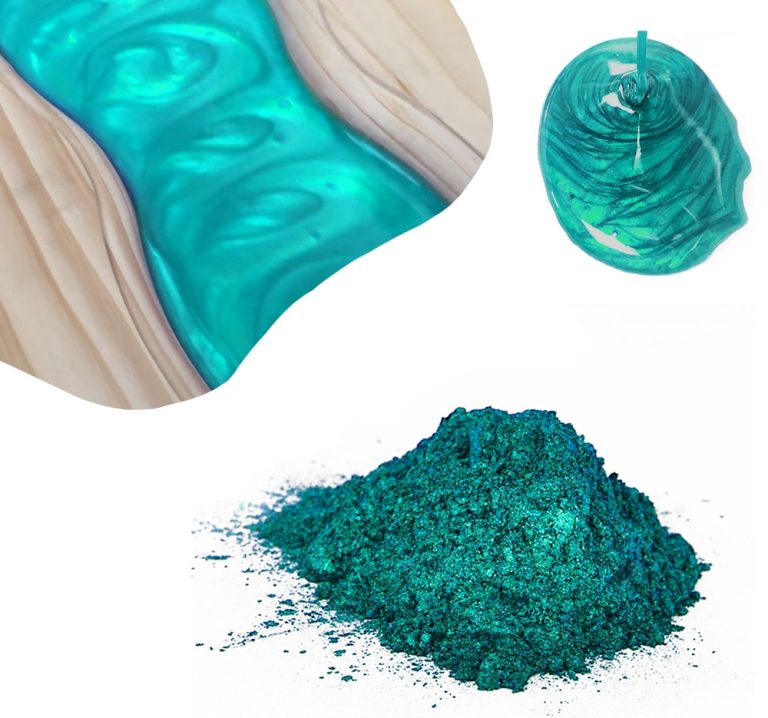
4 interference pigments for epoxy jewelry and Resin Art 🙂 In the bottle, the colors do not look as saturated as when added to the resin - examples of work and the real color of the pigment can be found on the main photo in the photo gallery of the product. Luminous pigments are made by grinding real metals. Blue and Gold are included in the Sahara and Sahara Holiday Pigment Kits, so if you've already bought these kits, you probably won't need interference pigments. Each package is equipped with a convenient dispenser and a protective cap. Color saturation can be varied by the amount of pigment used. We remind you that when working with epoxy resin, it is allowed to add pigments in an amount of no more than 5% of the total mass of the mixture.
$4,95
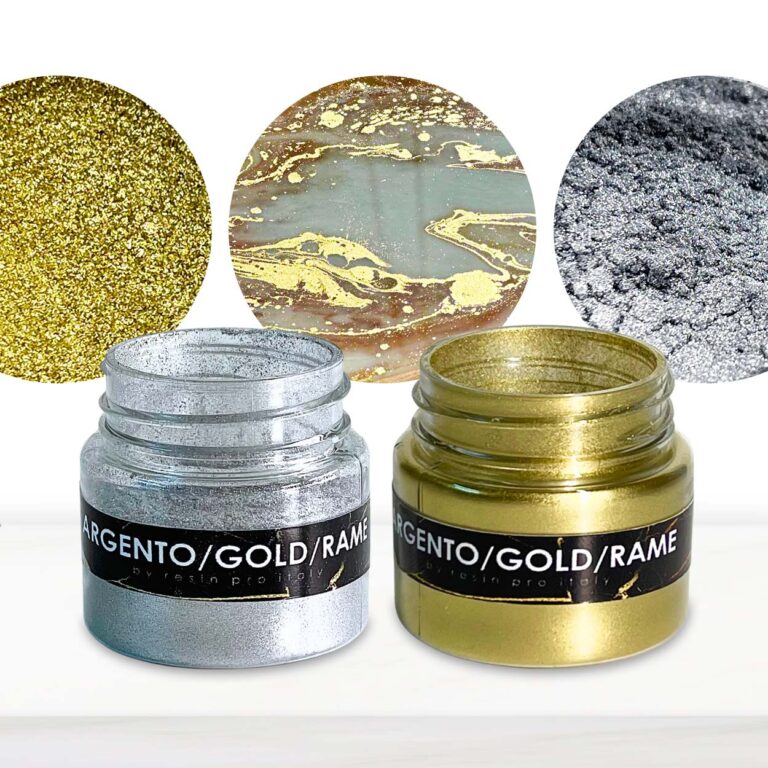
High gloss Pop up metallic pigment: a touch of luxury for your resin creations Being a very light pigment, it easily rises to the surface and leaves golden streaks allowing you to create a unique style. Ideal for: Resin Art technique, Pour Paint (Fluid Art), decoupage, decorations (paintings, furniture, boxes, trays, coasters) Do it Yourself or DIY
$6,95
3 METALLIC PIGMENTS KIT: aluminium, rich gold, copper (A metallic pigment). High-gloss metallic pigments with excellent covering power. When mixed with epoxy resin, they create a metallic effect on any item! Thanks to the wide range of shades, the pigments can be used in fine arts, in decoration, in restoration and in several industrial applications.
$24,49
How to Achieve a Modern Decorative Finish by Combining Microcement with Metallic Effects
You can elevate the look of your indoor or outdoor spaces by combining microcement with metallic effects, creating a stylish and contemporary finish. Here's a step-by-step guide on how to achieve this:
Microcement Application
Begin by applying microcement onto the desired surface following standard installation procedures. It is crucial to have a clean, smooth, and well-prepared base to ensure a uniform application of the microcement.
Metallic Effects Application
Once the microcement has dried and set, you can introduce the metallic effects. These effects can be metallic pigments, powders, or special paints that impart a metallic sheen to the surface.
Application Techniques
There are various methods to apply the metallic effects, including brushing, shading, or spraying, depending on the desired outcome. It is essential to adhere to the manufacturer's instructions for optimal results.
Sealing:
After combining microcement with metallic effects, sealing the surface with a protective coating like RESINPRO's transparent epoxy resin is vital. This protective layer will safeguard the finish and ensure its longevity over time.
Benefits of Combining Microcement with Metallic Effects:
The fusion of microcement with metallic effects offers numerous advantages, allowing you to achieve a distinct and contemporary design for both indoor and outdoor settings. Here's why this combination is highly valued:
Innovative Aesthetics:
Adding metallic pigments to microcement creates a luminous effect that adds depth and dimension to surfaces.
Customization:
Metallic effects provide a wide array of colors and shades, enabling you to customize the appearance of microcement based on your aesthetic preferences.
Contemporary Design:
The blend of microcement and metallic pigments complements modern and minimalist environments, bringing elegance and originality.
Reflectivity and Luminosity:
Metallic finishes enhance the reflectivity and brightness of treated surfaces, contributing to the creation of inviting and well-lit spaces.
Durability:
Incorporating metallic pigments does not compromise the strength and durability of microcement, ensuring a robust surface suitable for various requirements.
Ease of Maintenance:
Surfaces crafted with microcement and metallic effects are easy to clean and require minimal upkeep over time, making them ideal for diverse environments.
By combining microcement with metallic effects, you can enjoy aesthetic, functional, and practical benefits that allow you to craft distinctive and trendy spaces.
How to Apply Metallic Effect on Microcement:
To achieve the desired metallic effect on microcement, follow these steps meticulously:
Surface Preparation:
Ensure the microcement surface is clean, dry, and free of dust or dirt. Apply a specific primer if necessary to enhance the adhesion of the metallic coating.
Metallic Coating Application:
Various techniques, such as using epoxy or polyurethane resins mixed with metallic pigments, can be employed to achieve the desired effect. Apply the metallic coating with a brush, roller, or spatula according to your preference.
Uniform Application:
Ensure the metallic coating is evenly applied on the microcement surface, allowing for the creation of shades or special effects based on your chosen application method.
Drying and Finishing:
Follow the manufacturer's instructions for drying the metallic coating. Consider applying a transparent protective layer for enhanced durability and resistance.
Maintenance:
Regularly clean the surface with gentle products to maintain the metallic effect on microcement. Avoid using abrasive substances that could harm the coating.
By following these guidelines meticulously and working with care, you can achieve a stunning metallic effect on your microcement surfaces.
Most Popular Metallic Colors for Microcement:
When enhancing and personalizing microcement-coated surfaces, metallic colors are a favored choice. Some of the most popular metallic colors to pair with microcement include:
Silver:
Offers a modern and luminous appearance to microcement surfaces, ideal for creating a contemporary and sophisticated ambiance.
Gold:
Adds an elegant and luxurious touch to microcement walls or floors, infusing warmth and refinement.
Bronze:
A versatile choice that can evoke a cozy, rustic atmosphere or add a hint of antiquity and tradition to microcement-coated spaces.
Copper:
A warm metallic color that brings originality and modernity to microcement surfaces, creating a captivating contrast with the neutral tones of the coating.
Titanium:
A contemporary and sophisticated choice for those seeking a modern and minimalist aesthetic for their microcement surfaces.
Selecting one of these metallic colors or combining multiple shades can assist in crafting a unique and personalized design for environments adorned with microcement.
Mica Powder SAHARA is the perfect way to give even more emphasis to your creations. Thanks to its metallic pigments, you can create impressive 3D effects! Our new Mica Powder SAHARA is perfect to decorate your creations with resin! The mica-based pearlescent PEARLINE pigments have excellent fastness to light and high-temperature stability. Ideal for “glazing”, they can be used with all transparent resins. Thanks to the selection of colours, you can get truly unique and innovative chromatic effects. The selection of the finest raw materials and the high production technology allows us to offer a product with brilliant shades and high-dimensional constancy. Due to its wide range of colours, it can be used in several decorative applications, such as: hobbies, home decoration, fine arts, nail art.
$4,95

Resin Pro offers the possibility to achieve a perfect polishing by using different types of abrasive pastes. It can be used by hand or with an orbital polisher to make your resin creations shiny. Ebonite Abralon Sanding Pads Cosmetically appealing, consistent scratch pattern provides excellent traction. Combines the benefits of abrasive cloth and non-woven products. Opening in the fabric allows water to flow freely around the abrasive. Solid surface and foam backing provide even surface pressure. Last 5+ times longer than sandpaper. Use wet or dry (residual material can be removed by high pressure air). Now it's possible to get the most aggressive surface texture without that "cheese grater" look. Abralon sanding pads use silicon carbide particles that are precision sifted to a consistent grain size, then bonded evenly to a six-inch round fabric face for the most even scratch pattern available. WARNINGS: During processing, use protective masks, gloves, and other protective clothing. In case of contact with eyes, immediately rinse with cold water for 15 minutes and immediately consult a doctor. The kits may include by variations: EpoxyPolish Polishing cream – 250 ml [8,79 oz] - 1pc Ebonite Abralon Sanding Pads: - Ebonite Abralon Sanding Pad 150mm 360 grit - 1pc - Ebonite Abralon Sanding Pad 150mm 500 grit - 1pc - Ebonite Abralon Sanding Pad 150mm 1000 grit - 1pc - Ebonite Abralon Sanding Pad 150mm 2000 grit - 1pc - Ebonite Abralon Sanding Pad 150mm 3000 grit - 1pc - Ebonite Abralon Sanding Pad 150mm 4000 grit - 1pc EpoxyPolish Polishing cream How to Use: Step 1: Thoroughly clean the surface with a cloth. Step 2: Now you can polish by hand or with an orbital polisher. We recommend using the lowest possible speed to get the best result. Start Polishing with 360-500 grit. Note: Sand the entire surface evenly with circular movements and light pressure. Moisten the pad or the surface with water from time to time. Step 3: Now use the 1000 grit sandpaper. Note: Moisten the sandpaper or the surface with water from time to time. Step 4: Afterwards, use 2000 grit sandpaper. Note: Moisten the sandpaper or the surface with water from time to time. Lastly, use 4000 grit sandpaper to finish sanding. Step 5: Remove the sandpaper from the polishing disc and attach a soft sponge to it. Rinse the surface or wipe it with a damp cloth to remove any residual grain of the sanding. Step 6: Apply EpoxyPolish Polishing cream on the damp sponge. Use by hand or with an orbital polisher, using a large circular motion and exerting slight pressure. Step 7: Clean the surface with plenty of water to remove all the remaining residues. Step 8: Enjoy the result!!!
$21,49
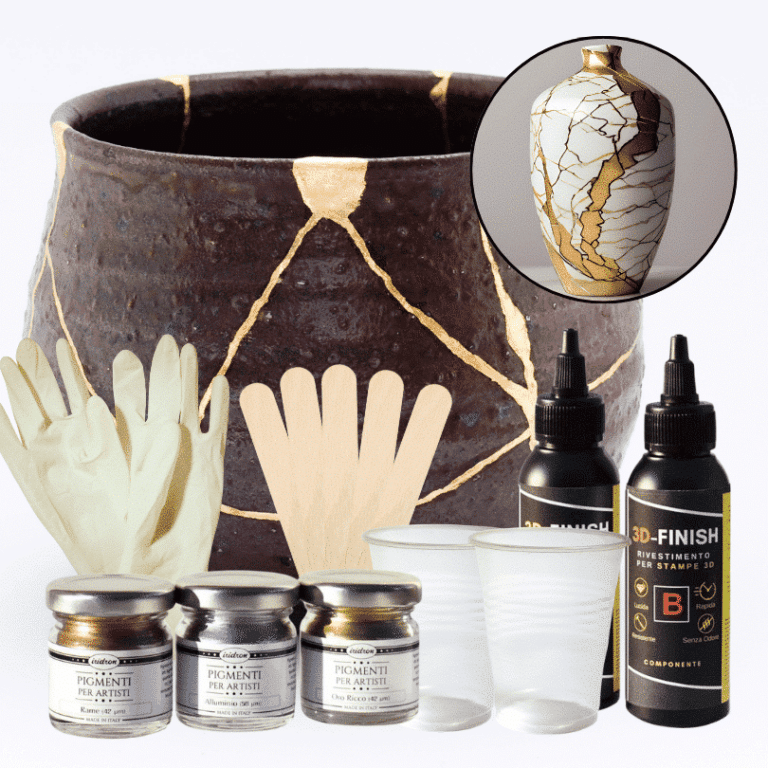
Kintsugi Repair Kit - Repair and Transform Your Ceramics with Elegance Celebrate imperfection with the ancient Japanese art Discover the traditional Japanese art of Kintsugi with our complete repair kit. Transform your broken ceramics into unique and fascinating works of art, highlighting imperfections with elegant gold, silver, or copper veins. Our kit is perfect for both beginners and experts, offering detailed instructions and everything you need to give new life and value to your most cherished items. 🌟 Specific epoxy resin (150g): slow catalysis to eliminate any bubbles or imperfections, allowing you to complete the work without rushing. 🎨 Dye of your choice (gold, copper, silver): customize your repair with a touch of elegance and refinement. ✨ Respect the tradition: follow the ancient art of Kintsugi and transform your ceramics into unique and precious treasures. The kit contains: 150g of resin for 3D decorations, 2 pairs of protective gloves, 2 mixing cups, and 5 spatulas for applying the resin, detailed instructions, everything you need in one kit. Give your ceramics a unique touch: repair them with style and make them even more beautiful. Buy the Kintsugi Repair Kit now and start creating your works of art today! Kintsugi Kit Instructions: Mix Resin: Measure 100A:50B by volume (or 100A:45B by weight) using a scale. Mix for 2 minutes, ensuring all surfaces are scraped. Add Colour: Mix your chosen metallic dye (gold, silver, or copper) into the resin to highlight the cracks. Prepare Surface: Ensure surfaces are clean, dry, and sanded. Apply Resin: Fill the cracks with the colored resin. Curing: Work in a temperature-controlled area, avoiding humidity. Safety: Wear protective gear.
$22,95
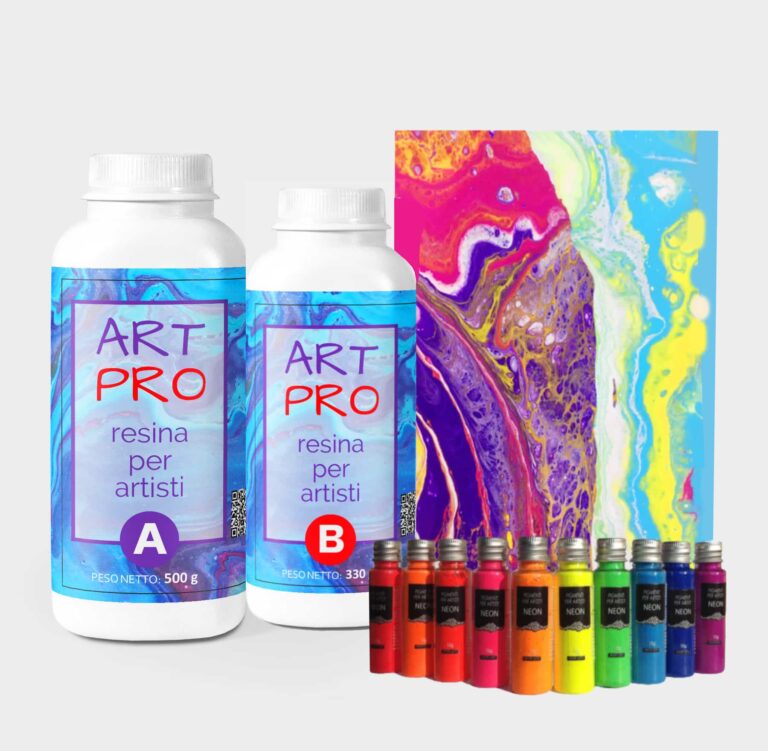
"RAPHAEL" KIT for Pour Paint & Resin Art Create your unique painting with the "RAPHAEL" kit. Experience the countless mixtures and design the perfect artwork! The "RAPHAEL" KIT includes: TRANSPARENT RESIN FOR ARTWORK AND DIY 1.66 KG [3,65 LB] NEON PIGMENTS SET RECTANGULAR FRAME CANVAS 30*30cm WOODEN SPATULA * 5pcs NITRILE GLOVES INSTRUCTION "TIPS HOW TO WORK WITH EPOXY" Transparent resin for artwork and DIY 1.66 KG [3,65 LB]. Transparent self-levelling UV-resistant epoxy system, which creates a hard and glossy protective layer for casting up to 1 cm [0,39”]. ART PRO, the epoxy resin for the artistic sector: thanks to its special formula and its dense structure, it allows you to create paintings with the "pour paint" and liquid paint technique. It does not leak out from the working surface, slowly reaching the corners of the frame. ART PRO preserves your original design and prevents any possible modification due to the casting of the resin: because of its special formula, the layers of colours do not expand and do not mix (unless you deliberately intervene), faithfully keeping with your creative idea! The surface is perfectly smooth and moisture-resistant. Solvent-free and odourless epoxy resin. Applications: - artworks, creation of art objects (paintings, panels, etc.) with the "fluid-art" (pour paint) technique (pouring up to 1 cm [0,39”]); - coating of surfaces, objects and furniture to add depth and brilliance to the colour; - create a 3D effect on prints, photos and images in general; - fixation of fillers (decorative elements, glass, stone, quartz, etc.) - creation of a perfectly transparent protective layer on your projects. The "ART-PRO" formula is specifically developed for coating in artistic applications. Compatible with colouring agents, powder pigments, alcohol-based and oil-based dyes, aerosol paints. Warning: the product is moisture sensitive, do not use on wet surfaces or with water-based dyes (e.g. Acrylics) Technical data: Usage ratio 100:66 (in weight) Pot Life (150 gr at 30°C) [0,33 lb at 86 F]: 1h20 ', Film (1 mm at 30°C) [0,03” at 86 F]: 6:00'. Full catalysis after 24 hours. Neon Pigments Set. PIGMENTS WITH COLOURED BASE are perfect for decoupage, decoration and anything related to DIY. By simply adding them to resins, paints or varnishes, you can express your creativity with truly brilliant shades (neon effect!). WARNING: pigments do not glow in the dark, as they are not fluorescent.
$69,95
 Free shipping on orders over €199,00
  Shipping Tracking!


 Google
 Facebook