
Finally, the first food contact certified* TRANSPARENT Epoxy Resin! To coat your plates and cutting boards! Non-toxic and certified for food contact (liquids included). Two-component, high-modulus, unfilled, medium-fluidized epoxy system. The system is composed using only raw materials included in the positive list of substances allowed for food contact (EU Regulation No. 10/2011 January 14, 2011) Two-component unfilled high-modulus epoxy resin, medium viscosity. Excellent surface finish and good resistance to yellowing, to be used for casting, characterized by high transparency, good outdoor stability, excellent mechanical resistance and resistance to basic and acid chemical substances. For self-leveling casting. Its medium-high viscosity allows a wide range of applications specifically for the realization of non-toxic surfaces. Charged with mineral aggregates of appropriate grain size, it is used to create self-leveling epoxy and screed surfaces suitable for contact with food. The main features of this product are: high transparency, excellent mechanical resistance, good chemical and carbonation resistance, high impregnation and reinforcement of technical fabrics, long working time, glossy and self-levelling surface. heat resistance - up to 70 C [158 F] 💥Key features: ⚙️ 【RESIN FOR FOOD CONTACT】 The particular formula makes the product, once cured, perfectly compatible with any type of food and is guaranteed by a specific certification. 🧪 【HIGH QUALITY】 Perfectly transparent even after catalysis. Totally shiny and self-leveling, complete catalysis will take about 24/48 hours - depending on atmospheric and environmental conditions - but it will already be workable after about 10 hours. 🌿 【SAFE AND CERTIFIED】 All our resins are Certified Non-Toxic, Solvent-free, non-flammable, and totally safe. Certified for contact with cold snacks. 💧 【EASY TO USE】 The 100:55 mixing ratio makes this product very easy to use. Being a two-component resin, simply mix RESIN A + HARDENER B in the ratio indicated above the package and let it harden without the need for further additives. 📞 【FREE PROFESSIONAL ASSISTANCE SERVICE] Since we are directly a manufacturer, we have access to a professional laboratory that will happily help you with any complex project. * Documentation ensures that the raw materials used are those listed by the Ministry of Health and the migration laboratory test on cured resin samples shall further ensure that the final product does not release any harmful substances if applied following the instructions. This information can be consulted by the end users in the HCCP certification which is the responsibility of the user. EpoxyFood : Food Contact Certificate:
$26,99
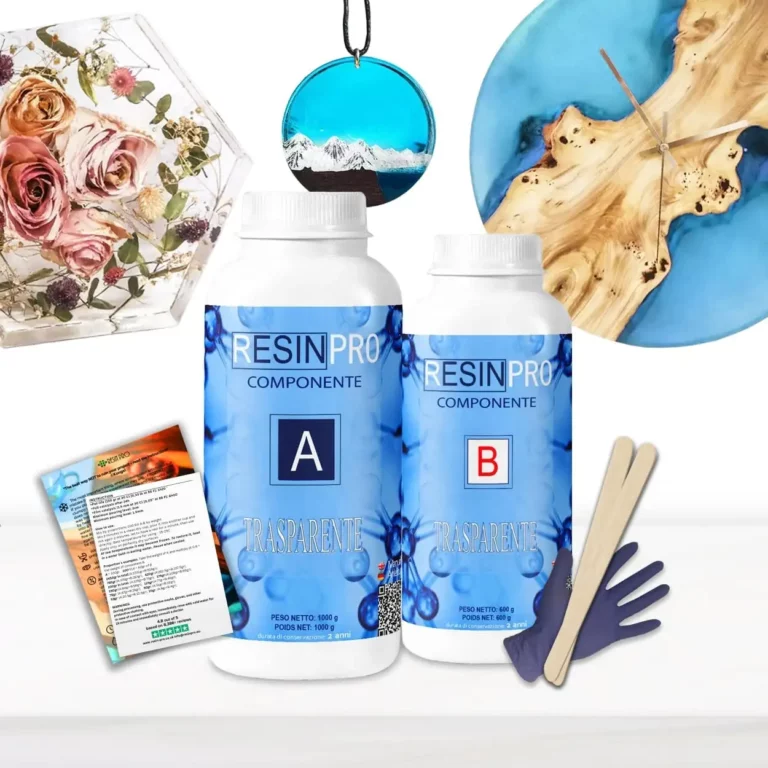
💥 Bestseller for: –Wood-working: Coating, Countertops and Tables, Lamps and Works of art; –Restoration and surface coating: Wood, Concrete, Ceramics, Canvas, Glass fiber, Floors; –DIY: Coasters, Penny-floors, Jewellery making, Dynamic modeling and Artistic creations; –Industrial: Boat care and maintenance; Impregnation of technical fabrics (fiberglass, carbon fiber, etc). 💥About “TRANSPARENT” – Ultra Clear Multipurpose Epoxy Resin: Our Non-Toxic Transparent Epoxy Resin is a high-quality, multipurpose resin that has become a top choice for thousands of customers around the world. It is perfect for creating stunning art pieces, tables jewelry, countertops, DIY projects, and woodworking. This resin is formulated to be safe and non-toxic, making it a great option for artists who are conscious of their environmental impact. It is odorless and VOC-free, making it safe to use indoors. While our Non-Toxic Transparent Epoxy Resin is safe to use, we do advise taking proper safety precautions when working with any type of resin. We recommend using gloves and masks or working in a well-ventilated area to avoid any potential irritation or allergic reactions. Non-Toxic Transparent Epoxy Resin is self-leveling and has a high-gloss finish. It is easy to use and can be mixed with a variety of pigments to create a wide range of colors. One of the best features of our Non-Toxic Transparent Epoxy Resin is its ability to create a super solid and shiny surface after full curing time. It can be used on a variety of surfaces, including wood, stone, ceramics, and more. It is perfect for creating unique and stunning pieces that are sure to impress. We offer free shipping on this product, so you can get started on your project right away. Plus, with its long shelf life, you can store it for future projects. Choose our Non-Toxic Transparent Epoxy Resin for a safe, high-quality, multipurpose option for all your creative needs. 💥Key features: • ⚙️ 【ULTRA TRANSPARENT EPOXY RESIN】-The crystal clear epoxy resin is suitable for both beginners and professionals. Start making jewelry, tables, and any other DIY – creation that involves the use of resin. • 🧪 【PROFESSIONAL QUALITY】-Made from high-quality materials – Excellent transparency, No bubbles, Odourless – because of a unique formula for DIY, craft and artistic creations. Ideal for casting and embedding objects too. Compatible with silicone, wood, fabric, glass and paper. • 🌿 【SAFE AND CERTIFIED】-All our resins are Certified Non-Toxic, Solvent-free, non-flammable, and totally safe. • 💧 【EASY TO USE】-The 100:60 mixing ratio makes this product very easy to use. Being a two-component resin, simply mix RESIN A + HARDENER B in the ratio indicated above the package and let it harden without the need for further additives. Can be colored as desired. • 📞 【FREE PROFESSIONAL ASSISTANCE SERVICE】-Since we are directly a manufacturer, we have access to a professional laboratory that will happily help you with any complex project 💥Suitable for: –Wood-working: Coating, Countertops and Tables, Lamps and Works of art; –Restoration or surface coating: Wood, Concrete, Ceramics, Canvas, Glass fiber, Floors; –DIY: Coasters, Penny-floors, Jewellery making, Dynamic modeling and Artistic creations; –Industrial: Boat care and maintenance; Impregnation of technical fabrics (fiberglass, carbon fiber, etc). + Heat and chemical resistance (Up to 70C); + Long working time; + Odourless; + Excellent mechanical strength;
$10,67

💥 Great choice for: –Stickers and Labels: Coating custom-made stickers, Labels, and Decals for long-lasting, Waterproof protection; –Medals and Badges: Protecting and enhancing the appearance of awards, badges, or emblems; –Resin Art: Adding a flexible, glossy finish to artworks. 💥About “BE FLEX” – "BE FLEX" - Transparent Polyurethane Resin for Doming – Scratch-Resistant: Protect and Enhance Your Creations with Resin Pro BeFlex: Multifunctional Protection: Perfect for coating stickers, medals, plaques, labels, and more. Provides full coverage and long-lasting protection against abrasions, scratches, and moisture. Flexible and Durable: BeFlex creates a flexible, transparent film that keeps your creations safe and shiny. It remains clear without yellowing, even after years, and resists scratches effectively. Easy Application: Suitable for any surface, from printed paper to resin, and even for embedding lights and LED lamps. Superior Quality Results: With BeFlex, your creations won’t just be protected but will also boast a glossy, premium appearance. Ideal for labels (including outdoor use) and for long-lasting surface protection. TECHNICAL DATA "BE FLEX" - Transparent Epoxy Resin for Dooming – Scratch-Resistant USE RATIO (by weight): 97A: 100B Coverage 1kg: 100*60*0.15cm 1sqm consumption (1.5mm thickness): 5kg Observe the use ratio and mix thoroughly for at least 3 minutes. Complete catalysis after 24h.
$31,95
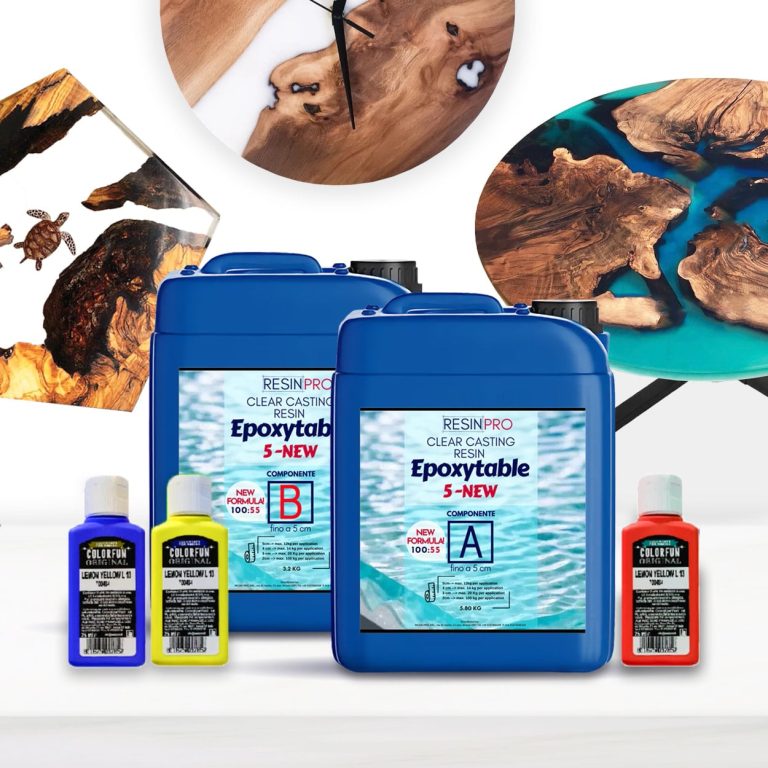
Bestseller for projects up to 5cm: –Tabletops & furniture: Ideal for creating & coating tabletops, including dining tables and countertops. –DIY & Home Decor: Use it for artistic projects and decorative elements. –Craft & Wood-working: A versatile choice for creative crafting projects, like dioramas and dynamic modelling. 💥About “EPOXYTABLE 5-FIVE” - deep pour epoxy resin for tables & large projects: Finally, the ultimate product that allows high-thickness castings, non-yellowing and scratch-resistant. Ultra-low exothermic reaction allows high-thickness castings WITHOUT OVERHEATING and DEFORMATIONS. Perfectly TRANSPARENT and BUBBLE-FREE. Specially designed to be used to create wooden and resin tables and for large castings for artistic works. 💥Key features: ⚙️ 【RIVERTABLE, COUNTERTOPS AND DEEP COATING RESIN】-Ideal for the wood and deep river tables, countertops or for the creation of objects that require high thickness casting. Special low exothermic reaction and its low viscosity are perfectly to deep thickness castings, guaranteeing stability and resistance to your creations. Detailed instruction and gloves for free. 🧪 【HIGH QUALITY】-Totally shiny, self-leveling and odourless epoxy resin. Easily polished. The added UV Anti-Yellowing Filters helps save transparency over time. The low density allows prevent the incorporation of air bubbles making it perfectly suitable for river tables and countertops. Compatible with silicone and wood, fabric, glass, paper or photographs. Complete catalysis ~ 5-7 days, but it will already be workable after about 72 hours. 🌿 【SAFE AND CERTIFIED】-All our resins are Certified Non-Toxic, Solvent-free, non-flammable, and totally safe. 💧 【EASY TO USE】-The 100:55 mixing ratio makes this product very easy to use. Being a two-component resin, simply mix RESIN A + HARDENER B in the ratio indicated above the package and let it harden without the need for further additives. Can be coloured as desired. 🇬🇧 【UK BASED TRUSTED COMPANY】 - RESIN-PRO team fulfils your order as fast as possible. We produce and realise epoxy resins since 2015. Just check our social media, where you will find thousands of projects made with our products around the world. THINGS TO KNOW: If one of the sides of the project is more than 100cm or the total weight of pouring epoxy is more than 8kg we insistently recommend to do a casting in two and more layers! (waiting 6- 8 hours between them). Please, pay extra attention mixing bulky amounts! 5cm–> max. 12kg per application 4cm –> max. 14 kg per application 3cm .–> max. 20 Kg per application 2cm –> max. 100 kg per application *Free colorant is just a sample. For getting a solid color you need the next quantity - 9kg - 3pcs of 25ml (75ml) 18kg - 6pcs of 25ml (150ml) You can add additional items here - RESIN COLOUR TRANSLUCENT EFFECT 25 ML
$21,49
How to Create Clear Epoxy Resin Panels
Clear epoxy resin panels are crafted by pouring epoxy resin into a transparent mold and incorporating colorants or pigments for customization. It is crucial to meticulously adhere to the manufacturer's guidelines for mixing and applying the resin. Once the curing process is complete, the panels can be sanded and polished to attain a transparent and glossy finish. Remember to operate in a well-ventilated space and utilize appropriate personal protective gear when working with the resin.
Silicone Mold Tutorial for Epoxy Resin
Silicone molds play a fundamental role in shaping custom and intricate designs with epoxy resin. Follow these steps to create them:
- Prepare the model, ensuring it is spotless and devoid of any defects.
- Pour the silicone into a container and mix it thoroughly.
- Position the model in a container and pour the silicone over it.
- Allow it to dry for the specified duration.
- Remove the model, and your silicone mold will be primed for use.
Colored Pigments for Clear Epoxy Resin
Tailored colored pigments for clear epoxy resin are specialized formulations that enable tinting the resin without jeopardizing its transparency. These pigments are formulated to be blended with epoxy or silicone resins to produce bespoke colors. Available in a range of hues, they can be employed for art pieces, jewelry coatings, and more, imparting a distinctive touch to projects involving clear resin.
DIY Guide for Epoxy Resin Panels
Crafting epoxy resin panels is a gratifying and imaginative endeavor. Here's a DIY guide to help you successfully fabricate resin panels:
Prepare the workspace, ensuring a well-ventilated and sanitary environment for safe operations.
Accurately measure and mix epoxy resin and catalyst as per the manufacturer's instructions. Thoroughly mix for 2-3 minutes.
Incorporate colors and pigments if desired. Thoroughly blend in appropriate pigments or colorants.
Gently pour the resin onto the prepared panel, ensuring uniform coverage.
Employ a torch to eliminate any air bubbles that may form during pouring.
Allow it to dry in a warm, dry location for the specified time outlined in the resin instructions.
Finishing Touches: Once dry, sand and polish the panel to achieve the desired outcome.
By adhering to these straightforward yet pivotal steps, you can fashion exquisite DIY resin panels to elevate your living space or present as thoughtful gifts to cherished individuals.

Resin Pro offers the possibility to achieve a perfect polishing by using different types of abrasive pastes. It can be used by hand or with an orbital polisher to make your resin creations shiny. Ebonite Abralon Sanding Pads Cosmetically appealing, consistent scratch pattern provides excellent traction. Combines the benefits of abrasive cloth and non-woven products. Opening in the fabric allows water to flow freely around the abrasive. Solid surface and foam backing provide even surface pressure. Last 5+ times longer than sandpaper. Use wet or dry (residual material can be removed by high pressure air). Now it's possible to get the most aggressive surface texture without that "cheese grater" look. Abralon sanding pads use silicon carbide particles that are precision sifted to a consistent grain size, then bonded evenly to a six-inch round fabric face for the most even scratch pattern available. WARNINGS: During processing, use protective masks, gloves, and other protective clothing. In case of contact with eyes, immediately rinse with cold water for 15 minutes and immediately consult a doctor. The kits may include by variations: EpoxyPolish Polishing cream – 250 ml [8,79 oz] - 1pc Ebonite Abralon Sanding Pads: - Ebonite Abralon Sanding Pad 150mm 360 grit - 1pc - Ebonite Abralon Sanding Pad 150mm 500 grit - 1pc - Ebonite Abralon Sanding Pad 150mm 1000 grit - 1pc - Ebonite Abralon Sanding Pad 150mm 2000 grit - 1pc - Ebonite Abralon Sanding Pad 150mm 3000 grit - 1pc - Ebonite Abralon Sanding Pad 150mm 4000 grit - 1pc EpoxyPolish Polishing cream How to Use: Step 1: Thoroughly clean the surface with a cloth. Step 2: Now you can polish by hand or with an orbital polisher. We recommend using the lowest possible speed to get the best result. Start Polishing with 360-500 grit. Note: Sand the entire surface evenly with circular movements and light pressure. Moisten the pad or the surface with water from time to time. Step 3: Now use the 1000 grit sandpaper. Note: Moisten the sandpaper or the surface with water from time to time. Step 4: Afterwards, use 2000 grit sandpaper. Note: Moisten the sandpaper or the surface with water from time to time. Lastly, use 4000 grit sandpaper to finish sanding. Step 5: Remove the sandpaper from the polishing disc and attach a soft sponge to it. Rinse the surface or wipe it with a damp cloth to remove any residual grain of the sanding. Step 6: Apply EpoxyPolish Polishing cream on the damp sponge. Use by hand or with an orbital polisher, using a large circular motion and exerting slight pressure. Step 7: Clean the surface with plenty of water to remove all the remaining residues. Step 8: Enjoy the result!!!
$21,49

💥 BESTSELLER FOR: –Resin-art: Geode-art, Ocean-art, Coasters, Trays, Fluid art (pour paint) and Art objects; –Surface coating: Coating + very good for vertical applications by brush or roller; –Restoration : Covering objects and furniture to add depth and brilliance to the colour. The surface is perfectly smooth and moisture-resistant. Solvent-free and odourless epoxy resin. 💥About ULTRA-HIGH VISCOSITY epoxy resin for artists "ART PRO DELUXE": The epoxy resin for the artistic sector: thanks to its special formula and its dense structure, it allows you to create paintings with the "pour paint" and liquid paint technique. It does not leak out from the working surface, slowly reaching the corners of the frame. Great choice for ocean-art; coasters and trays! ART PRO DELUXE preserves your original design and prevents any possible modification due to the casting of the resin: because of its special thick formula, the layers of colours do not expand and do not mix (unless you deliberately intervene), faithfully keeping with your creative idea! Additional features: Crystal Clear; + Odourless; + Excellent mechanical strength; + High impregnation and reinforcement of technical fabrics. The product can be coloured with any epoxy dye (both in paste and powder) in a percentage no more than 5% from the mix weight. It can also be thickened by the use of aggregates such as powders and fumed silica. DEAR ARTISTS! This type of epoxy has higher viscosity than you may expect! Please, read this note - 1. If you have no a lot of experience or you prefer to work with more liquid resin, please, check this Resin 👉🏽 ART PRO 2. If you prefer to do art-works in more viscosity resin, please, choose ART PRO DELUXE. But if it`s your first experience, we suggest to design your project before pouring, because, in this case you have short working-time (15-20 min). Due to its exceptionally high viscosity, our Deluxe epoxy resin is ideally suited for delicate casting projects, including ocean art, pour-art, and other creations that demand a resin with superior viscosity. When undertaking basic castings of 1-1.5cm, special care is needed to address bubble formation. We recommend a multi-layer approach for such castings, employing a heat gun after each application. For these projects, we suggest considering our lower viscosity resins - "Transparente" and "Art-Pro" - as the optimal solutions. Transparent self-levelling UV-resistant epoxy system, which creates a hard and glossy protective layer for casting up to 1 cm [0,39”] (ex. coasters, trays, art objects). The surface is perfectly smooth and moisture-resistant. Solvent-free and odourless epoxy resin. 💥Key features: ⚙️ 【RESIN ART EPOXY】 ART PRO DELUXE EPOXY RESIN is a ultra-high viscosity and high resistance product. The best choice for Resin-art, making Coasters, Trays, Ocean and Geode-art and casting surfaces. The particular formulation makes it a resistant product suitable for both the surface finishes of paintings, tables or even artistic floors. 🧪 【PROFESSIONAL QUALITY】Art Pro Deluxe Resin, unlike traditional "multipurpose" resins, has a special formulation and viscosity, which allows to obtain an impeccably transparent and glossy surface in any condition. Easily polished. The added UV Anti-Yellowing Filters helps save transparency over time. The low density allows prevent the incorporation of air bubbles making it perfectly suitable for river tables and countertops. Compatible with silicone and wood, fabric, glass, paper or photographs. Complete catalysis ~ 24-48 hours, but it will be ready for "unmoulding" after about 12 hours. 🌿 【SAFE AND CERTIFIED】 All our resins are Certified Non-Toxic, Solvent-free, non-flammable, and totally safe. 💧 【EASY TO USE】 The 100:70 mixing ratio (by weight) makes this product very easy to use. Being a two-component resin, simply mix RESIN A + HARDENER B in the ratio indicated above the package and let it harden without the need for further additives. Can be coloured as desired. 📞 【FREE PROFESSIONAL ASSISTANCE SERVICE】 Since we are directly a manufacturer, we have access to a professional laboratory that will happily help you with any complex project. 🇬🇧 【UK BASED TRUSTED COMPANY】 – RESIN-PRO team collect and send your order as fast as possible. We produce and realise epoxy resins since 2015. Just google our social media, where you find thousands of projects made with our products around the world. ____________________________________________________________________ 💥 Applications: - artworks, creation of art objects (paintings, panels, etc.) with the "fluid-art" (pour paint) technique (pouring up to 1 cm [0,39”]); - vertical applications by brush or roller - coating of surfaces, objects and furniture to add depth and brilliance to the colour; - create a 3D effect on prints, photos and images in general; - creation of a perfectly transparent protective layer on your projects. The "ART-PRO DELUXE" formula is specifically developed for coating in artistic applications. Compatible with colouring agents, powder pigments, alcohol-based and oil-based dyes, aerosol paints. Warning: the product is moisture sensitive, do not use on wet surfaces or with water-based dyes (e.g. Acrylics) ____________________________________________________________________ Epoxy resin is a complicated technical product, but if you follow the basic rules, you will get wonderful results! If you need any assistance, just call us - 07596 850968 or email us –
[email protected] With best regards, RESIN PRO TEAM😊 Check and tag our social media for inspiration! We are always happy to publish your art-work – [CP_CALCULATED_FIELDS id="1"]
$48,49
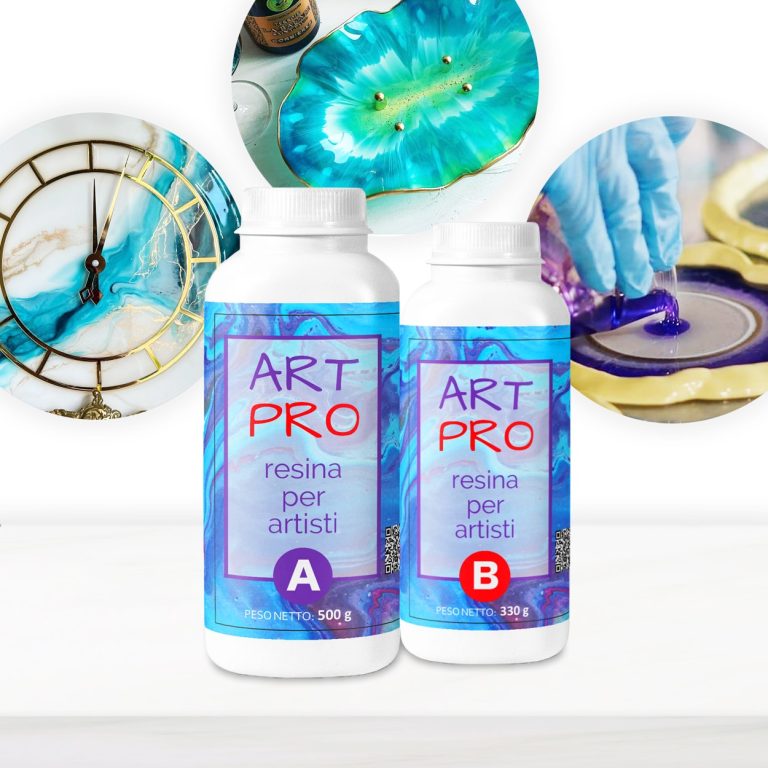
💥 BESTSELLER FOR: – Resin Artworks on surfaces, panels: Ocean Art, Marble Effect, Geode Art and etc; – Coasters and Trays with colour effects (layer thickness up to 1 cm [0,39”]); – Coating of surfaces - Floors, Canvases, Furniture, Etc; – 3D effect on prints, photos and images in general; – Fixation of decorative objects (decorative elements, glass, stone, quartz pieces, etc.); – Creation of a perfectly transparent protective layer on your projects. 💥About “ART PRO ” – Ultra Clear Medium Viscosity Epoxy Resin for Artists: First class quality epoxy resin for the artistic sector: thanks to its special dense formula, it allows you to create Resin Art works. It does not leak out from the working surface, slowly reaching the corners of the frame. ART PRO preserves your original design and prevents any possible modification due to the thickness of the resin: because of its special formula, the layers of colours do not expand and do not mix (unless you deliberately intervene), faithfully keeping with your creative idea! Additional features: Long working time; + Odourless; + Excellent mechanical strength; + High impregnation and reinforcement of technical fabrics. The product can be coloured with any epoxy dye (both in paste and powder) in a percentage ranging from 0.1% to 2.0%). It can also be thickened by the use of aggregates such as powders and fumed silica. 💥Key features: ⚙️ ULTRA TRANSPARENT EPOXY RESIN: -The crystal clear epoxy resin is suitable for both beginners and professionals. Start making Resin Art works, coasters, trays and any other DIY – creation that involves the use of medium viscosity resin. 🧪PROFESSIONAL QUALITY: -Made from high quality materials – Excellent transparency, Glossy surface, Odourless – because of unique formula for DIY, craft and artistic creations. Compatible with silicone, wood, fabric, glass and paper. 🌿 SAFE AND CERTIFIED: -All our resins are Certified Non-Toxic, Solvent-free, non-flammable, and totally safe. 💧 EASY TO USE: -The 3:2 mixing ratio makes this product very easy to use. Being a two-component resin, simply mix RESIN A + HARDENER B in the ratio indicated above the package and let it harden without the need for further additives. Can be coloured as desired. 📞 FREE PROFESSIONAL ASSISTANCE SERVICE: -Since we are directly a manufacturer, we have access to a professional laboratory that will happily help you with any complex project. 🇬🇧 UK BASED TRUSTED COMPANY: -RESIN-PRO team collects and sends your order as fast as possible. We produce and realise epoxy resins since 2015. Just google our social media, where you will find thousands of projects made with our products around the world. The "ART-PRO" formula is specifically developed for coating in artistic applications. Compatible with colouring agents, powder pigments, alcohol-based and oil-based dyes, aerosol paints. The migration laboratory test on cured resin samples ensures that the final product does not release any harmful substances, if applied following the instructions. Warning: the product is moisture sensitive, do not use on wet surfaces or with water-based dyes (e.g. Acrylics) ____________________________________________________________________ if you have not enough experience, we insistly suggest to make a small test before working with large project.
$28,49
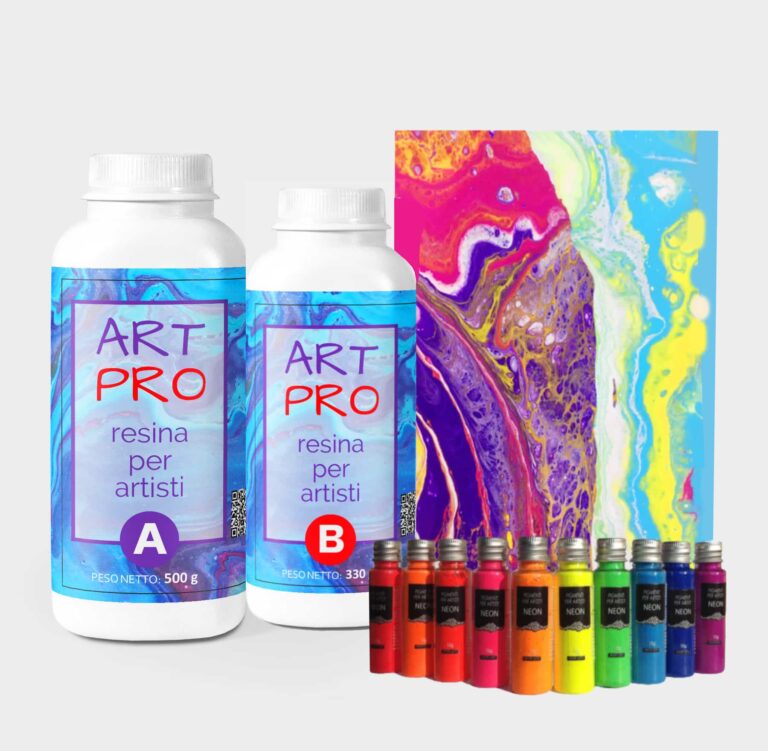
"RAPHAEL" KIT for Pour Paint & Resin Art Create your unique painting with the "RAPHAEL" kit. Experience the countless mixtures and design the perfect artwork! The "RAPHAEL" KIT includes: TRANSPARENT RESIN FOR ARTWORK AND DIY 1.66 KG [3,65 LB] NEON PIGMENTS SET RECTANGULAR FRAME CANVAS 30*30cm WOODEN SPATULA * 5pcs NITRILE GLOVES INSTRUCTION "TIPS HOW TO WORK WITH EPOXY" Transparent resin for artwork and DIY 1.66 KG [3,65 LB]. Transparent self-levelling UV-resistant epoxy system, which creates a hard and glossy protective layer for casting up to 1 cm [0,39”]. ART PRO, the epoxy resin for the artistic sector: thanks to its special formula and its dense structure, it allows you to create paintings with the "pour paint" and liquid paint technique. It does not leak out from the working surface, slowly reaching the corners of the frame. ART PRO preserves your original design and prevents any possible modification due to the casting of the resin: because of its special formula, the layers of colours do not expand and do not mix (unless you deliberately intervene), faithfully keeping with your creative idea! The surface is perfectly smooth and moisture-resistant. Solvent-free and odourless epoxy resin. Applications: - artworks, creation of art objects (paintings, panels, etc.) with the "fluid-art" (pour paint) technique (pouring up to 1 cm [0,39”]); - coating of surfaces, objects and furniture to add depth and brilliance to the colour; - create a 3D effect on prints, photos and images in general; - fixation of fillers (decorative elements, glass, stone, quartz, etc.) - creation of a perfectly transparent protective layer on your projects. The "ART-PRO" formula is specifically developed for coating in artistic applications. Compatible with colouring agents, powder pigments, alcohol-based and oil-based dyes, aerosol paints. Warning: the product is moisture sensitive, do not use on wet surfaces or with water-based dyes (e.g. Acrylics) Technical data: Usage ratio 100:66 (in weight) Pot Life (150 gr at 30°C) [0,33 lb at 86 F]: 1h20 ', Film (1 mm at 30°C) [0,03” at 86 F]: 6:00'. Full catalysis after 24 hours. Neon Pigments Set. PIGMENTS WITH COLOURED BASE are perfect for decoupage, decoration and anything related to DIY. By simply adding them to resins, paints or varnishes, you can express your creativity with truly brilliant shades (neon effect!). WARNING: pigments do not glow in the dark, as they are not fluorescent.
$69,95
 Free shipping on orders over €199,00


