Complete kit to apply the fibreglass together with the Polyester Resin, for fast, simple and long-lasting repairs! Includes all the necessary to prepare, mix and apply the product. 700 gr [1,54 lb] of orthophthalic polyester resin; 20 ml [0,70 oz] of hardener (to be applied at 3%); 1 square meter of fibreglass MAT 300 gr /m2 [0,66 lb]; 1 brush for application; 2 latex gloves; 1 instruction sheet; 1 container to mix the components; Ideal to repair fenders, car bodies, boats, pipes, water tanks, swimming pools, etc. Are you looking for a simple, fast and inexpensive product to make your repairs in a professional way? We offer you this repair kit, in which you will find everything you need for your application, and we will ship it to your home in 24 hours. This kit is designed to be used as a reinforcement and/or structural material. It consists of a sheet of high-quality glass filaments, a polyester resin (including hardener) for the impregnation of fibreglass, as well as latex gloves, a brush and an instruction sheet for its application. With this practical kit you can immediately repair car bodies, boats, pipes, tanks, swimming pools, roofs, and many others! It is also applicable on several types of materials and surfaces, such as metal, wood, rigid plastic, polyester, glass, porcelain, fibreglass, etc. USE: As described above, this kit is used as a reinforcement and structural material. It features a 1 m2 of high-quality fibreglass mat (300g/m2 [0,66 lb]) together with polyester resin. AREAS OF APPLICATION Composite materials such as skis, canoes, boats, etc. Automotive: composite materials for vehicle components. Industrial: composite for the reinforcement of plastic parts, reinforcement fabrics for structures, decorations, insulators. Sealant for swimming pools, tanks and liquid containers.
$18,49
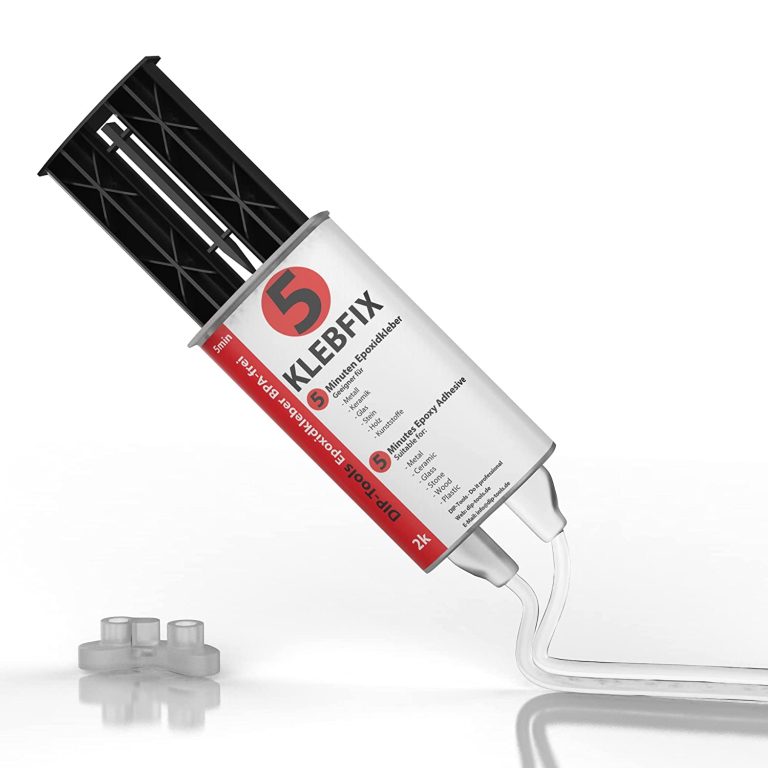
Advantages of Two-component Epoxy Resin Adhesive Extreme strength and resistance to thermal and mechanical influences Resistant to most aggressive substances and oils Available solvent free and BPA free It hardens even under water Compatible with a wide range of additives such as dyes and accelerators Expedited Potlife Application – BestPractice At room temperature (15-30 C The mixing ratio of the two components of 1: 1 is maintained automatically. Do not apply below 5 C outdoor temperature. The higher the ambient temperature, the more effectively the material polymerizes. This means that resistance increases at higher temperatures. It is recommended to have a cloth ready for cleaning. In addition, care must be taken that the work surface is protected and can be cleaned directly if necessary. The surface should be slightly roughened, because only then is the epoxy adhesive guaranteed to bond well with the material. To do this, you can sand or file the surface. To spread the sticker, a piece of cardboard or plastic is useful. After use, clean the tube so that the lid does not stick, and then close it tightly. The thickness of the adhesive should be thin enough (0.1-0.2 mm), but if necessary it can be thicker. The parts to be glued must be clean and free of oil and grease. Apply the adhesive on one side and join and press the parts to be glued. The potlife is about 5 minutes, good endurance is achieved after about 10-12 minutes, and total endurance after about 24 hours. Pot life is limited in time and describes the maximum working time of the uncured adhesive. Once the pot life has passed, the adhesive not yet applied must not be further processed, but must be disposed of! Until the manual force is reached, the binding must be additionally fixed, for example, with the help of a vice, adhesive tape or clamp. In the case of heat-assisted polymerisation, the temperature resistance of the joined parts must be guaranteed. In addition, the heating and cooling times of the parts to be joined must be respected. This time must be added to the curing time of the adhesive. Tension can occur in the glued joint during heating and cooling. With materials such as PP, PE, PTFE or silicone, the parts need to be pretreated with our primer. The need for a primer depends on the surface tension. If this is high enough it can be tested with water droplets on the surface. If the drops adhere well to the surface, a good bond is most likely. If the drops slip away, a primer is probably needed. Mixing There are several ways to mix the two components: - Mixing by hand - Use of a static mixing nozzle - Use of a dynamic mixing nozzle Hand mixing is sufficient in most cases. For this purpose, a toothpick or similar is used and the two components are mixed until a cloudy mass is formed. Make sure that no bubbles remain. When using a static mixing nozzle, the mixing of both components takes place inside the mixing nozzle so that the mixing is ideal. The first 2g should be discarded, given they are not yet mixed 1:1. However, the mixing nozzle can only be used until the adhesive in the mixing nozzle has dried. After that, you will need a new nozzle. W With a dynamic mixing nozzle, the speed of the mixer can be controlled electronically. This allows you to control the mixing intensity very precisely. However, this is intended for special industrial applications and is not necessary for everyday use. Harden The adhesive is chemically cured. This gives the advantage that gluing the surface is also possible, where adhesives that harden with moisture take a very long time. The bond is high strength and densely flexible. Thus, permanent resistance can be guaranteed in the event of shocks and vibrations. The use of the polymerised adhesive is also possible at high temperatures (up to about 120C), for a short time (30 min) up to 200C The polymerised adhesive has good resistance to physical (e.g. sunlight) or chemical (moisture, detergents, chemicals, etc.) influences. The great advantage of two-component epoxy adhesive is the fact that it hardens even under water and is robust. In addition, it is mouldable, so it can be inserted into any recess to fit. Technical data Epoxy Resin Hardener Base (amine mixture) Viscosity High Viscosity Transparent Color Density 1.1 g / ml Gap filling capacity 3mm Temperature resistance -40 up to +120 C Pot Life 5 min Hand resistance 10-12 min Final endurance 24 hours Shore hardness 60 Tensile shear strength 10 N / mm2 Module E 620 N / mm2
$32,95
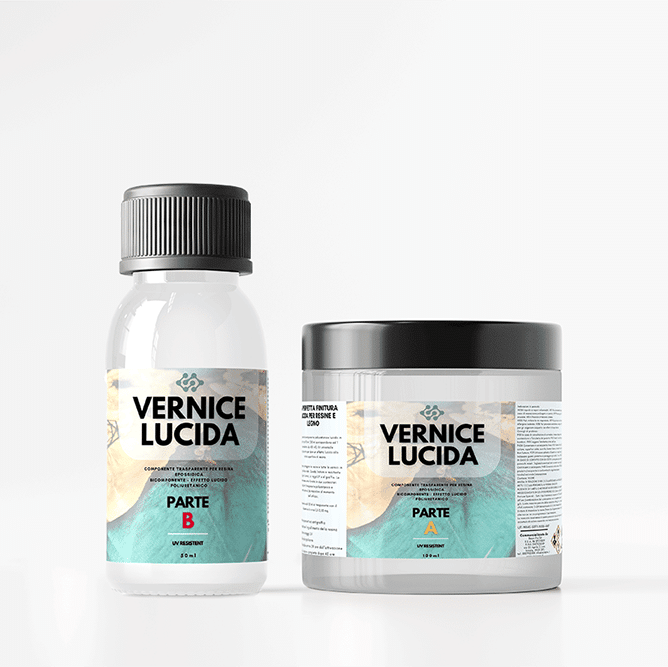
Polyurethane two-component varnish, glossy or matte (depending on the preparation), in 100 ml [3,51 oz] jar (100 ml [3,51 oz] correspond to a 400 ml [14,07 oz] can). Universal two-component kit to achieve the desired effect: depending on the preparation, it is possible to obtain either a glossy or a matte finish. Ideal to protect any resin and paint in a professional way. When catalysed, the protective clear coat is resistant to chemicals, UV rays and scratches. The package features two separate containers for the two components (the polyurethane clear coat and the catalyst), which should be mixed at the time of use. Recommended for resins that do not contain phosphorescent pigments, wood and various types of surfaces. Its unique properties fulfil the requirements for the protection, the sanding and the polishing of resins that do not contain phosphorescent pigments, wood and various types of surfaces The kit includes: – Component A; – Component B (catalyst); – Measuring cup. Properties: – Scratch-resistant protective finish; – Prevents the yellowing of the resin; – UV-resistant; – Easy to apply; – Depending on the preparation, you can obtain either a glossy or a matte finish; – Completely dries after 48 hours; – Always remember to prepare only the quantity you need, after the preparation the mixture can last for about 24 hours (20°C) [68 F]. 100 ml [3,51 oz] of transparent varnish with the addition of polyurethane thinner can cover an area of around 1.5-2.50 square meters. Warning: at first it develops a strong smell, which disappears once dried. Work in a ventilated area. Tips for use: Prepare the mixture of polyurethane clear coat and catalyst in the measuring cup included in the kit. For applications with Spray Gun, dilute the preparation with polyurethane thinner (you can use our polyurethane thinner). Spray Gun and polyurethane thinner are not included in the kit. Always remember to prepare only the quantity you need, after the preparation the mixture can last for about 24 hours (20°C) [68 F]. Examples of quantities for the preparation of the glossy transparent varnish: 100 ml [3,51 oz] CLEAR COAT + 50 ml [1,75 oz] CATALYST + 15-20 ml [0,52-0,70 oz] POLYURETHANIC THINNER (ONLY FOR APPLICATIONS WITH SPRAY GUN) Examples of quantities for the preparation of the matte transparent varnish: 100 ml [3,51 oz] CLEAR COAT + 30 ml [1,05 oz] CATALYST + 50-70 ml [1,75-2,46 oz] POLYURETHANIC THINNER (ONLY FOR APPLICATIONS WITH SPRAY GUN) Drying time (at 20°C [68 F] and 60% RH): Skin forming 15-20 min Touch dry 30-60 min Fully dried: 48 hours To recoat, allow to dry for 1-2 hours (20°C) [68 F] between each coat. REMOVE WITH ACETONE AND/OR NITRO THINNER (before the product has completely dried).
$14,04

Polyurethane two-component varnish, glossy or matte (depending on the preparation), in 100 ml [3,51 oz] jar (100 ml [3,51 oz] correspond to a 400 ml [14,07 oz] can). Universal two-component kit to achieve the desired effect: depending on the preparation, it is possible to obtain either a glossy or a matte finish. Ideal to protect any resin and paint in a professional way. When catalysed, the protective clear coat is resistant to chemicals, UV rays and scratches. The package features two separate containers for the two components (the polyurethane clear coat and the catalyst), which should be mixed at the time of use. Recommended for resins that do not contain phosphorescent pigments, wood and various types of surfaces. Its unique properties fulfil the requirements for the protection, the sanding and the polishing of resins that do not contain phosphorescent pigments, wood and various types of surfaces The kit includes: – Component A; – Component B (catalyst); – Measuring cup. Properties: – Scratch-resistant protective finish; – Prevents the yellowing of the resin; – UV-resistant; – Easy to apply; – Depending on the preparation, you can obtain either a glossy or a matte finish; – Completely dries after 48 hours; – Always remember to prepare only the quantity you need, after the preparation the mixture can last for about 24 hours (20°C) [68 F]. 100 ml [3,51 oz] of transparent varnish with the addition of polyurethane thinner can cover an area of around 1.5-2.50 square meters. Warning: at first it develops a strong smell, which disappears once dried. Work in a ventilated area. Tips for use: Prepare the mixture of polyurethane clear coat and catalyst in the measuring cup included in the kit. For applications with Spray Gun, dilute the preparation with polyurethane thinner (you can use our polyurethane thinner). Spray Gun and polyurethane thinner are included in the kit. Always remember to prepare only the quantity you need, after the preparation the mixture can last for about 24 hours (20°C) [68 F]. Examples of quantities for the preparation of the glossy transparent varnish: 100 ml [3,51 oz] CLEAR COAT + 50 ml [1,75 oz] CATALYST + 15-20 ml [0,52-0,70 oz] POLYURETHANIC THINNER (ONLY FOR APPLICATIONS WITH SPRAY GUN) Examples of quantities for the preparation of the matte transparent varnish: 100 ml [3,51 oz] CLEAR COAT + 30 ml [1,05 oz] CATALYST + 50-70 ml [1,75-2,46 oz] POLYURETHANIC THINNER (ONLY FOR APPLICATIONS WITH SPRAY GUN) Drying time (at 20°C [68 F] and 60% RH): Skin forming 15-20 min Touch dry 30-60 min Fully dried: 48 hours To recoat, allow to dry for 1-2 hours (20°C) [68 F] between each coat. REMOVE WITH ACETONE AND/OR NITRO THINNER (before the product has completely dried).
$34,49
 Free shipping on orders over €199,00
  Shipping Tracking!


 Google
 Facebook