Finally, the first food contact certified* TRANSPARENT Epoxy Resin! To coat your plates and cutting boards! Non-toxic and certified for food contact (liquids included). Two-component, high-modulus, unfilled, medium-fluidized epoxy system. The system is composed using only raw materials included in the positive list of substances allowed for food contact (EU Regulation No. 10/2011 January 14, 2011) Two-component unfilled high-modulus epoxy resin, medium viscosity. Excellent surface finish and good resistance to yellowing, to be used for casting, characterized by high transparency, good outdoor stability, excellent mechanical resistance and resistance to basic and acid chemical substances. For self-leveling casting. Its medium-high viscosity allows a wide range of applications specifically for the realization of non-toxic surfaces. Charged with mineral aggregates of appropriate grain size, it is used to create self-leveling epoxy and screed surfaces suitable for contact with food. The main features of this product are: high transparency, excellent mechanical resistance, good chemical and carbonation resistance, high impregnation and reinforcement of technical fabrics, long working time, glossy and self-levelling surface. heat resistance - up to 70 C [158 F] 💥Key features: ⚙️ 【RESIN FOR FOOD CONTACT】 The particular formula makes the product, once cured, perfectly compatible with any type of food and is guaranteed by a specific certification. 🧪 【HIGH QUALITY】 Perfectly transparent even after catalysis. Totally shiny and self-leveling, complete catalysis will take about 24/48 hours - depending on atmospheric and environmental conditions - but it will already be workable after about 10 hours. 🌿 【SAFE AND CERTIFIED】 All our resins are Certified Non-Toxic, Solvent-free, non-flammable, and totally safe. Certified for contact with cold snacks. 💧 【EASY TO USE】 The 100:55 mixing ratio makes this product very easy to use. Being a two-component resin, simply mix RESIN A + HARDENER B in the ratio indicated above the package and let it harden without the need for further additives. 📞 【FREE PROFESSIONAL ASSISTANCE SERVICE] Since we are directly a manufacturer, we have access to a professional laboratory that will happily help you with any complex project. * Documentation ensures that the raw materials used are those listed by the Ministry of Health and the migration laboratory test on cured resin samples shall further ensure that the final product does not release any harmful substances if applied following the instructions. This information can be consulted by the end users in the HCCP certification which is the responsibility of the user. EpoxyFood : Food Contact Certificate:
$26,99
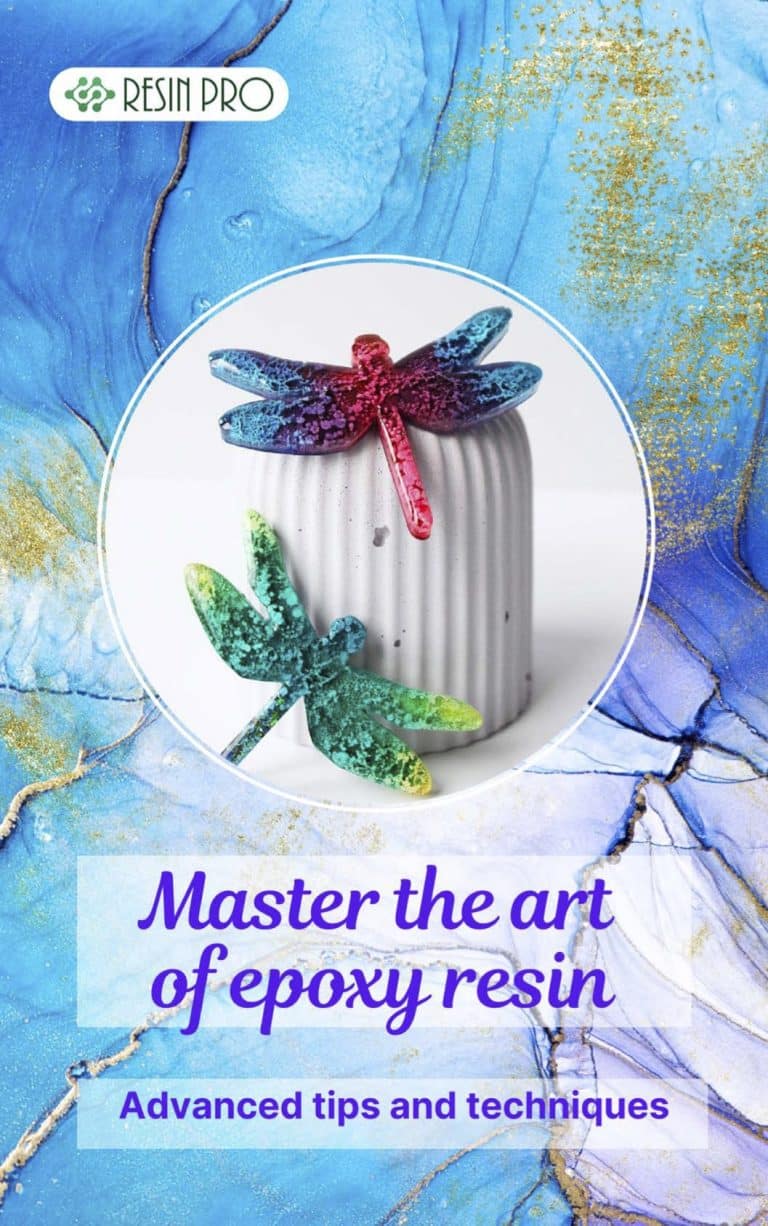
Discover the captivating world of epoxy resin with our e-book "Mastering the Art of Epoxy Resin: Tips and Advanced Techniques." Whether you're a passionate artist, an experienced DIYer, or looking to express your creativity, this book will guide you in learning and mastering this versatile technique. This comprehensive e-book offers an in-depth opportunity to learn advanced epoxy resin manipulation techniques. You'll uncover the secrets of harmonious blends, vibrant pigments, and flawless finishes to create unique works of art. Additionally, our practical tips will help you avoid common mistakes and overcome challenges encountered when working with this fascinating material. Whether you want to create epoxy resin jewelry, make stunning paintings, or design unique decorative objects, this e-book will be your essential companion. Unleash your creativity and master the art of epoxy resin with our expert advice and detailed instructions. Download "Mastering the Art of Epoxy Resin: Tips and Advanced Techniques" now to uncover the secrets of this versatile artistic method. Develop your artistic skills and create one-of-a-kind pieces that will captivate your friends and family. Don't miss this opportunity to become an epoxy resin expert and make your artistic mark
$21,95
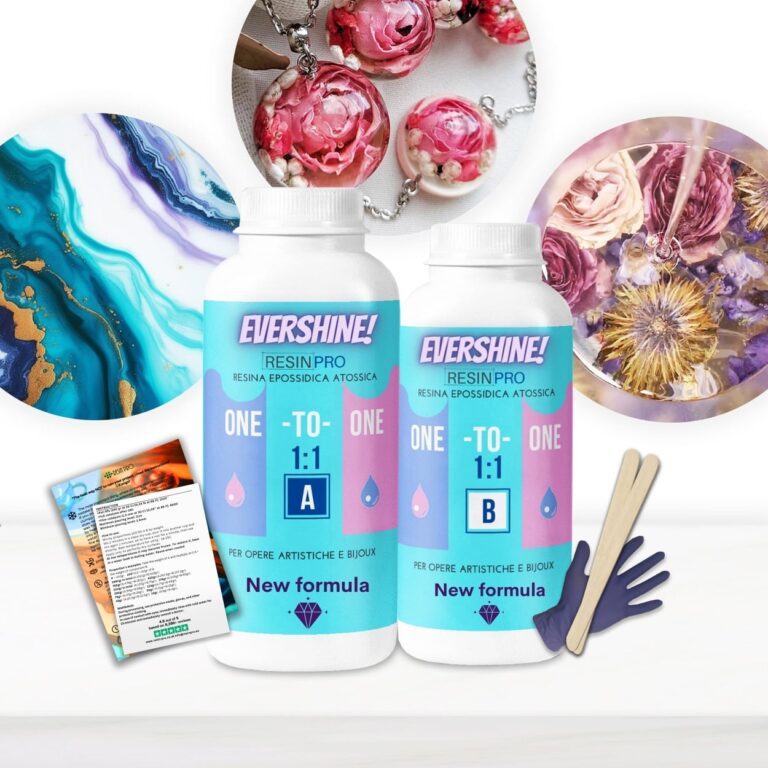
💥About “"ONE-2-ONE" - Epoxy Resin For Handcraft: Introducing our premium Non-Toxic Epoxy Resin, meticulously crafted for your creative ventures. This 11-gram quantity (500 ml) offers a perfect balance between versatility and precision, making it an ideal choice for various applications. Perfect to effortlessly design works of art and jewellery. 1:1 ratio for quick and error-free creations, non-toxic, transparent and durable. 💥 Best choice for: Artistic Creations: Ideal for creating stunning resin art pieces, jewellery, and decorative items. DIY Projects: Perfect for a wide range of DIY projects, including coating surfaces, encapsulating objects, and crafting personalized gifts. Crafting and Modelling: Explore its versatility in crafting, modelling, and various creative pursuits. 💥Key features: ✔️ Non-Toxic Formulation: Our epoxy resin is carefully formulated to ensure a safe and non-toxic experience for artists and creators. Enjoy peace of mind as you bring your ideas to life. ✔️ Versatile Applications: Whether you're a seasoned artist, DIY enthusiast, or crafting hobbyist, this epoxy resin is your go-to solution. Perfect for encapsulating, coating, casting, and more. ✔️ Easy to Use: The user-friendly nature of this epoxy resin makes it suitable for both beginners and experienced craftsmen. Achieve professional-grade results with ease. ✔️ Crystal Clear Finish: Experience the brilliance of crystal-clear finishes in your projects. The resin dries to a transparent and glossy surface, enhancing the visual appeal of your creations. ✔️ Reliable Performance: Our epoxy resin offers excellent adhesion, durability, and resistance to yellowing over time, ensuring your projects withstand the test of time.
$21,49
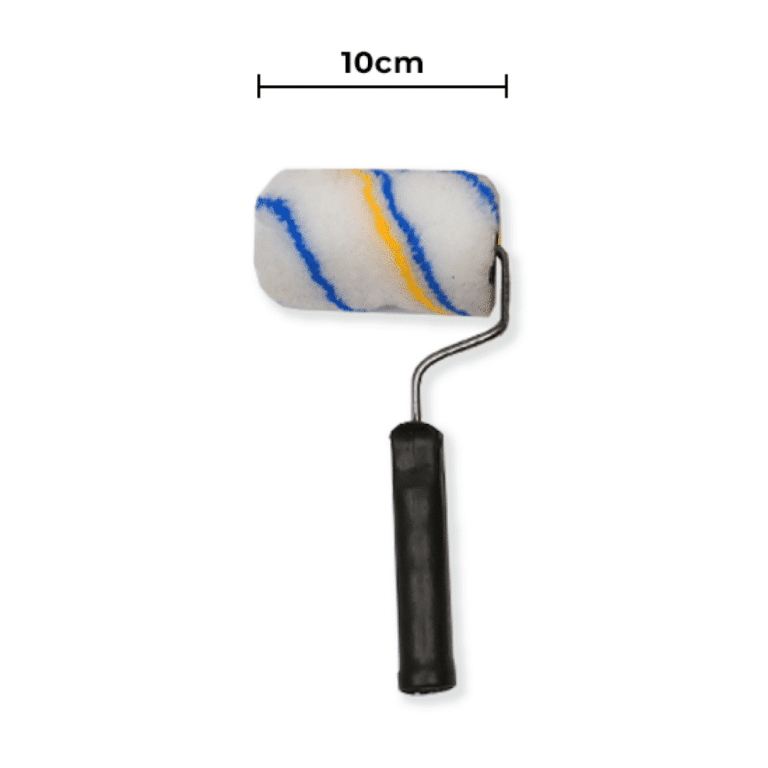
Small roller 10 cm Our wide, short-pile rollers allow you to process resin surfaces and floors with high precision without leaving an excessive dose of resin. In addition, their structure allows you to work accurately and evenly, ensauring perfect results. Precise and uniform processing: Thanks to the short pile, our roller allows you to work with precision and uniformity, providing perfect results without leaving an excessive dose of resin on the surface. Large roller 20cm If you need to cover large surfaces in a short time, but our large short pile roller for resins now and get perfect and uniform results! Sponge Roller For Resin Floors & Surfaces Uniform self-leveling sponge: The sponge of our roller allows you to cast a generous dose of resin that will self-level evenly on the surface, ensuring perfect and even results without any imperfection. If you want to achieve perfect and even surfaces in your resin floor and wall designs, buy our resin floor and wall sponge roller now!
$6,95
Applying Epoxy Resin to Walls
The process of applying epoxy resin to walls involves several steps to ensure a successful outcome. It begins with preparing the wall surface, applying a primer, and finally, the resin itself. Prior to application, it is essential to ensure that the wall surface is clean, smooth, and any cracks or holes are filled. Once the primer is applied to facilitate adhesion, the resin can be applied using a roller. Remember to prioritize safety by wearing the necessary protective gear when handling resin.
Epoxy Resin for Wall Surfaces
Epoxy resin for wall surfaces is a favored choice in the construction and interior design industries for its outstanding durability, resistance, and the extensive range of finishes and colors it offers. This versatile material can be applied to various surfaces including concrete, tiles, and wood, creating a flawless, uniform coating. Moreover, epoxy resin is waterproof and easy to maintain, making it particularly suitable for areas prone to moisture such as bathrooms and kitchens.
Creative Applications with Resin
The creative possibilities with resin are endless, encompassing artworks, jewelry, furniture, and floor coatings. Begin by preparing your workspace and safeguarding it with a protective covering. Follow the manufacturer's instructions to mix the epoxy resin components accurately. To introduce color, utilize specific resin pigments. Once mixed, pour the resin onto your chosen surface, ensuring even distribution, and allow it to cure for a minimum of 24 hours. Remember to work in a well-ventilated area and utilize appropriate personal protective equipment throughout the process.
Step-by-Step Guide for Interior Wall Resin Application
Applying resin to interior walls demands precision and expertise. Initiate the process by thoroughly cleaning the surface, eliminating any remnants of previous coatings, and rectifying imperfections with putty. Following the primer application, use a spatula to spread a layer of resin. Allow a minimum of 48 hours for the drying phase. Subsequently, apply a second layer of resin and proceed with the sealant application to safeguard the coating. Always prioritize working in a well-ventilated space and wearing suitable personal protective equipment.
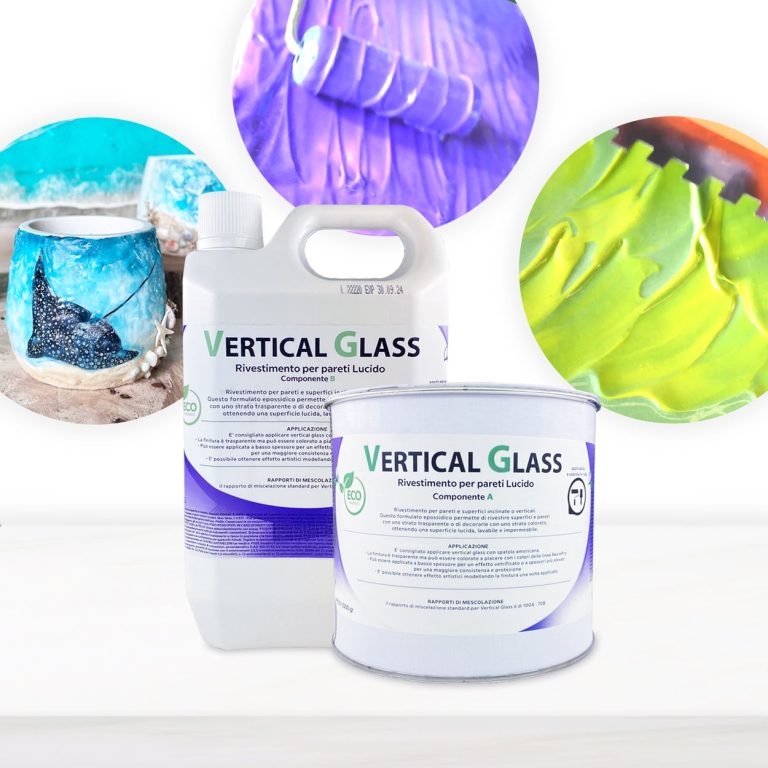
Coating for inclined or vertical walls and surfaces / This epoxy formulation allows you to coat surfaces and walls with a transparent layer or decorate them with a colored layer, resulting in a glossy, washable and waterproof surface. The Vertical Glass resin differs from normal resins allows creatives to create sharp shapes and designs on surfaces and canvases without the resin mixing unintentionally losing the original design! Transparent, UV-resistant epoxy system that creates a hard, glossy protective layer. Vertical Glass allows you to keep your initial design, faithfully respecting your creative idea! The surface will be perfectly smooth and resistant to moisture. Solvent-free and odorless epoxy resin. Applications: Floors and Walls (pre-existing) also vertical; Protection of material coatings and other artistic decorations; Coating, repair and decoration of shower trays and sanitary ware; Coating of surfaces, objects and furniture to give depth and brilliance to the color, even in Vertical! Features: For a smooth coating, it is applied with a spatula to the surface of any material: tile, concrete, wood, brick, etc. It has good hiding power, and completely covers the work surface in one application Creates a glossy, smooth and moisture-resistant layer To create a matte surface, it is easily sanded (48 hours after application, with a grain size of 1000-2000 P) Protects from moisture and gives a new life to surfaces It can be painted with dyes and pigments from our assortment Does not self-align: saves the drawing that you set for it 🙂 Please note that in the unpainted form, the material is not completely transparent, and there is a slight “milky” shade with almost imperceptible micro-particles, so we recommend painting it It is used for: Floor coverings, walls, furniture and other surfaces Protection of surfaces of materials Painting, repair and decoration of showers and bathrooms Creation of paintings, murals and other works of art
$109,49
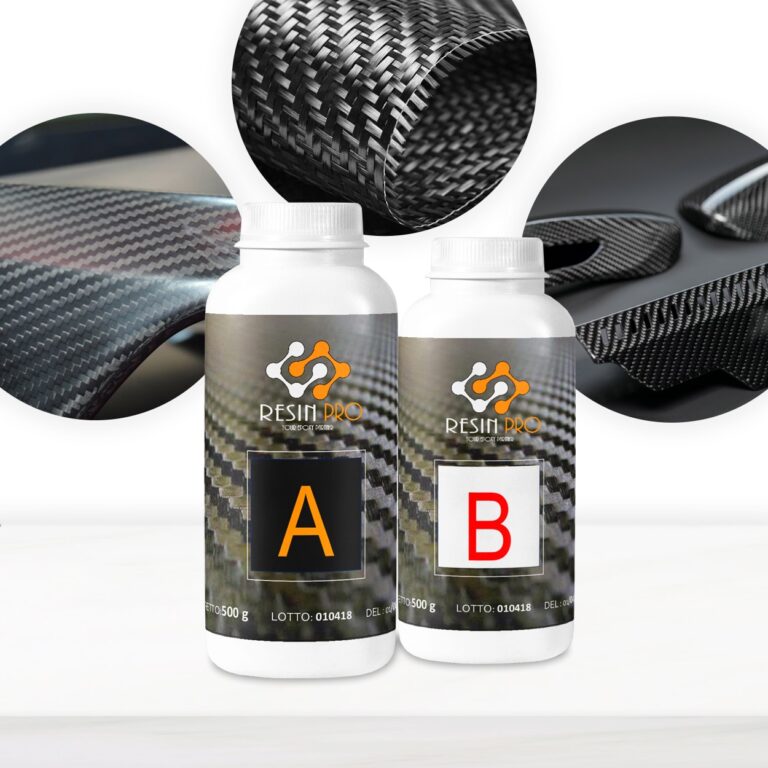
The Resin for Lamination with Carbon Fibre and Glass Fibre is a product formulated to ensure maximum mechanical strength and a perfect impregnation of the technical fabric. Its epoxy formulation allows an application at room temperature and guarantees a glossy and moisture resistant surface. Available quantities: 775 gr (500 gr of component A + 275 gr of component B). 1550 gr (1000 gr of component A + 550 gr of component B) 3.1 kg (2000 gr of component A + 1100 gr of component B)
$26,99
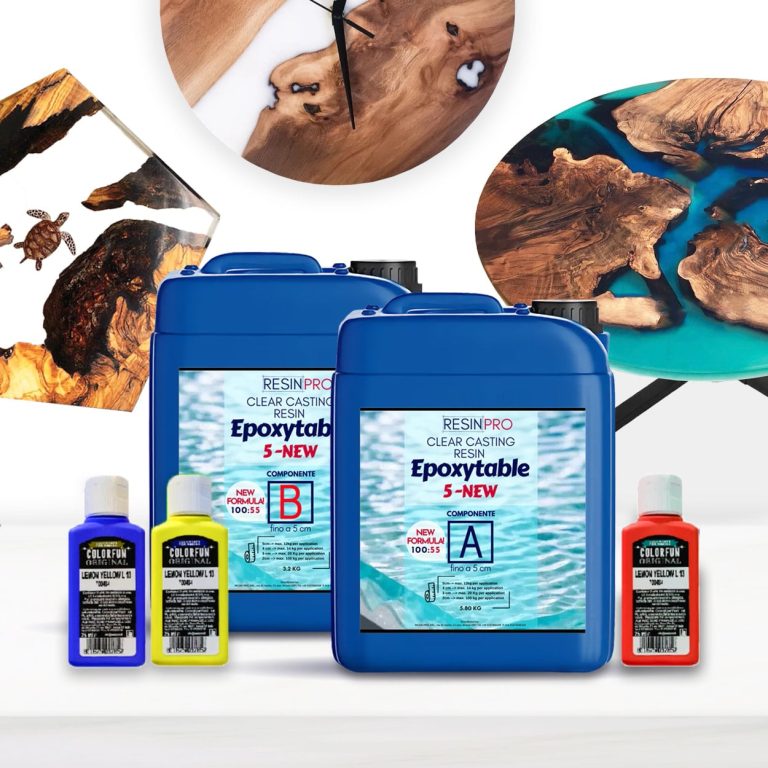
Bestseller for projects up to 5cm: –Tabletops & furniture: Ideal for creating & coating tabletops, including dining tables and countertops. –DIY & Home Decor: Use it for artistic projects and decorative elements. –Craft & Wood-working: A versatile choice for creative crafting projects, like dioramas and dynamic modelling. 💥About “EPOXYTABLE 5-FIVE” - deep pour epoxy resin for tables & large projects: Finally, the ultimate product that allows high-thickness castings, non-yellowing and scratch-resistant. Ultra-low exothermic reaction allows high-thickness castings WITHOUT OVERHEATING and DEFORMATIONS. Perfectly TRANSPARENT and BUBBLE-FREE. Specially designed to be used to create wooden and resin tables and for large castings for artistic works. 💥Key features: ⚙️ 【RIVERTABLE, COUNTERTOPS AND DEEP COATING RESIN】-Ideal for the wood and deep river tables, countertops or for the creation of objects that require high thickness casting. Special low exothermic reaction and its low viscosity are perfectly to deep thickness castings, guaranteeing stability and resistance to your creations. Detailed instruction and gloves for free. 🧪 【HIGH QUALITY】-Totally shiny, self-leveling and odourless epoxy resin. Easily polished. The added UV Anti-Yellowing Filters helps save transparency over time. The low density allows prevent the incorporation of air bubbles making it perfectly suitable for river tables and countertops. Compatible with silicone and wood, fabric, glass, paper or photographs. Complete catalysis ~ 5-7 days, but it will already be workable after about 72 hours. 🌿 【SAFE AND CERTIFIED】-All our resins are Certified Non-Toxic, Solvent-free, non-flammable, and totally safe. 💧 【EASY TO USE】-The 100:55 mixing ratio makes this product very easy to use. Being a two-component resin, simply mix RESIN A + HARDENER B in the ratio indicated above the package and let it harden without the need for further additives. Can be coloured as desired. 🇬🇧 【UK BASED TRUSTED COMPANY】 - RESIN-PRO team fulfils your order as fast as possible. We produce and realise epoxy resins since 2015. Just check our social media, where you will find thousands of projects made with our products around the world. THINGS TO KNOW: If one of the sides of the project is more than 100cm or the total weight of pouring epoxy is more than 8kg we insistently recommend to do a casting in two and more layers! (waiting 6- 8 hours between them). Please, pay extra attention mixing bulky amounts! 5cm–> max. 12kg per application 4cm –> max. 14 kg per application 3cm .–> max. 20 Kg per application 2cm –> max. 100 kg per application *Free colorant is just a sample. For getting a solid color you need the next quantity - 9kg - 3pcs of 25ml (75ml) 18kg - 6pcs of 25ml (150ml) You can add additional items here - RESIN COLOUR TRANSLUCENT EFFECT 25 ML
$21,49

Resin Pro offers the possibility to achieve a perfect polishing by using different types of abrasive pastes. It can be used by hand or with an orbital polisher to make your resin creations shiny. Ebonite Abralon Sanding Pads Cosmetically appealing, consistent scratch pattern provides excellent traction. Combines the benefits of abrasive cloth and non-woven products. Opening in the fabric allows water to flow freely around the abrasive. Solid surface and foam backing provide even surface pressure. Last 5+ times longer than sandpaper. Use wet or dry (residual material can be removed by high pressure air). Now it's possible to get the most aggressive surface texture without that "cheese grater" look. Abralon sanding pads use silicon carbide particles that are precision sifted to a consistent grain size, then bonded evenly to a six-inch round fabric face for the most even scratch pattern available. WARNINGS: During processing, use protective masks, gloves, and other protective clothing. In case of contact with eyes, immediately rinse with cold water for 15 minutes and immediately consult a doctor. The kits may include by variations: EpoxyPolish Polishing cream – 250 ml [8,79 oz] - 1pc Ebonite Abralon Sanding Pads: - Ebonite Abralon Sanding Pad 150mm 360 grit - 1pc - Ebonite Abralon Sanding Pad 150mm 500 grit - 1pc - Ebonite Abralon Sanding Pad 150mm 1000 grit - 1pc - Ebonite Abralon Sanding Pad 150mm 2000 grit - 1pc - Ebonite Abralon Sanding Pad 150mm 3000 grit - 1pc - Ebonite Abralon Sanding Pad 150mm 4000 grit - 1pc EpoxyPolish Polishing cream How to Use: Step 1: Thoroughly clean the surface with a cloth. Step 2: Now you can polish by hand or with an orbital polisher. We recommend using the lowest possible speed to get the best result. Start Polishing with 360-500 grit. Note: Sand the entire surface evenly with circular movements and light pressure. Moisten the pad or the surface with water from time to time. Step 3: Now use the 1000 grit sandpaper. Note: Moisten the sandpaper or the surface with water from time to time. Step 4: Afterwards, use 2000 grit sandpaper. Note: Moisten the sandpaper or the surface with water from time to time. Lastly, use 4000 grit sandpaper to finish sanding. Step 5: Remove the sandpaper from the polishing disc and attach a soft sponge to it. Rinse the surface or wipe it with a damp cloth to remove any residual grain of the sanding. Step 6: Apply EpoxyPolish Polishing cream on the damp sponge. Use by hand or with an orbital polisher, using a large circular motion and exerting slight pressure. Step 7: Clean the surface with plenty of water to remove all the remaining residues. Step 8: Enjoy the result!!!
$21,49
ResinPro: one supplier for all your needs
15 years of experience at your complete disposal, supplying resins and accessories for creativity, industry, DIY, flooring and marine applications.
At your home, directly from the manufacturer!
ResinPro is the direct manufacturer of our resin range for companies and hobbyists, guaranteeing the lowest prices on the market.
Learn more
The widest range of resins in the US!
We offer resins for every need, from artistic creations to marine and construction applications, far beyond the “limited” selection typically found in local DIY stores.
Expert technical support!
Our technicians provide free remote consulting to help you avoid mistakes and ensure you achieve the result you want — unlike “generic retailers” who sell 1,000 different products.
get a free consultation
RESIN PRO is a leader in resin production and distribution!
24-hour delivery: We ship across the US on the same day. Enjoy convenient home delivery with our appointment service—our courier will contact you in advance and deliver the package to your preferred location, or leave it at an alternative address of your choice.

Full support!
We provide continuous support from preparation to final application, including remote technical assistance, ensuring a smooth experience.
Talk with a specialist and place a phone order without registration and without credit cards!
 Free shipping on orders over €199,00