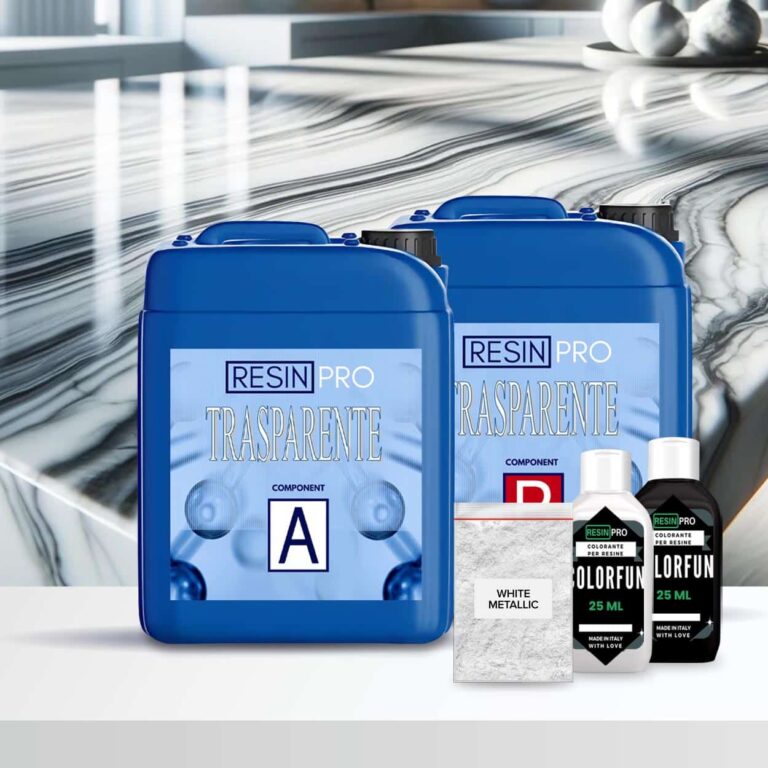
Top Cucina Kit Carrara Marble Effect with Epoxy Resin: The 2.4 kg kit (1.6 + 0.8) covers 1 square meter (+ 10 g white metallic pigment + 25 ml white dye +25 ml black dye) The 4 kg kit (2*1.6 + 0.8) covers 2 square meters (+ 2*10 g metallic pigment +2* 25 ml white dye + 2*25 ml black dye) The 8 kg kit covers 4 square meters (+ 4*10 g metallic pigment +4* 25 ml white dye+ 4*25 ml black dye) The 16 kg kit covers 8 square meters (+ 8*10 g white metallic pigment +8* 25 ml white dye 8*25 ml black dye) Kit Contents: 2.4kg, 4kg, 8kg or 16kg of "Art Pro" Epoxy Art Coat for a high quality base White dyeand Black of the "Colorfun" line for the perfect stone shades White Metallica Sahara pigment for that extra touch of sparkle Good to add: To enhance the appeal of the design:: Isopropanol 99.9% (additional option, not included in the price) To make the coating last longer: Polishield 100 Gloss (additional option, not included in the price). The coverage of a 0.5 kg kit is approximately 4 m2 Each kit includes dyes and pigment in sufficient quantity for the amount of resin required. HOW TO CREATE YOUR MARBLE EFFECT WITH EPOXY Guide Instructions: Step N1: Primer Start by carefully measuring the amount needed to cover the surface based on the consumption of 150 g/m2, making sure to follow the proportions indicated to obtain a homogeneous mixture. Once the base has been prepared, proceed with adding the dye, choosing between white or black depending on your needs. The quantity of colourant to add to the mixture can be measured in a few drops (max 5% by volume). This step is crucial to achieve the desired colour and ensure uniformity of the application. Before applying the primer, it is essential that the surface intended for treatment is adequately prepared. Sand the surface with a coarse grit (40 or 60) before any operation. Make sure it's completely clean, using a soft cloth or brush to remove any pigment, dirt or debris. The surface must also be completely dry; residual humidity can compromise the adhesion of the primer and its effectiveness in sealing the surface. Once the surface is ready, apply the mixture evenly, using a suitable tool such as a brush, roller or spatula, depending on the size of the area to be treated and your personal preference. The key is to get a thin, even layer that can cover the entire area without leaving gaps or excessive product buildup.. After application, it is essential to allow the primer to dry completely before proceeding with further treatments or finishes on the surface. The recommended waiting time is 12 hours; this range may vary slightly depending on environmental conditions, such as humidity and temperature, but offers a good compromise to ensure the mixture has time to dry and adhere properly. During this period, avoid touching or stressing the treated surface to ensure optimal results. Don't worry if you notice any discrepancies on the surface, the next main pour will level everything perfectly. Step N2: application Start by applying masking tape around the perimeter of your countertop to contain the epoxy you're about to pour. This step is essential to ensure the resin stays where it is needed. After applying the resin, wait about 1.5 hours before gently removing the tape. To ensure coverage is even and complete, plan to use approximately 1.6kg of resin for every square meter of surface area. When you are ready to mix the resin, use a drill equipped with a paddle mixer for quick and even action (use at low speed), taking about 2 minutes for this operation. If you prefer to mix by hand, be prepared to take double the time. Don't forget to scrape the sides and bottom of the container halfway through the process with a stick to ensure all the material is mixed well. Next, separate the already mixed resin into different glasses and add the desired colours, mixing the different colours in the different glasses until you obtain an intense and uniform colour per single glass. To create a striking visual effect, pour the coloured resin in random layers into a larger bucket, being careful not to mix the colours together too much. After filling the bucket, spread the contents over the surface of the worktop, leaving a small amount of resin aside to finish the edges later. To remove trapped air bubbles, gently run a propane torch or heat gun over the surface. Once the adhesive tapes have been removed, approximately 1.5 hours after application, if there are any dry edges, moisten them slightly by wearing a protective glove to promote an even appearance. Use appropriate tools, such as spatulas or plastic scrapers, to spread and level the resin along the edges, making sure to cover the entire area well. After letting the resin cure for 24 hours, you can apply a clear top coat or PoliShield scratch-resistant paint to further protect the surface. Finally, for even more refined visual effects, spray 99.9% isopropyl alcohol onto the surface just before the resin begins to fully harden. This will create unique lacy textures. Remember that when you remove the tape, it is essential that the resin is partially hardened, neither too liquid nor completely solid, to avoid unwanted drips. Attention! Safety Guidelines for Using Isopropyl Alcohol (99.9%) Isopropyl alcohol (IPA) is a highly flammable substance. Improper use—especially near heat sources like torches or heat guns—can result in fire or explosion. To ensure safe use, follow these precautions: Primary Risks Highly flammable: IPA vapors can ignite from sparks, open flames, or hot surfaces. Forms explosive vapor-air mixtures, especially in enclosed or poorly ventilated spaces. Strictly Prohibited: Using gas torches or heat guns near areas treated with IPA. Spraying IPA near active heat sources. Storing IPA near flames, heaters, or hot tools. Recommended Safety Measures: 1. Ventilation: Always work in a well-ventilated area when using IPA. 2. Wait Time: After applying IPA, wait at least 5–10 minutes to allow complete evaporation before using any heat tools. 3. Safe Distance: Keep IPA containers at least 2 meters (6 feet) away from heat or flame sources. 4. Storage: Store IPA in a tightly sealed container, away from direct sunlight or high temperatures. 5. Fire Safety: Have a CO₂ or dry chemical fire extinguisher nearby when working with flammable substances and open flames. In Case of Fire: Do not use water to extinguish the fire. Use an appropriate extinguisher, cut off air supply if safe, and call emergency services if needed.
$371,95
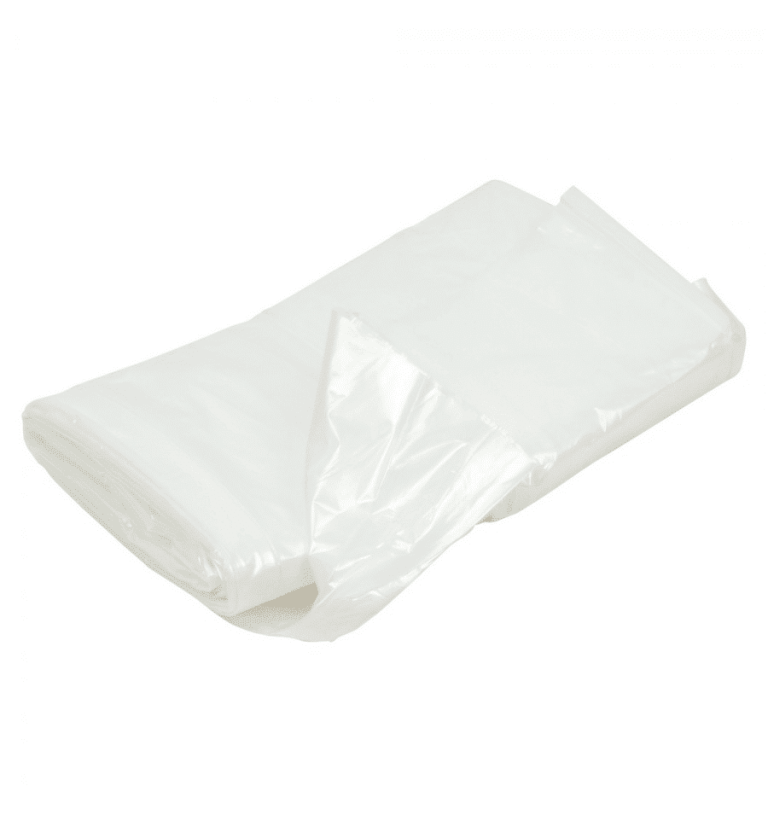
The 4X4 sheet is most commonly used to protect worktops and floors when working with Epoxy Resin! These very light but resistant sheets can be applied both on work tables (where artistic castings are made) and on floors when casting large size and in addition can be reused!
$4,07

💥 Bestseller for: –Prototyping:Polyurethane resin is frequently employed for rapid prototyping in industries such as automotive, medical, product design, and more. Its quick curing time and high casting precision make it ideal for efficiently producing test prototypes; –Modeling:Thanks to its high durability and the ability to replicate intricate details, polyurethane resin is used in art and design for creating models. This includes artistic sculptures, architectural prototypes, and decorative elements; –Small Batch Production:The "vacuum casting" technique with polyurethane resin enables cost-effective and rapid production of small batches of items with high detail. This is useful for manufacturing limited quantities of products with consistent characteristics; –Repair and Restoration:Polyurethane resin can be employed for the restoration and repair of various materials, including wood, stone, plastic, and metal. It is used to fill cracks, create missing components, or restore surfaces; –Manufacturing Seals and Components: Due to its chemical resistance and high wear resistance, polyurethane resin is widely used in the production of seals, including rubber seals, gaskets, and components for automobiles and industrial machinery; –Creative Projects:Artists and craftsmen use polyurethane resin for a wide range of creative projects, including art installations, decorative items, unique shapes, and even jewelry. 💥About “POLYFORM” POLYURETHANE CASTING RESIN: PolyForm, our cutting-edge polyurethane casting resin, is a high-performance solution designed for rapid prototyping in the modeling and automation industries. With a carefully formulated blend that boasts high fluidity and a remarkable Shore A hardness of 100, PolyForm empowers you to bring your creative visions to life with precision and efficiency. Key Features: Versatile Application: PolyForm is ideal for a wide range of applications, from creating detailed models to automating production processes. Its adaptability makes it a valuable asset in various industries. Rapid Prototyping: Craft prototypes with ease using silicone molds and PolyForm resin. These prototypes serve as crucial tools for pre-processing, strength testing, and dimensional analysis before moving on to mass production. Vacuum Casting Technique: Explore the "Vacuum casting" technique with PolyForm, enabling the production of small series of objects with identical mechanical, aesthetic, and dimensional properties to the final product. Quick Curing: Experience a fast pot life of 3 minutes and a maturation time of 30 minutes, allowing you to work efficiently and bring your ideas to life in a short span. Non-Toxic Certification: PolyForm is certified non-toxic for skin contact post-catalysis, ensuring the safety of handling the artifacts created with this resin. Technical Specifications: Viscosity: 70 mPa*s Weight Ratio A/B: 90/100 Color: Beige Usage Guidelines: Not suitable for coloring with dyes Do not use at temperatures below 8-10°C. Wear gloves and protective eyewear during mixing and application. Clean tools with epoxy or nitro thinner. Dispose of packaging following local regulations. PolyForm is your reliable partner for bringing innovation to your projects. Whether you're a hobbyist or a professional, PolyForm delivers exceptional results, providing the precision and reliability you need for your creative endeavors. Start creating with PolyForm today! [CP_CALCULATED_FIELDS id="1"] Download Non toxicity Certificate
$20,95
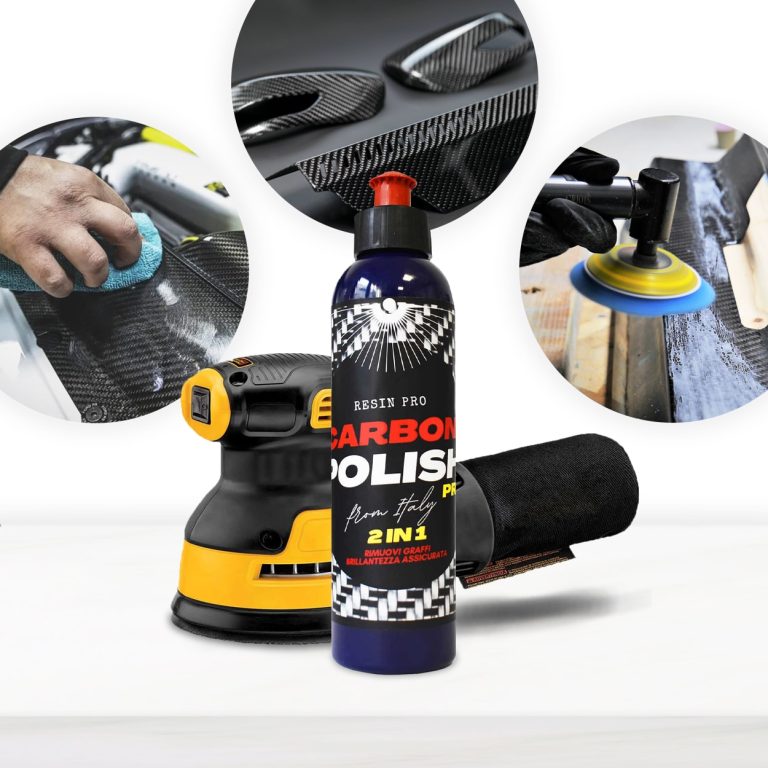
Carbon Polish Black (250ml) is the defined product for polishing your carbon, dark or black surfaces. The aesthetic and economic value of the carbon product is high, and for this reason it is essential to treat the surface with specific and dedicated products, which enhance the beauty of the “carbon look”. It is important to avoid “generic" products that can spoil the work done, with insufficient gloss or even worse, fail to remove scratches. EASY TO APPLY AND REMOVE MISCIBLE WITH WATER ODOURLESS DOES NOT WHITEN PLASTIC PARTS DOES NOT CONTAIN SILICONES VERY LOW ENVIRONMENTAL IMPACT The carbon polishing paste Carbon Polish Pro Black has been developed in a black colour precisely to ensure a brilliant finish and without white dots, typical of generic abrasive pastes. It can therefore be used for all dark surfaces (especially resin). Carbon Polish Pro Black is the specific paste for carbon; black colour prevents residues from remaining visible on surfaces after polishing. Thanks to the NAP (Nano Abrasive Particles) it is a 2 in 1 product; in fact it quickly removes scratches and defects from the surface and gives at the same time a deep shine like only a polish can do. In addition, its Synthetic Polymers allow you to correct and fill all the imperfections on the surfaces of Resin and carbon fiber artifacts. Eliminate scratches, defects and mirror shine with a single product! Carbon Polish Pro Black carbon polishing paste can be used both on the painted carbon and directly on the epoxy resin that covers the carbon fibers. Unlike commercial Polishes, Carbon Polish Pro Black is 100% Made in Italy, born from over 50 years of tradition in polishing. It allows both the hobbyist and the professions to obtain performing results quickly and easily. Here are the simple steps to polish or eliminate blemishes from your carbon fibre surfaces: If you need to use glass paper to remove the deepest scratches, you can do so without hesitation. The polishing paste will then be able to remove the sanding marks and make the surface smooth and shiny. Here's how:- The polishing paste Carbon Polish Black can be used by hand with extreme simplicity, with the help of a microfiber cloth or a foam pad. Or it can be used with electric tools, such as a drill and flexible, equipped with a special shepherd and foam pad (8000-12000 rpm) or with a polisher (1000-2000 rpm both rotary and ro orbital) with foam pad or wool (also synthetic). The use of tools of this kind will speed up the maintenance and ensure optimal results in even faster times. How to prepare the surface to be polished? Here are the tricks to make the most of NAP (Nano Abrasive Particles) technology:- Removals defects and scratches from sanding Depending on the depth of the scratch/defect, start with abrasive papers grit 800-1000 (for deep scratches) or simply 3000-4000 (for light scratches), always tend the surface wetted with water (this will help to make the result homogeneous) Apply the polishing paste for carbon fiber on the surface and spread it with circular and more or less energetic movements depending on the defect you want to remove. Or by directly attaching the buffer of the polisher / hose. We recommend one / two drops of carbon polishing paste every 3-4 cm. You can apply it several times thanks to synthetic polymers, without risking consuming the carbon, until the result is perfect. Clean up simply with water and a clean cloth. Put on your sunglasses and enjoy the dazzling result! Surface renewal: The product is also suitable as a fast and effective tool to renew your precious carbon surfaces, which wear out with normal use or exposure to atmospheric agents. In this case, the process is even easier: it is sufficient to apply the paste on the surface (well cleaned) and roll it out with circular movements, or by directly applying the buffer of the polisher / flexible. We recommend one / two drops of carbon polishing paste every 2-3 cm. The carbon polishing paste Carbon Polish Pro Black has been developed in black colour precisely to ensure a brilliant finish and without white dots, typical of generic abrasive pastes, and can therefore be used for all dark surfaces (especially resin). The special formula is free of volatile silicones and is therefore not harmful to health; it can also be used in painting processes.
$21,49
Materials Required for Making an Epoxy Resin Pendant
When creating a pendant using epoxy resin, you will need high-quality materials such as **RESINPRO epoxy resin**, jewelry molds, colors, pigments, mixing supplies, pouring tools, and accessories for finishing the pendant. **RESINPRO** offers a diverse range of top-notch supplies specifically tailored for crafting resin jewelry.
Costs and Budgeting for Crafting an Epoxy Resin Pendant
The overall costs of crafting a resin pendant vary based on the materials' quality and the intricacy of the design. Typically, the cost of materials for a single pendant falls between $10 and $30. By being mindful of your resin and accessory purchases, you can effectively manage your project expenses.
Economic Benefits of DIY Resin Jewelry Making
Engaging in DIY resin jewelry creation not only allows for cost savings but also enables you to craft one-of-a-kind, personalized pieces. By procuring premium yet affordable materials from **RESINPRO**, you can optimize the quality-price ratio and attain professional outcomes.
Tips for Procuring Quality Resin at Competitive Prices
Selecting high-grade resin is paramount for achieving exceptional results in resin jewelry crafting. **RESINPRO** offers a range of transparent and colored epoxy resins ideally suited for crafting pendants and various jewelry items. By buying the right quantities and capitalizing on promotions, you can minimize expenses while upholding superior quality in your creations.
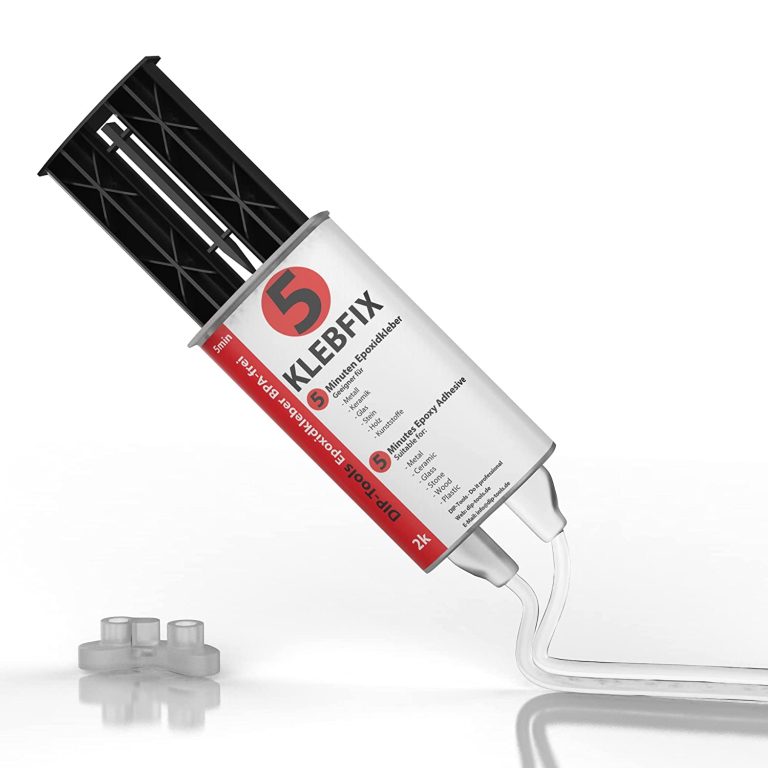
Advantages of Two-component Epoxy Resin Adhesive Extreme strength and resistance to thermal and mechanical influences Resistant to most aggressive substances and oils Available solvent free and BPA free It hardens even under water Compatible with a wide range of additives such as dyes and accelerators Expedited Potlife Application – BestPractice At room temperature (15-30 C The mixing ratio of the two components of 1: 1 is maintained automatically. Do not apply below 5 C outdoor temperature. The higher the ambient temperature, the more effectively the material polymerizes. This means that resistance increases at higher temperatures. It is recommended to have a cloth ready for cleaning. In addition, care must be taken that the work surface is protected and can be cleaned directly if necessary. The surface should be slightly roughened, because only then is the epoxy adhesive guaranteed to bond well with the material. To do this, you can sand or file the surface. To spread the sticker, a piece of cardboard or plastic is useful. After use, clean the tube so that the lid does not stick, and then close it tightly. The thickness of the adhesive should be thin enough (0.1-0.2 mm), but if necessary it can be thicker. The parts to be glued must be clean and free of oil and grease. Apply the adhesive on one side and join and press the parts to be glued. The potlife is about 5 minutes, good endurance is achieved after about 10-12 minutes, and total endurance after about 24 hours. Pot life is limited in time and describes the maximum working time of the uncured adhesive. Once the pot life has passed, the adhesive not yet applied must not be further processed, but must be disposed of! Until the manual force is reached, the binding must be additionally fixed, for example, with the help of a vice, adhesive tape or clamp. In the case of heat-assisted polymerisation, the temperature resistance of the joined parts must be guaranteed. In addition, the heating and cooling times of the parts to be joined must be respected. This time must be added to the curing time of the adhesive. Tension can occur in the glued joint during heating and cooling. With materials such as PP, PE, PTFE or silicone, the parts need to be pretreated with our primer. The need for a primer depends on the surface tension. If this is high enough it can be tested with water droplets on the surface. If the drops adhere well to the surface, a good bond is most likely. If the drops slip away, a primer is probably needed. Mixing There are several ways to mix the two components: - Mixing by hand - Use of a static mixing nozzle - Use of a dynamic mixing nozzle Hand mixing is sufficient in most cases. For this purpose, a toothpick or similar is used and the two components are mixed until a cloudy mass is formed. Make sure that no bubbles remain. When using a static mixing nozzle, the mixing of both components takes place inside the mixing nozzle so that the mixing is ideal. The first 2g should be discarded, given they are not yet mixed 1:1. However, the mixing nozzle can only be used until the adhesive in the mixing nozzle has dried. After that, you will need a new nozzle. W With a dynamic mixing nozzle, the speed of the mixer can be controlled electronically. This allows you to control the mixing intensity very precisely. However, this is intended for special industrial applications and is not necessary for everyday use. Harden The adhesive is chemically cured. This gives the advantage that gluing the surface is also possible, where adhesives that harden with moisture take a very long time. The bond is high strength and densely flexible. Thus, permanent resistance can be guaranteed in the event of shocks and vibrations. The use of the polymerised adhesive is also possible at high temperatures (up to about 120C), for a short time (30 min) up to 200C The polymerised adhesive has good resistance to physical (e.g. sunlight) or chemical (moisture, detergents, chemicals, etc.) influences. The great advantage of two-component epoxy adhesive is the fact that it hardens even under water and is robust. In addition, it is mouldable, so it can be inserted into any recess to fit. Technical data Epoxy Resin Hardener Base (amine mixture) Viscosity High Viscosity Transparent Color Density 1.1 g / ml Gap filling capacity 3mm Temperature resistance -40 up to +120 C Pot Life 5 min Hand resistance 10-12 min Final endurance 24 hours Shore hardness 60 Tensile shear strength 10 N / mm2 Module E 620 N / mm2
$32,95

The structure of the lessons that you will get access to: Preparation of the workspace and mixing of resin. We will show you how to quickly level the work surface, what temperature and what other conditions are needed for a good solidification of the resin. Let’s prepare the moulds for pouring. We will show you how to mix the resin, give you ready-made calculations of proportions and teach you how to use the automatic proportion calculator in a couple of clicks. Working with glitters: Let’s explain how to add our glitter and sparkles to the filling so that they do not float to the surface and how to ensure we don’t over-pour or use too little resin. Let’s show you three different ways to add glitters. Dropping ink into the resin: This is where the magic happens, because the process of dropping ink into the resin is simply mesmerising! The inks can be seen spinning in the resin! We prepare the ink, and drop it into the resin at the right time and in a way and sequence that creates the most beautiful and unique results – we will show everything! In the course, we shared 6 wonderful colour schemes for ink combinations from the PIÑATA line. After the course you will feel confident about which colours are better for which combination, and which colours can be diversified if desired. Finishing touches! We take the work out of the mould at the right time, and check the backdrop for sharp corners. If there are any found, we “smooth” them with a nail file as shown in the video. Also, here we will show you how to use a marker for creating gold or silver edges. The finishing layer: How to apply the finish correctly for the best effect. How to calculate the amount of resin for the finish of a decoration and how to overcome smudges, if they suddenly flow onto the back of the product. Bows: We will teach you how to tie a festive bow on a decoration so that it looks even more attractive and aesthetically pleasing, as well as beautifully hung on a festive tree. Bonus additional technique of filling “Silk” – how to do it and what will be needed for this? Bonus additional technique of filling “Flame ” – how to do it and what will be needed for this? Bonus additional technique for filling the “Cloud” – How is it done and what is needed for this? Bonus additional technique of filling with shiny ink-three options for working with them
$28,49
Intense and brilliant colour, ideal for Transparent Epoxy Resins. Mix small quantity to get a translucent effect. The high coverage of the "Colorfun Original" range allows to obtain a full and bright colour. The high concentration provides an opaque colour with a few drops. Usable to colour the products of the RESIN PRO range.
$13,45
“I-GUM SLOW” – Non-Toxic Silicone Rubber – Paste Form
Pasty silicone rubber “I-GUM” is a two–component product for creating moulds and forms for pouring with epoxy resin.
$22,85
ResinPro: one supplier for all your needs
15 years of experience at your complete disposal, supplying resins and accessories for creativity, industry, DIY, flooring and marine applications.
At your home, directly from the manufacturer!
ResinPro is the direct manufacturer of our resin range for companies and hobbyists, guaranteeing the lowest prices on the market.
Learn more
The widest range of resins in the UK!
We offer resins for every need, from artistic creations to marine and construction applications, far beyond the “limited” selection typically found in local DIY stores.
Expert technical support!
Our technicians provide free remote consulting to help you avoid mistakes and ensure you achieve the result you want — unlike “generic retailers” who sell 1,000 different products.
get a free consultation
RESIN PRO is a leader in resin production and distribution!
24-hour delivery: We ship across the UK on the same day. Enjoy convenient home delivery with our appointment service—our courier will contact you in advance and deliver the package to your preferred location, or leave it at an alternative address of your choice.

Full support!
We provide continuous support from preparation to final application, including remote technical assistance, ensuring a smooth experience.
Talk with a specialist and place a phone order without registration and without credit cards!
 Free shipping on orders over €199,00
  Shipping Tracking!


 Google
 Facebook