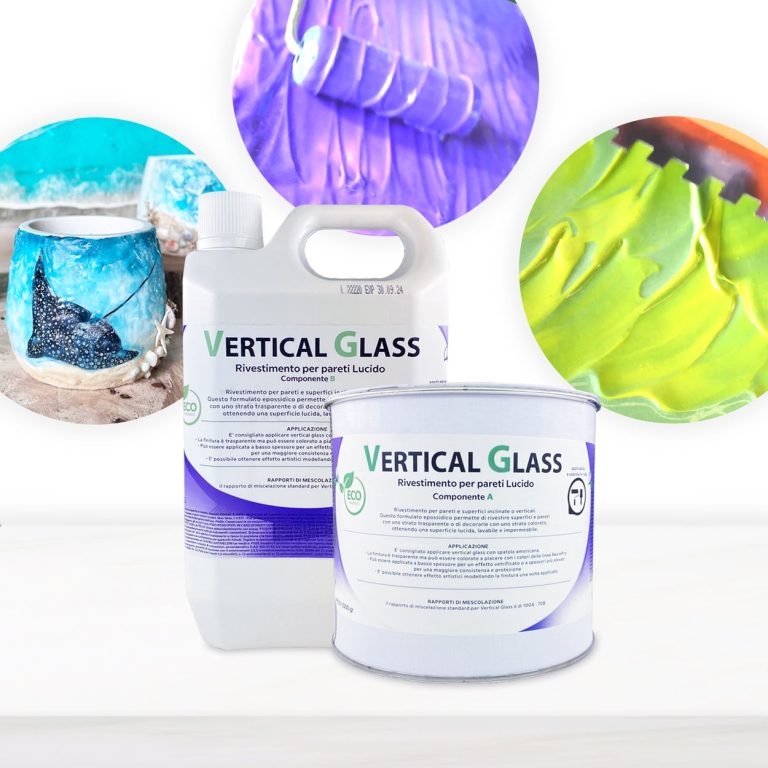
Coating for inclined or vertical walls and surfaces / This epoxy formulation allows you to coat surfaces and walls with a transparent layer or decorate them with a colored layer, resulting in a glossy, washable and waterproof surface. The Vertical Glass resin differs from normal resins allows creatives to create sharp shapes and designs on surfaces and canvases without the resin mixing unintentionally losing the original design! Transparent, UV-resistant epoxy system that creates a hard, glossy protective layer. Vertical Glass allows you to keep your initial design, faithfully respecting your creative idea! The surface will be perfectly smooth and resistant to moisture. Solvent-free and odorless epoxy resin. Applications: Floors and Walls (pre-existing) also vertical; Protection of material coatings and other artistic decorations; Coating, repair and decoration of shower trays and sanitary ware; Coating of surfaces, objects and furniture to give depth and brilliance to the color, even in Vertical! Features: For a smooth coating, it is applied with a spatula to the surface of any material: tile, concrete, wood, brick, etc. It has good hiding power, and completely covers the work surface in one application Creates a glossy, smooth and moisture-resistant layer To create a matte surface, it is easily sanded (48 hours after application, with a grain size of 1000-2000 P) Protects from moisture and gives a new life to surfaces It can be painted with dyes and pigments from our assortment Does not self-align: saves the drawing that you set for it 🙂 Please note that in the unpainted form, the material is not completely transparent, and there is a slight “milky” shade with almost imperceptible micro-particles, so we recommend painting it It is used for: Floor coverings, walls, furniture and other surfaces Protection of surfaces of materials Painting, repair and decoration of showers and bathrooms Creation of paintings, murals and other works of art
$109,49
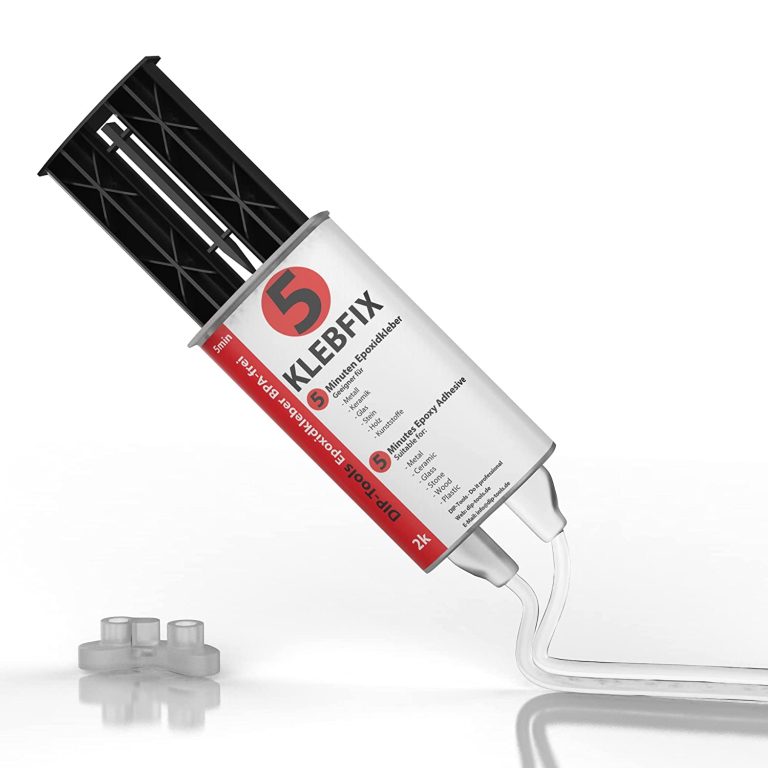
Advantages of Two-component Epoxy Resin Adhesive Extreme strength and resistance to thermal and mechanical influences Resistant to most aggressive substances and oils Available solvent free and BPA free It hardens even under water Compatible with a wide range of additives such as dyes and accelerators Expedited Potlife Application – BestPractice At room temperature (15-30 C The mixing ratio of the two components of 1: 1 is maintained automatically. Do not apply below 5 C outdoor temperature. The higher the ambient temperature, the more effectively the material polymerizes. This means that resistance increases at higher temperatures. It is recommended to have a cloth ready for cleaning. In addition, care must be taken that the work surface is protected and can be cleaned directly if necessary. The surface should be slightly roughened, because only then is the epoxy adhesive guaranteed to bond well with the material. To do this, you can sand or file the surface. To spread the sticker, a piece of cardboard or plastic is useful. After use, clean the tube so that the lid does not stick, and then close it tightly. The thickness of the adhesive should be thin enough (0.1-0.2 mm), but if necessary it can be thicker. The parts to be glued must be clean and free of oil and grease. Apply the adhesive on one side and join and press the parts to be glued. The potlife is about 5 minutes, good endurance is achieved after about 10-12 minutes, and total endurance after about 24 hours. Pot life is limited in time and describes the maximum working time of the uncured adhesive. Once the pot life has passed, the adhesive not yet applied must not be further processed, but must be disposed of! Until the manual force is reached, the binding must be additionally fixed, for example, with the help of a vice, adhesive tape or clamp. In the case of heat-assisted polymerisation, the temperature resistance of the joined parts must be guaranteed. In addition, the heating and cooling times of the parts to be joined must be respected. This time must be added to the curing time of the adhesive. Tension can occur in the glued joint during heating and cooling. With materials such as PP, PE, PTFE or silicone, the parts need to be pretreated with our primer. The need for a primer depends on the surface tension. If this is high enough it can be tested with water droplets on the surface. If the drops adhere well to the surface, a good bond is most likely. If the drops slip away, a primer is probably needed. Mixing There are several ways to mix the two components: - Mixing by hand - Use of a static mixing nozzle - Use of a dynamic mixing nozzle Hand mixing is sufficient in most cases. For this purpose, a toothpick or similar is used and the two components are mixed until a cloudy mass is formed. Make sure that no bubbles remain. When using a static mixing nozzle, the mixing of both components takes place inside the mixing nozzle so that the mixing is ideal. The first 2g should be discarded, given they are not yet mixed 1:1. However, the mixing nozzle can only be used until the adhesive in the mixing nozzle has dried. After that, you will need a new nozzle. W With a dynamic mixing nozzle, the speed of the mixer can be controlled electronically. This allows you to control the mixing intensity very precisely. However, this is intended for special industrial applications and is not necessary for everyday use. Harden The adhesive is chemically cured. This gives the advantage that gluing the surface is also possible, where adhesives that harden with moisture take a very long time. The bond is high strength and densely flexible. Thus, permanent resistance can be guaranteed in the event of shocks and vibrations. The use of the polymerised adhesive is also possible at high temperatures (up to about 120C), for a short time (30 min) up to 200C The polymerised adhesive has good resistance to physical (e.g. sunlight) or chemical (moisture, detergents, chemicals, etc.) influences. The great advantage of two-component epoxy adhesive is the fact that it hardens even under water and is robust. In addition, it is mouldable, so it can be inserted into any recess to fit. Technical data Epoxy Resin Hardener Base (amine mixture) Viscosity High Viscosity Transparent Color Density 1.1 g / ml Gap filling capacity 3mm Temperature resistance -40 up to +120 C Pot Life 5 min Hand resistance 10-12 min Final endurance 24 hours Shore hardness 60 Tensile shear strength 10 N / mm2 Module E 620 N / mm2
$32,95
The best choice for Resin and Geode-art, making Coasters, Trays, Ocean-art, jewellery and casting surfaces.
+ gloves & detailed instruction for FREE.
$33,85
The best choice for deep pouring:
✔️ Low exothermic reaction –> Castings up to 5cm [1,96”]
✔️ Strong UV filters –> Non-yellowing guaranteed for 5 years
✔️ Highly mechanical resistant surface, for maximum scratchproof properties
✔️ Low viscosity –> Bubbles free
✔️ Long working time –> No rush in the process
✔️ Heat resistance –> Up to 70°C [158 F]
✔️ Trusted quality –> We have already sold more than 26000 kits of this product, since we started in 2015
🌿 Cruelty Free, Vegan Friendly🐹
$16,85
How to Apply Microcement
Microcement is a versatile and long-lasting coating used to create seamless surfaces. Here is a step-by-step guide on how to apply it:
- Surface Preparation: Before applying microcement, it is essential to ensure that the surface is clean, dry, and free from dust, grease, or other impurities. It is also important to sand the surface well and repair any cracks.
- Primer Application: Apply a specific primer suitable for the surface type to enhance the adhesion of the coating to the base and improve its long-term durability.
- Microcement Application: Mix the microcement with water until you achieve a smooth, lump-free consistency. Spread it on the surface using trowels to create a uniform and thin layer.
- Sanding and Sealing: Once the microcement has dried completely, sand it to smooth out any imperfections. Finally, apply a protective sealant to make the surface water and stain-resistant.
- Finishing: Depending on the desired outcome, choose from various finishes such as glossy, matte, or satin.
Remember, applying microcement requires precision and expertise, so it may be advisable to seek assistance from industry professionals for optimal results.
Tools Required for Microcement Application
Having the right tools is crucial for effectively applying microcement. Here is a list of essential tools:
- - Primer: To prepare the surface and enhance microcement adhesion.
- - Microcement: The primary material for the coating.
- - Transparent Resin: To protect and seal the microcement after application.
- - Stainless Steel Trowels: For spreading and leveling the microcement evenly.
- - Fiberglass: Can be mixed with microcement to enhance its resistance.
- - Gloves and Masks: To protect hands and respiratory pathways during application.
- - Rubber Trowel or Sponge: For smoothing the microcement and achieving a polished surface.
- - Rubber or Sponge Roller: Useful for applying primer and sealant uniformly.
- - Fine Sandpaper: For sanding any imperfections post-application.
Ensure to follow the manufacturer's instructions for microcement and use the correct tools for optimal results.
Phases of Microcement Application
To achieve a high-quality and durable final result when applying microcement, it is crucial to follow several phases. Here are the main steps:
- - Surface Preparation: Ensure the surface is clean, dry, and free from impurities. Repair any cracks, imperfections, and sand the surface to a smooth finish.
- - Primer Application: Apply the primer evenly to enhance microcement adhesion. Allow it to dry completely.
- - Microcement Application: Mix the microcement thoroughly with water following the manufacturer's instructions. Apply thin, uniform layers with a stainless steel trowel to prevent color or thickness variations.
- - Sanding and Polishing: After the microcement has dried, sand the surface with fine sandpaper to remove imperfections. Apply a protective sealant for wear, water, and stain resistance.
- - Maintenance: Regularly clean the surface with specific products to preserve the finish and durability of the microcement.
By carefully following these phases and using the correct materials, you can achieve an excellent result in microcement application.
Preparing the Surface Before Applying Microcement
Properly preparing the surface before applying microcement is crucial for a successful application. Follow these essential steps:
- - Cleaning: Ensure the surface is thoroughly clean and free from dust, dirt, grease, or contaminants. Use appropriate detergents and degreasers for the material being treated.
- - Repairs: Inspect the surface for cracks, holes, or imperfections. Fill them with cement-based fillers, level the area well, and let it dry completely.
- - Sanding: If the surface is painted or polished, sand it to create a good adhesion base for microcement. Use fine sandpaper or a sander to roughen the surface for application.
- - Primer: Apply a specific microcement primer to the prepared surface to enhance adhesion and ensure long-term durability.
By following these steps diligently, you can ensure that the surface is adequately prepared to receive microcement application correctly and durably.
Intense and brilliant colour, ideal for Transparent Epoxy Resins. Mix small quantity to get a translucent effect. The high coverage of the "Colorfun Original" range allows to obtain a full and bright colour. The high concentration provides an opaque colour with a few drops. Usable to colour the products of the RESIN PRO range.
$13,45
“I-GUM SLOW” – Non-Toxic Silicone Rubber – Paste Form
Pasty silicone rubber “I-GUM” is a two–component product for creating moulds and forms for pouring with epoxy resin.
$22,85
Create your moulds using PURE MOLD silicone rubber! Compatible with many materials including resins, plaster and cement. Its transparency will allow you to observe through the mould and its high mechanical characteristics make it a product suitable for both professional and hobby use.
$22,45
EPOXY POLISH is an advanced epoxy resin polishing system that delivers a stunning, glossy finish for your resin projects. Ideal for professionals and DIY enthusiasts alike, this product rejuvenates surfaces to a mirror-like shine with ease.
$17,85
ResinPro: one supplier for all your needs
15 years of experience at your complete disposal, supplying resins and accessories for creativity, industry, DIY, flooring and marine applications.
At your home, directly from the manufacturer!
ResinPro is the direct manufacturer of our resin range for companies and hobbyists, guaranteeing the lowest prices on the market.
Learn more
The widest range of resins in the UK!
We offer resins for every need, from artistic creations to marine and construction applications, far beyond the “limited” selection typically found in local DIY stores.
Expert technical support!
Our technicians provide free remote consulting to help you avoid mistakes and ensure you achieve the result you want — unlike “generic retailers” who sell 1,000 different products.
get a free consultation
RESIN PRO is a leader in resin production and distribution!
24-hour delivery: We ship across the UK on the same day. Enjoy convenient home delivery with our appointment service—our courier will contact you in advance and deliver the package to your preferred location, or leave it at an alternative address of your choice.

Full support!
We provide continuous support from preparation to final application, including remote technical assistance, ensuring a smooth experience.
Talk with a specialist and place a phone order without registration and without credit cards!
 Free shipping on orders over €199,00


